
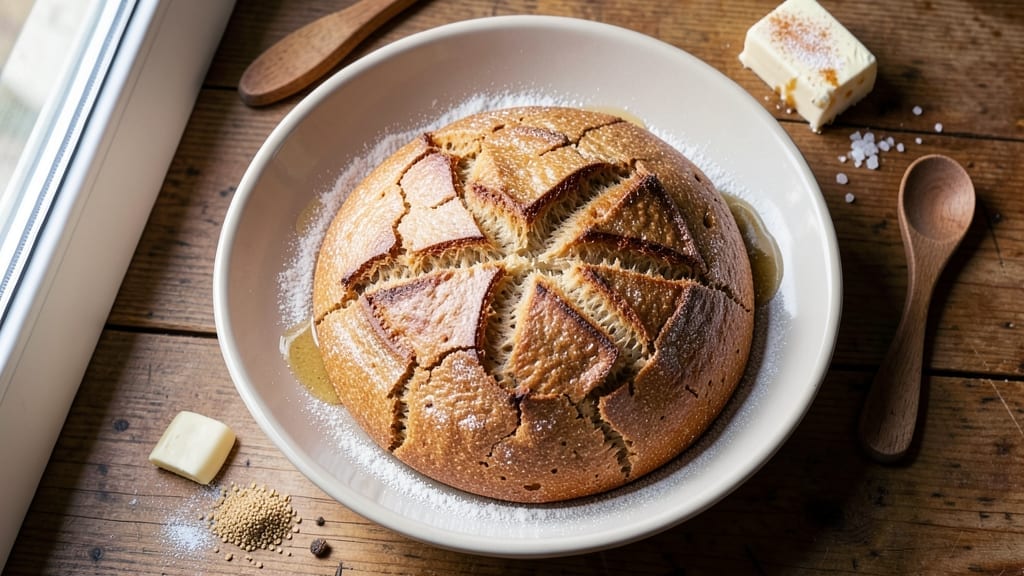
Mastering 00 flour sourdough bread delivers that perfect balance of crispy crust and airy crumb—without the kneading marathon. The secret lies in precise hydration adjustments and a patient fermentation process that develops deep flavor.
I’ve refined this method over years, perfecting the art of stretch-and-folds while keeping the technique accessible for home bakers.
This recipe transforms simple ingredients into a loaf with a golden, shatteringly crisp crust and an open crumb structure that’s impossible to resist. The no-knead approach saves time while building gluten strength through controlled fermentation. Whether you’re using a Dutch oven or a baking stone, the results are consistently restaurant-quality.
What sets this apart is the attention to detail—from creating a robust starter to monitoring dough temperature during bulk fermentation. The final loaf boasts a caramelized crust with a satisfying snap, while the interior remains tender and flavorful.
It’s the kind of bread that makes every slice feel like a reward.
Perfect for feeding a crowd or treating yourself to homemade artistry, this recipe scales effortlessly. Let’s get started on your first perfect loaf—no experience required, just patience and precision.
Ingredients for 00 flour sourdough bread
Nine essential ingredients transform into artisanal sourdough with perfect crust and open crumb—no kneading required.
| Ingredient | Amount | Notes |
|---|---|---|
| 00 Flour 🌾 | 4 cups | High-protein, finely milled for crisp crust |
| Active Dry Yeast 🍞 | ¼ tsp | Instant yeast works too |
| Unsalted Butter 🧈 | ½ cup | Cold, cubed for flavor development |
| Granulated Sugar 🍚 | 1 tbsp | Feeds yeast for better rise |
| Salt 🧂 | 1 ½ tsp | Diamond Crystal preferred |
| Water 💧 | 1 ½ cups | Room temperature, 70°F |
| Active Sourdough Starter 🍞 | 1 cup | 100% hydration, bubbly |
| Honey 🍯 | 1 tbsp | For crust color and flavor |
| Cornmeal 🌽 | 2 tbsp | For dusting Dutch oven |
| Ice Water ❄️ | 1 cup | For final dough shaping |
The 00 flour is non-negotiable here—its high protein and fine grind create that signature crisp crust and airy crumb. King Arthur or Caputo are my go-tos, but any quality Italian 00 will work. The sourdough starter needs to be active and bubbly—if it’s sluggish, feed it 12 hours before using. Butter adds incredible flavor, but cold cubes distribute better than melted. For yeast, I always double-check the expiration date—old yeast equals weak rise. The honey isn’t just for sweetness; it helps develop that gorgeous golden crust during baking.
No 00 flour? King Arthur Bread Flour at 60% hydration gets you close, though texture will differ slightly. Running low on starter? Instant yeast at 0.25 tsp can substitute in a pinch, but the flavor won’t be the same. The honey can be swapped for maple syrup or agave**, but honey’s acidity helps with crust color. For salt, Diamond Crystal dissolves more easily than Morton’s—trust me on this. The ice water might sound odd, but it’s crucial for shaping the dough properly. If you’re in a hurry, chilled water from the fridge works in a bind, but room temp is ideal.
Your starter should be at peak activity before mixing—look for bubbles along the sides and top. The dough benefits from a 12-14 hour cold proof in the fridge, which develops incredible flavor. For storage, wrap the baked loaf in a clean kitchen towel** and keep at room temp for 2-3 days. The crust stays crisp for days this way. Freeze any extras by slicing first—prevents freezer burn and makes toasty slices all winter. This loaf reheats beautifully; just pop slices in a 350°F oven for 5-8 minutes** to restore that bakery-fresh warmth.
Why You’ll Love This Recipe
- No-Knead Magic: I swear by the simplicity—just mix, rest, and bake. That 00 flour gives it a light, airy crumb without fuss, and the butter makes it so tender you’ll forget you didn’t slave over it.
- Buttery, Crispy Crust: The sugar caramelizes just enough for a golden crust, while the butter keeps every slice rich and melt-in-your-mouth. Honestly, this tastes like a bakery loaf but with half the effort.
- Weeknight Workhorse: Toss it with garlic and olive oil for dinner, or use it for sandwiches all week. It freezes beautifully too—just slice before freezing, and you’ve got toast ready in seconds.
- Budget-Friendly Staple: A single batch stretches for days, and the ingredients are basic—yeast, flour, butter, salt. I’ll be real: this is my go-to when I need to feed the family without breaking the bank.
Step-by-step instructions for 00 flour sourdough bread
Here’s how to craft a bakery-style loaf with a shatteringly crisp crust and airy crumb—no kneading required.
Mix the Autolyse for Optimal Gluten Development
In a large mixing bowl, combine the 4 cups 00 flour and 1.5 cups water at room temperature. Use your hands or a dough whisk to work the mixture until no dry flour remains—this creates an autolyse that hydrates the flour and begins gluten formation. Let the dough rest, covered, for 30 minutes. You’ll notice it becomes smoother and more elastic as the flour absorbs moisture and proteins begin to relax.
This resting period is crucial for developing the gluten structure without overworking the dough. The high-protein 00 flour will yield a stronger network than all-purpose, giving you that signature sourdough chew. After 30 minutes, the dough should look cohesive and slightly tacky to the touch.
Incorporate Yeast, Butter, and Flavorings
Add the 1 cup active sourdough starter, 0.25 tsp active dry yeast, 1 tbsp granulated sugar, 1.5 tsp salt, and 0.5 cup cold cubed unsalted butter to the rested dough. Using a dough scraper or your hands, gently fold these ingredients into the center of the dough, then incorporate them by stretching and folding the dough over itself—this technique builds strength without overworking.
After 5-6 sets of folds (about 10 minutes total), add the 1 tbsp honey and continue folding until fully integrated. The butter should be evenly distributed as small, pea-sized pieces throughout. Cover the bowl and let the dough rest another 30 minutes. This second rest allows the yeast to activate and the gluten to relax further, preparing for the final shaping.
Shape and Proof for Maximum Rise
Lightly flour your work surface and turn out the dough. Gently shape it into a loose round by pulling the edges toward the center while rotating the dough. Place the shaped dough seam-side up in a bowl lined with a damp towel, cover, and let it proof at room temperature for 1-2 hours or until it has nearly doubled in size. The dough should feel light and springy when pressed gently—this indicates active fermentation.
Here’s the thing—don’t rush this proofing stage. The sourdough starter needs time to develop its complex flavors, and the gluten structure must fully relax. If your kitchen is warm, the dough may rise faster; if cool, it may take longer. The goal is a dough that’s puffy but still retains some resistance when poked with your finger.
Final Shape and Cold Proof in the Dutch Oven
Turn the proofed dough out onto a lightly floured surface and shape it into a tight boule (round loaf). To do this, pull the dough toward you while rotating it, tucking the edges underneath as you go. Place the shaped dough seam-side down in a Dutch oven pre-dusted with 2 tbsp cornmeal. Cover and refrigerate for 12-16 hours—this cold proofing enhances flavor development and creates that signature open crumb.
During this time, the dough will rise slowly in the cold, developing deep, tangy flavors from the sourdough starter. The cornmeal coating prevents sticking and adds a subtle crunch to the crust. When ready to bake, the dough should have risen noticeably but still feel firm to the touch.
Bake for a Crisp Crust and Open Crumb
Preheat your oven to 450°F with the Dutch oven inside for 1 hour. Remove the Dutch oven from the oven and carefully transfer the dough (still in its cornmeal-lined pot) to the hot oven. Bake, covered, for 30 minutes, then remove the lid and bake another 15-20 minutes until the crust is deep golden brown and sounds hollow when tapped on the bottom.
The high heat and steam from the Dutch oven create that perfect combination of crisp crust and airy interior. For extra browning, you can brush the crust with ice water after removing the lid—this creates steam that enhances crust development. Let the bread cool on a wire rack for at least 1 hour before slicing to allow the crumb to set properly.
Pro Tips For Making 00 Flour Sourdough Bread
- Chill the Dough: After your final knead, pop the dough in the fridge for at least 8 hours—or overnight if you can swing it. I used to skip this, and my bread turned out dense and gummy. Cold slows fermentation, lets the gluten relax, and gives you that perfect open crumb. (Yes, even if you’re impatient like me.)
- Use Cold Butter: Cut that unsalted butter straight from the fridge into small cubes before mixing it into the dough. Warm butter gets absorbed unevenly, and your bread will end up greasy instead of flaky. Cold butter melts just enough during baking to create pockets—no butter pool at the bottom.
- Skip the Overproofing: Your dough’s ready when it springs back slowly when poked, not instantly. Overproofing turns your loaf into a sad, flat pancake. I learned this the hard way when I left mine too long and ended up with a dense brick. Check it every 30 minutes after the initial proof.
- Steam the Oven: Toss a metal bowl of boiling water on the oven rack right as you bake—this creates steam for 10 minutes. Without it, your crust will darken too fast and your crumb won’t rise properly. (Trust me, your bread’s crust will thank you.)
Regional styles of these flavors
Italian Artisan Style
In Italy, 00 flour sourdough is often baked in a wood-fired oven, creating that signature crisp crust with a soft, airy interior. For home bakers, I recommend using a cast iron Dutch oven preheated to 450°F—it mimics the steam retention of a traditional brick oven.
Italian bakers frequently add semolina or cornmeal to the dough for extra crunch, so dust your Dutch oven generously before baking. The key is patience: let the dough ferment at room temperature for 8-12 hours before baking to develop maximum flavor. 🌾
French Baguette Twist
For a French-inspired version, shape the dough into a long baguette instead of a boule. Use a banneton proofing basket lined with a floured towel to create those iconic ridges. After baking, brush the crust with melted butter while still warm for a richer finish.
The French technique calls for a shorter bulk fermentation—only 2-3 hours—followed by a quick cold proof in the fridge overnight. This method produces a lighter, more open crumb perfect for sandwiches. ✨
German Rustic Approach
German bakers often incorporate rye flour into their sourdough for a denser, heartier loaf. For this regional style, replace ½ cup of 00 flour with ½ cup rye flour and reduce the water by 1 tbsp to account for the rye’s higher absorption.
Shape the dough into a batard (oval loaf) and bake in a preheated stoneware pot instead of a Dutch oven. The result is a loaf with a slightly chewy interior and a deep, caramelized crust. 🔥
American No-Knead Adaptation
For a modern American take, skip the cold proof and use a quick bulk fermentation of 4-6 hours at room temperature. This method works beautifully with King Arthur 00 flour and produces a loaf with a slightly taller rise.
After shaping, bake directly on a preheated baking stone instead of using a Dutch oven for a thinner, crispier crust. The American adaptation often includes honey or maple syrup for extra sweetness, balancing the tangy sourdough flavor. 💫
Japanese Milk Bread Fusion
In Japan, milk bread (shokupan) is a staple, and combining it with sourdough creates a uniquely tender loaf. Replace ½ cup of water with ½ cup whole milk and add 1 tbsp powdered milk to the dough. The milk adds richness and helps create a softer crumb.
Shape the dough into a round loaf and bake in a greased loaf pan for a uniform rise. The result is a bread that’s both crisp on the outside and pillowy on the inside—perfect for toast or sandwiches. 🍞
Nutrition facts
Frequently asked questions
Why does 00 flour create a different texture than bread flour?
The high protein content in 00 flour (around 12-14%) builds stronger gluten strands, but its fine grind creates a lighter, more delicate crumb compared to bread flour. The lower ash content also allows for better browning and crispness in the crust. For this recipe, the 60% hydration works perfectly with 00’s fine particles to create that signature airy interior.
Can I use this recipe with a different type of starter?
Yes, but results will vary. A 100% hydration sourdough starter (equal parts flour and water) works best for this recipe. If using a discard starter, feed it with 00 flour 12 hours before using to match the protein content. Wild yeast starters may produce a slightly tangier flavor, while commercial starters will give a more consistent rise. Always ensure your starter is bubbly and active before mixing.
What’s the best way to tell when the dough is properly proofed?
Press the dough gently with one finger—if it springs back slowly (not immediately) and leaves a slight indentation, it’s ready. For visual cues, look for the dough to have doubled in size and feel noticeably lighter. The surface should also have small bubbles forming. In cooler kitchens (68°F or below), proofing may take 2-3 hours instead of the standard 1-2 hours.
Why did my crust turn out pale instead of golden brown?
This usually happens from insufficient steam during baking. Try these fixes: 1) Preheat your Dutch oven for 1 hour before baking, 2) Add 1 cup ice water to the oven floor when removing the lid, or 3) Brush the crust with honey or egg wash before the final bake. The 450°F temperature is crucial—lower temps prevent proper browning. Also ensure your oven thermometer is accurate.
How long can I keep this bread fresh?
Wrap the cooled loaf in a clean kitchen towel and store at room temperature for 2-3 days for maximum crust crispness. For longer storage, slice and freeze portions—thaw in a 350°F oven for 5-8 minutes to restore freshness. The cold proofing actually helps preserve freshness longer than quick-rise methods. Avoid plastic bags which trap moisture and make the crust soggy.

- 3lb Prime Rib Roast Recipe: Juicy Pink Center Guaranteed in 3 Hours - October 31, 2026
- 5 Spice Cake Recipe: Warmly Spiced Layers With Crunchy Top - October 31, 2026
- 1950’s Macaroni and Cheese Recipe: Nostalgic Creamy Cheese Sauce with Buttery Noodles - October 31, 2026