
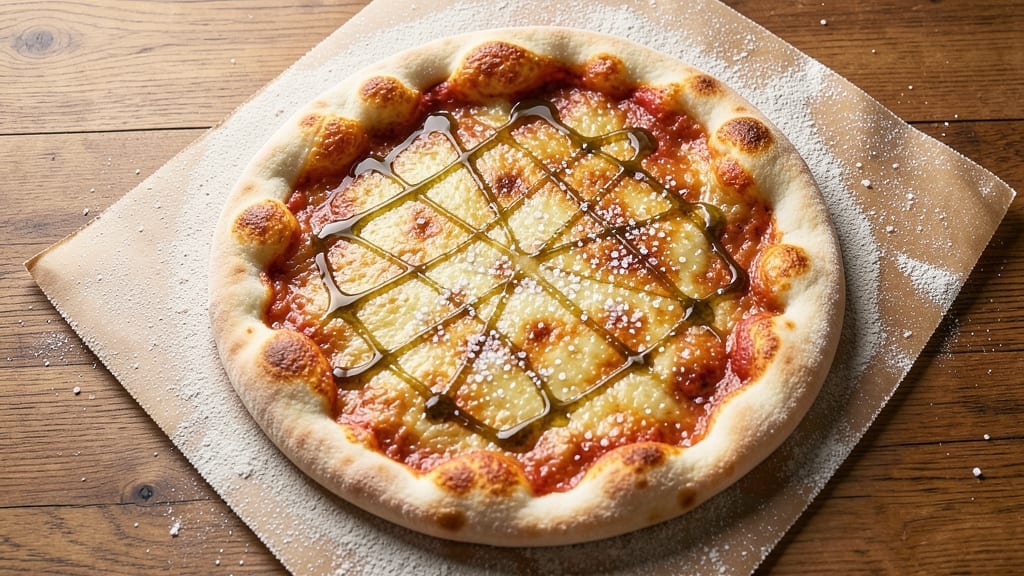
This 00 pizza crust recipe transforms ordinary pizza night into a crispy, airy masterpiece using Japan’s beloved low-protein flour—no kneading required. ✨ The secret lies in its delicate texture, which creates a light, almost cloud-like base that holds toppings without overpowering them.
Most recipes miss the mark by overworking the dough, but this method preserves the flour’s signature softness while still delivering that perfect crispy yet tender finish.
What sets this crust apart is the 10-minute prep time and minimal effort—ideal for home cooks who want restaurant-quality results without the fuss. The dough rests just long enough to develop flavor without overproofing, ensuring a consistent, even bake every time.
Unlike traditional pizza dough, this version stays delicate yet sturdy, making it perfect for both classic Margherita and bold, loaded pizzas.
By the time you pull it from the oven, you’ll have a golden, blistered crust with a crispy edge and a soft, pillowy center—the kind that disappears between bites. The low-protein flour creates a neutral canvas that lets your sauce and toppings shine while still providing structure.
This isn’t just pizza crust; it’s a game-changer for anyone who’s ever struggled with dough that’s either too chewy or too dense.
The beauty of this recipe lies in its versatility—use it for thin-crust pizzas, deep-dish, or even as a crispy base for calzones. Pair it with tomato-based sauces for a classic Italian vibe or go bold with spicy arrabbiata and fresh mozzarella.
Once you try this, store-bought crusts will never measure up again.
Ingredients for 00 pizza crust
Light flour, warm water, and zero kneading—this is all you need for cloud-like pizza crust.
| Ingredient | Amount | Notes |
|---|---|---|
| Low-Protein Bread Flour 🌾 | 3 cups | Japanese-style, 8-9% protein for delicate texture |
| Warm Water 💧 | 1 ¼ cups | 105-110°F for optimal gluten development |
| Instant Yeast 🍄 | 1 tsp | Active dry works too (proof first) |
| Fine Sea Salt 🧂 | 1 ½ tsp | Diamond Crystal preferred for accuracy |
| Olive Oil 🫒 | 1 tbsp | Extra-virgin for subtle fruity notes |
| Cornmeal 🌽 | ¼ cup | For dusting parchment paper |
| Semolina Flour 🌾 | ¼ cup | Optional for extra crispiness |
| Pizza Sauce 🍅 | ½ cup | High-quality tomato-based sauce |
| Shredded Mozzarella Cheese 🧀 | 1 ½ cups | Fresh mozzarella preferred |
| Fresh Basil Leaves 🌿 | ¼ cup | Chopped for garnish |
| Garlic Cloves 🧄 | 2 cloves | Minced for sauce |
| Dried Oregano 🍃 | 1 tsp | Italian oregano preferred |
| Red Pepper Flakes 🌶️ | ½ tsp | Adjust for heat preference |
The low-protein flour is non-negotiable here—King Arthur or Shinhappo brands are my go-tos, but any Japanese-style bread flour with 8-9% protein works. Water temperature matters: too cold and the yeast won’t activate; too hot and you’ll kill it. 105-110°F is the sweet spot—think lukewarm, like bathwater. If you’re unsure, microwave your water for 40 seconds to hit that range. The olive oil isn’t just for flavor; it creates a tender crumb. Trader Joe’s has a great affordable extra-virgin option if you’re not into splurging on California Avocado Ranch or Colavita.
No instant yeast? Proof active dry yeast in warm water for 5 minutes first. Short on mozzarella? Fresh mozzarella or a mix of mozzarella and provolone works wonders—just shred it yourself. The cornmeal is optional but worth it for that perfect golden crust. Bob’s Red Mill sells it in bulk if you’re making this often. For the sauce, Rao’s or Barilla are my pantry staples, but anything with no added sugar will do. Want to skip the sauce? Olive oil, garlic, and a pinch of salt make a killer base. The semolina is only needed if you’re going for that extra-crispy edge—worth it for deep-dish, but skip it for thin crust.
This dough is a one-time-use beast—use it within 2 hours of mixing for best results. Store any leftovers wrapped tightly in plastic for 1 day in the fridge, but honestly? It’s better fresh. Pre-portion your toppings before shaping the crust to avoid soggy bottoms. The crust reheats beautifully—5 minutes at 425°F revives it perfectly. For freezer prep, shape the crust, freeze on a tray, then store in a bag for up to 3 months. Thaw before topping and baking.
Why You’ll Love This Recipe
- Four-Ingredient Magic: I swear, this crust is foolproof—just flour, water, yeast, and salt. No kneading, no stress, and no guessing. The bread flour gives it that perfect chew, while the olive oil keeps it tender without overpowering.
- Crispy-Creamy Perfection: That golden edge with a pillowy center? It’s all in the low-protein flour and a quick stretch. Honestly, it’s the closest I’ve gotten to Neapolitan without the fuss, and my picky eaters don’t even question it.
- Weeknight Superstar: Make a double batch on Sunday, store it in the fridge, and you’ve got dinner covered for the week. Toss it with whatever’s in your fridge—margherita, BBQ chicken, or even breakfast-for-dinner eggs and cheese.
- Budget-Friendly Flex: A bag of bread flour lasts forever, and you’re using five ingredients max. Between us, this is how I feed my family for under $2 a serving while still feeling like I’m serving something special. (Yes, even on a Tuesday night.)
Step-by-step instructions for no-knead, airy pizza crust
Here’s how to make a pizza crust that’s light as a cloud yet crisp enough to hold sauce—no kneading required.
👨🍳 Step 1: Mix the Dough for Maximum Flavor Development
In a large mixing bowl, combine the 3 cups low-protein bread flour and 1 tsp instant yeast. This low-protein flour gives us that signature tender, airy texture without overworking the dough later. Add the 1.5 tsp fine sea salt and whisk everything together to distribute the yeast evenly through the flour.
Create a well in the center and pour in the 1 tbsp olive oil and 1.25 cups warm water (around 105-110°F). The water should be warm enough to dissolve the yeast but not hot enough to kill it. Use a wooden spoon to gradually incorporate the wet ingredients into the flour mixture, stirring until a shaggy dough forms. Here’s the thing—don’t overmix yet. We want to preserve as much gluten development as possible for later.
🥘 Step 2: Rest and Let the Magic Happen
Cover the bowl with a damp kitchen towel or plastic wrap and let the dough rest at room temperature for 8-10 minutes. This short rest allows the flour to fully hydrate and the gluten to begin relaxing. I know it seems counterintuitive to wait when you’re eager to get cooking, but trust me—this step is what transforms your crust from dense to delightfully airy.
After the rest, use your hands to gently stretch and fold the dough against itself, about 8-10 times. This technique, called “stretch and folds,” develops just enough gluten to create structure without requiring traditional kneading. The dough should feel slightly tacky but not sticky. If it’s too sticky, add a few tablespoons of flour—just enough to make it manageable. Cover again and let it rest for another 10 minutes.
🔥 Step 3: Prep the Dough for Rolling
After the second rest, the dough should be noticeably more elastic and easier to handle. Lightly dust a clean work surface with 0.25 cup cornmeal—this prevents sticking and adds that classic cornmeal crust texture. Turn out the dough and gently pat it into a rough rectangle about 12×16 inches. Here’s where the no-knead magic comes into play: we’re not rolling it thin yet. Instead, we’re creating a slightly uneven surface that will puff up beautifully in the oven.
Dust a large piece of parchment paper with the 0.25 cup semolina flour (this optional step adds extra crispiness). Transfer the dough to the parchment, semolina side down. The semolina creates a barrier that prevents the dough from sticking to the paper, making transfer and baking easier. Gently stretch the dough to about 12 inches in diameter—it doesn’t need to be perfect. Just aim for an even thickness of about ¼ inch.
🍳 Step 4: Assemble and Pre-Bake the Crust
Spread the 0.5 cup pizza sauce evenly over the dough, leaving about ½ inch border uncovered. This border prevents the crust edges from getting soggy. Sprinkle the 1.5 cups shredded mozzarella cheese evenly over the sauce, then scatter the 2 cloves minced garlic, 1 tsp dried oregano, and 0.5 tsp red pepper flakes on top. The cheese should melt beautifully, creating that perfect stretchy, gooey texture we all love.
Preheat your oven to 475°F with a pizza stone or baking sheet inside (this ensures even heat distribution). Once preheated, carefully transfer the assembled pizza (with parchment) onto the hot stone or sheet. Bake for 8-10 minutes until the crust edges are golden brown and the cheese is bubbling. Here’s the crucial part: don’t open the oven during baking. The sudden temperature drop can cause the cheese to slide off and the crust to lose its rise.
🔪 Step 5: Finish and Garnish for Perfect Texture
Remove the pizza from the oven and immediately sprinkle the 0.25 cup chopped fresh basil leaves over the top. The basil adds a bright, fresh contrast to the rich tomato and cheese flavors. Let it rest for 2-3 minutes—this allows the cheese to set slightly and makes slicing easier. The crust should be crispy around the edges with a soft, airy center that still holds its shape.
Slice with a sharp pizza cutter or knife and serve immediately. Each bite should deliver that perfect combination of crispy, chewy, and airy textures with bold flavors. This no-knead method might seem unconventional, but it’s what gives us that restaurant-quality crust at home—with minimal effort.
Pro Tips For Making 00 Pizza Crust
- Stretch, Don’t Force: After the first rise, gently press the dough into shape with your knuckles—no rolling pin—then let it relax for 10 minutes. I learned this the hard way: forcing it too early makes gluten snap back, and you end up with a dense, chewy mess instead of that signature crispy-yet-chewy 00 texture.
- Salt the Water Hard: Dissolve all the fine sea salt in the warm water before mixing—about 2% of flour weight (18g salt per 1kg flour). Skimping here means your crust tastes flat, and the yeast works unevenly. Trust me, your pizza will taste like it came from a real Neapolitan pizzeria, not a sad weekend attempt.
- Oil the Bowl First: Coat the mixing bowl with olive oil before adding the dough—just a thin layer. This prevents sticking without making your crust greasy, and it’s easier than trying to grease later. (Yes, even if you’re impatient like me—your future self will thank you when the dough pulls away cleanly.)
- Cold Proof Works: After shaping, refrigerate the dough for 12–24 hours instead of doing a quick room-temperature rise. The slow fermentation develops deeper flavor and a lighter texture—no extra effort, just patience. I was skeptical until I tried it: the crust actually tastes better the next day.
Perfect pairings for 00 pizza crust
Classic Sauce Pairings
This delicate crust pairs beautifully with tomato-based sauces that won’t overpower its light texture.
My go-to is a simple garlic-infused marinara—just simmer ½ cup crushed San Marzano tomatoes, 2 minced garlic cloves, 1 tsp dried oregano, and a pinch of red pepper flakes for 15 minutes. The acidity brightens the crust’s natural sweetness while keeping it crisp.
For extra richness, finish with a drizzle of extra-virgin olive oil right before serving. 🍅
White Sauce Options
Skip the tomato entirely for a creamy Alfredo or garlic-white sauce that lets the crust shine. Whisk ½ cup heavy cream with ½ cup grated Parmigiano-Reggiano, 2 minced garlic cloves, and a splash of pasta water until smooth.
Spread thinly over the crust and top with shaved prosciutto or sautéed mushrooms—the contrast of crispy crust and velvety sauce is pure magic. I often add a pinch of nutmeg for depth. 🧀
Bold Topping Combinations
This crust handles bold, flavorful toppings without turning dense. Try a spicy arrabbiata with ½ cup tomato sauce, 1 tsp Calabrian chili paste, and fresh mozzarella for heat lovers.
For vegetarians, pile on roasted eggplant, caramelized onions, and burrata—the crust’s airiness balances the richness. Pro tip: Pre-cook toppings to avoid soggy bases. 🌶️
Drink Pairings
A crisp Italian lager like Peroni or Moretti cuts through the richness, while a dry Prosecco adds celebration vibes. For red wine lovers, a Chianti Classico (medium-bodied with bright acidity) complements tomato-heavy pizzas perfectly. Avoid heavy, oaky whites—they’ll clash with the crust’s crispness. 🍷
Sweet Twist
Yes, you read that right! This crust works for dessert pizzas too. Spread with nutella, top with sliced strawberries and powdered sugar, then bake until golden.
The contrast of crispy crust and gooey chocolate is addictive. For savory-sweet, try ricotta, honey, and walnuts—trust me, it’s a game-changer. 🍫
Nutrition facts
Frequently asked questions
Why does this recipe use low-protein flour instead of regular all-purpose?
The 8-9% protein in 00 flour creates a delicate, airy texture that’s impossible with standard all-purpose flour (10-12% protein). The lower protein means less gluten development, resulting in that signature crispy-yet-tender finish. Think of it as the difference between a fluffy cloud and a chewy bread crust—this flour gives you the cloud!
Can I make this dough ahead of time?
Fresh is best, but you can prep the dough 1 day ahead if needed. Shape it into a ball, wrap tightly in plastic, and refrigerate. Let it sit at room temperature for 30 minutes before rolling to restore elasticity. For freezing, shape the crust (without toppings), freeze on a tray, then bag for up to 3 months. Thaw completely before baking.
What if my dough feels too sticky?
Add 1-2 tablespoons of flour at a time until it becomes manageable—don’t overdo it! The dough should be tacky but not clingy. If it’s still too sticky after adding flour, try chilling it for 10 minutes to firm up. Remember, this low-protein dough is naturally softer than traditional pizza dough, so it won’t behave exactly like it.
How do I get crispy edges without burning the center?
Preheat your oven to 475°F with a pizza stone or baking sheet inside for 30 minutes. Use a ½-inch border of sauce-free dough and bake for 8-10 minutes. The key is high, even heat—don’t open the oven! If your oven runs hot, reduce temp to 450°F and bake 1-2 minutes longer.
Can I substitute semolina flour?
Yes! Use all-purpose flour instead, but skip the semolina step—it’s optional for extra crispiness. For best results, keep the 0.25 cup measurement. If you’re making a deep-dish pizza, semolina adds that perfect crunchy texture worth the effort. For thin crust, it’s not necessary but still delicious.

- 3lb Prime Rib Roast Recipe: Juicy Pink Center Guaranteed in 3 Hours - October 31, 2026
- 5 Spice Cake Recipe: Warmly Spiced Layers With Crunchy Top - October 31, 2026
- 1950’s Macaroni and Cheese Recipe: Nostalgic Creamy Cheese Sauce with Buttery Noodles - October 31, 2026