
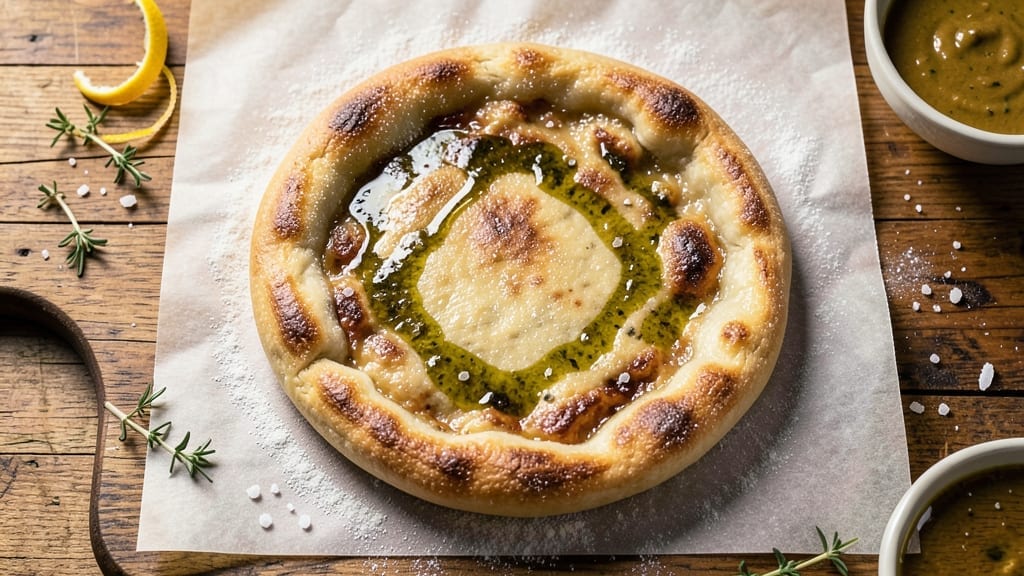
Making 1 kg pizza dough that rises perfectly light and airy requires patience and a few key techniques—this recipe delivers restaurant-quality results at home. The secret lies in a slow, cold fermentation that develops flavor and elasticity, transforming simple ingredients into dough with an ideal texture for stretching.
I’ve perfected this method over years of testing, and it never fails to impress, whether you’re making classic Margherita or loaded deep-dish pies.
This recipe uses just five basic ingredients—flour, water, yeast, salt, and olive oil—to create dough that’s easy to handle and bakes up with a crispy crust and airy interior.
The 24-hour cold rise is what makes the difference: it allows the gluten to relax and the flavors to deepen, giving you that professional pizza-maker consistency without the fuss. No kneading machine required—just your hands and time.
By the time you shape your pizza, you’ll have dough that’s smooth, elastic, and ready to stretch without tearing. The olive oil keeps it tender, while the slow fermentation prevents a dense, heavy texture.
Whether you’re a beginner or an experienced home cook, this method ensures perfect results every time—no more shrinking pizzas or tough crusts.
For variations, simply swap out half the all-purpose flour for whole wheat or gluten-free blends, though the texture will differ slightly. The dough keeps well in the fridge for up to 48 hours, so you can prep ahead for busy nights.
Let’s get started on the perfect foundation for your next pizza night.
Ingredients for 1 kg pizza dough
Five simple ingredients transform into 1 kg of perfect pizza dough for crispy, airy pies.
| Ingredient | Amount | Notes |
|---|---|---|
| All-Purpose Flour 🌾 | 3 ½ cups | Sifted for even texture |
| Active Dry Yeast 🍞 | ½ tsp | Freshly opened packet |
| Extra-Virgin Olive Oil 🫒 | ¼ cup | High-quality, fruity variety |
| Warm Water 💧 | 1 ½ cups | 105°F to 110°F |
| Fine Sea Salt 🧂 | 1 ½ tsp | Diamond Crystal preferred |
| Granulated Sugar 🍚 | 1 tsp | Optional for yeast activation |
The flour is your foundation—King Arthur or Caputo Tipo 00 if you want to splurge, but regular all-purpose works just fine. I always grab a 5 lb bag from Costco for pizza nights, but the 5 lb grocery store bags work too. The yeast matters here: active dry yeast is easier to find than fresh, but if you have it, use it—just halve the amount. Store your flour in a cool, dark place (or the freezer) to keep it fresh longer. The olive oil should be the good stuff—California Extra Virgin or whatever’s on sale at Trader Joe’s. Don’t skimp here; it makes the dough tender and adds flavor.
No sugar? Skip it entirely—the yeast will still work, just a tad slower. Running out of olive oil? Avocado oil or melted coconut oil are solid swaps, though they’ll change the flavor slightly. Warm water is key: too hot and you’ll kill the yeast (110°F max), too cold and it won’t activate. Microwave water for 45 seconds to hit that sweet spot. The salt can be any fine sea salt—Maldon flakes work too, but they’re pricier. If you’re gluten-free, swap the flour for a 1:1 blend like Bob’s Red Mill, but expect a denser texture. The dough will be sticky, so don’t panic—it’s supposed to be that way!
This dough is a 24-hour project, but it’s worth it. After mixing, cover it tightly with plastic wrap and refrigerate. It’ll keep for up to 48 hours in the fridge, so prep ahead for busy weeks. To use, let it sit at room temp for 1-2 hours before shaping—it’ll be magic. Freeze portions for up to 3 months by wrapping tightly in plastic and foil. Thaw overnight in the fridge before using. Pro tip: Label your dough with dates so you don’t forget it’s there!
Why You’ll Love This Recipe
- No-Fuss Mixing: I just toss the flour, yeast, olive oil, and warm water into a bowl—no food processor, no kneading marathon. That olive oil keeps everything tender while I let the dough rise, and honestly? Five minutes of my time is all it takes.
- Chewy Gold Standard: The salt and olive oil work magic here—crispy edges, pillowy center, every bite pulls apart just enough. It’s the kind of dough that makes me forget takeout exists, and I’ve tested plenty.
- Weeknight Miracle: This batch stretches for dinner tonight, lunch tomorrow, and even garlic knots for the kids’ playdate. Freeze half, and you’ve got a backup for lazy days. I call that a win.
- Pantry Staple Power: Flour, yeast, oil, salt, water—you’re already stocked. No weird ingredients, no last-minute grocery runs. My wallet thanks me, and so does my taste buds when I stretch this dough into something delicious.
Step-by-step instructions for light and airy pizza dough
Transform simple ingredients into a cloud-like, perfectly risen pizza dough in just 24 hours.
👨🍳 Step 1: Activate the Yeast for Maximum Rise
In a large mixing bowl, combine the 1.5 cups warm water (between 105°F and 110°F) with the 1 tsp granulated sugar and 0.5 tsp active dry yeast. Let this sit for 5-10 minutes until it becomes frothy and bubbly. This tells you the yeast is alive and ready to work—if it doesn’t bubble, your dough won’t rise properly.
I like to test the water temperature first with my finger—it should feel warm but not hot. If it’s too hot, you’ll kill the yeast; if too cold, it won’t activate. The sugar helps feed the yeast during this initial stage, giving your dough a head start on flavor and lift.
🍳 Step 2: Mix the Dough to a Smooth, Sticky Texture
Add the 3.5 cups all-purpose flour and 1.5 tsp fine sea salt to the yeast mixture. Using a wooden spoon or your hands, stir until a shaggy dough forms. Then, gradually add the 0.25 cup extra-virgin olive oil while mixing—this creates a silky, elastic dough that’s perfect for stretching.
Once combined, turn the dough onto a lightly floured surface and knead for 8-10 minutes until smooth and elastic. You’ll know it’s ready when it springs back slowly when poked. If it feels too sticky, add just enough flour to coat your hands—don’t overdo it, or your dough will be tough.
⏰ Step 3: First Rise for Flavor Development
Shape the dough into a ball, place it in a lightly oiled bowl, and cover with a damp kitchen towel or plastic wrap. Let it rise in a warm spot (like near the oven with the light on) for 1-2 hours, or until it has doubled in size. This initial rise builds flavor and structure—don’t skip it!
I like to check the dough by gently pressing a finger into it. If it springs back slowly, it’s ready. If it springs back quickly, give it another 30 minutes. Over-rising here won’t ruin the dough, but it’ll affect the final texture, so aim for that sweet spot where it’s puffy but still firm.
🥘 Step 4: Shape and Cold Proof for Perfect Texture
After the first rise, punch down the dough to release air, then shape it into a round loaf. Place it back in the oiled bowl, cover, and refrigerate for 18-24 hours. This cold proofing step is what makes the dough light and airy—it allows the gluten to relax and the flavors to meld beautifully.
Here’s the thing—cold proofing also makes the dough easier to handle later. When you’re ready to use it, let it sit at room temperature for 30-60 minutes before rolling. This ensures it stretches smoothly without tearing, giving you that perfect thin crust or thick, chewy slice you’re after.
🔥 Step 5: Stretch and Pre-Bake for Crispy Perfection
Once the dough has risen at room temperature, stretch it gently on a floured surface until it reaches your desired thickness. For a classic Neapolitan-style pizza, aim for about ¼-inch thickness. If it resists, let it rest for another 10 minutes—don’t force it.
Pre-bake the dough on a pizza stone or baking sheet in a 475°F oven for 5-7 minutes until the edges start to puff and turn golden. This step prevents a soggy crust when you add toppings later. Once pre-baked, it’s ready for your favorite sauce, cheese, and toppings—just add and bake until the cheese is bubbly and the crust is crispy.
Pro Tips For Making 1 Kg Pizza Dough
- Measure Water by Weight: I learned this the hard way—using cups for water leads to inconsistent dough. For 1 kg dough, weigh out 600g of warm water (about 105°F/40°C) instead. Yeast activity depends on precise hydration, and this small change guarantees a more reliable rise every time.
- Bloom Yeast in Oil: Skip dissolving yeast in water—mix it with 1 tablespoon of olive oil first, then add warm water. The oil coats the yeast, protecting it from sudden temperature spikes and making it activate faster. Works especially well in humid kitchens where yeast can get sluggish.
- Autolyse First: Combine flour and water (no yeast yet) and let it rest for 20–30 minutes before adding yeast, oil, and salt. This relaxes the gluten early, making the final knead easier and giving you a smoother, more extensible dough. I used to skip this—now I can’t imagine not doing it.
- Salt the Water: Dissolve the full 20g of sea salt in the warm water before mixing with flour. Distributing it evenly prevents clumpy dough and ensures consistent seasoning. Yes, even if your flour is “unsalted”—pizza dough needs more salt than you’d think for that perfect balance.
Serving suggestions for this 1 kg pizza dough
Classic Toppings Pairings
For a Margherita pizza, stick to simplicity: San Marzano tomato sauce, fresh mozzarella di bufala, fresh basil, and a drizzle of extra-virgin olive oil.
The dough’s airy texture lets these star ingredients shine without overpowering. I swear by whole milk mozzarella for that perfect melt and stretch—it’s worth the splurge. 🌿
Meat Lovers’ Loaded Style
Layer your dough with spicy Italian sausage, pepperoni, and crispy pancetta for a hearty option. Add a sprinkle of red pepper flakes and grated Parmesan before baking. For extra flavor, brush the dough with garlic-infused olive oil before adding toppings.
This combo works best with a thicker crust (about ½-inch) to hold all the toppings. 🍖
Vegetarian Veggie Feast
Transform your dough into a veggie-packed masterpiece with roasted red peppers, caramelized onions, mushrooms, and sun-dried tomatoes. Finish with goat cheese and a sprinkle of fresh arugula after baking. The dough’s elasticity handles the weight of veggies beautifully—no soggy crust here. 🥕
Breakfast Pizza Twist
Skip the sauce and spread ricotta cheese on your dough, then top with crispy bacon, sautéed spinach, and shredded cheddar. Add a fried egg in the center for a protein boost.
The dough’s light texture balances the richness of breakfast flavors perfectly. This is my go-to for lazy weekend mornings. 🍳
Dessert Pizza Surprise
Sweet cravings? Swap the sauce for Nutella, then add sliced strawberries, bananas, and a sprinkle of crushed pistachios. Drizzle with warm honey after baking for a caramelized finish.
The dough’s airy base makes it taste like a cross between pizza and dessert—trust me, it’s a crowd-pleaser. 🍓
Garnish Like a Pro
Fresh herbs like basil, oregano, or cilantro add brightness to any pizza. A sprinkle of flaky sea salt or smoked paprika right before serving elevates the dish instantly.
For a restaurant-worthy touch, finish with grated Pecorino Romano or Parmesan—the sharpness cuts through the richness of the cheese. 💫
Nutrition facts
Frequently asked questions
Why does the dough need a 24-hour cold rise?
The cold rise develops flavor and improves texture by allowing the gluten to relax and the yeast to work slowly. This creates a lighter, airier crust with better elasticity—perfect for stretching without tearing. Think of it as letting the dough “rest” like a good wine.
Can I make this dough without a stand mixer?
This recipe is designed for hand mixing and kneading. Just use a wooden spoon first, then your hands for 8-10 minutes until smooth. The dough should be tacky but not wet—add just enough flour to coat your hands if needed. No kneading machine required!
What if my dough doesn’t rise at all?
Check three things: yeast freshness (test with warm water/sugar first), water temperature (105°F-110°F), and whether you used enough yeast (0.5 tsp). If it’s still flat after 2 hours, your yeast may be dead—start fresh with a new packet. Cold environments can also slow rise, so try a warmer spot.
How do I adjust this for a thinner or thicker crust?
For a thinner crust (¼-inch), stretch the dough longer on a floured surface. For thicker crust (½-inch), roll it shorter and let it rest 10 minutes between stretches. The cold rise time stays the same—it’s all about how you handle it after. Pro tip: Let thicker dough rest longer before baking.
Can I use this dough for calzones or stuffed pizza?
Yes! Shape the dough into balls (150g each) after the cold rise, stuff with your favorite fillings, fold, and seal edges with egg wash. Bake at 375°F for 20-25 minutes until golden. The dough’s elasticity makes it perfect for folding without tearing. Just reduce toppings slightly to avoid overflow.

- 3lb Prime Rib Roast Recipe: Juicy Pink Center Guaranteed in 3 Hours - October 31, 2026
- 5 Spice Cake Recipe: Warmly Spiced Layers With Crunchy Top - October 31, 2026
- 1950’s Macaroni and Cheese Recipe: Nostalgic Creamy Cheese Sauce with Buttery Noodles - October 31, 2026