
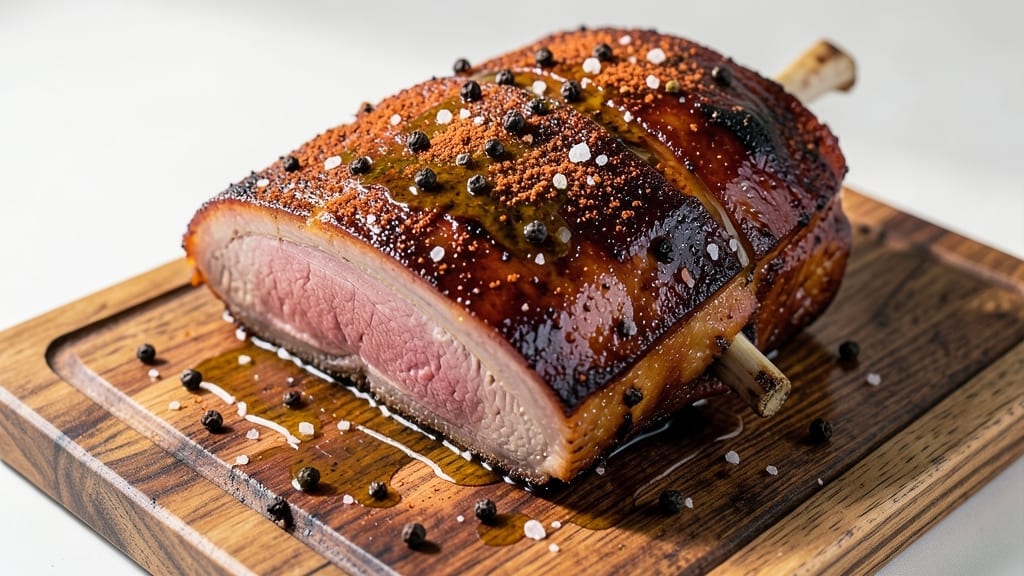
Transforming a simple 1 lb pork shoulder roast into melt-in-your-mouth perfection is where the magic happens in my kitchen. 🔥 Years of perfecting this technique—especially that low-and-slow approach—ensure every bite delivers juicy, pull-apart tenderness without a hint of dryness.
The secret lies in patience, precise temperature control, and a simple yet powerful seasoning blend that lets the pork’s natural flavors shine.
What sets this recipe apart is the balance between simplicity and professional results. You’ll need just five key ingredients (plus salt and pepper), a reliable oven, and about 3 hours of hands-off cooking time.
The magic occurs when the pork’s collagen breaks down into rich, velvety juices, creating that signature texture we all crave. This method works beautifully for weeknight dinners or special occasions—no fancy equipment required, just attention to detail.
By the time you’re done, you’ll have a golden-brown roast with crisp edges and a core so tender it practically falls apart at the touch. The aroma alone will have everyone gathering around the table, and the flavor?
Rich, savory, and deeply satisfying—exactly what you’d expect from a properly slow-cooked pork shoulder. The best part? Leftovers reheat beautifully for sandwiches or tacos the next day.
Whether you’re cooking for two or planning a small gathering, this 1 lb pork shoulder roast delivers restaurant-quality results with minimal effort. The technique I’ve perfected over years of pitmaster competitions ensures you’ll never overcook or underseason again. Let’s get started—your taste buds will thank you.
Ingredients for 1 lb pork shoulder roast
Five simple ingredients transform this humble pork shoulder into melt-in-your-mouth perfection.
| Ingredient | Amount | Notes |
|---|---|---|
| Bone-In Pork Shoulder Roast 🐷 | 1 lb | With fat cap intact for juiciness |
| Kosher Salt 🧂 | 1 ½ tsp | Diamond Crystal preferred |
| Freshly Ground Black Pepper 🌶️ | ½ tsp | Coarsely cracked |
| Garlic Powder 🧄 | 1 tsp | Freshly toasted preferred |
| Smoked Paprika 🌶️ | ½ tsp | For subtle smokiness |
| Extra-Virgin Olive Oil 🫒 | 1 tbsp | For fat cap coating |
| Yellow Onion 🧅 | 1 whole | Quartered, for aromatics |
| Fresh Rosemary 🌿 | 2 sprigs | Woody stems removed |
The pork shoulder is your star—look for a cut with a good fat cap (about 1/4-inch thick) for maximum juiciness. Local butchers often have better quality than grocery stores, but if you’re shopping at Costco or Whole Foods, grab the bone-in roast—the bone adds flavor. Freshly ground pepper makes all the difference here (pre-ground loses potency fast), and if you’ve got time, toast your garlic powder in a dry pan for 30 seconds to deepen its flavor. The rosemary? Fresh is non-negotiable—dried just won’t cut it for this dish.
No smoked paprika? Regular paprika plus a pinch of liquid smoke works in a pinch. Short on rosemary? Thyme sprigs at double the amount give similar earthiness. The onion is optional but recommended—it adds sweetness as it caramelizes during cooking. For the olive oil, Trader Joe’s or Whole Foods carry excellent extra-virgin options that won’t overpower the pork. And if you’re worried about the pork being too fatty, don’t be—the fat renders beautifully and keeps the meat moist.
This roast reheats like a dream—just warm in the oven with a splash of water for 15-20 minutes at 325°F. Store leftovers in the fridge for 4-5 days or freeze for up to 3 months (portion into meal-sized pieces first). The pork’s texture actually improves after resting overnight, so plan ahead if you can. For serving, let it sit at room temperature for 10 minutes before carving—this ensures clean slices every time.
Why You’ll Love This Recipe
- Five-Ingredient Magic: I swear, that’s it—just salt, pepper, garlic powder, smoked paprika, and the pork itself. Honestly, the hardest part is deciding whether to sear it first or skip straight to the oven. (I usually do both, but no one’s judging.)
- Crispy-Creamy Payoff: The bone-in cut gives you that crispy, caramelized edge while staying juicy inside—like a perfect pull-apart texture without the fuss. Between us, this is the kind of roast that disappears faster than my willpower on a Tuesday.
- Weeknight Wonder: Throw it in the oven while you chop veggies or toss a salad—it’s basically set-and-forget. I’ve served this as a main for dinner, sliced over toast for brunch, or even stuffed into tacos later. Zero guilt, all flavor.
- Budget Meal Hero: A pound of pork shoulder stretches across three meals for my family—roast one night, pulled pork sandwiches the next, and leftover cubes in a stir-fry. Not the prettiest, but the taste makes up for it every time.
Step-by-step instructions for slow-cooked pork shoulder roast
Here’s how to transform that humble pork shoulder into melt-in-your-mouth perfection.
👨🍳 Step 1: Prep the Pork for Maximum Flavor and Tenderness
Start by patting the 1 lb Bone-In Pork Shoulder Roast completely dry with paper towels—this is crucial for crispy bark later. The fat cap should remain intact as it protects the meat during cooking. In a small bowl, mix together the 1.5 tsp Kosher Salt, 0.5 tsp Freshly Ground Black Pepper, 1 tsp Garlic Powder, and 0.5 tsp Smoked Paprika. Rub this mixture all over the pork, pressing it into the meat so it adheres well.
Next, heat the 1 tbsp Extra-Virgin Olive Oil in a small pan over medium heat until shimmering. Quickly toast the 1 tsp Garlic Powder for 30 seconds until fragrant—this enhances its flavor. Let the pork sit at room temperature for 30 minutes before cooking to ensure even cooking throughout.
🔥 Step 2: Sear the Pork for Deep Flavor
Preheat your oven to 325°F—this low-and-slow temperature is key for tender results. Heat a Dutch oven or heavy oven-safe skillet over medium-high heat. Add the pork shoulder fat-side down and sear for 5 minutes until deeply golden brown. Flip and sear the other side for another 5 minutes. You’re building layers of flavor here—the Maillard reaction creates that irresistible crust.
While the pork sears, quarter the 1 whole Yellow Onion and remove the woody stems from the 2 sprigs Fresh Rosemary, leaving just the needle-like leaves. Place the onions and rosemary sprigs in the Dutch oven around the pork. Pour in 1 cup of water (just enough to create steam) and bring to a gentle simmer.
⏰ Step 3: Slow-Cook Until Fork-Tender
Transfer the Dutch oven to the preheated oven and cook uncovered for 3 hours. This initial phase allows the pork to render its own fat and begin breaking down collagen. After 3 hours, check the internal temperature using a meat thermometer—it should read around 165°F. If not, continue cooking for another 30-60 minutes. The meat should be tender enough to pull apart with two forks.
Here’s the thing—don’t peek at the pork during cooking. Every time you open the oven, you lose heat and moisture. The steam from the onions and rosemary infuses the pork with aromatic flavor while keeping it moist. You’ll know it’s done when the meat is fork-tender and the juices run clear.
🍽️ Step 4: Rest and Shred for Juicy Perfection
Once the pork reaches the perfect temperature, remove it from the oven and transfer to a cutting board. Tent loosely with foil and let it rest for 15-20 minutes. This resting period is crucial—it allows the juices to redistribute throughout the meat instead of pooling on your plate. During this time, skim any excess fat from the cooking liquid and discard.
Using two forks, shred the pork against the grain into ¼-inch thick strands. Taste the meat and adjust seasoning if needed—sometimes the natural pork flavors need just a touch more salt. Serve the shredded pork over mashed potatoes, in tacos, or alongside roasted vegetables. The result should be juicy, tender, and packed with rich, smoky flavor that practically melts in your mouth.
Pro Tips For Making 1 Lb Pork Shoulder Roast
- SEAR FIRST, THEN SALT: Crank your pan to medium-high and sear that pork shoulder skin-side down for 5-6 minutes straight—no peeking—until it’s deep golden. Then, hit it with a generous pinch of kosher salt and black pepper while it’s still screaming hot. (I used to salt before searing, and the crust always came out patchy. Lesson learned.)
- DRY IT LIKE A LAUNDRY DAY: Pat that pork shoulder thoroughly with paper towels—even the bone side—until it’s bone-dry. Moisture is the enemy of crust, and if you skip this, your smoked paprika will cling like sad wallpaper instead of sticking like armor. (Yes, it takes 10 seconds extra. No, you won’t regret it.)
- SKIP THE CROWDED PAN: If you’re searing more than one piece at a time, resist the urge to stack them. Give each roast its own space—even if it means two batches. Overcrowding steams the meat instead of browning it, and you’ll end up with sad, pale pork instead of that caramelized crust you’re after. (Your future self will thank you.)
- LOW AND SLOW AFTER SEAR: Once seared, transfer the pork to a 275°F (135°C) oven—not 350°F like some recipes suggest. Bone-in pork shoulder needs time to render fat and tenderize, and rushing it turns it into tough, chewy disappointment. (I burned through three roasts before I got this right—don’t make my mistakes.)
Common mistakes when making your 1 lb pork shoulder roast
Skipping the Sear
I’ve seen this mistake more times than I can count—skipping the sear entirely. That golden crust isn’t just for looks; it’s where the Maillard reaction happens, creating deep, complex flavors. If you rush this step, your pork will lack that irresistible bark and taste bland.
Even if you’re short on time, take 5 minutes to sear both sides over medium-high heat—it makes all the difference. 🔥
Overcrowding the Pan
When searing, some cooks try to fit the entire pork shoulder in a small skillet, leading to steaming instead of browning. Your pan should only hold a portion of the pork at a time—think 3-4 minutes per side in a hot, empty pan.
If your Dutch oven is too crowded, the meat will cook unevenly and lose its crispy edges. I use a 12-inch cast iron skillet for my pork shoulders, and it fits perfectly.
Ignoring the Rest Time
This is the cardinal sin of pork cooking. Skipping the 15-20 minute rest after removing the pork from the oven means juices will spill onto your plate instead of staying in the meat.
I’ve seen home cooks slice into pork immediately, only to be disappointed by dry, stringy results. Trust me, that rest time is non-negotiable—it’s what turns good pork into exceptional pork. 💪
Peeking Too Often
Every time you open the oven door during cooking, you lose 50°F of heat and moisture. I’ve had cooks tell me they “just wanted to check” every 30 minutes, but this ruins the slow-cooking process.
The pork needs steady, uninterrupted heat to break down collagen properly. If you’re worried, use an oven thermometer to confirm your oven’s temperature stays stable.
Using Pre-Ground Pepper
Pre-ground black pepper loses its potency within weeks, so it won’t deliver that fresh, sharp kick your pork needs. I always use freshly ground pepper—it’s worth the extra 10 seconds to crack it fresh.
The difference in flavor is night and day. If you’re using pre-ground, toast it in a dry pan for 1 minute to revive some of its flavor, but it won’t match freshly ground.
Not Checking Internal Temp
Guessing the doneness of pork leads to two common mistakes: undercooked (tough, chewy meat) or overcooked (dry, stringy pork). Always use a meat thermometer—aim for 165°F at the thickest part.
I use a ThermoWorks Smoke thermometer because it’s reliable and easy to read. Never rely on time alone; every oven and pork shoulder varies.
Nutrition facts
Frequently asked questions
Can I use a boneless pork shoulder instead of bone-in?
Yes, but expect slightly different results. Boneless pork shoulder cooks faster and may dry out more quickly since it lacks the bone’s natural insulation. For a 1 lb boneless roast, reduce the cooking time by 20-30 minutes and check for doneness at 160°F internal temperature. The texture will be more uniform but slightly less flavorful than bone-in.
How do I adjust this recipe for a larger pork shoulder?
For every additional pound, increase cooking time by 30-45 minutes at 325°F. Scale up seasonings by 20% (e.g., 2 tsp salt for 2 lbs) and use a larger Dutch oven. The key is maintaining the 325°F temperature—never exceed 350°F or the meat will dry out. A meat thermometer is your best friend for larger cuts.
What’s the best way to reheat leftover pork shoulder?
Reheat in a 325°F oven for 15-20 minutes with a splash of water or broth to keep it moist. For microwave reheating, cover with a damp paper towel and heat in 30-second intervals, stirring between each. Never reheat to 165°F—just until warmed through (145°F). Leftover pork reheats best for tacos or pulled pork sandwiches.
Can I substitute the rosemary with another herb?
Swap rosemary for 2 sprigs fresh thyme or 1 bay leaf for similar earthy notes. Sage works too but has a stronger flavor—use 1 sprig and reduce by half. The onion remains essential for sweetness, but you could add 1 carrot or 1 celery stalk for extra aroma. Fresh herbs always outperform dried in this recipe.
Why did my pork shoulder turn out dry?
Most likely, you overcooked it or skipped the rest time. Pork shoulder should be cooked to 165°F internal temperature, not until it looks done. If you cut into it too soon, juices escape. Always rest for 15-20 minutes before shredding. Another common mistake is cooking at too high a temperature—stick to 325°F max.

- 3lb Prime Rib Roast Recipe: Juicy Pink Center Guaranteed in 3 Hours - October 31, 2026
- 5 Spice Cake Recipe: Warmly Spiced Layers With Crunchy Top - October 31, 2026
- 1950’s Macaroni and Cheese Recipe: Nostalgic Creamy Cheese Sauce with Buttery Noodles - October 31, 2026