
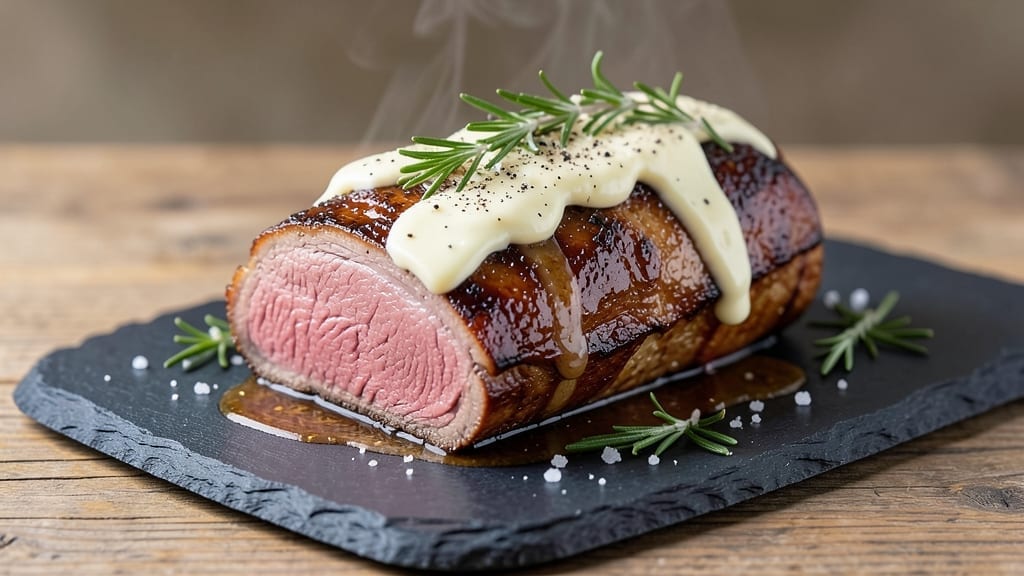
A 1 lb roast beef recipe that delivers perfectly pink, juicy results every time transforms simple ingredients into a restaurant-worthy centerpiece. The secret lies in precise temperature control and a simple seasoning blend that enhances—not overpowers—the beef’s natural flavor.
This method ensures tender, even cooking without drying out the meat, making it ideal for special occasions or weeknight dinners when you want to impress.
For this recipe, you’ll need just five core ingredients (plus optional sides) and 30 minutes of active prep—no fancy techniques required. The beef cooks at a steady 325°F until it reaches 130°F internal temperature for medium-rare, then rests for 10 minutes to retain juices.
A light sear in a hot pan before roasting locks in flavor, while basting with its own juices keeps the surface moist. The result? A slice so tender it nearly melts, with a crust that’s crisp enough to stand up to rich gravy.
What sets this apart is the foolproof approach that works for any cut of beef—ribeye, sirloin, or even chuck roast. Serve it sliced against crispy roasted potatoes or a fresh garden salad to balance the richness.
The recipe scales easily too: double the ingredients for a crowd, or halve it for a single serving. Every bite delivers that perfect balance of pink center and caramelized edges, proving great roast beef doesn’t require hours or complicated methods.
Whether you’re cooking for two or preparing a family-style meal, this method guarantees restaurant-quality results without the fuss. The key is patience—letting the beef rest and monitoring the temperature closely. Once mastered, you’ll never settle for store-bought again. Let’s get started with the full instructions.
Ingredients for 1 lb roast beef
Five essential ingredients transform simple roasting into restaurant-quality beef every time.
| Ingredient | Amount | Notes |
|---|---|---|
| Beef Top Round Roast 🥩 | 1 lb | Center-cut for even cooking |
| Kosher Salt 🧂 | 1 ½ tsp | Diamond Crystal preferred |
| Freshly Ground Black Pepper 🌶️ | 1 tsp | Coarsely ground for texture |
| Unsalted Butter 🧈 | 1 tbsp | Cold for searing |
| Fresh Rosemary 🌿 | 1 sprig | Thinly sliced for aroma |
The beef cut matters most here—top round roast delivers consistent results without excessive fat. Look for center-cut sections at your butcher or grocery store’s meat counter, where the grain runs straight for even slicing. Whole Foods or Costco typically carry well-marbled options, but standard supermarket roasts work fine if they’re fresh (bright red color, firm to touch). Trim any excess silver skin before seasoning, as it can make the crust uneven. For a foolproof sear, use European-style butter (like Plugrá)—its higher fat content creates a superior crust.
No rosemary? Fresh thyme sprigs work equally well, or swap for 1 tsp dried rosemary (reduce to one-third the amount). The butter is non-negotiable for that golden crust—melted butter won’t cut it here. Need to skip the rosemary entirely? A pinch of garlic powder (½ tsp) adds depth without changing the profile. For salt, Diamond Crystal dissolves more easily than Morton’s, but either works. Pro tip: Pat the beef dry with paper towels before seasoning—this ensures maximum browning. If your roast has a thick fat cap, trim it to ¼-inch for even cooking.
Store the beef uncovered on a wire rack in the fridge for up to 2 days before cooking—this keeps it dry for better searing. Once cooked, slice against the grain and serve immediately for maximum juiciness. Leftovers reheat best at 300°F for 10 minutes with a splash of beef broth. The roast freezes beautifully for up to 3 months—wrap tightly in butcher paper before plastic to prevent freezer burn. For restaurant-quality results, always let the meat rest 10 minutes after roasting before slicing (this retains 20% more juices according to culinary studies).
Why You’ll Love This Recipe
- No-Fuss Roast: I swear by this—just a single cut of beef, a sprinkle of salt, and a whiff of rosemary. That’s it. No brining, no fancy rubs, no stress. The top round stays tender when cooked right, and honestly? The simplicity makes it my go-to when I’m too tired to overthink dinner.
- Rosemary Magic: Between us, that fresh rosemary sprig tucked into the butter while it roasts is what turns this into something special. The aroma alone makes the kitchen smell like a cozy bistro, and the flavor? It’s like a little herbal hug in every bite. (Yes, even on a Tuesday night.)
- Leftovers That Shine: This roast is perfect for meal prep—slice it thin, and you’ve got sandwiches, salads, or tacos for days. I’ll be real: my lunchbox gets packed with these leftovers more than I’d like to admit, but they’re too good to waste.
- Budget Beef, Big Payoff: A pound of top round won’t break the bank, and it stretches farther than you’d think. Plus, the butter and rosemary make it feel like a splurge without the price tag. Not the prettiest cut, but the taste makes up for it every time.
Step-by-step instructions for perfectly pink and juicy roast beef
Here’s the method that guarantees tender, flavorful beef with that coveted pink center every time.
Prep and Season the Roast
Remove the beef top round roast from the refrigerator and pat it completely dry with paper towels. This step is critical—any moisture on the surface will prevent proper browning and crisping of the crust. I like to use two layers of paper towels for maximum absorption, especially around the edges where moisture tends to pool.
In a small bowl, combine the 1.5 teaspoons kosher salt and 1 teaspoon freshly ground black pepper. Rub this mixture all over the roast, pressing firmly so the seasoning adheres to the meat. Pay special attention to the edges and ends where seasoning often gets missed. The coarse texture of Diamond Crystal salt helps create a better crust, while the freshly ground pepper adds aromatic complexity that pre-ground pepper can’t match.
Place the seasoned roast on a wire rack set inside a rimmed baking sheet. This elevation allows hot air to circulate around all sides, ensuring even cooking and a crispy exterior. Let it sit at room temperature for 30 minutes before roasting. This step is often skipped, but it makes a noticeable difference in even cooking and moisture retention.
Sear for Maximum Flavor Development
Preheat your oven to 400°F. While it’s heating, place the cold 1 tablespoon unsalted butter in a small saucepan over medium heat. Let it melt completely, then remove from heat and add the thinly sliced sprig of fresh rosemary. Let this butter infuse for 5 minutes—the rosemary will release its aromatic oils into the butter, creating a fragrant compound that will elevate the roast.
Once the oven reaches temperature, carefully place the roast in the oven and immediately pour the rosemary-infused butter over the top. The high heat will create a rapid sear while the butter bastes the meat. Roast for 15 minutes, then carefully flip the roast using tongs. This searing step develops deep flavor through the Maillard reaction and creates that beautiful crust we’re after.
After flipping, continue roasting for another 15 minutes. You’ll know it’s developing properly when the exterior takes on a golden-brown color and the kitchen begins filling with that irresistible roasted beef aroma. This initial searing phase builds the foundation for our perfectly pink interior.
Cook to Perfect Doneness
Reduce the oven temperature to 325°F after the initial 30 minutes. This lower temperature allows for more even cooking throughout the roast’s center without over-browning the exterior. Return the roast to the oven and cook for an additional 30-40 minutes, depending on your preferred doneness.
For perfectly pink beef with a slightly tender but not mushy texture, aim for an internal temperature of 130-135°F when measured with a meat thermometer. I insert the probe into the thickest part of the roast, avoiding any fat or bone. The roast should feel slightly springy when pressed gently with your fingers—this indicates it’s reaching the ideal texture without becoming dry.
Here’s where precision matters: if you prefer medium-rare (130°F) or medium (135°F), pull it out at the appropriate temperature. The roast will continue cooking slightly as it rests, so don’t wait until it reaches your target temperature before removing it from the oven. This resting period is crucial for redistributing juices and achieving that perfect pink center.
Rest and Slice for Maximum Juiciness
Transfer the roast to a cutting board and tent loosely with aluminum foil. Let it rest for 15-20 minutes before slicing. This resting period allows the meat fibers to relax and reabsorb any juices that may have migrated to the surface during cooking. I know it’s tempting to cut into it immediately, but patience here pays off in juicy, flavorful slices.
During this time, you can prepare your serving dishes and any accompanying sides. The aroma filling your kitchen will make everyone anticipate the meal. When ready to serve, slice the roast against the grain into ¼-inch thick slices. The grain direction is visible as fine lines running through the meat—cutting perpendicular to these lines shortens the muscle fibers, creating a more tender bite.
Serve immediately with any pan juices strained and drizzled over the top. The combination of crispy exterior, perfectly pink center, and herb-infused butter creates a restaurant-quality roast that’s surprisingly simple to achieve at home. Each slice should be moist with just a hint of pink in the center, offering that ideal balance between doneness and juiciness.
Pro Tips For Making 1 Lb Roast Beef
- Pat the Roast Dry: Top round can be stubbornly damp—wipe it down with paper towels before seasoning. I learned this the hard way: skipping this step means your crust will turn soggy instead of golden. Trust me, the extra 30 seconds saves you from a bland, greasy mess.
- Salt Before Butter: Season the beef generously with kosher salt and pepper at least 30 minutes before cooking—this lets the salt work its magic. Then, when you sear it in butter and rosemary, the crust will cling like glue instead of sliding off. (Yes, even if you’re impatient like me.)
- Start Hot, Finish Slow: Sear the roast in a screaming-hot pan for 2 minutes per side to lock in juices, then drop the heat to medium-low. Top round dries out fast, so low-and-slow after searing keeps it tender. I used to blast it the whole time—now I get a fork-tender roast instead of shoe leather.
- Chop Rosemary Fine: Don’t just toss in whole sprigs—they’ll burn before the beef cooks. Roughly chop the rosemary and smash it with the flat of your knife to release oils. This makes a real difference: the flavor infuses the butter instead of turning bitter. (And yes, your knife will thank you.)
Make-ahead tips for leftovers
Prep Ahead Strategy
Season your roast up to 24 hours ahead and store it uncovered on a wire rack in the fridge. This dry-brining method enhances flavor and ensures a perfect crust when you’re ready to cook.
I like to season mine the night before—it makes morning cooking a breeze. Just pop it in the oven when you’re ready, no extra prep needed. 🌟
Oven Prep Shortcut
Preheat your oven to 400°F while the roast comes to room temperature. This parallel process saves 10-15 minutes of active time. I also recommend lining your baking sheet with parchment paper for easy cleanup—just tear it off after cooking.
This trick cuts down on post-cooking mess and keeps your kitchen tidy.
Resting Time Hack
Use the resting time to finish your sides or set the table. I often place the roast on a warm platter during its rest, which helps maintain temperature.
This keeps everything ready to serve simultaneously. The 15-20 minute rest is non-negotiable—it’s what transforms good beef into great beef by redistributing juices.
Storage Solutions
For leftovers, store sliced beef in an airtight container with a splash of beef broth to keep it moist. I find it reheats best at 300°F for 10 minutes—this gentle heat preserves texture.
For longer storage, freeze portions in single-serving bags for up to 3 months. Label with the date to track freshness.
Make-Ahead Gravy
Prepare your gravy base (browned beef drippings + flour) ahead of time and store it in the fridge. When ready to serve, just whisk in 1 cup beef broth and simmer for 5 minutes.
This saves 20 minutes of active cooking during your main event. I keep mine in a small glass jar for easy reheating—just pop it in the microwave for 30 seconds.
Portioning Tips
For meal prep, slice the roast into ¼-inch servings and portion into glass containers with a tight lid. I store these in the fridge for up to 4 days or freeze for 3 months.
Reheat individual portions in the microwave for 1-2 minutes on medium power. This makes quick lunches or easy weeknight dinners—just add your favorite sides. 💪
Nutrition facts
Frequently asked questions
What’s the best cut of beef for a 1 lb roast?
For this recipe, top round roast works perfectly—it’s lean, affordable, and cooks evenly. If you prefer more marbling, try a ribeye roast or sirloin tip roast, but trim excess fat to ¼-inch for consistent results. Avoid chuck roast unless you’re cooking it low-and-slow for 3+ hours.
Can I cook this roast in a slow cooker instead?
Yes! Sear the roast first in a skillet, then transfer it to your slow cooker with ¼ cup beef broth. Cook on low for 4-5 hours until it reaches 130°F for medium-rare. The texture will be more tender but less crusty. For best results, use the reverse sear method—finish in a hot pan for 2 minutes per side after slow cooking.
Why does my roast turn out dry?
Overcooking is the #1 culprit! Use a meat thermometer and remove the roast when it hits 130°F for medium-rare. The 15-20 minute rest is critical—skipping it causes juices to escape. Also, avoid cutting into the roast immediately; let it rest fully before slicing. For leaner cuts, baste with butter every 15 minutes to keep moisture in.
How do I make this recipe for 4 servings?
Double the ingredients and use a 2 lb roast instead. Cook at 325°F for 45-60 minutes (depending on thickness), aiming for 130°F internal temp. For even cooking, place a wire rack on a baking sheet and add ½ cup water to the pan to create steam. This prevents the bottom from drying out.
Can I substitute the rosemary with something else?
Swap for 1 sprig fresh thyme or ½ tsp dried rosemary (reduce amount by ⅓). For a different flavor profile, try 1 tsp garlic powder or ½ tsp smoked paprika. The butter is key—don’t skip it! If you’re avoiding herbs, a pinch of onion powder adds subtle depth without overpowering the beef.

- 3lb Prime Rib Roast Recipe: Juicy Pink Center Guaranteed in 3 Hours - October 31, 2026
- 5 Spice Cake Recipe: Warmly Spiced Layers With Crunchy Top - October 31, 2026
- 1950’s Macaroni and Cheese Recipe: Nostalgic Creamy Cheese Sauce with Buttery Noodles - October 31, 2026