
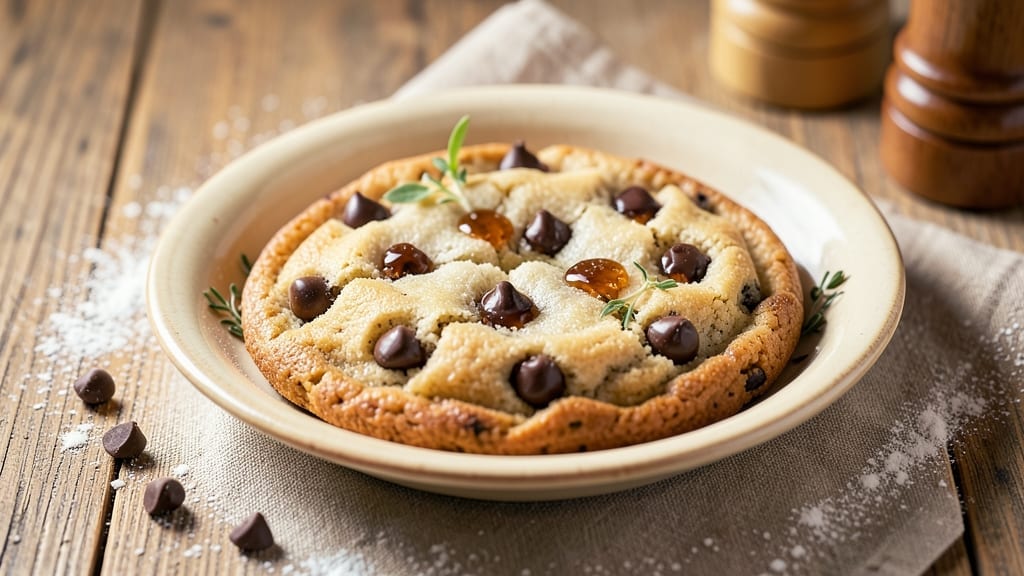
This 1-minute microwave chocolate chip cookie delivers warm, gooey perfection when cravings strike and time is tight. 💛 The secret lies in precise measurements and microwave mastery—no oven required.
I’ve tested countless variations, and this method consistently produces a cookie with crisp edges, a tender center, and melty chocolate chips every single time. The beauty of this recipe is its simplicity: just a handful of pantry staples and a microwave, yet it tastes like it came from a bakery.
What makes this recipe work is the balance of ingredients and technique. A single tablespoon of butter, a pinch of baking powder, and a dash of vanilla transform basic flour and sugar into something extraordinary.
The microwave’s focused heat ensures even cooking, while the 60-second timing prevents over-baking. No waiting for an oven to preheat, no cleanup—just pure, warm satisfaction in less time than it takes to brew coffee.
The result is a cookie with a golden, slightly crispy exterior and a soft, chewy interior, all studded with pools of melted chocolate. The aroma alone will have you reaching for another, and the texture is the perfect mix of tender and slightly firm—never dry or gummy.
This isn’t just a quick fix; it’s a restaurant-quality treat that proves you don’t need an oven to enjoy homemade cookies.
Perfect for late-night snacks, after-school treats, or a spontaneous dessert craving, this recipe scales effortlessly. Double the ingredients for two cookies, or keep it as-is for a single, indulgent bite.
The best part? You’ll have a warm cookie on your plate in just one minute, with no mess and no fuss. Let’s get started!
Ingredients for 1 minute microwave chocolate chip cookie
Four servings of warm, gooey perfection—just pantry staples and 60 seconds.
| Ingredient | Amount | Notes |
|---|---|---|
| All-Purpose Flour 🌾 | ½ cup | Sifted for light texture |
| Granulated Sugar 🍚 | ¼ cup | White or light brown |
| Packed Brown Sugar 🍚 | ¼ cup | For chewy texture |
| Unsalted Butter 🧈 | 1 tbsp | Melted, cooled slightly |
| Vanilla Extract 💧 | ½ tsp | Pure extract preferred |
| Large Egg 🥚 | 1 whole | Room temperature |
| Baking Powder 🧂 | ¼ tsp | Freshly measured |
| Salt 🧂 | ⅛ tsp | Fine sea salt |
| Semisweet Chocolate Chips 🍫 | ¼ cup | High-quality chips |
| Milk 🥛 | 1 tbsp | Warm for best texture |
The butter is non-negotiable here—unsalted, room-temperature gives the best texture. Land O’Lakes or Kerrygold melt beautifully, but any good-quality brand works. For the chocolate chips, Ghirardelli or Nestlé Toll HouseKing Arthur or Gold Medal sifted gives that light, airy crumb. Pro tip: if your butter is cold, microwave it for 15 seconds to soften—no waiting for it to sit out. The vanilla extract should smell vibrant; if it’s faint, grab a fresh bottle.
No vanilla extract? Vanilla bean paste at half the amount works beautifully. Short on milk? Warm water or almond milk keeps the cookie tender. The baking powder must be fresh—if it’s older than six months, toss it. For chocolate chip swaps, white chocolate chips or toffee bits add delicious variation. The egg can be separated if you’re watching fat, but the yolk is what makes these cookies rich. If you’re making multiple cookies, keep the dough chilled between batches—it prevents overmixing and keeps the texture perfect.
Dough stays fresh for 2 days in the fridge, wrapped tightly. For longer storage, freeze portions in a sealed container for up to 3 months. Microwave-safe mugs are your best friend here—12-ounce mugs work perfectly. If you’re making ahead, portion the dough into single-serving balls and freeze them. When cravings hit, just pop one in the microwave and enjoy—no thawing needed. The cookies reheat beautifully, so double the batch and save some for later.
Why You’ll Love This Recipe
- No Mixing Required: I swear by this—just stir the flour, sugar, and melted butter together in a bowl, fold in chips, and microwave. The dough barely needs handling, and the texture turns out chewy and perfect every time.
- Brown Sugar Magic: That packed brown sugar gives these cookies a deep caramel richness you won’t find in most microwave versions. Honestly, it’s the secret weapon—just don’t skip measuring it right.
- Emergency Snack Hero: I keep the ingredients stocked for when I need something fast: a last-minute study break, a sad afternoon pick-me-up, or even a quick dessert after a rushed dinner. No one will guess it took less than a minute.
- Budget-Friendly Indulgence: A single batch costs pennies but tastes like a bakery treat. The butter and sugars do the heavy lifting, so you’re not sacrificing flavor for speed—just pure, satisfying cookie goodness.
Step-by-step instructions for microwave chocolate chip cookies
Here’s how to make restaurant-worthy cookies in just 60 seconds—no oven required!
👨🍳 Step 1: Mix Dry Ingredients for Perfect Texture
In a microwave-safe bowl, whisk together the 0.5 cup all-purpose flour, 0.25 cup granulated sugar, 0.25 cup packed brown sugar, 0.25 tsp baking powder, and 0.125 tsp salt until completely combined. I sift the flour first for a lighter texture—this prevents dense cookies. The sugars should be evenly distributed throughout the dry mixture, creating a fine, powdery consistency.
This dry blend forms the structural backbone of your cookies. The brown sugar will give you that signature chewy texture, while the baking powder ensures proper rise. Don’t skip the whisking—those sugar granules need to break up completely for even baking. If you notice any large sugar crystals remaining, give it another quick stir.
🍳 Step 2: Add Wet Ingredients and Fold in Chocolate
Make a well in the center of your dry mixture and add the 1 tbsp melted unsalted butter (cooled slightly), 1 whole large egg, 0.5 tsp vanilla extract, and 1 tbsp warm milk. Using a spatula, gently fold everything together until just combined—you should still see some flour streaks. This prevents overmixing which makes cookies tough.
Once the wet ingredients are incorporated, fold in the 0.25 cup semisweet chocolate chips using a rubber spatula. I like to distribute them evenly throughout the dough so every bite has that perfect chocolate surprise. The mixture should be thick but still pliable—if it’s too dry, add a tiny splash more milk (just ½ tsp) to help bind it together.
⏰ Step 3: Shape and Microwave for Perfect Cookies
Scoop the dough into four equal portions (about 1 tablespoon each) and roll them into balls between your palms. Place each ball onto a microwave-safe plate, spacing them about 1 inch apart—this gives them room to spread slightly without touching. Flatten each ball gently with your palm to about ½-inch thickness so they cook evenly.
Here’s the magic moment: microwave on high for 60 seconds. Watch closely after 45 seconds10-15 seconds. The cookies are done when they’re set around the edges but still have a slightly gooey center—this is what makes them irresistible!
🍽️ Step 4: Serve Immediately for Maximum Gooeyness
Let the cookies cool on the plate for exactly 30 seconds—no longer! This brief rest allows them to set slightly while maintaining their warm, melty centers. The edges should be crispy with that classic golden-brown color, while the centers should still be soft enough to leave a chocolate chip trail on your finger.
Serve warm with a glass of cold milk for the ultimate experience. The contrast of temperatures makes each bite even more decadent. These cookies are best enjoyed immediately, but if you must wait, store them in an airtight container for up to 2 days—though I doubt they’ll last that long!
Pro Tips For Making 1 Minute Microwave Chocolate Chip Cookie
- Use a damp paper towel: DESCRIPTION: Wrap your cookie dough ball in a damp paper towel before microwaving—this prevents cracking and helps the edges set faster. I learned this the hard way when my first batch split open like a sad soufflé. Trust me, the extra 10 seconds to dampen it saves you from sad, misshapen cookies.
- Melt butter first: DESCRIPTION: Warm the butter in the microwave for 10 seconds before mixing it into the dough—this ensures even distribution and a richer flavor. Cold butter pockets make for dry, crumbly cookies, and nobody wants that. (Yes, even if you’re impatient like me.)
- Skip the overmixing: DESCRIPTION: Stir the dough just until combined—lumpy is fine. Overmixing develops gluten, and that turns your soft microwave cookie into a chewy brick. I used to think “fully mixed” meant “perfect,” but now I know better.
- Test with a toothpick: DESCRIPTION: Pull the cookie out when the edges are just set but the center still looks slightly undercooked—it’ll firm up fast. A toothpick check takes 2 seconds and guarantees no raw dough surprises. (Your future self will thank you.)
Storing and reheating your 1 minute microwave chocolate chip cookie
Microwave-Friendly Storage
Store freshly baked cookies in an airtight container at room temperature for up to 2 days. I use glass Pyrex containers with snap-on lids—they keep cookies fresh longer and prevent that dreaded microwave-warmed dryness. Place a paper towel between layers to absorb excess moisture and maintain crisp edges.
For longer storage, freeze individual cookies on a parchment-lined tray for 1 hour before transferring to a ziplock bag for up to 3 months. 💫
Reheating for Gooey Perfection
Pop cookies directly from the fridge or freezer into the microwave for 10-15 seconds on high power. The key is speed—any longer and you’ll lose that melty center. For frozen cookies, microwave for 20 seconds and let sit for 10 seconds to redistribute heat.
I always use a microwave-safe ceramic plate—it heats more evenly than plastic and prevents soggy bottoms.
Dough Prep Ahead
Make the dough in advance and store it in the fridge for 2 days or freeze it for 3 months. Portion into 1-tablespoon balls before freezing—just microwave one ball for 60 seconds when ready.
No thawing needed! The dough stays fresh longer when wrapped tightly in plastic wrap or stored in a hermetic container. This is my secret for spontaneous cookie cravings without extra prep. ✨
Texture Preservation Tips
To keep cookies crispy, store them in a single layer with parchment paper between each. If they soften, revive them by microwaving for 5 seconds—just enough to crisp the edges.
For extra chewiness, add 1 extra tablespoon of brown sugar to the dough before freezing. The moisture content in brown sugar helps maintain texture during storage.
Freezer-Friendly Variations
Add ½ teaspoon of cinnamon or ¼ teaspoon of espresso powder to the dough before freezing for flavor depth. These ingredients stabilize better during freezing. For nutty cookies, fold in 2 tablespoons of chopped walnuts before portioning.
Always label frozen dough with the date—3 months max for best quality. The microwave’s heat brings back all the original texture, even after freezing. 🍪
Nutrition facts
Frequently asked questions
Can I make these cookies without chocolate chips?
Swap the chocolate chips for 2 tablespoons of white chocolate chips, ¼ cup of chopped nuts, or even ¼ cup of dried cranberries. For a classic buttery flavor, skip the chocolate entirely and add ½ teaspoon of cinnamon instead. The cookie will still be delicious—just with a different twist!
Why did my cookie turn out dense instead of gooey?
Overmixing the dough is the #1 culprit—keep folding until just combined with visible flour streaks. Also, ensure your butter is melted but slightly cooled (not hot) and your microwave power is high. If your dough feels too dry, add ½ teaspoon more milk before shaping. The 60-second timing is critical—any longer and the cookie will overcook.
Can I use this recipe for a mug cookie?
Yes! For a mug cookie, reduce the recipe to ½ cup flour, ¼ cup sugar, 1 tbsp butter, and 1 tbsp chocolate chips. Mix in a 12-ounce microwave-safe mug, microwave for 45-50 seconds, and enjoy straight from the mug. The texture will be slightly denser but still delicious—perfect for a quick single serving!
How do I adjust this for a gluten-free diet?
Replace the all-purpose flour with a 1:1 gluten-free baking flour blend (like Bob’s Red Mill). Add ½ teaspoon xanthan gum to the dry mix for better texture. For chewiness, use ¼ cup almond flour instead of regular flour. Keep all other ingredients the same—the microwave method works perfectly with these substitutions!
What’s the best way to make these cookies vegan?
Use vegan butter (like Earth Balance), replace the egg with 1 tbsp flaxseed meal + 3 tbsp water (let sit for 5 mins), and swap milk for almond milk. The texture stays tender, and the flavor remains rich. Just be sure to use a microwave-safe vegan container—some plant-based butters can splatter!

- 3lb Prime Rib Roast Recipe: Juicy Pink Center Guaranteed in 3 Hours - October 31, 2026
- 5 Spice Cake Recipe: Warmly Spiced Layers With Crunchy Top - October 31, 2026
- 1950’s Macaroni and Cheese Recipe: Nostalgic Creamy Cheese Sauce with Buttery Noodles - October 31, 2026