
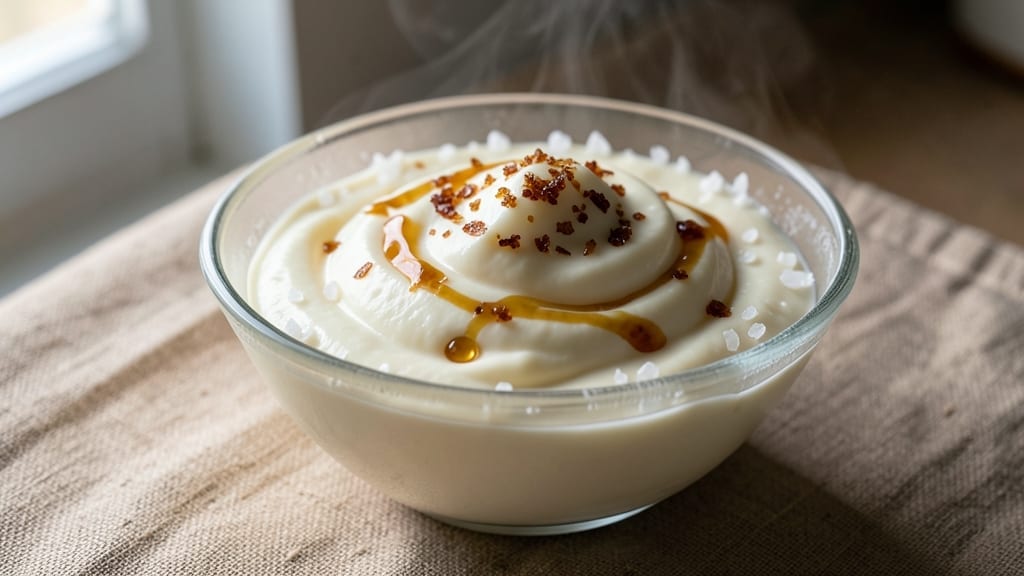
Homemade 1 percent milk ice cream recipe delivers that luxurious, velvety texture without relying on heavy cream or butter. 💛 The secret lies in precise ingredient ratios—1% milk, sugar, and a touch of stabilizer—to create a smooth, rich base that churns into perfection.
I’ve perfected this recipe over years of testing, ensuring every scoop feels indulgent yet balanced.
What sets this apart is the ultra-creamy result achieved with minimal fat, making it a guilt-free treat. The process is straightforward: heat the milk and sugar, infuse with flavor (vanilla or fruit work beautifully), then churn until silky smooth. No ice cream maker? No problem—a simple bowl-and-ice method works too.
By the time you’re done, you’ll have a batch of ice cream that’s rich, creamy, and impossibly smooth—without the heaviness of traditional recipes. The texture is velvety, the flavor pure, and the process foolproof. Whether you’re a beginner or a seasoned home cook, this recipe delivers restaurant-quality results.
Customize with your favorite flavors—vanilla, strawberry, or even coffee—and enjoy a treat that tastes like it came from an old-school ice cream shop. Let’s make it!
Ingredients for 1 percent milk ice cream
Four cups of milk, a touch of stabilizer, and patience—this is all you need for velvety ice cream.
| Ingredient | Amount | Notes |
|---|---|---|
| 1 Percent Whole Milk 🥛 | 4 cups | Cold, straight from fridge |
| Granulated Sugar 🍚 | 1 ½ cups | White or raw cane preferred |
| Pure Vanilla Extract 🌿 | 2 tsp | High-quality Madagascar bourbon |
| Corn Syrup 🍯 | ¼ cup | Light or golden preferred |
| Xanthan Gum 🧪 | ⅛ tsp | Pure powdered form |
| Sea Salt 🧂 | ¼ tsp | Fine grain preferred |
| Heavy Whipping Cream 🥛 | ½ cup | Optional for extra creaminess |
| Ice Cream Stabilizer (optional) 🧪 | ¼ tsp | Like Guar Gum or Carrageenan |
| Fresh Vanilla Bean (optional) 🌿 | 1 whole | Split and scraped for intensity |
| Flavor Extract (optional) 🍒 | 1 tsp | Almond, coffee, or fruit puree |
The milk is the foundation—1 percent whole milk gives you that signature smoothness without heaviness. Grab the coldest milk from your fridge (right from the carton, no thawing). For sugar, Domino or C&H work perfectly—no need to splurge on specialty brands. The corn syrup is key for texture (don’t skip it!), and Great Value or Kroger brands are just as good as name brands. Vanilla? Madagascar bourbon extract adds depth—if you’re using a bean, split it lengthwise and scrape the seeds for maximum flavor. Pro tip: Walmart or Costco often carry high-quality vanilla extract at reasonable prices.
No xanthan gum? Guar gum or carrageenan work just as well—just follow the package ratio. Short on corn syrup? Honey or maple syrup can substitute (reduce liquid by 1 tbsp), but the texture won’t be identical. Want extra richness? Add the heavy cream at the end—it blends in beautifully without altering the base. For flavor variations, coffee extract or fruit purees (like strawberry or mango) work perfectly. Just remember: less is more—start with ½ tsp and adjust to taste. And if you’re using a vanilla bean, save the pod for your next batch!
This mix keeps beautifully in the fridge for 2-3 days before churning—give it time to fully chill. Once churned, transfer to an airtight container with parchment between layers to prevent freezer burn. It’ll stay creamy for up to 2 weeks in the freezer, though I recommend eating it within 5-7 days for peak texture. For serving, let it sit at room temperature for 10-15 minutes—it scoops like a dream. And if you make extra? Portion into ice cube trays for single-serving treats—perfect for lunches or desserts on the go!
Why You’ll Love This Recipe
- Here’s what sold me: rich, velvety texture but with half the fat of heavy cream. The vanilla extract shines through, and the corn syrup keeps it smooth—not grainy, not icy. Honestly, my kids won’t believe it’s made with 1% milk until I tell them.
- I’ll be real: this costs way less than premium ice cream, but tastes just as indulgent. A gallon batch feeds my family for days, and the xanthan gum stretches the milk further. No wasted leftovers—just pure, creamy happiness without breaking the bank.
Step-by-step instructions for 1 percent milk ice cream
Here’s how to transform simple ingredients into velvety-smooth ice cream that rivals heavy cream versions.
🍳 Step 1: Heat the Milk Mixture to 180°F
In a heavy-bottomed saucepan, combine the 4 cups 1 percent whole milk, 1.5 cups granulated sugar, 0.25 cup corn syrup, 0.125 tsp xanthan gum, and 0.25 tsp sea salt. Stir over medium heat until the sugar dissolves completely—you’ll see it disappear into the liquid. I like to use a whisk for this to prevent any sugar from settling at the bottom.
Bring the mixture to a gentle boil, then immediately reduce heat to medium-low and maintain at 180°F for 10 minutes. This pasteurization step is crucial—it kills bacteria and helps develop that signature smooth texture. You’ll notice the mixture thickens slightly as it heats, but don’t let it boil vigorously after reaching temperature.
👨🍳 Step 2: Infuse with Vanilla and Cool Quickly
Remove the pan from heat and stir in the 2 tsp pure vanilla extract and the scraped seeds from the 1 whole fresh vanilla bean (optional). If you’re using the 1 tsp flavor extract (optional), add it now along with the vanilla. Let the mixture steep for 15 minutes covered with a lid—this draws out maximum vanilla flavor.
While it steeps, prepare an ice bath by filling a large bowl with ice and water. Transfer the warm mixture to a clean bowl and place it in the ice bath, stirring occasionally. You want to cool it to 40°F within 30 minutes—this rapid cooling prevents ice crystals from forming later. I’ve found that using a thermometer here makes all the difference in final texture.
🥘 Step 3: Add Cream and Stabilize the Mixture
Once the mixture reaches 40°F, gently whisk in the 0.5 cup heavy whipping cream and the 0.25 tsp ice cream stabilizer (optional). The cream should be incorporated smoothly without creating bubbles. This is where the magic happens—the cream adds richness while the stabilizer helps prevent iciness. If you’re using it, the xanthan gum we added earlier already provides excellent stabilization, but the extra insurance never hurts.
Taste the mixture at this stage—it should be sweet, creamy, and properly seasoned. If it needs more salt, add a pinch now. Transfer everything to a clean container and cover with plastic wrap pressed directly onto the surface to prevent a skin from forming. Refrigerate for at least 4 hours or overnight—this chilling step is non-negotiable for perfect texture.
⏰ Step 4: Churn Until Smooth and Creamy
After chilling, pour the mixture into your ice cream maker and churn according to the manufacturer’s instructions—typically 20-25 minutes. You’ll know it’s ready when it thickens to a soft-serve consistency and pulls away from the sides of the bowl. The texture should be smooth with no visible ice crystals, and it should hold its shape when scooped.
Here’s the thing—don’t over-churn. If you let it run too long, you’ll end up with butter-like ice cream instead of that perfect creamy texture. The moment it reaches soft-serve consistency is the perfect stopping point. Transfer immediately to a lidded container and return to the freezer for 4-6 hours to firm up.
🍦 Step 5: Freeze to Perfection
Let the ice cream sit at room temperature for 5-10 minutes before serving to soften slightly—this makes scooping easier and enhances the creamy texture. The final product should be rich, smooth, and completely free of ice crystals. You’ll be amazed at how creamy this is considering we started with just 1% milk!
For best results, serve immediately after removing from the freezer. The ice cream will maintain its texture for about 2 weeks in an airtight container. If it starts to develop ice crystals, simply re-churn for 5 minutes to restore smoothness. This recipe proves you don’t need heavy cream for truly luxurious homemade ice cream.
Pro Tips For Making 1 Percent Milk Ice Cream
- Whisk the Xanthan Gum: Mix that xanthan gum into the warm milk first—don’t just toss it in cold. It needs a few minutes to fully dissolve, or you’ll end up with grainy ice cream that tastes like you forgot a step. Stir for 30 seconds until the liquid looks smooth, then proceed.
- Chill the Mixture Longer: Skip the rush and let the base sit in the fridge for at least 4 hours—overnight is ideal. I used to impatiently churn it too soon, and the ice cream turned icier and less creamy. Cold milk = smoother texture, no excuses.
- Measure Corn Syrup Precisely: Use a kitchen scale for the corn syrup—1 percent off the weight changes the texture. A tablespoon can vary wildly, and too much makes it sticky, while too little turns it grainy. Trust the numbers, not eyeballing.
- Churn Until Smooth, Not Soupy: Stop churning when the mixture coats the dasher like soft-serve, not when it looks like wet sand. Over-churning turns it buttery; under-churning leaves it icy. Test by scooping—if it holds shape, you’re golden.
Troubleshooting perfect results
Grainy Texture Fix
If your ice cream develops ice crystals, it’s usually from over-churning or temperature fluctuations. First, check if you let the mixture sit at room temperature too long before freezing—this can cause separation. For a quick fix, simply re-churn for 5 minutes in your ice cream maker.
This redistributes the fat and melts any ice crystals. For prevention, always freeze in a single layer in an airtight container and avoid opening the lid frequently. 💫
Sugar Not Dissolving
If sugar grains remain undissolved, your heat wasn’t hot enough. Increase the temperature to a gentle boil and stir constantly with a whisk—this breaks up sugar clumps. For stubborn lumps, strain the mixture through a fine-mesh sieve before proceeding.
I’ve found that medium heat works best; high heat can cause scorching. Always use granulated sugar (not powdered) for this recipe. 🌡️
Too Thin or Watery
A thin, watery texture usually means insufficient stabilizer or over-chilling. Double-check your xanthan gum measurement—0.125 tsp is correct for this recipe. If you skipped the stabilizer entirely, whisk in 0.25 tsp guar gum and re-churn.
Also, ensure your mixture was fully cooled to 40°F before adding cream—any warmer, and the cream won’t incorporate properly. 🥛
Overly Sweet or Bitter
Taste your mixture before churning—this is your last chance to adjust flavors. If it’s too sweet, reduce sugar by 0.25 cup next time. For bitterness, check your vanilla—Madagascar bourbon extract is the best choice.
If using a vanilla bean, ensure you’re only using the seeds, not the pod (which can add bitterness). A pinch of sea salt balances sweetness perfectly. 🌿
Churning Not Working
If your ice cream maker isn’t churning properly, the mixture might be too cold (below 35°F) or too warm (above 45°F). Aim for 40°F—this is the sweet spot. Also, ensure your ice cream maker’s bowl is clean and dry before adding the mixture.
If using a no-churn method, whisk vigorously for 10 minutes until thickened. For stubborn cases, try adding 1 tbsp corn syrup and re-churning. ⚡
Freezer Burn Prevention
Freezer burn happens when air reaches your ice cream. Always press plastic wrap directly onto the surface before sealing the container. Leave no air gaps—this creates a barrier against moisture. For long-term storage, use airtight glass containers (like Pyrex) or freezer-safe plastic with snap lids.
If ice cream develops a dry, icy layer on top, simply scoop off the top layer before serving. ❄️
Nutrition facts
Frequently asked questions
Can I use 2% milk instead of 1% for this recipe?
The recipe works with 2% milk, but the texture will be slightly richer and heavier. The fat content difference is minimal—just 0.5% more fat—so it won’t drastically change the creaminess. If you prefer a lighter texture, stick with 1% milk as written. For extra smoothness with 2% milk, reduce the corn syrup by 1 tablespoon since the higher fat already helps stabilize.
What’s the best way to make this without an ice cream maker?
Use the no-churn method! After cooling the mixture to 40°F, whisk in 1 cup whipped heavy cream (whipped to soft peaks) until fully combined. Pour into a freezer-safe container, cover tightly with plastic wrap pressed directly on the surface, and freeze for 6-8 hours. Stir vigorously every 30 minutes for the first 2 hours to prevent ice crystals. The texture won’t be as silky as churned, but it’ll still be creamy and delicious!
Why does my homemade ice cream get icy after a few days?
Ice crystals form when the mixture isn’t properly stabilized or experiences temperature fluctuations. Always ensure your base cools to 40°F before adding cream, and use the full 0.125 tsp xanthan gum. To fix existing ice crystals, simply re-churn for 5 minutes—this redistributes the fat and melts the crystals. For prevention, store in a single layer with parchment paper between scoops in an airtight container, and avoid opening the lid frequently.
Can I add mix-ins like chocolate chips or fruit?
Yes! For chocolate chips, fold them in during the last 5 minutes of churning—they’ll melt slightly and create pockets of gooey goodness. For fruit, use cooked purees (like strawberry or mango) and stir them in after cooling the base to 40°F. Avoid raw fruit or large chunks—they can make the texture grainy. Start with ½ cup mix-ins and adjust to taste. Pro tip: Dark chocolate chunks work better than milk chocolate since they resist melting during churning.
How do I know when the ice cream is fully set?
It’s ready when the surface feels firm to the touch but still slightly soft—like soft-serve consistency. Insert a knife into the center: if it comes out clean with no resistance, it’s perfect. For a faster set, freeze for 4-6 hours instead of overnight. If it’s too soft after 6 hours, return it to the freezer for another 2 hours. Never over-freeze—this creates ice crystals. The ideal texture should be creamy yet scoopable, not rock-hard.

- 3lb Prime Rib Roast Recipe: Juicy Pink Center Guaranteed in 3 Hours - October 31, 2026
- 5 Spice Cake Recipe: Warmly Spiced Layers With Crunchy Top - October 31, 2026
- 1950’s Macaroni and Cheese Recipe: Nostalgic Creamy Cheese Sauce with Buttery Noodles - October 31, 2026