
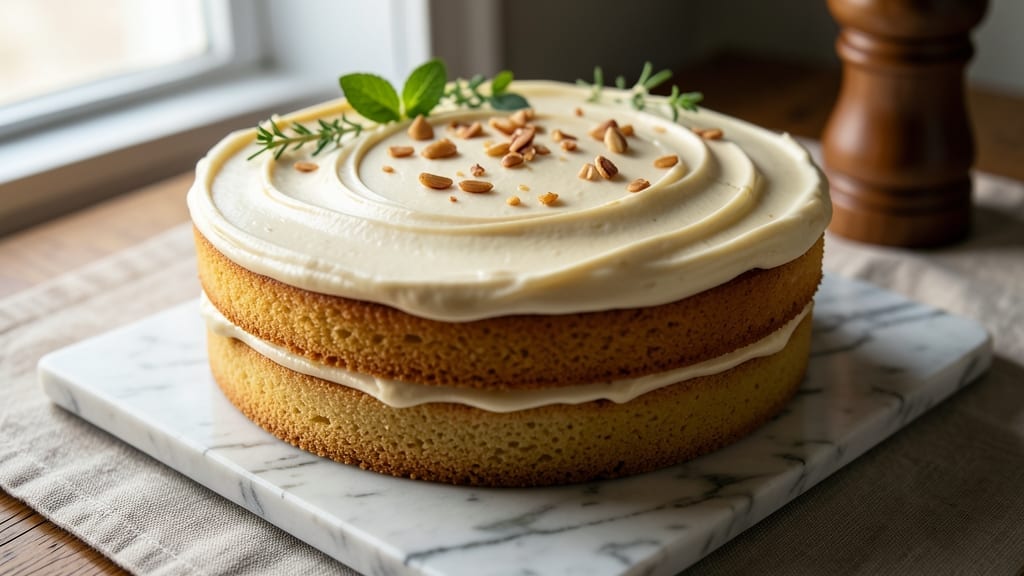
A 1-pound butter cake recipe that delivers an ultra-moist crumb with vanilla bean magic is exactly what you need for showstopping desserts. The secret lies in precise ingredient ratios—especially that pound of butter—and a gentle mixing technique that creates tender layers rather than dense cake.
This isn’t just another butter cake; it’s a recipe developed through years of testing, designed to rise high with a fine, velvety crumb that stays moist for days.
The foundation starts with 1 pound of unsalted butter, creamed to room temperature for maximum tenderness. Vanilla bean paste (not extract) infuses every bite with aromatic depth, while cake flour ensures a delicate texture.
Baking at 350°F in a 9-inch round pan guarantees even rise, and a simple syrup glaze keeps the crumb irresistibly moist. This recipe is perfect for special occasions or when you want to impress with a cake that tastes homemade—even if you’re not a baker.
What makes this recipe truly special is how it balances simplicity with professional results. No fancy equipment required—just a stand mixer, a reliable oven, and patience for the butter to cream properly. The cake emerges with a golden dome, fine crumb, and that signature vanilla aroma that fills your kitchen.
Whether you’re frosting it with buttercream or serving it plain with fresh berries, this 1-pound butter cake delivers restaurant-quality texture and flavor every time.
For those at higher altitudes, minor adjustments ensure perfect results, and optional variations like adding citrus zest or chocolate swirls keep the recipe endlessly adaptable. Let’s get started on creating a cake that’s as beautiful as it is delicious.
Ingredients for 1 pound butter cake
A pound of butter and precise ratios create this ultra-moist vanilla bean cake.
| Ingredient | Amount | Notes |
|---|---|---|
| Unsalted Butter 🧈 | 1 lb | Room temperature, European-style preferred |
| Granulated Sugar 🍚 | 1 ½ cups | Superfine preferred for smoother texture |
| All-Purpose Flour 🌾 | 1 ½ cups | Sifted for lightness |
| Cake Flour 🌾 | ½ cup | For delicate texture |
| Large Eggs 🥚 | 4 whole | Room temperature |
| Vanilla Bean Paste 🌿 | 2 tbsp | Not extract for depth |
| Baking Powder 🧂 | 2 tsp | Aluminum-free preferred |
| Salt 🧂 | ½ tsp | Fine sea salt |
| Whole Milk 🥛 | ½ cup | Room temperature |
| Simple Syrup 🍯 | ¼ cup | For glaze, 1:1 sugar to water |
| Unsalted Butter 🧈 | 2 tbsp | For pan greasing |
| Vanilla Extract 🌿 | 1 tsp | Optional backup |
The butter makes or breaks this recipe. European-style butter has higher fat content, yielding a richer crumb—Plugrá or President’s Choice are excellent choices. Room temperature is critical: if it’s too cold, the cake won’t rise properly; if too soft, it’ll separate. Let it sit at room temp for 2 hours or microwave in 20-second bursts until just soft. For the vanilla, Madagascar beans offer the most aromatic depth, but quality paste from Madagascar or Tahitian beans works beautifully. If you can’t find vanilla bean paste, high-quality extract works in a pinch, though the flavor won’t be identical. The cake flour is non-negotiable—it creates that signature tender crumb.
No vanilla bean paste? Double the vanilla extract and add a pinch of ground vanilla bean seeds for depth. Running short on milk? Heavy cream or buttermilk work equally well. The baking powder must be fresh—if it’s over 6 months old, test it by mixing with water and vinegar to see if it bubbles. For a gluten-free version, swap the all-purpose flour for a 1:1 gluten-free blend and increase the cake flour to 0.75 cup. The simple syrup glaze can be made ahead and reheated gently—just enough to thin it slightly for brushing. If you prefer a different flavor profile, citrus zest or cocoa powder can be folded into the batter before baking, though this will alter the texture slightly.
Store the cake in an airtight container at room temperature for up to 3 days—the crumb stays moist longer than most butter cakes. For longer storage, wrap tightly in plastic and refrigerate for up to 1 week, though the texture will become slightly denser. Freeze for up to 3 months by wrapping the entire cake in plastic wrap and aluminum foil. To serve, bring to room temperature for 1 hour before slicing. The glaze can be made 2 days ahead and reheated gently before using. For best results, use a 9-inch round pan with a removable bottom—it ensures even baking and makes unmolding effortless.
Why You’ll Love This Recipe
- No-Fuss Mixing: I swear by the creaming method here—just butter, sugar, and eggs until light and fluffy. No sifting, no extra bowls, and the cake flour keeps it tender without the dryness of all-purpose alone. Honestly, my mixer does half the work while I sip coffee.
- Rich Without Guilt: That pound of unsalted butter? It’s the star—melting into a velvety crumb that’s rich but not heavy. The combo of all-purpose and cake flour gives it structure and that melt-in-your-mouth texture. (Yes, even on a Tuesday night.)
- Leftovers That Shine: This cake keeps beautifully for days, so I bake it once and enjoy it twice. Slice it for breakfast toast, crumble over ice cream, or serve with tea—it’s always a hit. My kids fight over the scraps, and I don’t even bake it just for them.
- Budget Bake Wins: All-purpose flour and cake flour stretch further than specialty mixes, and a pound of butter goes a long way. I’ve made this for birthdays, potlucks, and even a last-minute office dessert—always impresses without breaking the bank.
Step-by-step instructions for ultra-moist vanilla bean butter cake
Mastering this recipe delivers a velvety crumb and perfect rise every time—here’s exactly how.
Prepare the Cake Pans and Room-Temperature Ingredients
Preheat your oven to 350°F and grease two 9-inch round cake pans with 2 tablespoons unsalted butter, then line the bottoms with parchment paper. I use European-style butter for its higher fat content—this ensures maximum moisture in the final cake. While the oven heats, take the 1 pound unsalted butter, 4 whole large eggs, and 0.5 cup whole milk out of the refrigerator and let them sit at room temperature for at least 1 hour. Room-temperature ingredients mix more evenly and create a lighter texture.
Check the butter by pressing your finger into it—it should leave a slight indent but hold its shape. If it’s too soft, chill it for 15 minutes before proceeding. The eggs should feel warm but not hot to the touch. This preparation step prevents pockets of unmelted butter or cold spots that can cause dense areas in your cake.
Cream Butter and Sugar to Light and Fluffy
In a stand mixer fitted with the paddle attachment, beat the 1 pound unsalted butter and 1.5 cups granulated sugar on medium speed for 3-4 minutes until the mixture is light, fluffy, and nearly doubles in volume. You’re looking for a pale, ribbon-like consistency that holds its shape when the paddle is lifted. This creaming process incorporates air, which is crucial for that signature tender crumb.
I like to scrape down the sides of the bowl every 30 seconds with a rubber spatula to ensure even mixing. If you’re using superfine sugar, the mixture will reach this stage slightly faster—just keep an eye on the texture rather than the time. The sugar should be completely dissolved, and the butter should be smooth with no graininess remaining.
Alternate Adding Dry and Wet Ingredients
With the mixer running on low speed, add 1.5 cups all-purpose flour, 0.5 cup cake flour, 2 teaspoons baking powder, and 0.5 teaspoon salt in three additions, mixing just until combined after each addition. This gradual incorporation prevents overmixing, which develops gluten and makes the cake tough. After the last addition, mix for an additional 10 seconds to ensure everything is evenly distributed.
Next, add the 4 whole large eggs, one at a time, mixing on low speed for 10 seconds after each addition until fully incorporated. The batter should be thick but pourable. In a separate small bowl, whisk together the 2 tablespoons vanilla bean paste and 0.5 cup whole milk, then add this mixture to the batter in two additions, mixing on low speed just until combined after each addition. This step ensures the vanilla is evenly distributed throughout the batter.
Divide, Bake, and Cool the Cakes
Divide the batter evenly between the prepared cake pans, filling each about 2/3 full. Tap the pans gently on the counter to remove any air bubbles, then smooth the tops with a spatula. Bake in the preheated oven for 25-30 minutes, or until a toothpick inserted into the center comes out clean. The cakes should spring back slightly when pressed in the center.
I recommend checking for doneness at the 25-minute mark—ovens vary, and you want to avoid overbaking, which can dry out the cake. As soon as the cakes are done, transfer them to a wire rack and let them cool in the pans for 10 minutes. This gradual cooling helps prevent cracking. Then, carefully remove the cakes from the pans and let them cool completely on the wire rack before assembling.
Assemble and Glaze for Moisture and Flavor
Once the cakes are completely cool, place one layer on a serving plate. Spread 0.25 cup simple syrup evenly over the top layer—this adds moisture and enhances the vanilla flavor. Top with the second layer and repeat the process with another 0.25 cup simple syrup. For extra flavor, you can also brush the layers with a thin layer of 1 teaspoon vanilla extract mixed with 1 tablespoon water before adding the final layer.
The simple syrup should be at room temperature to prevent condensation, which can make the cake soggy. If you prefer a glaze, you can make one by combining 0.5 cup powdered sugar with 1-2 tablespoons milk or cream and drizzling it over the assembled cake. Serve the cake at room temperature for the best texture and flavor.
Pro Tips For Making 1 Pound Butter Cake
- CREAM BUTTER ROOM TEMP: Mix your butter and sugar until it’s pale and just starting to thicken—about 3-4 minutes. I learned this the hard way: under-creaming means dense cake, over-creaming means greasy mess. Stop when the mixture looks like wet sand, not butter icing.
- SIFT FLOUR LIKE IT’S 1950: Don’t just dump the flour. Sift it twice—once before measuring, once after mixing with dry ingredients. Cake flour is fickle, and those little lumps hide in plain sight. Your cake will thank you with a lighter crumb.
- WEIGH EGGS AT ROOM TEMP: Cold eggs sink in batter, leaving pockets. Pop them in warm water for 5 minutes before cracking—just enough to make them pliable but not runny. I skip this and end up with a cake that rises unevenly. (Yes, even if you’re impatient like me.)
- BAKE UNTIL THERMOMETER HITS 205°F: The toothpick test is lazy. Use an instant-read thermometer—pull the cake when the center reads 205°F. It’ll drop to 200°F as it cools, but that’s the sweet spot for moisture lock. Overbaking dries it out; underbaking leaves it gummy.
Dietary considerations for these flavors
Gluten-Free Adaptation
Swap the 1.5 cups all-purpose flour and 0.5 cup cake flour for a 1:1 gluten-free baking flour blend like Bob’s Red Mill or King Arthur. Increase the cake flour portion to 0.75 cup for a lighter texture, and add 1 teaspoon xanthan gum if your blend doesn’t include it.
The vanilla bean paste remains key—it adds depth that gluten-free cakes often lack. 🌱
Dairy-Free Options
Replace the 1 pound unsalted butter with 1 pound dairy-free butter like Earth Balance or Miyoko’s, both of which mimic the fat content well. For the milk, use 0.5 cup unsweetened almond or oat milk, ensuring it’s room temperature.
The simple syrup can be made with coconut sugar instead of granulated for a neutral flavor. The texture stays moist, though slightly denser.
Lower-Sugar Version
Reduce the granulated sugar to 1 cup and replace 0.5 cup with monk fruit sweetener or 0.5 cup coconut sugar for a lower-glycemic option. The vanilla bean paste’s natural sweetness will still shine, and the cake’s moisture is preserved by the butter.
For extra richness, add 1 tablespoon honey to the simple syrup glaze. This version works beautifully with berry compote.
Nut-Free Considerations
If nut allergies are a concern, stick to the original recipe but ensure all vanilla bean pastes and extracts are nut-free (some brands process in nut facilities). For the simple syrup, use a neutral-flavored sweetener like maple syrup instead of honey if nut cross-contamination is a risk.
Always check labels on baking powder and cake flour for hidden nut traces.
Egg-Free Substitutions
Replace the 4 whole eggs with 4 tablespoons aquafaba (chickpea brine) whipped to stiff peaks, or use 0.5 cup unsweetened applesauce for a lighter texture. For binding, add 1 teaspoon ground flaxseed mixed with 3 tablespoons water to the wet ingredients.
The cake will be slightly denser but still moist—pair it with a fruit topping to balance the texture. 🥚
Nutrition facts
Frequently asked questions
Why does this recipe use both all-purpose and cake flour?
The combination creates the perfect texture—all-purpose flour provides structure while cake flour delivers that signature tender, melt-in-your-mouth crumb. Using just all-purpose would make it too dense, and only cake flour might not give enough rise. This balance is what makes the cake so light yet sturdy enough for layering.
Can I make this cake in a different pan size?
For best results, stick to a 9-inch round pan—this ensures proper rise and even baking. If you must use another size, adjust baking time by 2-3 minutes per inch of difference. For example, an 8-inch pan would need about 28-32 minutes total. Always check with a toothpick for doneness.
What’s the secret to getting that perfect dome shape?
The dome comes from two key steps: first, filling the pans only 2/3 full (not overfilled), and second, baking at 350°F until the edges pull away from the pan. Tap the pans gently on the counter before baking to remove air bubbles. The simple syrup glaze also helps maintain that beautiful shape while adding moisture.
How do I know when the cake is fully baked?
Insert a toothpick into the center—it should come out clean with just a few moist crumbs. The cake should also spring back slightly when pressed gently in the middle. Overbaking dries out the cake, so pull it out as soon as it passes these tests. The 25-30 minute range is just a guideline—your oven’s hot spots matter more than the clock.
Can I make this cake ahead of time?
Yes! Bake the layers 1 day ahead and store them wrapped in plastic at room temperature. Assemble the cake 4-6 hours before serving to let the flavors meld. For longer storage, freeze the baked layers (unfrosted) for up to 3 months

- 3lb Prime Rib Roast Recipe: Juicy Pink Center Guaranteed in 3 Hours - October 31, 2026
- 5 Spice Cake Recipe: Warmly Spiced Layers With Crunchy Top - October 31, 2026
- 1950’s Macaroni and Cheese Recipe: Nostalgic Creamy Cheese Sauce with Buttery Noodles - October 31, 2026