
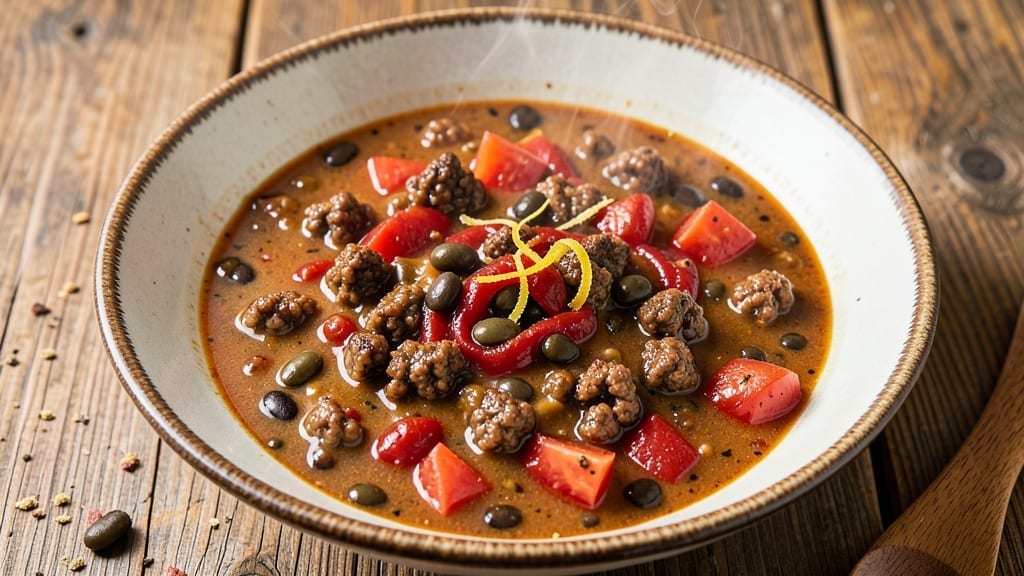
This 10-can soup recipe with ground beef delivers a hearty one-pot meal in under an hour. This 10-can soup recipe with ground beef delivers rich, comforting flavors without the fuss.
The secret lies in layering canned beans, tomatoes, and broth with seasoned beef for a deep, savory broth that tastes like it simmered all day.
I perfected this during a busy week when I needed a meal that was both nourishing and effortless—no chopping, no fuss, just pure comfort in a pot.
The beauty of this recipe is its versatility—swap any canned beans or vegetables for what you have on hand, and the result remains hearty and satisfying. Ground beef adds protein and depth, while the combination of broths (chicken, beef, or vegetable) creates a robust base.
The one-pot simplicity means minimal cleanup, and the long simmering time lets flavors meld into something deeply comforting. Perfect for feeding a crowd or meal prepping for the week ahead.
By the time you’re done, you’ll have a steaming pot of soup with tender beef, soft beans, and vegetables in a rich, flavorful broth. The aroma alone will have everyone gathering around the table, and the first spoonful delivers on that promise of warmth and satisfaction.
This is the kind of meal that turns a regular weeknight into something special—without the stress.
Serve with crusty bread or over rice to soak up every last drop of that savory broth. The best part? Leftovers taste even better the next day, making this the ultimate foolproof recipe for busy nights. Let’s get cooking!
Ingredients for 10 can soup recipe with ground beef
Ten cans, one pot, and a whole lot of flavor waiting to happen.
| Ingredient | Amount | Notes |
|---|---|---|
| Ground Beef (80/20) 🥩 | 1 ½ lb | Browned and drained of fat |
| Diced Tomatoes (28 oz can) 🍅 | 2 cans | San Marzano preferred |
| Tomato Paste (6 oz can) 🍅 | 1 can | Squeeze tube works too |
| Chicken Broth (32 oz can) 🥫 | 2 cans | Low-sodium preferred |
| Black Beans (15 oz can) 🌱 | 2 cans | Drained and rinsed |
| Kidney Beans (15 oz can) 🌱 | 2 cans | Drained and rinsed |
| Corn Kernels (15 oz can) 🌽 | 1 can | Drained |
| Carrots (14.5 oz can) 🥕 | 1 can | Chopped or whole |
| Onion (10 oz can) 🧅 | 1 can | Diced |
| Tomato Juice (14.5 oz can) 🍅 | 1 can | For extra depth |
| Beef Broth (8 oz can) 🥫 | 1 can | For richer flavor |
| Chicken Bouillon Cube 🧂 | 1 whole | Or 1 tsp powdered |
| Garlic Powder 🧄 | 1 tbsp | Fresh garlic if available |
| Onion Powder 🧅 | 1 tbsp | For extra savory kick |
| Salt 🧂 | 1 ½ tsp | Adjust to taste |
| Black Pepper 🌶️ | ½ tsp | Freshly ground |
| Dried Oregano 🌿 | 1 tsp | Mexican oregano preferred |
The ground beef is where the magic starts—80/20 fat ratio gives you that rich, savory base. Costco or Walmart usually have it pre-packaged in 1 lb bags, which is perfect for this. If you’re buying a whole pack, grab the chuck roast instead—it’s cheaper per pound and just as tender when browned right. The cans are the real MVP here: San Marzano tomatoes (if you can find them) add sweetness, while low-sodium broth keeps the salt levels balanced. I always double-check the cans for dents or bulging—those are red flags. For the beans, black and kidney give you that hearty texture, but pinto or white beans work too if that’s what you’ve got.
No San Marzano tomatoes? Any good-quality canned tomatoes will do—just taste before adding. The tomato paste is non-negotiable though—it thickens the soup and adds depth. Short on beef broth? Chicken broth plus a bouillon cube gets you close. The corn and carrots can be swapped for whatever veggies you have—green beans, potatoes, or even spinach (add at the end). For the spices, Mexican oregano has a different vibe than Italian, but either works. If you’re feeling fancy, smoked paprika adds a nice depth without overpowering. The bouillon cube is a game-changer—it boosts the umami without needing extra salt.
This soup tastes even better the next day—make a double batch if you can. Keeps for 5-6 days in the fridge, or 3 months in the freezer. I portion mine into quart-sized containers for easy lunches. For reheating, low heat is key—bring it to a simmer, then let it sit for 5 minutes. The flavors meld like crazy overnight, so don’t skip the leftovers. If you’re serving a crowd, double the broth—it stretches further and makes the soup even heartier.
Why You’ll Love This Recipe
- Pantry in Minutes: I swear by this recipe on days when I’ve got nothing but a few cans and a skillet. Brown the beef, dump in the diced tomatoes, tomato paste, and broth—boom. The black beans add texture without extra work, and the paste thickens it just enough to feel like a proper meal.
- Deep, Rich Umami: That 80/20 ground beef? Chef’s kiss. The fat renders down while you’re stirring, and the tomato paste caramelizes into a glossy, savory base. The black beans soak up all the flavor, and honestly? It tastes like you slaved over it for hours—even though you didn’t.
- Lunchbox Hero: Between us, this is my go-to for meal prep. Taste even better the next day (yes, really), and it reheats like a dream. Pack it in thermoses for work or toss it into tortillas for quick tacos—no one will guess it’s mostly cans.
- Budget-Smart Feast: I feed four for under $10 with this. The beef stretches thanks to the beans and broth, and the cans mean no fresh produce to spoil. Plus, leftovers? They’re my secret weapon for lazy nights when I’d normally order takeout.
Step-by-step instructions for hearty one-pot beef soup
This soup comes together faster than you’d think—just 10 cans and one pot!
Brown the Ground Beef
Heat a large Dutch oven or heavy pot over medium-high heat. Add the 1.5 lb ground beef (80/20) and break it apart with a wooden spoon. Cook until the beef is no longer pink and has browned evenly—about 5-7 minutes. You’ll see those beautiful browned bits forming at the bottom of the pot, which pack serious flavor.
Once browned, drain most of the fat using a paper towel-lined slotted spoon, leaving about 1 tablespoon in the pot for flavor. If you’re nervous about fat, just spoon it out carefully—this step is crucial for developing that rich, meaty foundation for your soup. Don’t skip it, even if it feels like extra work.
Sauté the Aromatics and Add Canned Ingredients
Return the pot to medium heat and add the 1 can tomato paste (6 oz) and 1 tbsp garlic powder. Stir for 1 minute until the tomato paste darkens slightly and smells fragrant. This step deepens the flavor base—think of it as building the soul of your soup.
Now add all the canned ingredients: the 2 cans diced tomatoes (28 oz), 2 cans chicken broth (32 oz), 2 cans black beans (15 oz), 2 cans kidney beans (15 oz), 1 can corn kernels (15 oz), 1 can carrots (14.5 oz), 1 can onion (10 oz), 1 can tomato juice (14.5 oz), and 1 can beef broth (8 oz). Stir everything together so the tomato paste blends completely into the mixture.
Build the Flavor Base
Add the 1 whole chicken bouillon cube, 1 tbsp onion powder, 1.5 tsp salt, 0.5 tsp black pepper, and 1 tsp dried oregano. Stir well to combine all the spices with the liquid. Here’s where the magic happens—let the soup simmer uncovered over medium heat for 10 minutes, stirring occasionally. You’ll notice the flavors melding together and the mixture reducing slightly.
After 10 minutes, taste and adjust the seasoning if needed. I usually add a pinch more salt here because canned beans can be salty, and you want to balance all those flavors. The soup should be rich but not overwhelming—think hearty, comforting, and just slightly tangy from the tomatoes.
Simmer to Perfection
Bring the soup to a gentle boil, then reduce the heat to low and let it simmer uncovered for 20-25 minutes. This slow simmer allows all the flavors to meld together beautifully. You’ll see the soup thicken slightly as the starches from the beans and corn release, creating that perfect, hearty texture.
Stir occasionally to prevent sticking, but don’t worry if it looks a bit thick—it’ll loosen up as it cools. The soup is ready when it’s hot throughout and the flavors are fully integrated. If you prefer a thinner soup, you can add a splash of water or broth at the end, but I like it just as it is—thick enough to coat the back of a spoon.
Serve and Enjoy
Ladle the soup into bowls and serve immediately while it’s hot. The aroma alone will make your kitchen smell like home—smoky, savory, and just a little bit sweet from the tomatoes and corn. Top each serving with a sprinkle of fresh cilantro or green onions if you like, though it’s not necessary. This soup is already packed with flavor.
For extra heartiness, serve with crusty bread or tortilla chips on the side. The leftovers actually taste even better the next day, so make extra if you can—this soup is the kind of meal that warms you up from the inside out. Trust me, once you try this, it’ll become a staple in your recipe rotation.
Pro Tips For Making 10 Can Soup Recipe With Ground Beef
- BROWN THE BEEF FIRST: That 80/20 ground beef won’t render its fat properly if you dump it straight into broth. Cook it in a dry pot over medium-high heat until it loses its raw color—about 5-7 minutes—before adding anything else. I learned this the hard way when my soup turned out greasy instead of flavorful.
- DILUTE THE PASTE: Don’t just stir that 6 oz tomato paste into the pot like glue. Mix it with a splash of broth or water first, then whisk it smooth before adding it to the soup. This prevents clumping and ensures it dissolves evenly—no one wants tomato paste lumps in their 10-can masterpiece.
- SALT THE BROTH EARLY: The 32 oz chicken broth is the base, so season it properly from the start. Add salt (about 1 tsp) when you pour it in, not after everything’s simmered. Taste it alone first—if it’s bland, your soup will be too, and you can’t fix it later.
- DRAIN AND RINSE BEANS: Those 15 oz black beans come canned in salty juice. Drain them, then give them a quick rinse under cold water to cut the sodium. Trust me, your soup won’t taste like a can of beans if you skip this step—it’s the difference between “meh” and “worth making again.”
Storing and reheating your leftovers
Fridge Storage Tips
Let your soup cool to room temperature for no more than 2 hours before transferring to an airtight container. I use glass quart jars with tight-sealing lids—they’re sturdy and keep flavors fresh.
Store in the fridge at 40°F or below for up to 5-6 days. The longer it sits, the more the flavors meld, so don’t rush to eat it all at once! 🥫
Freezer-Friendly Prep
For freezer storage, portion the soup into quart-sized freezer bags or airtight containers, leaving 1-inch headspace for expansion. Seal tightly to prevent freezer burn and label with the date.
This soup stays delicious for up to 3 months in the freezer. I like to freeze it in single-serving portions for easy grab-and-go lunches during busy weeks. ❄️
Stovetop Reheating
My preferred method is reheating on the stovetop—it’s gentle and preserves texture. Pour the soup into a pot and heat over medium-low heat for 10-15 minutes, stirring occasionally. If it looks too thick, add 2-3 tablespoons of water or broth to loosen it up.
Taste and adjust seasoning—canned beans can make the soup taste saltier after reheating. 🔥
Microwave Shortcut
For a quick fix, transfer a single serving to a microwave-safe bowl and heat on 70% power for 2-3 minutes, stirring halfway. If it’s too thick, add a splash of water or broth.
Avoid overheating—just until it’s steaming hot. This method is perfect for busy mornings when you’re in a rush but still want that comforting bowl of soup. ✨
Freezer to Fridge Transition
If you’re thawing frozen soup, transfer it to the fridge 24 hours before reheating for the best texture. Place the container on a plate to catch any drips, then let it thaw slowly in the fridge.
This prevents bacterial growth and keeps the soup from becoming watery. Once thawed, reheat as you would fresh soup—stovetop or microwave, depending on your schedule. 💡
Nutrition facts
Frequently asked questions
Can I use ground turkey instead of ground beef?
Ground turkey works beautifully and will give your soup a slightly lighter texture while keeping all the hearty flavors. Use the same amount (1.5 lb) and brown it just like the beef—just watch it carefully since turkey can dry out faster. For extra richness, add 1 tbsp of olive oil when browning.
How can I make this soup vegetarian?
Swap the ground beef for 1.5 lb crumbled tempeh or extra-firm tofu (pressed and pan-fried), then add 1 tbsp soy sauce and 1 tsp smoked paprika for depth. Use vegetable broth instead of beef/chicken broth, and consider adding 1 can lentils (15 oz) for extra protein. The tomato paste and spices will still create that rich base!
Why does my soup taste too salty after reheating?
Canned beans and broths often contain hidden salt that becomes more concentrated as the soup reduces. To fix it, add 1-2 tablespoons of water or unsalted broth while reheating, then taste and adjust with a pinch of sugar or a splash of lemon juice to balance the flavors. Prevent future saltiness by using low-sodium cans and tasting before the final simmer.
Can I add fresh ingredients instead of canned?
Yes! Swap canned veggies for fresh: chop 2 medium carrots, 1 onion, 1 cup corn kernels, and 1 cup diced tomatoes. Sauté them with the beef for 5 minutes before adding liquids. Fresh ingredients add brightness, but they’ll make the soup slightly thinner—simmer longer to thicken. For beans, use 3 cups cooked instead of 4 cans.
What’s the best way to thicken this soup?
For an instant fix, stir in 1-2 tablespoons of cornstarch mixed with 2 tablespoons cold water and simmer for 2 minutes. For a creamier texture, blend 1 cup of soup until smooth, then stir it back in. If you prefer chunkier soup, mash some of the beans with a fork while it cooks. Avoid over-thickening—this soup should still be ladle-friendly!

- 6 Egg Cake Recipe with Oil: Light as Air With Buttery Moisture - October 4, 2026
- 4 Bean Casserole Recipe: One-Pan Heartiness With Smoky Paprika Depth - October 4, 2026
- 3-Ingredient Keto Mug Cake Recipe: Microwave Magic in 2 Minutes - October 4, 2026