
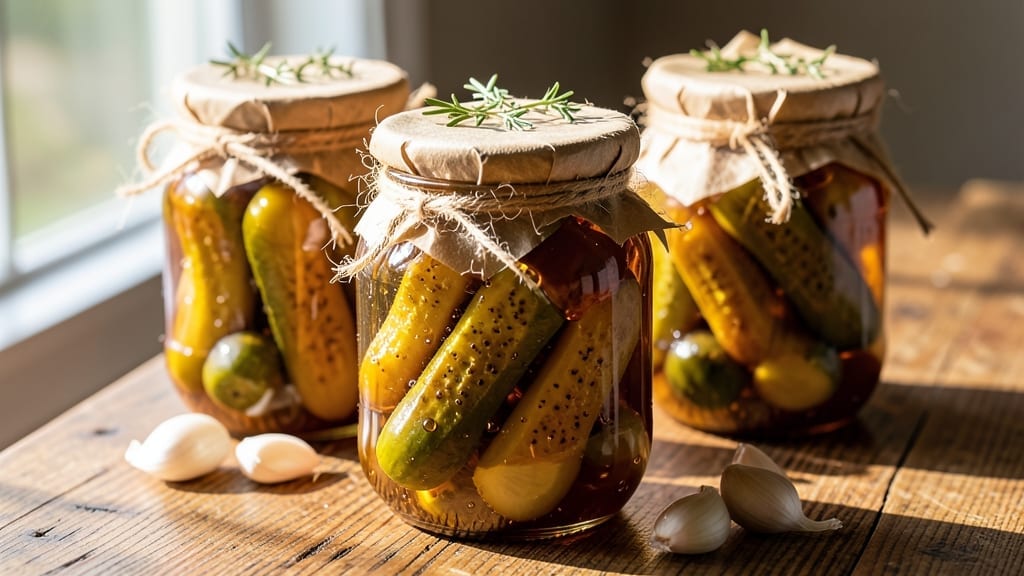
This 10-day sweet pickle recipe transforms simple cucumbers into addictively crunchy, tangy-sweet treats with minimal daily effort—just 10 minutes a day for a week. The process blends traditional fermentation with modern convenience, creating pickles that stay crisp and flavorful for months.
I perfected this method after years of experimenting with brine ratios and sweetening techniques, ensuring safety and deliciousness every time.
The secret begins with a salt brine that draws out moisture and kickstarts fermentation, followed by a sugar brine that balances sweetness and preserves texture. Using apple cider vinegar or honey for sweetness adds depth while keeping the process vegetarian-friendly.
Each day, you’ll simply check the liquid level and adjust, a ritual that yields restaurant-quality pickles without the wait.
By day 10, your cucumbers will be glossy, crisp, and bursting with flavor—no softness, no bitterness, just perfect sweet-tangy crunch. The fermentation process naturally preserves them, so they’ll keep in the fridge for 6+ months, ready to elevate sandwiches, charcuterie boards, or snack plates.
This isn’t just a recipe; it’s a foolproof method for homemade pickles that taste better than store-bought.
Safety is built in with pH-tested brines and mold prevention tips, so you can ferment with confidence. Whether you’re a beginner or a seasoned foodie, this 10-day schedule makes sweet pickles achievable—no shortcuts, just crunchy, sweet success. Let’s get started with the full step-by-step guide.
Ingredients for 10 day sweet pickle
Simple ingredients transform into restaurant-quality sweet pickles with just 10 minutes daily.
| Ingredient | Amount | Notes |
|---|---|---|
| Kirby Cucumbers 🥒 | 2 lb | Small, firm, unpeeled |
| Non-Iodized Sea Salt 🧂 | ½ cup | Diamond Crystal preferred |
| Granulated Sugar 🍚 | 2 cups | White or raw cane sugar |
| Apple Cider Vinegar 🍎 | 1 cup | Raw, unfiltered preferred |
| Honey 🍯 | ½ cup | Wildflower or clover variety |
| Garlic Cloves 🧄 | 4 cloves | Smashed, peeled |
| Fresh Dill Sprigs 🌿 | ¼ cup | Packed, stems removed |
| Mustard Seeds 🌶️ | 1 tsp | Yellow or brown |
| Black Peppercorns 🌶️ | 1 tsp | Crushed lightly |
| Clean Glass Jars 🥫 | 4 pieces | 16-oz mason jars, sterilized |
| Distilled Water 💧 | 4 cups | Filtered or boiled |
| Red Food Coloring 🎨 | ¼ tsp | Optional, for pink hue |
The cucumbers are non-negotiable—Kirby or Persian types stay crispest, while larger ones turn mushy. Local farmers markets often have perfect small ones, or grab the pre-washed baby cucumbers at Trader Joe’s if you’re short on time. The non-iodized salt is crucial; iodized can cloud the brine. If you can’t find Diamond Crystal, any fine sea salt works, but Morton kosher salt is a good backup. For the jars, Ball or Kerr mason jars are the gold standard—sterilize them in boiling water for 10 minutes to prevent mold.
No apple cider vinegar? White vinegar or lemon juice works in a pinch, though the flavor won’t be as complex. Swapping honey for maple syrup keeps it vegetarian, but the pickles will be slightly darker. The garlic and dill are optional but highly recommended—they add serious flavor. If you’re avoiding sugar, monk fruit sweetener at half the amount mimics the texture. For the mustard seeds, ground mustard at 1/4 tsp works if you’re in a hurry, but whole seeds add texture. The red coloring is just for looks—skip it if you prefer natural hues.
Prep all jars and ingredients the first day to save time. The brine stays potent for 6+ months in the fridge, but cucumbers last 3-4 weeks if submerged properly. If mold appears (rare, but possible), discard immediately
Why You’ll Love This Recipe
- No-Fuss Prep: I swear, this takes less effort than waiting for takeout. Just slice those Kirby cucumbers, layer them in a jar with salt and sugar, then let time do the work—no stirring, no peeking, no stress.
- Sweet-Tart Magic: That honey and apple cider vinegar combo? It’s the kind of balance that makes you pause mid-bite. Crunchy outside, just slightly sweet with a tangy kick—like a dessert you didn’t know you needed.
- Meal Prep MVP: Honestly, I make a big batch and keep it in the fridge for weeks. Toss them on sandwiches, chow down with burgers, or just snack straight from the jar—no excuses to skip a meal when these are ready.
- Budget Brightener: Sea salt, sugar, and vinegar? You’re already stocked. Kirby cucumbers are cheap, and this recipe stretches one jar into enough pickles for a month. My wallet and my taste buds win.
Step-by-step instructions for 10-Day sweet pickles
Here’s how to make perfectly sweet, crunchy pickles with minimal daily effort.
Prepare and Sterilize the Jars and Cucumbers
Start by washing the 4 clean glass jars thoroughly with hot, soapy water. Then sterilize them by filling each with boiling water for 5 minutes. This ensures your pickles stay fresh and free from contamination. While the jars are sterilizing, rinse the 2 lb Kirby cucumbers under cold water to remove any dirt. Cut each cucumber into 1-inch thick slices—this size ensures they stay crisp throughout the pickling process. I like to trim the ends slightly to create even surfaces for better slicing.
As you slice, arrange the cucumbers in the sterilized jars, packing them tightly to maximize flavor infusion. Leave about ½ inch of headspace at the top of each jar—this prevents the liquid from overflowing during processing. The tight packing also helps the pickling solution penetrate every slice evenly. If you notice any soft spots on the cucumbers, trim them away to ensure only firm, crunchy pieces make it into your jars.
Create the Sweet Pickling Solution
In a large bowl, combine the 4 cups distilled water, 0.5 cup non-iodized sea salt, and 2 cups granulated sugar. Stir until the salt and sugar dissolve completely—this creates the brine that will transform the cucumbers into sweet, tangy pickles. The salt draws out moisture from the cucumbers, while the sugar adds that signature sweetness. I like to use a wooden spoon for stirring to avoid scratching the bowl.
Next, add the 1 cup apple cider vinegar, 0.5 cup honey, 4 smashed garlic cloves, 0.25 cup fresh dill sprigs, 1 tsp mustard seeds, and 1 tsp black peppercorns to the bowl. If you’re using the 0.25 tsp red food coloring, dissolve it in a small amount of water first to prevent clumping. Stir everything together until the garlic and spices are fully incorporated. The mixture should have a rich, aromatic scent—this is your cue that the flavors are melding beautifully.
Pack the Jars and Seal Tightly
Carefully pour the pickling solution over the cucumbers in each jar, ensuring every slice is fully submerged. Use a wooden spoon to nudge any cucumbers that might have floated to the top back down. The liquid should cover the cucumbers by at least ½ inch—this prevents mold growth and ensures even flavor distribution. If needed, add a few extra drops of vinegar to maintain the proper level.
Once packed, seal the jars tightly with their lids. I like to give the lids a quick wipe with a damp cloth before screwing them on to ensure a good seal. Place the jars on a baking sheet to catch any potential drips during the initial fermentation process. Let them sit at room temperature for 10 minutes to allow the solution to fully penetrate the cucumbers. This step is crucial for developing the perfect balance of sweet, tangy, and slightly spicy flavors.
Ferment for 10 Days with Daily Attention
After the initial 10-minute rest, store the jars in a cool, dark place—like a pantry or cellar—where the temperature stays between 60-70°F. Open and check each jar daily for the first 3 days, pressing down any cucumbers that have floated to the top. This ensures they remain fully submerged in the flavorful liquid. You’ll notice the liquid may become slightly cloudy or develop a thin layer of foam—this is normal and indicates fermentation is underway.
On day 4, transfer the jars to the refrigerator to slow down the fermentation process. This step is key to preventing the pickles from becoming too sour or soft. Leave them in the fridge for the remaining 6 days, giving the flavors time to meld and the cucumbers time to absorb the sweet, tangy solution. After 10 days total, your pickles should be perfectly sweet, crunchy, and ready to enjoy. If you prefer a slightly firmer texture, you can leave them in the fridge for an additional 2-3 days—but don’t overdo it, or they’ll start to soften.
Store and Enjoy Your Sweet Pickles
Once the 10-day process is complete, your sweet pickles are ready to be stored in the refrigerator. They’ll keep for up to 3 months, though I find they taste best within the first 2 months. When serving, remove a jar from the fridge and let it sit at room temperature for 10 minutes before opening—this helps the flavors come alive. The pickles should have a vibrant color, a delightful crunch, and a perfect balance of sweet, tangy, and slightly spicy notes.
To serve, simply open a jar and scoop out the pickles with a slotted spoon, allowing any excess liquid to drain back into the jar. These pickles pair beautifully with sandwiches, charcuterie boards, or even as a sweet and tangy snack on their own. If you have any leftover pickling liquid, don’t toss it—save it in a small jar in the fridge for up to 2 weeks. It makes an excellent marinade for meats or a quick brine for other vegetables.
Pro Tips For Making 10 Day Sweet Pickle
- WEIGH THE CUCUMBERS: Skip eyeballing—use a kitchen scale for the cucumbers. A 10-day pickle relies on precise salt-to-vegetable ratios, and eyeballing means some jars end up too salty while others taste bland. Weigh them before slicing, and aim for about 3 pounds per quart jar.
- SALT IN LAYERS: Don’t just dump salt on top. Pack the cucumbers in jars with alternating layers of salt and sliced cucumbers—about 1 tablespoon per 2 cups of cucumbers. This ensures even distribution and prevents clumping, which means every slice gets properly brined.
- USE COOL VINEGAR: Let your apple cider vinegar sit at room temperature before mixing it with the sugar and honey. Cold vinegar can shock the sugar and slow down the syrup formation, leaving you with a thinner, less flavorful brine. A 10-minute wait makes a real difference in texture and sweetness.
- STIR THE SYRUP DAILY: The first 48 hours are critical—give the sugar and vinegar mixture a quick stir every day. This prevents sugar settling at the bottom, which can lead to uneven sweetness in your pickles. Even a 30-second stir keeps everything balanced.
Regional styles of these flavors
Southern Sweet Pickles
In the American South, sweet pickles are a beloved staple, often made with a generous touch of sugar and vinegar for that signature tangy-sweet balance. I remember my grandma’s recipe using Kirby cucumbers and a sugar-packed brine—she’d always add a pinch of ground turmeric for that classic golden hue.
The process here mirrors hers, but with a modern twist by incorporating honey instead of just white sugar for deeper flavor complexity. These pickles are perfect for Southern-style sandwiches or as a sweet accompaniment to fried chicken. 🍗
German Sauerkraut-Inspired Sweet Pickles
Germany’s love for fermented vegetables inspired a variation where carrots and onions are added alongside cucumbers for extra crunch and sweetness. I’ve adapted this by using apple cider vinegar and mustard seeds to mimic the tangy, slightly spicy profile of traditional sauerkraut.
The result is a crunchy, colorful mix that works beautifully in German-inspired charcuterie boards or as a side for bratwurst. The fermentation time remains the same, but the added veggies require an extra 1-2 days in the fridge to soften slightly for better texture. 🥕
Japanese Sweet Pickles
Japanese sweet pickles, or asazuke, often feature rice vinegar and a touch of mirin for a delicate sweetness. For this adaptation, I swap the apple cider vinegar for rice vinegar and add ½ cup mirin to the brine, along with ½ tsp grated ginger for warmth.
The cucumbers stay crisp and develop a subtle floral sweetness that pairs wonderfully with sushi rolls or tempura. The fermentation process is slightly shorter—just 7 days—since rice vinegar speeds up flavor infusion. 🍣
Mexican Chile-Lime Sweet Pickles
For a spicy-sweet twist, Mexican-style pickles incorporate lime juice and chile peppers into the brine. Here, I replace ½ cup of the apple cider vinegar with fresh lime juice and add 1 tsp finely chopped jalapeño and ½ tsp chili powder to the brine.
The result is a zesty, slightly spicy pickle that’s perfect for tacos, quesadillas, or margaritas. The fermentation time stays at 10 days, but the lime juice helps preserve the bright, tangy flavor longer. 🌶️
Scandinavian Cloudberry Sweet Pickles
In Scandinavian traditions, cloudberries are often used to sweeten fermented dishes, adding a tart, jammy depth. For this version, I blend ½ cup of cloudberry jam (or lingonberry jam) into the brine along with the honey and vinegar.
The pickles develop a rich, berry-infused sweetness that’s ideal for Swedish meatballs or open-faced sandwiches. The jam also acts as a natural preservative, extending the shelf life to 4 months in the fridge. 🍓
Nutrition facts
Frequently asked questions
Why do I need to use non-iodized salt for sweet pickles?
Iodized salt can cloud the brine and leave an unpleasant metallic taste in your pickles. Non-iodized sea salt (like Diamond Crystal) dissolves cleanly and enhances the natural fermentation process without interfering with flavor. If you only have iodized salt, rinse the jars thoroughly after the initial brine stage to remove any residue.
Can I make these pickles without vinegar?
Yes, but the flavor will be less tangy and more reliant on fermentation acids. Replace the 1 cup apple cider vinegar with an extra ½ cup honey and ½ cup lemon juice to mimic the acidity. The pickles will still ferment, but expect a milder taste—vinegar is key for that classic sweet-tangy balance.
What if my pickles get moldy during fermentation?
Discard the entire jar immediately if you see any mold—even a tiny spot means bacteria are present. This is rare with proper sterilization, but if it happens, check your jar seals or storage temperature (keep it between 60-70°F the first 3 days). Always use sterilized jars and keep cucumbers fully submerged to prevent mold growth.
How do I adjust the sweetness level?
For less sweetness, reduce the sugar by ½ cup or swap half the sugar for monk fruit sweetener. For extra sweetness, add ½ cup more sugar or 2 tbsp honey to the brine. Taste-test the brine before adding cucumbers—it should be slightly sweeter than your final preference since the cucumbers absorb some flavor.
Can I reuse the pickling liquid?
The leftover brine makes an excellent marinade for meats or quick pickle for other veggies. Store it in a clean jar in the fridge for up to 2 weeks. To reuse, simply pour the liquid over fresh cucumbers or vegetables, add a pinch of salt, and let sit for 1-2 hours before eating. It won’t keep as long as fresh pickles, but it’s perfect for quick snacks.

- 6 Egg Cake Recipe with Oil: Light as Air With Buttery Moisture - October 4, 2026
- 4 Bean Casserole Recipe: One-Pan Heartiness With Smoky Paprika Depth - October 4, 2026
- 3-Ingredient Keto Mug Cake Recipe: Microwave Magic in 2 Minutes - October 4, 2026