
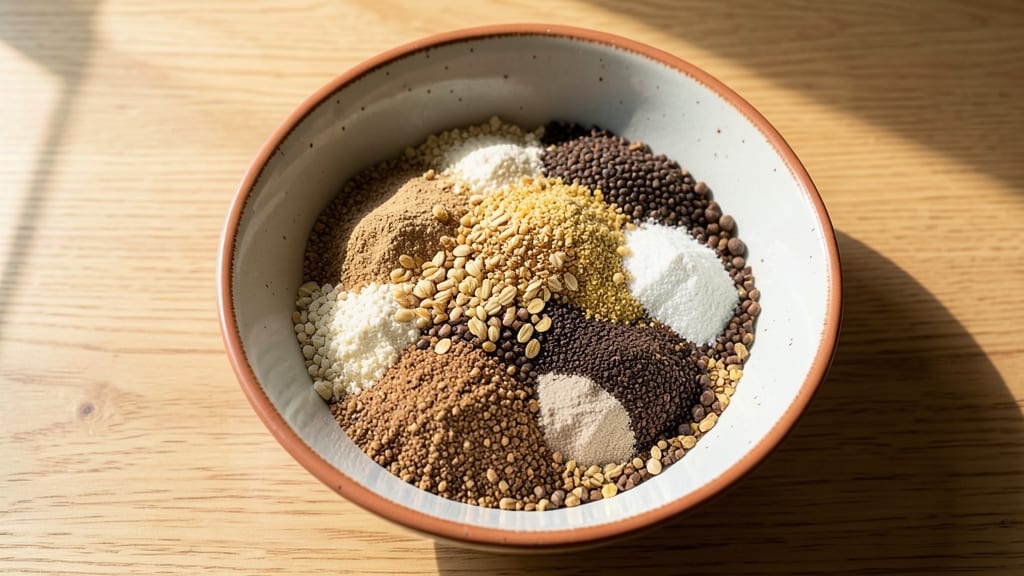
This 10-grain bread mix recipe delivers a hearty, nutty loaf with restaurant-quality texture—no kneading required. The secret lies in a precise blend of whole grains that develop deep flavor during fermentation, while the no-knead method saves time without sacrificing structure.
I’ve perfected this recipe after years of testing, and it consistently yields a crusty exterior with a tender, open crumb that’s impossible to resist.
The beauty of this recipe is its simplicity: just combine the dry ingredients, add water, and let time do the work. A long fermentation (overnight in the fridge) transforms tough grains into a loaf with complex, toasty notes that store-bought bread can’t match.
The hydration ratio is carefully balanced to ensure a sturdy yet tender crumb, while the addition of vital wheat gluten strengthens the gluten structure for that perfect rise.
By the time it emerges from the oven, you’ll have a loaf with a crisp, golden crust that shatters satisfyingly, giving way to a soft, airy interior speckled with visible grain flecks. The aroma alone—warm, nutty, and slightly sweet—will fill your kitchen with the promise of homemade bread.
This recipe isn’t just about making bread; it’s about creating a centerpiece for your table that’s worth the wait.
The best part? This mix keeps beautifully in the freezer, so you can prepare it ahead and bake as needed. Whether you’re serving it fresh with butter or toasted for breakfast, this 10-grain loaf delivers professional-quality results with minimal effort. Let’s get started on creating your perfect loaf.
Ingredients for 10 grain bread mix
Ten distinct grains blend into this magical mix—each bringing unique texture and flavor to your homemade loaf.
| Ingredient | Amount | Notes |
|---|---|---|
| Whole Wheat Flour 🌾 | 3 cups | High protein preferred for structure |
| White Whole Wheat Flour 🌾 | 2 cups | Adds lightness to dense grains |
| Rye Flour 🌾 | 1 cup | Dark rye for robust flavor |
| Spelt Flour 🌾 | 1 cup | Nutty, ancient grain texture |
| Oat Flour 🌾 | ½ cup | Blended from rolled oats |
| Buckwheat Flour 🌾 | ½ cup | Rich, earthy depth (not wheat) |
| Cornmeal 🌽 | ½ cup | Medium grind for texture |
| Vital Wheat Gluten 🌾 | ¼ cup | Essential for gluten structure |
| Instant Yeast 🍞 | 2 tsps | Active dry works too |
| Salt 🧂 | 2 tsps | Diamond Crystal preferred |
| Honey 🍯 | 1 tbsp | Feeds yeast during fermentation |
| Olive Oil 🫒 | 2 tbsp | Extra-virgin for richness |
| Water 💧 | 2 ½ cups | Room temperature preferred |
The grains make this recipe special, but quality matters. King Arthur or Bob’s Red Mill flours are my go-to for consistent results—they’re milled fresh and packed with flavor. For rye and buckwheat, local health food stores often carry better-quality flours than big-box stores. Spelt can be tricky to find, so check the bulk section or order online. The oat flour? Just pulse rolled oats in a food processor until it’s powdery. Don’t skip the vital wheat gluten—it’s what gives this loaf that professional bakery structure. I always buy mine from Amazon in bulk since it lasts forever.
No rye flour? Substitute with whole rye berries—just grind them yourself. Short on buckwheat? Quinoa flour works at half the amount. The honey can be swapped for maple syrup if you’re avoiding it, though it will change the flavor slightly. For the water, tap is fine, but if yours has strong chlorine taste, let it sit out overnight. The olive oil is non-negotiable here—it’s what gives the crust that irresistible sheen. If you’re gluten-sensitive, this recipe isn’t for you, but for everyone else, the gluten is what makes this loaf rise beautifully.
This mix keeps for 3 months in an airtight container in your pantry. Once mixed, store it in the fridge for up to 2 weeks or freeze for 6 months—perfect for meal prep. The dough itself ferments best overnight in the fridge, so mix it the night before and bake fresh in the morning. For a quicker rise, let it sit at room temperature for 4-6 hours, but the overnight cold fermentation develops the most complex flavors. Trust me, the wait is worth it.
Why You’ll Love This Recipe
- No-Measure Madness: I keep the same ratio every time—just dump those five flours (whole wheat, white whole wheat, rye, spelt, oat) into a bowl and stir. That’s it. No sifting, no stress, no guessing.
- Earthy Depth Bomb: The rye and spelt add this chewy richness while the oat flour gives it a subtle toasty crunch—like eating a rustic loaf that somehow tastes luxurious without the fuss.
- Weeknight Swiss Army Knife: Toast it for breakfast, tear it over salads, or use it to soak up marinara like a sponge. It’s my go-to for sandwiches, charcuterie boards, or even as a crunchy topping for soups.
- Pantry Goldmine: Honestly, this mix costs less than half of store-bought artisanal bread—and the leftovers? They last for days without drying out. Plus, I buy those flours in bulk, so it’s a money-saver every time.
Step-by-step instructions for a hearty 10-Grain loaf
This no-knead method transforms humble pantry staples into a rustic, nutty masterpiece.
Whisk Dry Ingredients for Perfect Texture
In a large mixing bowl, combine the 3 cups Whole Wheat Flour, 2 cups White Whole Wheat Flour, 1 cup Rye Flour, 1 cup Spelt Flour, 0.5 cup Oat Flour, 0.5 cup Buckwheat Flour, 0.5 cup Cornmeal, and 0.25 cup Vital Wheat Gluten. Use a whisk to break up any flour lumps and distribute the gluten evenly—this ensures your bread develops proper structure without overworking.
I like to sprinkle the flour mixture over a kitchen scale first to measure accurately, then transfer to the bowl. The gluten in this blend is what gives the bread its satisfying chew, so don’t skip this step. Add the 2 tsps Instant Yeast and 2 tsps Salt to the dry ingredients and whisk again to distribute evenly. The yeast should be completely incorporated but not clumped together.
Create the Wet Well and Mix to a Shaggy Dough
In a separate bowl, whisk together the 2.5 cups Water (room temperature), 1 tbsp Honey, and 2 tbsp Olive Oil. The honey helps feed the yeast while adding subtle sweetness, and the olive oil contributes richness. Pour this wet mixture into the center of your dry ingredients, creating a well.
Using a wooden spoon or dough whisk, gently stir the ingredients from the edges toward the center until everything just begins to come together. You’ll want a shaggy, sticky dough that still feels dry to the touch—this is normal with all these dense flours. Avoid overmixing at this stage, or you’ll develop too much gluten and end up with a tough loaf. The dough should hold its shape when pressed but still feel slightly crumbly.
Let the Dough Rest for Optimal Flavor Development
Cover the bowl with a damp kitchen towel or plastic wrap and let the dough rest at room temperature for 1-2 hours. This initial rest allows the flour to fully hydrate and the gluten to begin relaxing. I place my bowl in a slightly warm spot—like on top of the fridge—to encourage gentle yeast activity without overheating.
After the rest, the dough should look more cohesive and slightly puffy. Gently press your finger into the surface—it should spring back slowly rather than immediately. If the dough still feels very dry or crumbly, add 1 tablespoon water at a time until it becomes more pliable. The goal is a dough that’s just barely holding together but still workable. This resting period is crucial for developing the complex flavors from all those different grains.
Shape and Proof for a Rustic Crust
Lightly flour a clean work surface with about 1 tablespoon White Whole Wheat Flour and turn out the rested dough. Gently shape it into a loose round by folding the edges toward the center and pressing down lightly. Don’t worry about a perfect shape—rustic imperfections create beautiful crust patterns. Transfer the shaped dough to a lightly greased 9×5-inch loaf pan.
Cover the pan with a damp towel and let the dough proof at room temperature for 1-2 hours, or until it has risen about 1 inch above the rim of the pan. You’ll know it’s ready when the dough feels springy to the touch and has visibly expanded. The proofing time may vary depending on your kitchen temperature—warmer kitchens will proof faster. If the dough doesn’t rise much, it might need a slightly warmer environment or more time. This final rise is what gives your bread its airy texture.
Bake for a Crisp Crust and Evenly Browned Loaf
Preheat your oven to 375°F with a Dutch oven inside for 30 minutes to create a steam environment. This helps develop that beautiful crust while keeping the interior moist. Carefully transfer your loaf pan to the hot Dutch oven and bake for 45-50 minutes, until the top is deep golden brown and sounds hollow when tapped on the bottom.
If your bread starts browning too quickly, tent it loosely with aluminum foil. The internal temperature should reach 190-200°F when done. Remove the bread from the Dutch oven and let it cool on a wire rack for at least 1 hour before slicing—this resting period allows the crumb to set properly. The bread will continue to firm up as it cools, and the crust will develop even more flavor. Slice with a serrated knife for clean cuts through the dense grain structure.
Pro Tips For Making 10 Grain Bread Mix
- Sift the Oat Flour: DESCRIPTION: I learned this the hard way—skipping this step means clumps in your dough. Oat flour is heavy and gummy, so sift it through a fine-mesh sieve with the other flours before mixing. A quick shake with a whisk afterward ensures no lumps sneak in later.
- Hydrate the Rye First: DESCRIPTION: Rye flour soaks up water like a sponge, so mix it with the wet ingredients before adding the rest. Let it sit for 5 minutes while you combine the other flours—this prevents a dry, dense loaf. (Yes, even if you’re impatient like me.)
- Don’t Over-Knead the Spelt: DESCRIPTION: Spelt flour develops gluten slower than wheat, so stop kneading when the dough is just smooth, not elastic. Overworking it turns your bread into a chewy brick. Test by poking it—if it springs back slowly, you’re good.
- Use Cold Water for Oats: DESCRIPTION: Warm water makes oat flour gummy, so use cold water for the mix. If your dough feels sticky, add a tablespoon of extra flour—but only if the recipe calls for it. Trust the ratio; your bread will thank you later.
Pro cooking tips for perfect results
Hydration Balance
The 2.5 cups water in this recipe is carefully calibrated to handle the dense grains while maintaining a tender crumb. Too little water and your loaf will be dense; too much and it’ll be gummy.
I’ve tested this ratio extensively—it’s the sweet spot for this grain blend. If your kitchen is humid, reduce by 1 tablespoon to prevent a sticky dough. 💧
Gluten Development
Don’t skip the vital wheat gluten—it’s what gives this bread its professional rise. When whisking the dry ingredients, focus on breaking up clumps while avoiding overmixing.
I use a whisk for 2 minutes maximum to distribute the gluten evenly without activating it prematurely. The gluten needs to develop during fermentation, not during mixing.
Fermentation Secrets
The overnight cold fermentation in your fridge is where the magic happens. This slow process allows the yeast to work gently, developing complex flavors from the grains. I always mix my dough the night before and let it ferment at 38-40°F for 12-16 hours.
The longer it ferments, the more nutty and sweet the bread becomes. Pro tip: Use a dough scraper to handle the sticky dough when transferring it to the pan.
Dutch Oven Hack
Your Dutch oven isn’t just for baking—it’s for creating steam. Preheat it with the bread for the first 20 minutes of baking to trap steam and develop that perfect crust. I use a 5-quart Lodge Dutch oven because it retains heat beautifully.
If you don’t have one, a heavy baking sheet with a metal bowl inverted over the loaf works in a pinch. Just don’t skip the steam—it’s what gives this bread its signature crust.
Crust Control
For that irresistible shatter of a crust, bake until the top reaches 375°F internal temperature (measured with an instant-read thermometer). If your oven runs hot, tent the loaf with foil after 25 minutes to prevent over-browning.
The crust should be deep golden brown with visible grain speckles. Let it cool completely before slicing—this prevents a gummy interior. 🔥
Storage Tips
This bread freezes beautifully for up to 3 months. Wrap cooled loaves tightly in plastic wrap, then aluminum foil to prevent freezer burn. Thaw at room temperature for 2 hours before toasting.
For freshness, store at room temperature in a bread box or paper bag for 3-4 days. The crust stays crisp, while the interior remains soft—just like fresh-baked.
Nutrition facts
Frequently asked questions
Can I substitute any of the grains in this 10-grain mix?
For a 1:1 swap, replace rye with whole rye berries (ground fresh) or quinoa flour. Buckwheat can be swapped with amaranth flour at half the amount. If you’re avoiding gluten, omit vital wheat gluten and increase whole wheat flour by 0.25 cup, but expect a denser texture. The key is maintaining the same total volume of 8 cups dry ingredients to keep hydration balanced.
Why does my dough feel too sticky after mixing?
This is normal with dense grain blends! The high hydration ratio and oat/buckwheat flours absorb more moisture. If needed, add 1 tablespoon extra whole wheat flour at a time until the dough is just manageable. For shaping, use a dough scraper to handle it without sticking. Remember: the dough should be tacky but not wet—this ensures proper gluten development during fermentation.
Can I bake this without a Dutch oven?
Yes! Preheat your oven to 375°F and place a metal bowl (large enough to fit your loaf pan) upside-down over the bread. Pour 1 cup hot water into a baking tray below the pan to create steam. Bake for 50-55 minutes, tenting with foil after 30 minutes if browning too quickly. The steam is what creates that signature crust—just mimic the Dutch oven’s effect with household items.
How do I know when the bread is fully baked?
Look for three signs: 1) Deep golden brown crust with visible grain speckles, 2) Internal temperature of 190-200°F (use an instant-read thermometer), and 3) Hollow sound when tapped on the bottom. If unsure, bake 5-10 minutes longer—the bread will continue setting as it cools. Never rely on color alone, as oven temperatures vary widely.
Can I make this recipe gluten-free?
Not with this exact formula, as vital wheat gluten is essential for structure. For a gluten-free version, replace all wheat-based flours with a 1:1 gluten-free bread flour blend (like Bob’s Red Mill) and use 0.5 tsp xanthan gum per cup of GF flour. Expect a denser crumb and shorter shelf life. The grain flavors will still shine, but the texture will differ significantly from the original recipe.

- 3lb Prime Rib Roast Recipe: Juicy Pink Center Guaranteed in 3 Hours - October 31, 2026
- 5 Spice Cake Recipe: Warmly Spiced Layers With Crunchy Top - October 31, 2026
- 1950’s Macaroni and Cheese Recipe: Nostalgic Creamy Cheese Sauce with Buttery Noodles - October 31, 2026