
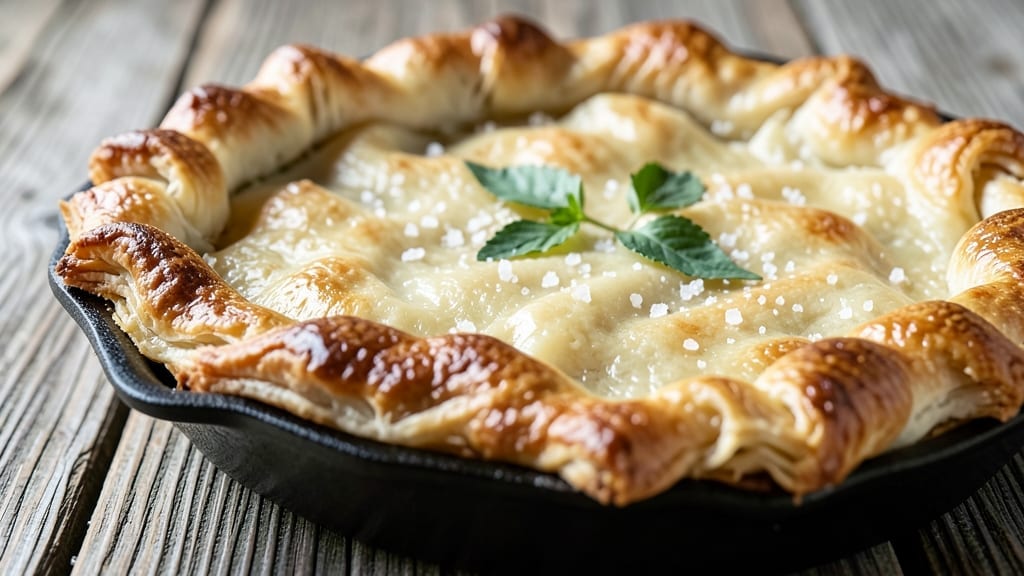
A 10-inch butter pie crust is the foundation of every perfect slice—flaky, golden layers that hold fillings without a hint of sogginess. This recipe delivers the classic, foolproof method I’ve perfected over years of baking, using cold butter and precise technique to create those signature delicate flakes.
The secret lies in chilling the dough at every stage, ensuring crisp edges and tender layers that never disappoint.
What sets this crust apart is its versatility—whether you’re making an apple pie, pecan tart, or pumpkin pie, this recipe forms the perfect base. The dough comes together in just 15 minutes, then rests while you prep your filling.
Blind-baking the crust ensures it stays sturdy under even the heaviest fillings, like custards or fruit compotes. Every step is designed to prevent shrinking or cracking, so you get a clean, professional-looking crust every time.
By the time you slide that golden, flaky crust into the oven, you’ll have a restaurant-quality base that’s crisp enough to stand up to forks and tender enough to melt in your mouth.
The aroma alone—warm butter, toasted flour, and a whisper of vanilla—will have everyone asking for seconds. This isn’t just a crust; it’s the difference between a good pie and a showstopper.
Ready to master the art of pie crust? This method works for both beginners and seasoned bakers, with tips for troubleshooting and variations like lattice tops or pre-baked bottoms. Let’s get started on the first step—cold butter, cold dough, and perfect slices ahead.
Ingredients for 10 inch butter pie crust
Eight essential ingredients transform into the perfect golden crust for any pie.
| Ingredient | Amount | Notes |
|---|---|---|
| All-Purpose Flour 🌾 | 2 ½ cups | Sifted for light texture |
| Unsalted Butter 🧈 | 1 cup | Cold, cubed, 6 tbsp total |
| Ice Water ❄️ | ⅓ cup | Chilled for crispness |
| Diamond Crystal Kosher Salt 🧂 | ½ tsp | Fine grain preferred |
| Granulated Sugar 🍚 | 2 tbsp | For subtle sweetness |
| Pure Vanilla Extract 🌿 | 1 tsp | For aromatic depth |
| Large Egg Yolk 🥚 | 1 whole | For binding |
| White Vinegar 🍶 | 1 tsp | Enhances flakiness |
The butter is non-negotiable here—cold, unsalted sticks from brands like Land O’Lakes or Plugrá work best. Grab the coldest butter in your fridge and cut it into 1/2-inch cubes—this ensures those signature flakes. If your butter starts to soften while working, pop the dough back in the fridge for 10 minutes. The flour? King Arthur or Bob’s Red Mill are my go-tos—they’re finely milled and consistent. Pro tip: use a food processor to pulse the flour, butter, and salt together for even distribution and less mess. That first pulse creates the perfect crumbly base for the flakes.
No vanilla extract? Vanilla bean paste works just as well, or skip it entirely—this crust is still delicious. Running short on egg yolks? 1 tbsp cold water plus 1 tsp cornstarch mimics the binding power. The vinegar might sound odd, but it boosts gluten development for a stronger crust. For a lattice top variation, divide the dough in half after chilling—one for the base, one for the pattern. And if you’re blind-baking? Pie weights or dried beans are your friends to prevent puffing.
This dough is all about patience—chill between every step. After mixing, wrap it in plastic and refrigerate for at least 1 hour (overnight is ideal). For blind-baking, preheat your oven to 375°F and bake with a parchment-lined tray for 15-20 minutes before adding filling. Leftovers? Roll out the dough, wrap tightly, and freeze for up to 3 months. Thaw in the fridge overnight before using—never at room temperature. The secret to perfect slices? A sharp 10-inch pie dish and a hot knife for clean cuts.
Why You’ll Love This Recipe
- Foolproof First Try: I’ll admit—pie crusts scare me. But this one? No rolling pins, no stress. The cold butter cuts into the flour like magic, and a splash of ice water binds it all together in minutes. No need to be a pastry chef here.
- Butter So Rich: That first bite of flaky layers? It’s all thanks to the cold, cubed butter melting just right. I swear, the sugar in the dough adds this subtle caramel note when baked—like a little secret upgrade. Honestly, store-bought crusts can’t compete.
- Bakes What You Want: Need a pie for Thanksgiving? A quick dessert for a potluck? This crust handles it all—sweet or savory fillings, no adjustments needed. I’ve used it for pecan pie, chicken pot pie, even a cheesy galette. It’s my go-to blank canvas.
- Pantry Staple Magic: Five ingredients, all things I already have. No weird substitutions or last-minute grocery runs. And leftovers? I freeze extra dough between parchment paper—no waste, just future pies waiting to happen. Budget-friendly? Absolutely.
Step-by-step instructions for golden flake butter pie crust
Here’s how to create the ultimate pie crust with layers so delicate they’ll melt in your mouth.
Cut and Chill the Butter
Take the 1 cup unsalted butter and cut it into ¼-inch cubes using a sharp chef’s knife. Place the cubes in a freezer-safe container and chill for 15 minutes—this prevents the butter from turning to oil during mixing. The goal is to keep those butter pieces cold and firm so they create flaky layers when baked.
While the butter chills, measure out the 2.5 cups all-purpose flour and sift it into a large mixing bowl. This removes any lumps and aerates the flour, which helps create a lighter texture. I like to use a fine-mesh sieve for this step—it makes all the difference in the final crust.
Mix Dry Ingredients and Add Cold Butter
In the bowl with the sifted flour, whisk in the 0.5 teaspoon diamond crystal kosher salt, 2 tablespoons granulated sugar, and 1 teaspoon white vinegar. The vinegar might seem odd, but it reacts with the flour to create a tender, flaky crust. Mix these dry ingredients together until evenly distributed—you should see no more than a few small flecks of salt or sugar.
Add the chilled butter cubes to the flour mixture. Using your fingertips, gently toss the butter pieces until they’re all lightly coated with flour. This creates a crumbly texture that’s essential for flaky layers. Don’t overmix—just enough to distribute the butter evenly throughout the flour.
Incorporate Wet Ingredients for Perfect Binding
Create a well in the center of the flour-butter mixture and add the 1 whole large egg yolk, 1 teaspoon pure vanilla extract, and ⅓ cup ice water. The ice water is crucial—it keeps the butter cold and helps create those signature flakes. Using a fork or pastry cutter, gently mix the ingredients until the dough just comes together.
Here’s the thing—you want the dough to be moist but not sticky. If it feels too dry, add 1 teaspoon more ice water at a time until it holds together when pressed. If it’s too wet, sprinkle in 1 tablespoon more flour. The dough should form a shaggy mass that’s easy to handle but not crumbly.
Form and Chill the Dough
Turn the dough out onto a lightly floured surface and gently shape it into a 10-inch round disc. I like to use a bench scraper to help me form neat edges. Wrap the dough tightly in plastic wrap and refrigerate for at least 1 hour—this resting period relaxes the gluten and makes rolling out much easier. For best results, chill overnight if possible.
During this time, the dough will firm up, which prevents it from shrinking when you roll it out. I press the dough into a flat disc shape before wrapping it—this helps maintain the round shape during chilling. The cold temperature also allows the butter to stay solid, which is what creates those beautiful flaky layers when baked.
Roll and Fit the Crust
Remove the chilled dough from the refrigerator and place it on a lightly floured surface. Using a rolling pin, roll the dough from the center outward to a 12-inch circle—this gives you enough overhang to create a classic pie crust with a decorative edge. Keep the dough moving as you roll to prevent it from sticking.
Carefully transfer the rolled-out dough to a 10-inch pie dish, letting the edges hang over the sides. This overhang creates the classic pie crust edge that bakes up beautifully. Gently press the dough into the pie dish, then trim any excess dough hanging over the edge. The crust is now ready to be filled or baked blind for a perfect base.
Pro Tips For Making 10 Inch Butter Pie Crust
- Cut Butter into Pea-Sized Pieces: I used to chop butter into big chunks and wondered why my crust never got flaky. Cold butter matters—cut it into pea-sized bits so it melts evenly during baking, creating those perfect air pockets. (Yes, even if you’re impatient like me, don’t skip this.)
- Use Ice Water, Not Cold: Cold water makes dough tough. Ice water keeps gluten relaxed and prevents a gummy crust. Fill a glass with ice and water, then add the water from the ice—it’s colder than you think and worth the effort.
- Don’t Overwork the Dough: I learned this the hard way—kneading or pressing too much develops gluten, and your crust turns tough instead of tender. Work the dough just until it holds together, then handle it as little as possible.
- Chill the Dough Twice: My grandmother swore by this, and she was right: wrap the dough in plastic and refrigerate for 1 hour, then freeze it 20 minutes before rolling. The second chill prevents shrinking and makes rolling out a breeze—no more sticky messes.
Regional styles of this dish
Southern Classic
In the American South, this butter pie crust is the backbone of iconic desserts like peach cobbler and chicken pot pie.
The crust gets an extra touch of warmth with a pinch of ground cinnamon (about ½ teaspoon) mixed into the flour—just enough to complement fruit fillings without overpowering. I’ve made this version countless times for family gatherings, and it’s always the first to disappear. 🥧
French Technique
French bakers take flakiness to another level by using pâte brisée principles—this crust is essentially a refined version of that classic. The key difference? A 1:2 butter-to-flour ratio (by weight) and no sugar in the dough, which keeps it delicate for savory pies like mushroom-wild rice or spinach-and-feta.
I’ve adapted this method by adding 1 tablespoon cold vodka (instead of water) for extra tenderness. 🇫🇷
Midwest Homestyle
This is the crust I grew up with—thick, sturdy, and buttery, perfect for apple crisp or cherry pie. The Midwest twist?
A generous pinch of nutmeg (about ¼ teaspoon) and 1 tablespoon cornmeal folded into the flour for a slightly grainy texture that holds up to heavy fillings. My grandmother always said, “A good crust should hold a fork upright,” and this one does. ❄️
Pacific Northwest Adaptation
For a lighter, more open-textured crust (ideal for blackberry galette or pecan tart), swap ½ cup of the all-purpose flour for almond flour. The result is a nutty, slightly crumbly crust with a beautiful golden hue.
I also add 1 teaspoon lemon zest to the dough for a bright contrast to tart berries. The Pacific Northwest’s rainy climate makes this crust a favorite for holiday baking. 🌿
New England Rustic
In New England, pies are often pre-baked with a lattice top—this crust is no exception. The secret here? Chilling the dough between layers if you’re making a double-crust pie.
For a maple-glazed crust, brush the baked bottom with 2 tablespoons maple syrup before adding filling. The syrup caramelizes beautifully, adding depth to apple or pumpkin pies. 🍁
Modern Twist
For a gluten-free version (great for dietary restrictions), replace 1 cup of the all-purpose flour with 1 cup gluten-free 1:1 baking flour (like Bob’s Red Mill). Add ½ teaspoon xanthan gum to bind the dough.
I’ve also experimented with brown butter for a nutty, caramelized flavor—simply brown the butter first, then chill it before cubing. This works amazingly with pecan or sweet potato pies. 🔥
Nutrition facts
Frequently asked questions
Why does my butter pie crust turn out tough instead of flaky?
Overworking the dough or using warm butter are the most common culprits. Always keep butter cold and cut it into small cubes—this prevents melting during mixing. Work quickly and avoid overmixing once the wet ingredients are added. The dough should feel shaggy, not smooth. If it’s too sticky, add just 1 tablespoon more flour at a time.
Can I make this crust ahead of time?
This dough keeps perfectly in the fridge for up to 3 days or frozen for 3 months. Wrap it tightly in plastic wrap to prevent drying. For best results, thaw overnight in the fridge before rolling. The longer it chills, the easier it rolls out and the flakier the final crust will be.
What’s the best way to blind-bake this crust?
Preheat oven to 375°F and line the crust with parchment paper, then fill with pie weights or dried beans. Bake for 15-20 minutes until edges are golden. Remove weights and bake 5-10 minutes more to crisp. For extra insurance, brush the bottom with 1 egg white before baking—this prevents browning spots.
How do I fix a cracked crust after baking?
Don’t worry—cracks are common! Brush them with simple syrup (equal parts sugar and water) or melted butter before adding filling. The liquid will seal the cracks and create a beautiful golden finish. For deep cracks, you can also brush with apricot jam (warmed) before filling.
Can I use this crust for savory pies too?
Yes! For savory applications like spinach and feta or mushroom-wild rice, skip the sugar and reduce vanilla to ½ teaspoon. Brush the baked crust with garlic-infused olive oil before adding filling. The butter flavor works beautifully with savory ingredients, and the flaky texture holds up perfectly.

- 3lb Prime Rib Roast Recipe: Juicy Pink Center Guaranteed in 3 Hours - October 31, 2026
- 5 Spice Cake Recipe: Warmly Spiced Layers With Crunchy Top - October 31, 2026
- 1950’s Macaroni and Cheese Recipe: Nostalgic Creamy Cheese Sauce with Buttery Noodles - October 31, 2026