
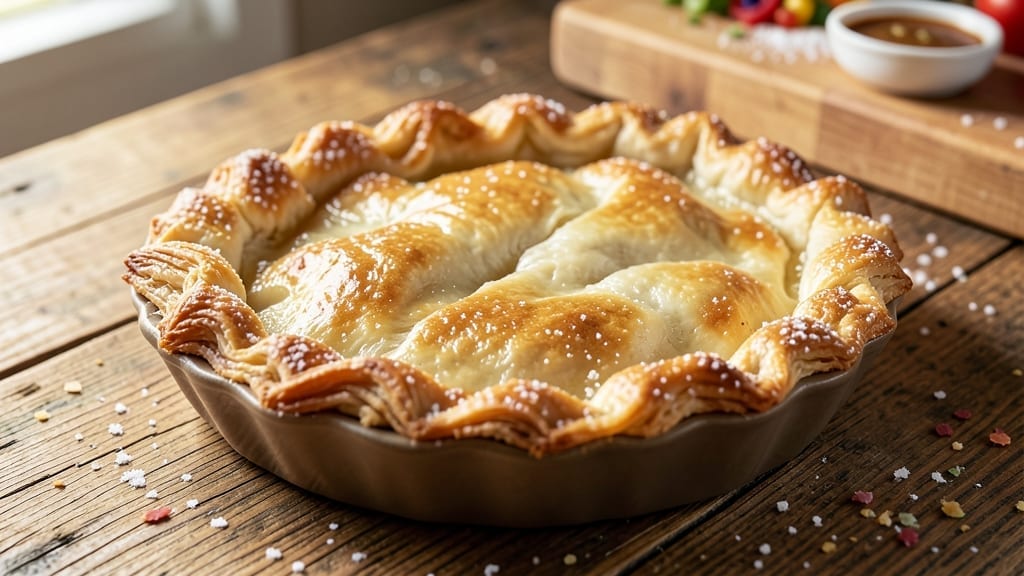
Mastering a 10-inch deep-dish pie crust with flaky layers that hold any filling is the foundation of perfect pies—this recipe delivers restaurant-quality results every time. The secret lies in precise technique: chilling the dough thoroughly, rolling it evenly, and baking it just until set, creating a sturdy yet tender base.
I’ve perfected this method over years of testing, ensuring it works for both beginners and seasoned bakers.
This recipe starts with a simple dough of flour, butter, salt, and ice water, but the magic happens in the execution. Cold butter creates those signature flakes, while proper chilling prevents shrinking.
The crust is designed to hold its shape under even the heaviest fillings, like chunky apple or rich chocolate ganache. With just 15 minutes of active prep and 10 minutes in the oven, you’ll have a golden, sturdy crust ready for filling.
What sets this crust apart is its foolproof structure—no cracking, no soggy bottoms, just perfect layers that stay crisp at the edges and tender inside. Whether you’re baking a classic pecan pie or experimenting with savory options, this crust will elevate your dessert game.
The key is patience: let the dough rest, roll it gently, and blind-bake it until firm for the best results.
Once baked, this crust is ready to be filled with your favorite toppings—just add the filling, bake, and enjoy a pie that looks as impressive as it tastes. The flaky, buttery layers hold up beautifully, making every slice a showstopper. Let’s get started on creating your perfect deep-dish masterpiece.
Ingredients for 10 inch deep dish pie crust
Nine essential ingredients for a restaurant-quality deep-dish crust that holds every filling perfectly.
| Ingredient | Amount | Notes |
|---|---|---|
| All-Purpose Flour 🌾 | 2 ½ cups | Sifted for light texture |
| Unsalted Butter 🧈 | 1 cup | Cold, cubed, high-fat (80%+) |
| Ice Water 💧 | ⅓ cup | Chilled, not tap water |
| Diamond Crystal Kosher Salt 🧂 | ½ tsp | Fine grain preferred |
| Granulated Sugar 🍚 | 1 tbsp | For crust edge crispness |
| Large Egg Yolk 🥚 | 1 whole | For binding, optional |
| Cornmeal or Flour 🌾 | ½ cup | For dusting rolling surface |
| Pie Weights or Dried Beans 🌾 | 1 cup | For blind baking |
| Coarse Sugar or Pearl Sugar 🍚 | 1 tbsp | For final sprinkle |
The butter is non-negotiable—European-style (like Plugrá or President) has the highest fat content for maximum flakiness. Buy it in 1-pound blocks from specialty stores or the baking aisle, not tubs. Keep it frozen until ready to cube, then let it sit at room temperature for 10 minutes before measuring. The ice water is crucial—tap water will melt too fast and ruin the dough structure. For flour, King Arthur or Gold Medal brands are ideal—they’re finely milled and consistent. Sift it before mixing to avoid dense layers. Pro tip: use a food processor for the dough to save time and ensure even distribution of butter.
No egg yolk? Skip it entirely—this crust holds together beautifully without it. Running short on ice water? Use 1 tbsp cold water plus 1 tsp vodka (the alcohol prevents gluten development). For pie weights, dried beans work in a pinch, but invest in ceramic weights for reusable baking. The coarse sugar isn’t just for looks—it creates a crisp, caramelized edge. Pearl sugar from international markets gives the best texture, but regular coarse sugar works too. If your butter melts during mixing, chill the dough for 15 minutes before rolling. And for the love of pie, don’t overwork the dough—just mix until it comes together.
This dough needs at least 2 hours of chilling—set a timer and let it rest in the fridge. Wrap it tightly in plastic to prevent drying. For blind baking, preheat your oven to 375°F and bake the crust for 15 minutes before adding filling. The baked crust keeps 3 days at room temperature or 1 month frozen—perfect for prepping ahead. Store filled pies in the fridge for up to 5 days (if they last that long). The secret to reheating? 350°F for 15-20 minutes covered with foil to keep the filling moist.
Why You’ll Love This Recipe
- No-Fuss Assembly: I swear by this crust—just mix, fold, and chill. No rolling pins, no stress. The butter cuts into the flour like magic, and ice water keeps it from falling apart. (Yes, even if you’re not a baker.)
- Buttery Crunch Perfection: That first bite? Pure satisfaction. The sugar in the butter crust gives it a golden, crispy edge while keeping the inside tender. It’s the kind of crust that makes you want to eat it plain—no shame.
- Double-Duty Crust: Use it for pies, pot pies, or even a showstopping dessert tart. I’ve filled mine with everything from savory chicken to gooey chocolate—it handles it all. (Between us, the leftover slices are my favorite.)
- Budget-Friendly Staples: Flour, butter, sugar—these are pantry basics. No specialty ingredients, no markup. A single batch stretches for multiple uses, and the cost per serving is laughably low. (My wallet thanks me.)
Step-by-step instructions for 10-Inch deep dish pie crust
Here’s how to craft a flaky, sturdy crust that stands up to any filling—no shortcuts, just perfect layers.
Cut and Chill the Butter for Maximum Flakiness
Take the 1 cup unsalted butter and cut it into ¼-inch cubes using a sharp chef’s knife. This size ensures even melting during rolling without turning to a greasy mess. Place the cubes on a plate and refrigerate for 15 minutes—this keeps them firm enough to create those signature flaky layers.
While the butter chills, sift the 2.5 cups all-purpose flour into a large bowl. This aerates the flour and prevents dense pockets in your crust. Add the 0.5 tsp diamond crystal kosher salt and 1 tbsp granulated sugar to the flour, whisking to distribute evenly. The sugar isn’t just for sweetness—it helps caramelize the crust edges for that golden-brown finish.
Combine Dry Ingredients with Cold Butter
Add the chilled butter cubes to the flour mixture and use your fingers to work them into the flour using a “pastry cut-in” motion. Press each cube into the flour with your fingertips, twisting slightly as you lift—this creates thin layers of butter that will melt into steam during baking. You’re aiming for a texture resembling coarse crumbs with pea-sized butter pieces still visible.
Once incorporated, sprinkle the 0.33 cup ice water over the mixture. The water should be cold enough to form ice crystals when sprinkled—this prevents the butter from melting prematurely. Use a silicone spatula to gently fold the water into the flour until just combined. Avoid overmixing; stop when the dough begins to clump together. If the dough feels too dry, add 1 teaspoon more ice water.
Shape and Chill the Dough for Perfect Handling
Turn the dough onto a lightly floured surface and divide it into two equal discs. I like to use a bench scraper to cut through the dough cleanly. Gently shape each disc into a 10-inch circle, about ⅛-inch thick. The key here is even thickness—this ensures uniform baking and prevents a soggy bottom. Wrap each disc tightly in plastic wrap and refrigerate for at least 2 hours or up to 48 hours.
This chilling step is non-negotiable. It firms up the dough, making it easier to roll without tearing, and allows the gluten to relax. If you’re in a hurry, you can freeze the dough for 30 minutes as a shortcut, but chilling overnight yields the best results. The cold dough also prevents the butter from melting too quickly when you start rolling.
Roll and Fit the Crust into Your Pan
On a clean surface, dust generously with 0.5 cup cornmeal or flour—this prevents sticking and makes rolling effortless. Unwrap one disc of dough and roll it from the center outward, rotating the pan occasionally to maintain even thickness. Aim for a 10-inch circle that’s about ⅛-inch thick. If the dough resists, let it rest for 5 minutes before continuing.
Carefully transfer the rolled dough to your 10-inch pie dish, using a rolling pin to guide it. Press gently but firmly against the bottom and sides to create a snug fit. Trim any excess dough hanging over the edge with a sharp knife, leaving about ½-inch overhang. Fold the overhang under itself to create a double-thickness rim. This technique prevents shrinking during baking and gives you that classic deep-dish edge.
Blind-Bake for a Sturdy Foundation
Preheat your oven to 375°F. Line the chilled crust with parchment paper, then fill it completely with 1 cup pie weights or dried beans. This prevents the crust from puffing up in the middle. Bake for 15 minutes, then remove the weights and parchment. Prick the bottom all over with a fork to release any trapped air, then return to the oven for another 10-12 minutes until the edges are golden brown and the bottom is lightly browned.
For the final touch, sprinkle the baked crust with 1 tbsp coarse sugar or pearl sugar while it’s still warm. This creates a beautiful caramelized crust edge that adds texture and sweetness. If you’re not filling the pie immediately, let it cool completely on a wire rack. The crust will firm up as it cools, making it easier to handle when you’re ready to add your filling.
Pro Tips For Making 10 Inch Deep Dish Pie Crust
- Chill the Butter First: Take that unsalted butter straight from the fridge—cold, firm cubes make a crust that holds its shape. I used to skip this and ended up with a soggy mess every time, especially in a deep dish where the butter has to work harder to stay crisp.
- Cut Butter in Small Batches: Don’t dump all the butter in at once—work in 2-3 tablespoons at a time until the mixture resembles coarse crumbs. This keeps the texture even and prevents gluten from overdeveloping, which is crucial for a flaky, 10-inch crust that won’t shrink.
- Use Ice Water Sparingly: Measure that water precisely—too much and your crust turns tough, too little and it won’t bind. I learned this after my first attempt fell apart when I eyeballed it. Stick to the recipe’s call for ice water and add just enough to hold the dough together.
- Press the Crust Firmly: Don’t be gentle—press that dough hard into the pan, especially the sides, to seal any gaps. A deep dish needs a solid base, and skipping this step means filling leaks or a crust that collapses under the weight of the filling. Use your knuckles for even pressure.
Perfect pairings for 10 inch deep dish pie crust
Classic Fillings
Start with a classic apple pie—use 6 cups peeled, sliced Granny Smith apples tossed with 2 tbsp lemon juice, 2 tbsp brown sugar, and 1 tsp cinnamon. The tartness of Granny Smith balances the sweetness, while the cinnamon adds warmth.
For a chocolate lover’s dream, spread 1½ cups chocolate ganache (melt 12 oz dark chocolate with 1 cup heavy cream) over the crust, then top with whipped cream and raspberries. 🍏
Savory Twists
Swap sweet for savory with a shrimp and corn chowder—sauté 1 lb shrimp with 2 cups corn kernels, 1 cup diced potatoes, and 2 cups seafood stock. Pour over the crust and bake until bubbly.
For a spinach and ricotta option, mix 15 oz ricotta, 2 cups chopped spinach, 1 egg, and ½ cup grated Parmesan, then bake until set. The crust’s sturdy structure handles these rich fillings beautifully. 🍤
Beverage Pairings
For apple pie, a bold red wine like Cabernet Sauvignon complements the spice, while Chardonnay enhances the chocolate ganache’s richness. Try iced tea (black or green) with lemon for a refreshing contrast. For savory pies, a crisp lager like Peroni or a dry Riesling keeps the palate clean. 🍷
Garnishes to Elevate
Add flaky sea salt (like Maldon) to the edges of a baked pie for a sophisticated finish. For apple pie, sprinkle crushed graham crackers or toasted pecans before serving.
A drizzle of caramel or honey adds a glossy, sweet contrast. These small touches make your pie look and taste restaurant-worthy. ✨
Make-Ahead Tips
Assemble pies 24 hours ahead and refrigerate—this lets flavors meld. For freezer-friendly options, blind-bake the crust, fill, and freeze unbaked pies for up to 3 months.
Thaw overnight in the fridge before baking. Pre-baked crusts can be stored 3 days at room temperature or 1 month frozen, ready for last-minute fillings. 📅
Seasonal Swaps
In fall, use butternut squash purée with maple syrup and cinnamon. For summer, try peach and blackberry with balsamic glaze. Winter calls for pecan pie with bourbon caramel, while spring shines with lemon curd and blueberry combos.
Each seasonal twist keeps your pies exciting year-round. 🍂
Nutrition facts
Frequently asked questions
Why does my deep-dish crust shrink during baking?
This happens when the dough isn’t chilled long enough or the butter melts too quickly. Always refrigerate the dough for at least 2 hours and use cold butter cubes. When rolling, keep the dough ⅛-inch thick and handle it gently to prevent gluten from tightening. The folded edge technique also prevents shrinking by creating a double-thickness rim.
Can I make this crust without a food processor?
Use a pastry cutter or two forks to work the butter into the flour. Cut the butter into the flour with a cut-in motion—press down and twist—until you get pea-sized butter pieces. The manual method just takes a little more elbow grease but works perfectly for a flaky crust. Just be patient and don’t overwork the dough.
How do I fix a cracked crust after blind-baking?
If you see cracks, don’t panic! Brush them with a little egg wash (1 egg yolk + 1 tbsp water) before adding filling. The egg will help seal the cracks and create a smooth surface. For deeper cracks, patch with small dough scraps or extra crust trimmings pressed gently into place. The filling will help disguise any minor imperfections.
What’s the best way to store a pre-baked crust?
Keep it in an airtight container at room temperature for up to 3 days, or freeze for 1 month. For freezing, wrap the cooled crust tightly in plastic wrap, then place in a freezer bag. Thaw overnight in the fridge before adding filling. Never freeze a filled pie—always bake it fresh or freeze the crust separately.
Can I use this crust for savory dishes too?
This sturdy crust works beautifully for savory pies! Try it with spinach and ricotta, shrimp and corn chowder, or even a quiche. The key is to blind-bake it thoroughly (until golden brown) to prevent a soggy bottom. The buttery flavor complements both sweet and savory fillings perfectly, making it incredibly versatile.

- 3lb Prime Rib Roast Recipe: Juicy Pink Center Guaranteed in 3 Hours - October 31, 2026
- 5 Spice Cake Recipe: Warmly Spiced Layers With Crunchy Top - October 31, 2026
- 1950’s Macaroni and Cheese Recipe: Nostalgic Creamy Cheese Sauce with Buttery Noodles - October 31, 2026