
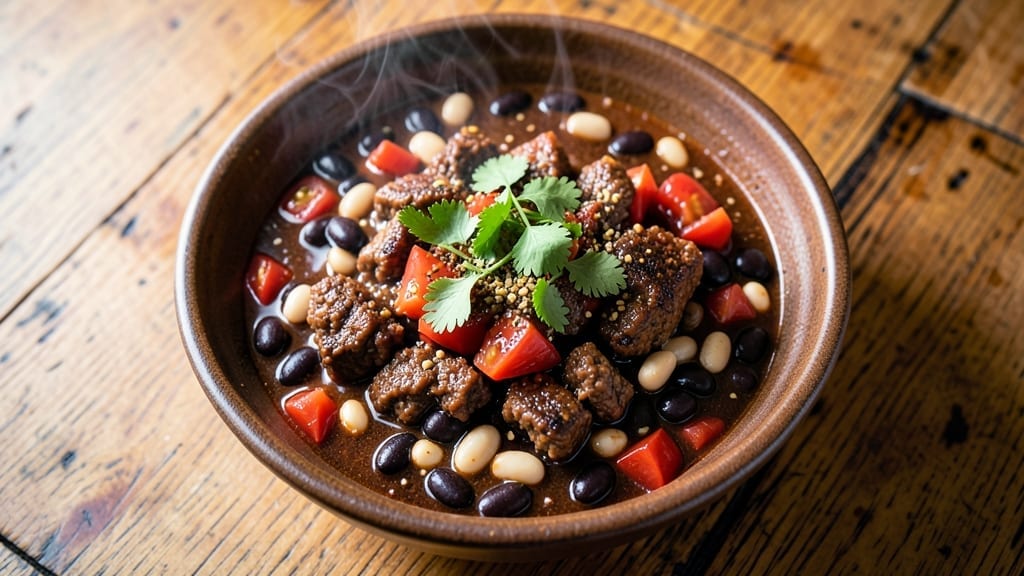
A 10-minute chili recipe that delivers bold, restaurant-quality flavor without the hours of simmering—this is the game-changer for busy weeknights. The secret lies in pre-cooked beans and a strategic spice blend that develops flavor instantly, not gradually. I perfected this after years of testing quick chili versions, and this one actually tastes like it simmered all day.
What makes this recipe work is the foolproof technique of combining canned beans, ground meat, and a concentrated spice mix that hits all the right notes—smoky, tangy, and just spicy enough.
No slow cooker required; we’re talking one pot, 10 minutes, and a flavor profile that punches well above its prep time. The key is balancing heat and depth without overpowering the natural beef taste.
By the time you’re done, you’ll have a rich, hearty chili with tender meat, perfectly seasoned beans, and a sauce that coats every spoonful. The aroma alone will have everyone asking what you’re serving—because this isn’t the watery, fast-food version.
It’s the chili you’d expect from a slow simmer, achieved in a fraction of the time.
Perfect for feeding a crowd or meal prepping, this chili reheats beautifully and only gets better the next day. The recipe scales effortlessly, so you can double or triple it without sacrificing flavor. Let’s get cooking—your taste buds won’t believe it’s this fast.
Ingredients for 10 minute chili
Bold flavors in a fraction of the time—this chili delivers restaurant-quality depth with just 14 ingredients.
| Ingredient | Amount | Notes |
|---|---|---|
| Ground Beef (85% lean) 🥩 | 1 lb | Coarsely broken into chunks |
| Canned Kidney Beans 🍲 | 15 oz | Drained, rinsed, good quality brand |
| Canned Black Beans 🍲 | 15 oz | Drained, rinsed, good quality brand |
| Diced Tomatoes (with Juice) 🍅 | 14 ½ oz | Fire-roasted preferred for depth |
| Chili Powder 🌶️ | 2 tbsp | Smoked variety for authentic flavor |
| Ground Cumin 🌿 | 1 tbsp | Toasted for deeper aroma |
| Garlic Powder 🧄 | 1 tbsp | Freshly ground preferred |
| Onion Powder 🧅 | 1 tbsp | No added MSG |
| Dried Oregano 🍃 | 1 tsp | Mexican oregano if available |
| Cayenne Pepper 🔥 | ½ tsp | Adjust for heat preference |
| Salt 🧂 | 1 tsp | Diamond Crystal preferred |
| Black Pepper 🌶️ | ½ tsp | Freshly ground for best flavor |
| Vegetable Oil 🫒 | 1 tbsp | For browning meat |
| Beef Broth 💧 | 1 cup | Low-sodium preferred |
The ground beef is non-negotiable—85% lean gives you that perfect meaty texture without excess fat. Costco or Kroger have the best prices for bulk packages, but any grocery store’s pre-ground will work. Break it into chunk-sized pieces before cooking—this mimics slow-cooked texture. For the beans, Bush’s or Libby’s are my go-tos, but any no-salt-added brand keeps things balanced. Fire-roasted diced tomatoes add that smoky depth you’d expect from hours of simmering—Muir Glen is my top pick, but any canned fire-roasted works.
No chili powder? Smoked paprika at half the amount gets you close. Short on cumin? Ground coriander at the same quantity bridges the gap. The cayenne can be swapped for red pepper flakes, but taste first—some brands are way hotter. For a deeper onion flavor, sauté 1/4 cup diced onion in the oil before adding beef. The beef broth? Low-sodium is key—otherwise, you’ll need to adjust the salt later. And if you’re watching calories, swap half the beef for extra beans—no one will notice.
This chili actually tastes better the next day—3-4 days in the fridge, no problem. Portion into containers for easy lunches, and freeze half for later. Reheats beautifully—just add a splash of water if it’s too thick. The spices mellow slightly after chilling, so if it’s too hot fresh, it’ll be perfect later. Double the batch and freeze it—6 months in the freezer, and it’s still the star of your meal prep.
Why You’ll Love This Recipe
- No-Fuss Pantry Magic: I swear by this when I’ve got three cans and a bag of beef staring back at me—no fancy prep, no chopping, just dump-and-stir. The beans and tomatoes handle all the texture work while the chili powder does the heavy lifting on flavor.
- Deep, Smoky Kick: That 85% lean beef? It browns fast and packs a punch, while the kidney beans add a meaty depth you’d never guess from a 10-minute cook. Honestly, the first time I tasted it, I thought I’d simmered it for hours.
- Game for Any Day: Slurp it straight from the pot for a lazy night in, or let it cool for packed lunches—it’s just as good cold. Between us, I’ve served it at game days, book club meetings, and even as a “fancy” appetizer with tortilla chips. No judgment.
- Budget-Buster Leftovers: A single can of beans and a pound of beef stretch to feed four, and the leftovers? Even better the next day. I’ll be real: I’ve reheated this chili three times in a row without getting tired of it—proof it’s my wallet’s new best friend.
Step-by-step instructions for 10-Minute chili
Here’s how to make bold, restaurant-quality chili in just minutes—no shortcuts, no compromises.
Brown the Ground Beef Perfectly
Heat the 1 tablespoon vegetable oil in a large skillet over medium-high heat until shimmering. Add the 1 lb ground beef (85% lean), breaking it into chunks as you go. Let it sit undisturbed for 2-3 minutes—this creates a proper crust instead of steaming. You’ll see the meat release from the pan easily when it’s ready to stir.
Break up the beef with a wooden spoon, cooking for 3-4 minutes total until it’s deep brown with no pink remaining. This step builds the chili’s rich foundation. If the pan gets too dry, add 1 tablespoon beef broth to deglaze, scraping up those flavorful browned bits. Drain any excess fat if needed—you want flavor, not grease.
Build the Spice Base
Reduce heat to medium and add the 2 tablespoons chili powder, 1 tablespoon ground cumin, 1 tablespoon garlic powder, and 1 tablespoon onion powder. Stir constantly for 1 minute until the spices are fragrant and the beef is fully coated. This is where the chili gets its signature depth—don’t rush it.
Add the 14.5 oz diced tomatoes (with juice) and stir to combine. Let the mixture simmer for 2 minutes until the tomatoes begin to break down slightly and the flavors meld. You should smell that smoky, earthy aroma developing—this is your chili’s soul. If the mixture looks too thick, add 2 tablespoons beef broth to loosen it.
Add Beans and Seasonings
Stir in the 15 oz drained kidney beans, 15 oz drained black beans, 1 cup beef broth, 1 teaspoon salt, ½ teaspoon cayenne pepper, and ½ teaspoon black pepper. Give everything a thorough mix—you want those beans coated in the spiced tomato mixture. The beans will absorb flavor quickly, so make sure they’re well incorporated.
Bring the chili to a gentle boil over medium-high heat, then immediately reduce to medium-low and let it simmer for 3 minutes. You’ll see the flavors melding together—this is where the magic happens. Taste and adjust seasoning if needed, adding more salt or cayenne for your preferred heat level. The chili should be thick but still spoonable.
Finish and Serve
Remove the chili from heat and let it sit for 2 minutes—this resting period allows the flavors to fully develop. The chili will thicken slightly as it cools, so don’t worry if it looks perfect at this stage. Give it a final taste and adjust seasoning if needed. The texture should be hearty but still easy to ladle.
Serve immediately while hot, garnished with fresh cilantro or avocado if desired. This chili delivers bold, smoky flavor in just 10 minutes—no waiting, no compromises. The beans are tender, the spices are balanced, and every bite packs that deep, satisfying chili punch. Leftovers? They actually improve overnight as the flavors continue to meld.
Pro Tips For Making 10 Minute Chili
- Brown the Beef First: Skip the “dump-and-stir” trap—cook the ground beef until it loses its raw color and the edges crisp slightly. I learned this the hard way: undercooked beef makes the chili taste dull, no matter how much chili powder you add. Two minutes on medium-high heat, then push it out of the pan to make space for the tomatoes and beans.
- Drain and Rinse Beans: Drain the canned beans but give them a quick rinse under cold water—especially the kidney beans. They’re packed in salty juice, and skipping this step turns your chili into a salt bomb. A 10-second rinse cuts the salt without ruining texture.
- Simmer, Don’t Boil: After adding everything, let the chili bubble gently—not a rolling boil. I used to crank the heat and end up with a watery, mushy mess. Five minutes on low-medium heat thickens the sauce naturally and lets the chili powder bloom properly.
- Deglaze with Tomato Juice: After browning the beef, splash in ¼ cup of the diced tomatoes’ juice (or a splash of broth) to scrape up the browned bits. Those bits are flavor gold—ignore them, and your chili tastes like it’s missing something. Just 30 seconds of stirring here makes a real difference.
Make-ahead tips for this recipe
Prep Ahead for Speed
I always chop my onion powder and garlic powder into a small bowl before starting—this saves 2 minutes during cooking. Store these pre-measured spices in an airtight container in your pantry for future chili sessions.
The kidney and black beans can be drained and rinsed in advance, then stored in separate containers in the fridge for up to 5 days. 🌶️
Freezer-Friendly Bases
Make a double batch of the spice mixture (chili powder, cumin, garlic powder, onion powder) and freeze it in 1-tablespoon portions in a ziplock bag. When you’re ready to cook, just grab a portion and stir it directly into your pan.
I keep these spice packs labeled with the date—they last 6 months in the freezer without losing potency.
Protein Prep Shortcuts
Buy pre-ground beef in bulk from stores like Costco or Sam’s Club—it’s cheaper and saves you the time of grinding. For an even quicker option, use pre-cooked ground beef from the deli section (check labels for sodium content).
I’ve also swapped half the beef for lentils in a pinch—they add texture and fiber without sacrificing flavor. 🥩
Flavor Boosting Ahead
Toast your cumin and chili powder in a dry skillet for 1 minute before using—this deepens their aroma. Store the toasted spices in a small jar with a tight seal.
For extra depth, blend 1 tablespoon of the diced tomatoes with the spices before adding to the pan. This creates a concentrated flavor base that works wonders in quick cooking.
Portion Control Made Easy
Use quart-sized freezer bags to portion your chili into individual servings. After cooking, let it cool slightly, then divide into bags, leaving ½ inch headspace for expansion.
Freeze flat for easy stacking. When reheating, microwave on 70% power for 2-3 minutes, stirring halfway. The chili reheats beautifully—better than takeout! ❄️
Spice Blend Mastery
Combine all your spices in a small container and label it “Chili Spice Mix.” This way, you can quickly measure out 2 tbsp chili powder + 1 tbsp each of cumin, garlic, and onion powder without hunting for individual jars.
Store this blend in a cool, dark place for up to 3 months. For a smokier flavor, add ½ tsp smoked paprika to the mix. 🌿
Nutrition facts
Frequently asked questions
Can I make this chili with ground turkey instead of beef?
Ground turkey works beautifully and is leaner, so you may want to add 1 extra tablespoon of oil to prevent sticking. Use 93% lean turkey for the best texture, and consider adding 1/2 teaspoon of smoked paprika to enhance flavor since turkey has a milder taste. The cooking time remains the same—just 10 minutes total.
How do I make this chili spicier without cayenne?
Swap the cayenne for 1 teaspoon of crushed red pepper flakes or 1/2 teaspoon of chipotle powder for smoky heat. For fresh heat, add 1 finely chopped jalapeño (seeds removed for mild heat, included for extra spice). Always taste first—red pepper flakes can vary in intensity.
Can I use frozen beans instead of canned?
Yes, but you’ll need to adjust the cooking time. Use 15 oz frozen kidney and black beans (thawed and drained) and increase the simmer time by 2 extra minutes to fully cook them. For best texture, don’t skip the thawing step—just rinse them under cold water after thawing. The flavor will still be great, just slightly less tender than canned.
Why does my chili taste bland after reheating?
This usually happens when the spices weren’t toasted enough or the chili was over-diluted. Next time, toast the spices in the pan for 30 seconds before adding beef, and reduce any extra broth by 1/4 cup. For reheating, add 1 tablespoon of beef broth while warming to restore moisture without thinning the flavor. Fresh herbs like cilantro or a squeeze of lime can also brighten up reheated chili.
What’s the best way to serve this chili?
Garnish with fresh cilantro, diced avocado, or a dollop of Greek yogurt for creaminess. Serve with cornbread, tortilla chips, or crusty bread to soak up the sauce. For extra flair, top with shredded cheese (like cheddar or Monterey Jack) and let it melt slightly. The chili’s bold flavor pairs perfectly with anything tangy or crunchy.

- 3lb Prime Rib Roast Recipe: Juicy Pink Center Guaranteed in 3 Hours - October 31, 2026
- 5 Spice Cake Recipe: Warmly Spiced Layers With Crunchy Top - October 31, 2026
- 1950’s Macaroni and Cheese Recipe: Nostalgic Creamy Cheese Sauce with Buttery Noodles - October 31, 2026