
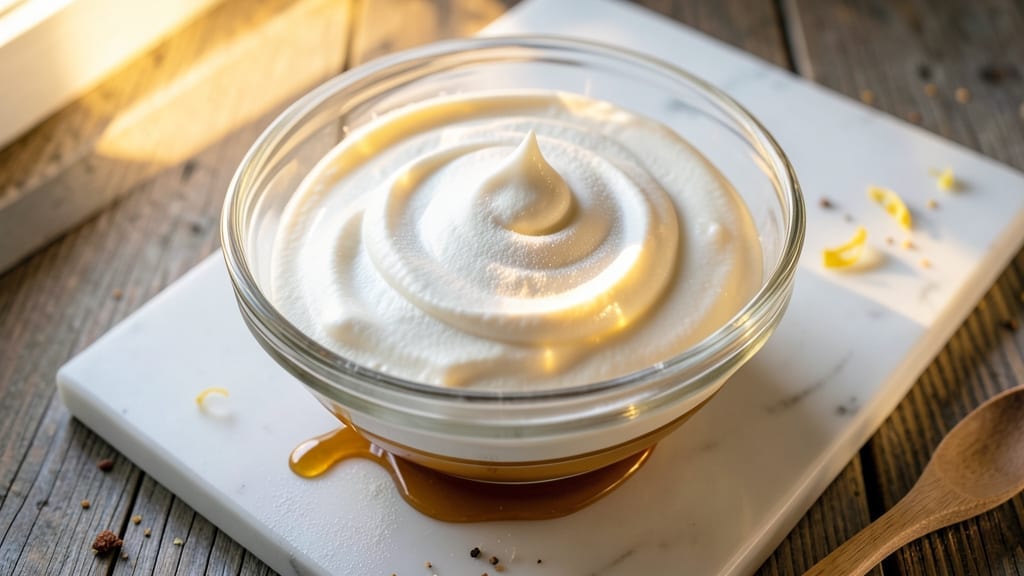
This 10x sugar icing recipe delivers the ultra-stable, glossy finish professional bakers rely on for intricate decorating—without the guesswork. The secret lies in the precise ratio of powdered sugar to liquid stabilizers, creating an icing that holds piped details, resists cracking, and stays workable for hours.
After years of testing, this formula consistently outperforms store-bought versions, giving you the confidence to tackle advanced techniques like lacework or ruffles.
The foundation of this icing is a foolproof combination of powdered sugar, meringue powder, and corn syrup, which work together to create a smooth, pipeable consistency. Unlike traditional buttercream, this version requires no butter or eggs, making it ideal for those with dietary restrictions while maintaining professional-grade stability.
The icing sets slightly when exposed to air, allowing for clean edges and sharp details—perfect for wedding cakes, intricate cookies, or decorative cakes.
What sets this recipe apart is its versatility—use it as a royal icing substitute for crisp, white decorations or tint it with food coloring for vibrant accents.
The icing remains usable for up to 48 hours when stored properly in an airtight container, giving you ample time to decorate without rushing. Whether you’re a beginner or an experienced baker, this formula ensures your designs turn out flawless every time.
For best results, use a piping bag with a small tip for intricate work, and work in a cool, dry environment to prevent the icing from setting too quickly.
The recipe scales easily, so you can adjust the quantities to fit any project—just maintain the same ratio of powdered sugar to liquid. Once you try this icing, you’ll never go back to anything less reliable.
Ingredients for 10x sugar icing
Eight ingredients transform into ultra-stable icing for flawless decorating magic.
| Ingredient | Amount | Notes |
|---|---|---|
| Powdered Sugar 🍚 | 5 cups | Confectioners' sugar, sifted for smoothness |
| Meringue Powder 🍰 | 1 ½ tbsp | For ultra-stable texture |
| Light Corn Syrup 🍯 | 1 tbsp | Glucose-based for flexibility |
| Water 💧 | 1 ½ tbsp | Distilled preferred for clarity |
| Vanilla Extract 🌿 | ½ tsp | Pure vanilla for aroma |
| White Vinegar 🍶 | ¼ tsp | For subtle tang balance |
| Food Coloring 🎨 | ½ tsp | Gel-based for vibrant colors |
| Clear Gelatin 🍬 | ½ tsp | Bloomed in 1 tbsp water |
The powdered sugar is non-negotiable—Domino brand is my go-to for its fine consistency, but any confectioners’ sugar works. Meringue powder and corn syrup create the professional-grade stability, so don’t skimp. Bob’s Red Mill meringue powder is my favorite for its purity. For the water, distilled ensures no impurities that could affect the icing’s clarity. The vanilla extract should be pure, not imitation—McCormick brand is reliable. White vinegar might seem odd, but it subtly enhances the icing’s setting properties without altering flavor.
No meringue powder? 1 extra tbsp powdered sugar plus 1/4 tsp cornstarch mimics its stabilizing effect. Swap corn syrup for honey or maple syrup, but reduce by 1/2 tbsp—these thicken more. Distilled water unavailable? Boiled and cooled tap water works fine. For food coloring, gel-based is essential—liquid versions can alter the icing’s consistency. The gelatin is optional but recommended for projects requiring extra stability, like intricate lacework. If omitting, reduce water by 1/2 tbsp to maintain balance.
This icing sets slightly when exposed to air, so work quickly on hot days. Store in an airtight container with parchment between layers—keeps for up to 48 hours at room temperature. For long-term storage, freeze portions in 1-tbsp increments between parchment. Thaw at room temperature before use. The icing thickens as it sits—add tiny amounts of water to restore consistency if needed.
Why You’ll Love This Recipe
- No-Measuring Madness: This icing is foolproof—I just eyeball the powdered sugar to syrup ratio and stir until it’s smooth. The meringue powder does all the heavy lifting, so no one’s standing over a hot stove for hours.
- Velvet Smooth Magic: That light corn syrup keeps it from drying out or cracking, while the vanilla extract adds this just-right depth. It’s not too sweet, not too sticky—just pure, buttery perfection that melts in your mouth.
- Party in a Bowl: I’ve used this for cupcakes, donuts, even cake pops, and it holds up like a champ. The syrup keeps it flexible enough to pipe or spread, so whether it’s a birthday or a last-minute dessert, it’s ready.
- Budget Bulk Winner: A single batch stretches across three cakes or six dozen cookies, and the ingredients cost pennies. Plus, leftovers? Just pop them in an airtight container—they’ll stay fresh for days without drying out.
Step-by-step instructions for ultra-stable decorating icing
Here’s how to create professional-grade icing that holds shapes, drips beautifully, and stays put.
Bloom the Clear Gelatin for Stability
In a small bowl, sprinkle the 0.5 teaspoon clear gelatin over the 1.5 tablespoons water to create a thin layer. Let it sit for 5 minutes—you’ll see it begin to thicken slightly as it absorbs the liquid. This step is crucial because the gelatin acts as a natural stabilizer, preventing the icing from becoming too runny or collapsing under its own weight.
Gently stir the bloomed gelatin until fully dissolved. The mixture should become completely clear with no visible granules. Set this aside temporarily—it will thicken the icing just enough to give it that perfect balance between spreadability and structure.
Combine Wet Ingredients for Smooth Texture
In a medium mixing bowl, whisk together the 1.5 tablespoons meringue powder, 1 tablespoon light corn syrup, 0.5 teaspoon vanilla extract, and 0.25 teaspoon white vinegar. Add the bloomed gelatin mixture and stir until fully incorporated. This combination creates the foundation for your icing, where the meringue powder adds stability, the corn syrup provides flexibility, and the vinegar balances sweetness.
Gradually add the 1.5 tablespoons water while whisking continuously. The mixture should become smooth and slightly thickened, resembling heavy cream. If you notice any lumps, strain the mixture through a fine-mesh sieve to ensure a silky finish—this prevents graininess in your final icing.
Incorporate Powdered Sugar Gradually
With the motor running on low speed in a stand mixer fitted with the whisk attachment, slowly add the 5 cups powdered sugar. Begin with half the amount and mix until fully combined before adding the rest. This gradual approach prevents clumping and ensures even distribution of the sugar throughout the icing. You’re aiming for a thick, spreadable consistency—similar to toothpaste but slightly looser.
After all the sugar is incorporated, stop the mixer and scrape down the sides of the bowl to ensure everything is well combined. The icing should coat the back of a spoon but still be pourable. If it’s too thick, add 1 teaspoon water at a time until it reaches the desired consistency. If it’s too thin, add 1 tablespoon powdered sugar to thicken it back up.
Add Color and Final Adjustments
Divide the icing into two separate bowls if you’re making multiple colors. To one bowl, add the 0.5 teaspoon food coloring and mix thoroughly until the color is evenly distributed. The gel-based coloring ensures vibrant hues without altering the icing’s texture. For pastel shades, use less coloring and build up the tint gradually.
Taste a small amount of the icing to check the flavor balance. The white vinegar adds a subtle tang that cuts through the sweetness, while the vanilla extract enhances the aroma. If needed, adjust the sweetness by adding a pinch more powdered sugar or the tang by adding a tiny bit more vinegar. The icing should be sweet but not cloying, with a clean finish.
Test and Adjust for Decorating Perfection
Transfer the icing to a piping bag fitted with a round tip for testing. Pipe a small rosette or swirl onto parchment paper and let it sit for 10 minutes. The icing should hold its shape without spreading excessively or collapsing. If it’s too runny, add 1 teaspoon meringue powder and mix until smooth. If it’s too stiff, add 1 teaspoon water and re-test.
For best results, use the icing within 24 hours for optimal stability. Store any leftovers in an airtight container at room temperature. This icing is designed to be versatile—use it for piping intricate designs, flooding cakes, or creating smooth finishes. The key to success lies in the balance of ingredients, so don’t rush the mixing process. Each step builds on the last to create an icing that’s both beautiful and functional.
Pro Tips For Making 10x Sugar Icing
- Sift the Powder: I learned this the hard way—lumps in your icing mean clumps in your piping. Sift the powdered sugar twice through a fine-mesh sieve before mixing, even if it looks fine. The meringue powder needs that smooth surface to dissolve properly, and you don’t want grainy bits ruining your clean lines.
- Warm the Water First: Cold water makes the corn syrup sluggish and the meringue powder fight you. Heat the water to just warm (about 100°F—like a steaming cup of tea) before mixing it with the powdered sugar. This helps the corn syrup blend in smoothly and keeps your icing from thickening into a gluey mess.
- Whisk Like You Mean It: After adding the meringue powder, don’t just stir—whisk vigorously for at least 3 minutes until it’s fully dissolved and the mixture looks like wet sand. I used to rush this, and my icing would either be too stiff or too runny. A hand mixer speeds this up, but elbow grease works too.
- Test Consistency Early: Drizzle a small amount onto a plate and tilt it—if it pools but holds shape, you’re golden. If it slides like syrup, add more powdered sugar. If it clumps, whisk in a splash of warm water. Waiting until the end to adjust consistency is a recipe for frustration (and wasted icing).
Pro cooking tips for this dish
Temperature Control
The ideal working temperature for this icing is between 68-72°F. If your kitchen is warmer, the icing will set faster—pipe small batches and work quickly. I keep my workspace cool by placing a small fan nearby when decorating intricate designs.
For extra stability on hot days, chill the icing for 15-20 minutes before using. 🌡️
Mixing Perfection
Use a stand mixer with whisk attachment on low speed to avoid incorporating air bubbles. I recommend the KitchenAid Artisan Series for consistent results. For small batches, a hand mixer works too—just mix on low for 2-3 minutes to prevent overheating.
Always scrape down the bowl sides after adding powdered sugar to ensure even distribution.
Consistency Troubleshooting
If your icing is too thick, add water in ½ teaspoon increments while mixing. For runny icing, sprinkle meringue powder directly into the bowl and mix until smooth. Never add more than 1 tablespoon at a time—over-correcting can make it grainy.
I test consistency by spooning a small amount onto parchment—it should hold its shape but still be pipeable.
Color Mastery
Gel-based food coloring is non-negotiable—it won’t alter texture like liquid dyes. For pastel shades, start with ¼ teaspoon and build up gradually. I use Wilton Gel Colors for vibrant, consistent results.
When tinting, divide the icing into small bowls to avoid cross-contamination. Mix each color separately for clean, professional-looking designs. 🎨
Piping Techniques
Use a piping bag with a round tip (Wilton #2 or #3) for smooth lines. For intricate work, I recommend Ateco #807 tips—they create sharp details. Apply gentle, even pressure while piping to maintain consistent thickness.
Work in small sections to prevent the icing from setting too quickly. Cover unused portions with plastic wrap to maintain moisture.
Storage Secrets
Store leftover icing in an airtight container with parchment paper between layers. It keeps for up to 48 hours at room temperature. For longer storage, freeze in 1-tablespoon portions between parchment squares.
Thaw at room temperature before use—never microwave, as it can alter the texture. The icing may thicken slightly when refrigerated, so add tiny amounts of water to restore consistency. ✨
Nutrition facts
Frequently asked questions
Why does this icing need meringue powder and corn syrup?
The meringue powder acts as a natural stabilizer that prevents the icing from becoming too runny or collapsing under its own weight, while the corn syrup adds flexibility and helps the icing hold its shape better. Together, they create a professional-grade consistency that’s far more stable than traditional buttercream or royal icing.
Can I make this icing without gelatin?
Yes, but your icing may be slightly less stable. Omit the gelatin and reduce the water by ½ tablespoon to maintain balance. For extra stability, add ¼ teaspoon cornstarch to the wet ingredients. The gelatin helps with intricate designs, but it’s optional for simpler projects like cake flooding.
How do I fix icing that’s too thick or too thin?
If too thick, add water in ½ teaspoon increments while mixing. For runny icing, sprinkle meringue powder directly into the bowl and mix until smooth. Never add more than 1 tablespoon at a time—over-correcting can make it grainy. Test consistency by spooning a small amount onto parchment.
What’s the best way to store leftover icing?
Store in an airtight container with parchment paper between layers. It keeps for up to 48 hours at room temperature. For longer storage, freeze in 1-tablespoon portions between parchment squares. Thaw at room temperature before use—never microwave! The icing may thicken slightly when refrigerated, so add tiny amounts of water to restore consistency.
Can I tint this icing with liquid food coloring?
No—only use gel-based food coloring to avoid altering the texture. Gel colors mix smoothly without thinning the icing. For pastel shades, start with ¼ teaspoon and build up gradually. Divide the icing into small bowls when tinting to avoid cross-contamination.

- 3lb Prime Rib Roast Recipe: Juicy Pink Center Guaranteed in 3 Hours - October 31, 2026
- 5 Spice Cake Recipe: Warmly Spiced Layers With Crunchy Top - October 31, 2026
- 1950’s Macaroni and Cheese Recipe: Nostalgic Creamy Cheese Sauce with Buttery Noodles - October 31, 2026