
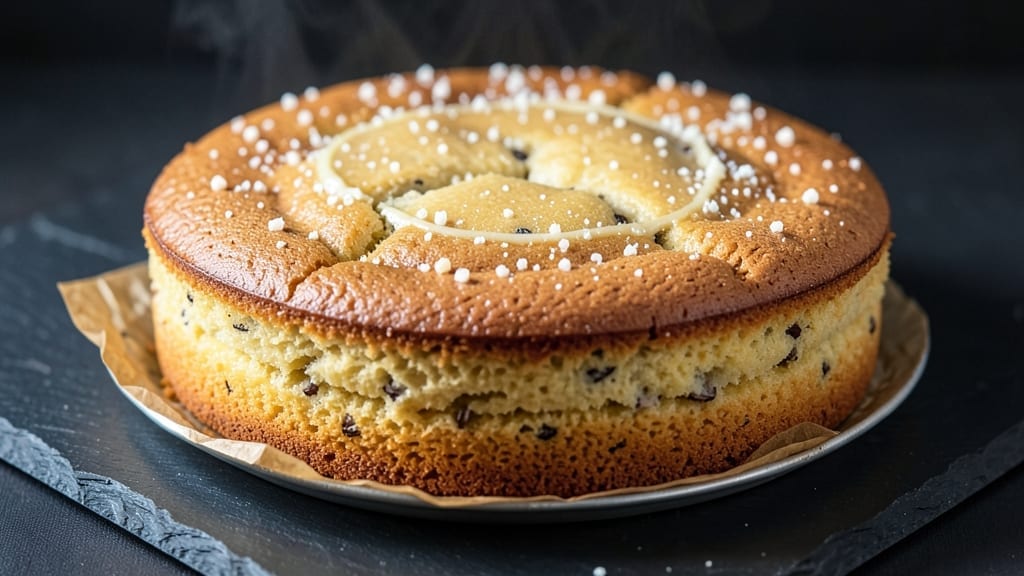
An 11-inch cake recipe baked in a single pan solves the problem of layered perfection without the fuss of multiple pans or tricky assembly. This recipe delivers a moist, tender vanilla bean cake with a subtle crumb that stays fresh for days—ideal for celebrations or spontaneous treats.
The secret lies in precise ingredient ratios and a gentle baking technique that ensures even rise and golden edges without overbaking.
What sets this 11-inch cake apart is its versatility—whether you prefer a simple buttercream glaze, rich chocolate ganache, or fresh berry compote, the cake’s neutral flavor absorbs any topping beautifully. The vanilla bean infusion adds depth without overpowering, making it a crowd-pleaser for weddings, birthdays, or everyday indulgence.
With just one pan, you eliminate the guesswork of layering while still achieving restaurant-quality results.
The baking process is straightforward: mix, pour, bake, and cool. A 350°F oven ensures even heat distribution, while a 30-35 minute bake time (depending on your oven) guarantees a perfectly domed top.
The cake’s structure holds up well for slicing, and its moist texture makes every bite satisfying. No special equipment is needed—just a standard round pan and patience for the cooling phase.
For dietary adaptations, swap butter for coconut oil or use a gluten-free flour blend without sacrificing texture. The recipe’s simplicity makes it adaptable to any occasion, from elegant dinner desserts to casual family gatherings.
Once you master this one-pan wonder, you’ll never need to stress over complicated cake assembly again.
Ingredients for 11 inch cake
Twelve simple ingredients transform into a restaurant-quality cake—no layers, no fuss, just pure vanilla bliss.
| Ingredient | Amount | Notes |
|---|---|---|
| Unsalted Butter 🧈 | 1 cup | Room temperature, full-fat preferred |
| Granulated Sugar 🍚 | 2 cups | Superfine for smoother texture |
| Vanilla Bean 🌿 | 2 whole | Scraped seeds and pod |
| All-Purpose Flour 🌾 | 2 ½ cups | Sifted, spooned lightly |
| Baking Powder 🧂 | 2 tsp | Aluminum-free preferred |
| Salt 🧂 | ½ tsp | Fine sea salt |
| Large Eggs 🥚 | 4 whole | Room temperature |
| Milk 🥛 | 1 cup | Whole milk preferred |
| Vanilla Extract 🍯 | 1 tbsp | Pure vanilla extract |
| Vegetable Oil 🫒 | ½ cup | Light, neutral flavor |
| Buttercream Frosting 🍰 | 2 cups | Optional, homemade or store-bought |
The vanilla bean is the star here—Madagascar bourbon beans from Penzeys or your local specialty store give that deep, floral aroma. If you can’t find whole beans, high-quality pure extract works, but don’t skimp on the vanilla extract. For the flour, King Arthur or Gold Medal are my go-tos—they bake evenly without weighing you down. The butter? Plugrá or Land O’Lakes are reliable, but grab the European-style if you want extra richness. Room temperature ingredients are non-negotiable—cold butter and eggs won’t mix properly, and you’ll end up with dense cake. Let everything sit out for 1-2 hours before starting.
No vanilla bean? Double the vanilla extract—just know it won’t be the same. Swap whole milk for almond or oat milk if needed, but the cake won’t be quite as tender. For a gluten-free version, King Arthur GF flour blend works perfectly—just add 1 tsp xanthan gum. The baking powder is crucial—double-acting ensures proper rise. If you’re short on time, pre-made buttercream from Betty Crocker or Duncan Hines saves steps, but homemade (butter + powdered sugar + milk) tastes infinitely better. The oil keeps the crumb moist—don’t skip it, even if you’re using butter elsewhere.
This cake keeps beautifully—3 days at room temperature wrapped in plastic, or 1 week refrigerated in an airtight container. For longer storage, freeze slices wrapped individually for up to 3 months. The frosting can be added fresh or stored separately—just bring it to room temp before spreading. I always bake mine the night before and let it sit overnight; the flavors meld even more, and the crumb softens just right. Slice with a hot knife for clean cuts—trust me on this.
Why You’ll Love This Recipe
- No-Fuss Mixing: I swear by this recipe because it’s just three bowls—no fancy whisks or sifters. Cream the butter and sugar until light, fold in the vanilla, and you’re basically done. The flour and baking powder go in last, and boom: no lumps, no stress.
- Vanilla Kisses: That scraped vanilla bean? It’s the star. The rich, buttery crumb gets this deep, warm vanilla punch that makes store-bought frosting taste like a sad afterthought. Honestly, I’ve skipped frosting entirely just to let the cake shine.
- Birthday or Breakfast: This size is perfect—big enough for a crowd but not so huge it goes to waste. I’ve served it at birthday parties (with whipped cream), as a weekend brunch cake (with jam), and even as a midnight snack (straight from the fridge). It’s the chameleon of desserts.
- Budget-Friendly Stretch: Butter and sugar are the only splurges, and they go a long way. A single 11-inch cake feeds 8–10 people, so half goes in the freezer for next week’s coffee break. Leftovers? They’re the best kind—soft, moist, and still delicious after three days.
Step-by-step instructions for layered vanilla bean cake
This one-pan vanilla bean cake delivers bakery-style layers with a tender crumb and rich flavor.
Prepare the Cake Batter
Preheat your oven to 350°F and grease an 11-inch round cake pan with the 1 cup unsalted butter, reserving a small amount for brushing later. Line the bottom with parchment paper for easy removal.
In a stand mixer fitted with the paddle attachment, cream together the 1 cup unsalted butter and 2 cups granulated sugar on medium speed for 3-4 minutes until light and fluffy. Scrape down the sides as needed. This step is crucial—it incorporates air that creates that signature tender crumb.
Add the 4 whole large eggs, one at a time, mixing well after each addition. Then add the 1 tbsp vanilla extract and scrape the seeds from the 2 whole vanilla beans, adding both seeds and pod to the mixture. Mix until fully combined.
In a separate bowl, whisk together the 2.5 cups all-purpose flour, 2 tsp baking powder, and 0.5 tsp salt. With the mixer on low speed, gradually add the dry ingredients to the wet, alternating with the 1 cup milk and 0.5 cup vegetable oil in three additions. Begin and end with flour. Mix just until combined—overmixing develops gluten and makes the cake tough.
Bake the Cake Layers
Pour the batter evenly into the prepared cake pan and smooth the top with a spatula. Bake for 30-35 minutes or until a toothpick inserted in the center comes out clean. The cake should be golden brown and spring back when gently pressed.
Here’s the thing—I like to rotate the pan halfway through baking for even heat distribution. If the edges brown too quickly, tent the pan with foil to prevent overbrowning. The cake is done when it pulls away from the sides of the pan and has a slight bounce to the touch.
Remove the cake from the oven and let it cool in the pan for 10 minutes. Then invert onto a wire rack to cool completely. This gradual cooling prevents cracking and maintains that perfect structure.
Assemble the Cake Layers
Once the cake is completely cool, use a serrated knife to trim the dome from the top and level the cake. Then use a long serrated knife or cake leveler to cut the cake horizontally into three even layers. I find it easiest to place a long piece of tape on the knife as a guide for consistent thickness.
Place the first layer on a cake stand or plate. Spread ⅓ cup buttercream frosting evenly over the top, leaving a ½-inch border unfrosted. Repeat with the remaining layers, stacking them with the frosting between each layer. This ensures clean layers and prevents the cake from becoming soggy.
For the final touch, spread the remaining 1⅔ cups buttercream frosting evenly over the top and sides of the cake. Use a bench scraper to create smooth, clean edges. Chill the cake in the refrigerator for 30 minutes before serving to allow the frosting to set.
Pro Tips For Making 11 Inch Cake
- Cream Butter Slowly: Beat the butter and sugar until it’s pale, not just fluffy—about 3-5 minutes with an electric mixer. I learned this the hard way: rushing it leaves a dense cake, and no one wants that. The butter needs time to fully emulsify with the sugar for that tender crumb.
- Sift the Flour Twice: Don’t skip sifting the flour, even if it looks fine. Use a fine-mesh sieve and do it twice—once before mixing, once after adding baking powder—to avoid lumps and guarantee even distribution. My first cake had weird pockets of dryness until I started doing this.
- Avoid Overmixing Batter: Stop folding in the flour the second it’s just combined. Overmixing develops gluten, and that’s how you end up with a tough, chewy cake instead of a light one. Give it a few gentle stirs with a spatula—no need to go full-on baker’s elbow grease.
- Rotate the Pan: Swap the cake pan halfway through baking (around 25-30 minutes). The oven’s heat isn’t even, and this ensures the edges and center cook uniformly. I used to pull out uneven cakes until I remembered my mom’s trick—now they’re golden all over.
Make-ahead tips for 11 inch cake
Batter Prep Ahead
Mix the cake batter up to 24 hours in advance and store it in an airtight container in the refrigerator. The flavors deepen overnight, and the batter comes to room temperature quickly when ready to bake.
I always prepare mine the night before—just let it sit at room temperature for 1 hour before pouring into the pan. This trick eliminates last-minute stress and ensures perfect texture. 💫
Bake & Freeze Layers
Bake the cake as directed, then let it cool completely before slicing into layers. Wrap each layer individually in plastic wrap and freeze for up to 3 months. When ready to assemble, thaw the layers at room temperature for 1 hour before frosting.
This method is perfect for special occasions when you want to bake ahead but assemble fresh. The cake maintains its moisture and structure beautifully. ❄️
Frosting Prep
Make your buttercream frosting 1 day ahead and store it in an airtight container at room temperature. If using homemade frosting, cover it tightly to prevent drying. For store-bought frosting, follow the package instructions for storage.
Re-whip before spreading to ensure smooth, fluffy texture. I like to make mine a day ahead so it’s ready to go when the cake is cool. 🍰
Assemble Early
Assemble the cake up to 4 hours before serving. Place it in the refrigerator to set the frosting, then bring it to room temperature before slicing. This timing works perfectly for events where you need to serve the cake later in the day.
The frosting stays smooth, and the cake maintains its structure without drying out. Trust me, this is a game-changer for stress-free serving. ✨
Storage Shortcuts
Store the fully assembled cake in an airtight container at room temperature for 3 days or refrigerate for 1 week. If you’re freezing the whole cake, wrap it tightly in plastic wrap followed by aluminum foil to prevent freezer burn.
Thaw overnight in the refrigerator before serving. This method keeps the cake fresh and delicious for days without losing its moist texture. 💡
Nutrition facts
Frequently asked questions
Why does this recipe use an 11-inch pan instead of standard layers?
An 11-inch pan creates a single, sturdy cake that’s easy to slice into three perfect layers without the fuss of stacking multiple small cakes. The larger surface area also allows for even baking, preventing cracks or uneven rises that often happen with thin layers. Plus, it eliminates the need for layering tools or tricky assembly!
Can I make this cake without a stand mixer?
Use a hand mixer or even a whisk for the initial butter-sugar creaming (it’ll take 5-7 minutes of vigorous mixing). For the dry ingredients, fold them in with a spatula—just be gentle to avoid overmixing. The key is patience; the extra effort ensures that tender crumb.
How do I fix a cracked top on my cake?
Cracks usually happen from overbaking or sudden temperature changes. If you notice cracks forming during baking, tent the pan with foil. For minor cracks, they’re purely cosmetic—just frost over them! For deep cracks, slice the cake horizontally to hide them, or use a thin layer of frosting to blend them into the design.
What’s the best way to store leftovers?
Wrap the cake tightly in plastic wrap and store at room temperature for 2-3 days. For longer storage, refrigerate for up to 1 week or freeze slices (individually wrapped) for 3 months. Thaw frozen slices overnight in the fridge. Never leave it out uncovered—moisture causes drying or sogginess.
Can I substitute vanilla extract for vanilla bean?
Yes, but the flavor will be less complex. Use 2 tablespoons of high-quality pure vanilla extract (like Madagascar bourbon) instead of the beans. For extra depth, add ½ teaspoon of vanilla bean paste or a pinch of ground vanilla bean seeds. The extract won’t replicate the floral notes, but it’ll still taste delicious!

- 3lb Prime Rib Roast Recipe: Juicy Pink Center Guaranteed in 3 Hours - October 31, 2026
- 5 Spice Cake Recipe: Warmly Spiced Layers With Crunchy Top - October 31, 2026
- 1950’s Macaroni and Cheese Recipe: Nostalgic Creamy Cheese Sauce with Buttery Noodles - October 31, 2026