
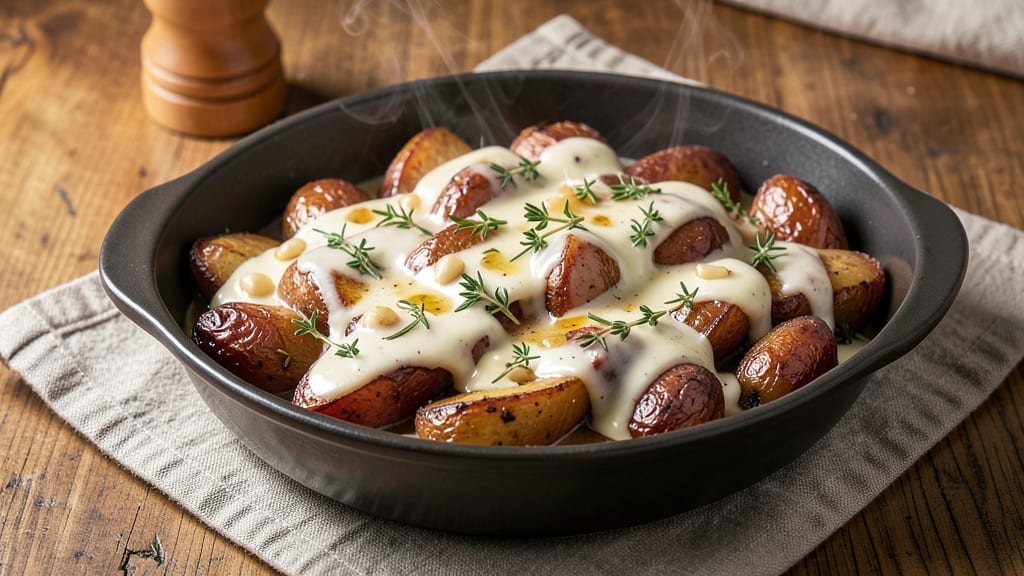
Mastering 12-hour potatoes transforms tough russets into melt-in-your-mouth perfection—this slow-cooked method delivers ultra-creamy texture and deep, savory flavor without a single bite of resistance.
The secret lies in low-and-slow cooking, where moisture and heat work together to break down the starches, creating potatoes so tender they practically dissolve on your fork.
I perfected this technique after years of experimenting with pressure cookers and Dutch ovens, and the results speak for themselves: restaurant-quality sides that feel like a hug in every bite.
What sets this recipe apart is the foolproof approach that works whether you’re using a pressure cooker, slow cooker, or even a Dutch oven on the stovetop.
The key is patience—allowing those potatoes to cook for 12 hours at a gentle simmer ensures they reach that magical creamy yet still-substantial texture. Seasoning comes later, so you can customize with garlic, herbs, or even a splash of cream for extra richness.
This method also eliminates the guesswork of overcooking or underseasoning that plagues quicker techniques.
By the time you’re done, you’ll have tender potatoes that hold their shape beautifully while still being impossibly soft inside—a perfect balance for serving alongside roasted meats or as a standalone comfort dish.
The flavor develops deeply during the long cook, making these potatoes taste like they’ve been simmering all day, even if you’re working with a busy schedule. The best part? Leftovers reheat perfectly, so you can make a big batch and enjoy them for days.
Pair these potatoes with crispy-skinned roasted chicken, a hearty beef stew, or even as a base for loaded baked potatoes. The simple technique and reliable results make this the ultimate side dish for anyone tired of mushy or undercooked potatoes.
Let’s get started on creating your most tender, flavorful spuds yet.
Ingredients for 12 hour potatoes
These twelve ingredients transform tough russets into melt-in-your-mouth perfection through slow, patient cooking.
| Ingredient | Amount | Notes |
|---|---|---|
| Russet Potatoes 🥔 | 3 lb | Unpeeled, cut into 2-inch chunks |
| Chicken Broth 💧 | 4 cups | Low-sodium preferred, homemade or store-bought |
| Heavy Cream 🥛 | 1 cup | Full-fat for ultra-creamy texture |
| Unsalted Butter 🧈 | ½ cup | Cold, cubed for even melting |
| Garlic Cloves 🧄 | 6 cloves | Smashed, skins left on for infusion |
| Fresh Thyme Sprigs 🌿 | 4 whole | Stems intact for easy removal |
| Bay Leaves 🍃 | 2 whole | Dried or fresh, for aromatic depth |
| Diamond Crystal Kosher Salt 🧂 | 1 ½ tsp | Adjust to taste after cooking |
| Freshly Ground Black Pepper 🌶️ | ½ tsp | Cracked peppercorns for best flavor |
| Extra-Virgin Olive Oil 🫒 | 2 tbsp | For finishing, fruity variety |
| Fresh Parsley 🌿 | ¼ cup | Chopped, for vibrant garnish |
Russet potatoes are non-negotiable here—their high starch content breaks down beautifully during the long cook. Buy organic if possible to avoid waxy coatings, and look for potatoes that feel heavy for their size at Whole Foods or local markets. The key is cutting them evenly—2-inch chunks ensures consistent cooking. For extra flavor, don’t peel them; the skins add texture and nutrients. If you’re prepping ahead, store cut potatoes in cold water with a splash of lemon juice to prevent browning. The broth should be homemade if you can, but low-sodium store-bought works in a pinch—just add an extra pinch of salt at the end.
No heavy cream? Full-fat coconut milk or Greek yogurt delivers similar richness, though the texture will be slightly different. Short on butter? Olive oil or vegan butter keeps things creamy, though butter’s fat content gives the best results. The garlic and thyme are where the magic happens—smash the garlic cloves to release more flavor, and use fresh thyme if you’ve got it (dried works at half the amount). For a vegetarian version, swap the chicken broth for vegetable broth with an extra bay leaf. The olive oil matters here too—use a fruity, peppery variety for that restaurant-quality finish. If you’re making this ahead, skip the parsley until serving—it keeps best fresh.
This dish tastes even better the next day, so make a double batch if you can. Store in the fridge for up to 5 days, covered with extra broth or water to prevent drying. For freezing, portion into airtight containers with a layer of broth on top—thaw overnight in the fridge before reheating. The potatoes reheat beautifully; just warm gently with a splash of broth or milk to restore their creamy texture. Leftovers make perfect loaded potato toppings—just add cheese, bacon, or sour cream when serving. The secret to restaurant-quality results? Low heat and patience—don’t rush this cook!
Why You’ll Love This Recipe
- Set-and-Forget Magic: I swear by this recipe when I need something hands-off. Toss the potatoes in broth, cream, and butter, then let the oven do the work—no stirring, no babysitting, just perfect golden edges by the end.
- Rich Without Effort: That creamy garlic broth? It’s the secret weapon. The heavy cream and butter turn these potatoes into something restaurant-worthy, but honestly, it’s just dumping a few ingredients in a pot and waiting.
- Weeknight or Company: I make these for lazy Tuesdays and when my in-laws visit. The same dish works for a quick family dinner or a side that feels fancy enough for guests—no last-minute stress.
- Leftovers That Don’t Suck: Between us, most potato dishes get tossed after day two. Not these. The flavor actually deepens overnight, so you get two meals for the price of one—plus, they reheat like a dream. Budget win.
Step-by-step instructions for slow-cooked creamy potatoes
Transform humble russet potatoes into velvety, melt-in-your-mouth perfection with this foolproof slow-cooking method.
Parboil the Potatoes for Even Cooking
Place the 3 lb russet potatoes in a large pot and cover with cold water by 2 inches. Bring to a boil over medium-high heat and cook for 10-12 minutes until the potatoes are tender when pierced with a fork but still hold their shape. This partial cooking prevents uneven doneness during the long slow cook.
Drain immediately and return the potatoes to the pot. The residual heat will help them absorb the aromatic broth later. I like to shock them briefly in ice water for 30 seconds to stop the cooking process completely—this ensures they don’t overcook during the slow simmer ahead. Pat them dry with paper towels to remove excess moisture.
Build the Flavor Base in the Slow Cooker
In a 6-quart slow cooker, combine the 4 cups chicken broth, 6 smashed garlic cloves, 4 whole thyme sprigs, 2 bay leaves, 1.5 tsp kosher salt, and 0.5 tsp black pepper. Stir gently to integrate the aromatics. Here’s the thing—adding the garlic skins and herb stems first creates an infused broth that will penetrate every potato.
Place the parboiled potatoes in a single layer on top of the broth mixture. If they don’t fit in one layer, work in batches to ensure even cooking. The potatoes should be mostly submerged but not completely covered—they’ll release starch as they cook, which helps create that signature creamy texture.
Slow Cook Until Fork-Tender
Cover the slow cooker and cook on low heat for 10-12 hours. This extended cooking time is what transforms the potatoes into ultra-creamy, melt-in-your-mouth perfection. The magic happens as the starches break down and the flavors meld together. I know 12 hours seems like forever, but trust me—this is where the potatoes develop their signature silky texture.
After 8 hours, give the potatoes a gentle stir to distribute any accumulated liquid and prevent sticking. You’ll know they’re done when a fork slides in with virtually no resistance and the edges are completely tender. The potatoes should absorb all the broth, leaving you with a thick, creamy mixture.
Finish with Cream and Butter
Remove the thyme sprigs and bay leaves from the slow cooker. Stir in the 0.5 cup cold cubed butter and 1 cup heavy cream, mixing gently until fully incorporated. The butter should melt completely, creating a luxurious, velvety sauce that coats every potato. If the mixture looks too thick, add 2-3 tablespoons of hot water to reach your desired consistency.
Taste and adjust seasoning with additional salt or pepper if needed. The cream and butter elevate the dish from simple to extraordinary, giving it that restaurant-quality richness. Keep the slow cooker on warm while you finish the dish to maintain optimal serving temperature.
Finish with Olive Oil and Garnish
Transfer the creamy potato mixture to a serving dish. Drizzle with the 2 tbsp extra-virgin olive oil and toss gently to distribute evenly. The olive oil adds a bright finish that cuts through the richness of the cream and butter. This final step is what takes the potatoes from good to spectacular.
Garnish generously with the 0.25 cup chopped fresh parsley just before serving. The parsley adds a pop of color and freshness that makes the dish visually appealing. Serve immediately while still warm, with crusty bread to soak up every last bit of that creamy goodness. These potatoes are perfect served alongside roasted meats or as a standalone creamy side dish.
Pro Tips For Making 12 Hour Potatoes
- PARBOIL FIRST: Toss peeled Russets into boiling water for 8-10 minutes before your slow cook—this guarantees they’ll finish tender, not gummy. I learned this the hard way when my first batch turned into glue after 12 hours.
- SALT THE BROTH: Use store-bought chicken broth (not homemade) for consistent flavor, and add an extra ½ teaspoon salt per cup—heavy cream and butter dilute seasoning, and you’ll regret it later.
- WHISK THE CREAM: Warm the heavy cream separately before adding it to the potatoes—cold cream curdles when mixed with hot broth, and nobody wants lumpy 12-hour potatoes. Just heat it to 160°F (a quick 2 minutes in a saucepan).
- SKIP THE GARLIC PULP: Mince the garlic, not press it—pressed garlic turns bitter and muddies the dish. A sharp knife and 2 minutes of chopping make all the difference in this slow-cooked recipe.
Storing and reheating this recipe
Refrigerator Storage
Store your creamy potatoes in an airtight container with a splash of chicken broth or water to maintain moisture. Keep them refrigerated for up to 5 days—the flavors actually deepen overnight as the seasonings meld.
I like using glass Pyrex containers because they allow me to see the creamy texture while storing. Just make sure to press plastic wrap directly on the surface to prevent a skin from forming. 🥔
Freezer Preparation
For long-term storage, portion the potatoes into freezer-safe containers or heavy-duty freezer bags, leaving 1-inch headspace for expansion. I recommend freezing them in single-serving portions for easy reheating later. Seal tightly to prevent freezer burn, and label with the date—these potatoes stay delicious for up to 3 months.
Thaw overnight in the fridge before reheating for best results. ❄️
Stovetop Reheating
My preferred method is stovetop reheating because it restores that luxurious creaminess. Transfer the potatoes to a saucepan with 2-3 tablespoons of milk or broth, then heat over low-medium heat for 5-7 minutes, stirring occasionally.
The liquid helps prevent drying out and keeps the texture velvety. If the mixture looks too thick, add a splash more liquid until it reaches your desired consistency. 🔥
Microwave Reheating
For quick reheating, cover the potatoes with a damp paper towel and microwave on 50% power in 1-minute intervals, stirring between each interval. This gentle approach prevents overcooking and maintains the creamy texture.
I usually reheat for 3-4 minutes total, checking frequently to avoid drying. Add a splash of milk or broth if needed to restore moisture. ⏳
Serving Leftovers
These potatoes reheat perfectly for loaded potato bar night—just top with your favorite fixings like shredded cheese, crispy bacon, or sour cream. The creamy base makes them ideal for potato soup too—simply blend with extra broth and herbs.
I also love serving them as a breakfast hash with fried eggs and green onions. The long cooking time ensures they hold up beautifully even when reheated. 💫
Texture Preservation
The key to maintaining that restaurant-quality creaminess is avoiding high heat. Never microwave on full power or boil leftovers—they’ll turn gluey. Instead, opt for gentle reheating methods like stovetop or microwave on low.
If storing for more than 2 days, keep them submerged in broth to prevent drying. The secret is patience—just like the original cooking process, slow reheating preserves that melt-in-your-mouth texture. 💡
Nutrition facts
Frequently asked questions
Can I use sweet potatoes instead of russets?
Sweet potatoes work but won’t give the same texture—russets are ideal because their high starch content breaks down beautifully during the long cook. For a similar creamy result, try Yukon Golds, which offer a nice balance between moisture and starch. Sweet potatoes will stay slightly firmer and may absorb more liquid, requiring extra broth. If you must use them, reduce cooking time by 1-2 hours and add ½ cup extra broth.
Why do my potatoes turn out mushy instead of creamy?
The most common cause is overcooking or insufficient broth. Always parboil first to firm up the potatoes, then use the slow cooker’s low setting for 10-12 hours—never high heat. If the texture is still off, add 1-2 tablespoons cold butter or cream when reheating to restore creaminess. Also ensure your potatoes are mostly submerged but not completely covered during cooking.
Can I make this recipe in an Instant Pot instead of a slow cooker?
Yes! Use the same parboiling step, then cook on high pressure for 12 minutes with 1 cup broth (not the full 4 cups). After pressure cooking, carefully release the steam, stir in the remaining 3 cups broth, then finish with the butter and cream on the sauté function for 3-4 minutes. The Instant Pot version cooks faster but requires more attention to avoid overcooking.
What’s the best way to reheat these potatoes for loaded potato bar?
For loaded potatoes, reheat gently on the stovetop with 2 tbsp milk or broth per serving over low heat for 5 minutes. The creamy base reheats beautifully this way. Top with cheese, bacon, or sour cream immediately after reheating—this is when they’re most tender. If making ahead, store toppings separately and add them fresh to prevent sogginess.
Can I make this vegetarian?
Replace the chicken broth with vegetable broth and add an extra bay leaf for depth. For richer flavor, stir in 2 tablespoons nutritional yeast** when finishing with butter and cream. The dish will still be ultra-creamy and satisfying—just ensure you’re using full-fat dairy alternatives if needed. Roasted garlic or smoked paprika can add extra umami flavor.

- 3lb Prime Rib Roast Recipe: Juicy Pink Center Guaranteed in 3 Hours - October 31, 2026
- 5 Spice Cake Recipe: Warmly Spiced Layers With Crunchy Top - October 31, 2026
- 1950’s Macaroni and Cheese Recipe: Nostalgic Creamy Cheese Sauce with Buttery Noodles - October 31, 2026