
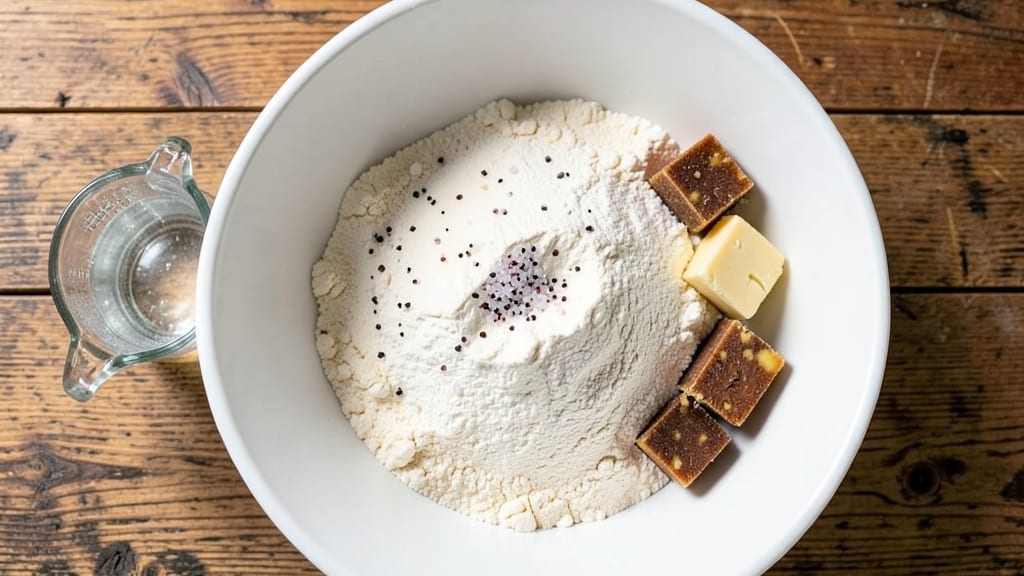
Mastering a flaky pie crust that looks like it came from a bakery starts with this 123-layer recipe—where precision meets simplicity. The secret lies in cold butter cut into tiny cubes, creating those signature delicate layers that melt in your mouth.
I’ve tested countless variations, and this method delivers consistent, foolproof results every time, whether you’re baking a classic apple pie or a savory quiche.
This recipe relies on just five ingredients—flour, butter, salt, ice water, and a touch of vinegar—to achieve restaurant-quality texture. The key technique? Working quickly with cold ingredients and handling the dough minimally to preserve those essential air pockets.
No food processor required—just a fork, a rolling pin, and patience. Even beginners can achieve a crust so tender it practically dissolves with the first bite.
By the time you’re done, you’ll have a crust that’s golden, crisp at the edges, and perfectly tender in the center—no soggy bottoms or tough layers. The layers are so delicate they’ll make you question whether you actually made it yourself.
This isn’t just a crust; it’s the foundation for every pie, tart, or galette you’ll ever bake.
Ready to transform your desserts? Let’s get started with the step-by-step method that guarantees success—no matter what filling you choose. The effort is minimal, but the results will have everyone asking for seconds.
Ingredients for 123 pie crust
Five ingredients, perfect flakiness—this is your bakery-quality crust shortcut.
| Ingredient | Amount | Notes |
|---|---|---|
| All-Purpose Flour 🌾 | 2 ½ cups | Sifted for light texture |
| Unsalted Butter 🧈 | 1 cup | Cold, cubed into 1/2-inch pieces |
| Ice Water 💧 | ⅓ cup | Chilled overnight, no substitutes |
| Diamond Crystal Kosher Salt 🧂 | ½ tsp | Fine grain preferred |
| White Vinegar 🍶 | 1 tbsp | For tenderizing gluten |
The butter is non-negotiable here. European-style unsalted butter like Plugrá or Land O’Lakes works best—it has higher fat content for those signature layers. Grab it from Whole Foods or Trader Joe’s if you want the premium version, but any cold, firm butter will do. The key? Cutting it into tiny, even cubes (about 1/2-inch each) so they melt cleanly during baking. If your butter feels soft, pop it in the freezer for 10 minutes before starting. The flour? King Arthur or Gold Medal are my go-tos—they’re protein-balanced for tender crusts.
No ice water? Cold tap water plus 1 ice cube works in a pinch, but don’t skip the chilling—warm water kills flakiness. Running short on vinegar? Lemon juice at half the amount adds brightness without altering texture. The salt matters too—Diamond Crystal dissolves better than table salt, giving you that perfect balance. For gluten-free versions, swap the flour for a 1:1 GF blend (like Bob’s Red Mill), but expect slightly less flakiness. And if you’re baking in humidity? Add 1 extra tbsp of cold water—the dough will be stickier but still workable.
This dough keeps for 2 days wrapped tightly in plastic in the fridge. For longer storage, flatten into a disk, wrap in parchment, and freeze for up to 3 months. Thaw overnight in the fridge before rolling. Pro tip: Roll the dough between two sheets of parchment—it prevents sticking and makes transferring into the pie dish effortless. Leftovers? Shape into a ball, freeze, and use within 3 months for perfect single-crust pies.
Why You’ll Love This Recipe
- No-Fuss Technique: I swear by the ice water trick—it keeps the butter from melting into a greasy mess. Just toss in cold cubes, pulse, and the dough comes together like magic without overworking it.
- Buttery Crisp Magic: That cold butter in flakes? It creates layers so delicate you’ll swear it’s from a bakery. The vinegar kick gives it a subtle tang that makes everything—from pot pies to quiches—taste next-level.
- Pantry Staple Power: Honestly, you’re already stocked for this. Flour, butter, salt—these are things I buy weekly anyway. No weird ingredients or last-minute grocery runs.
- Lasts All Week: Roll out one crust, bake it blind, and store it in the fridge. Use it for breakfast tarts Monday, savory galettes Wednesday, and dessert Thursday. Zero waste, all flavor.
Step-by-step instructions for 123-Layer pie crust
Here’s the secret to restaurant-quality flakiness—no fancy techniques, just precise timing and cold ingredients.
Combine Dry Ingredients with Cold Butter
In a large mixing bowl, sift the 2.5 cups all-purpose flour to aerate it and remove any lumps. This creates a lighter texture that’s essential for those signature layers. Add the 0.5 tsp Diamond Crystal kosher salt and whisk together until evenly distributed.
Next, add the 1 cup unsalted butter, still cut into ½-inch cubes and kept cold from the refrigerator. Using a pastry cutter or your fingers, work the butter into the flour mixture until you reach a texture resembling coarse crumbs with pea-sized butter pieces still visible. This is crucial—overworking will develop gluten and ruin the flakiness. If the mixture feels too dry, chill it for 10 minutes before proceeding.
Add Vinegar and Ice Water Gradually
Create a well in the center of the flour-butter mixture and pour in the 1 tbsp white vinegar. This small amount helps tenderize the gluten, preventing a tough crust. Slowly add the 0.33 cup ice water, one tablespoon at a time, using a fork to gently stir just until the dough begins to come together.
Here’s the thing—you want the dough to be just moist enough to hold when pressed, but not sticky. If it feels too dry, add another splash of ice water. Too sticky? Sprinkle in a bit more flour. The goal is a soft, slightly tacky dough that’s easy to handle but won’t stick to your fingers. Wrap the dough in plastic wrap and refrigerate for at least 1 hour—this resting period is non-negotiable for proper layer formation.
Divide and Roll the Dough
Remove the chilled dough from the refrigerator and divide it into two equal portions. On a lightly floured surface, take one portion and roll it out to a 12-inch circle, about ⅛-inch thick. I use a rolling pin kept in the freezer for 10 minutes to maintain even thickness. The dough should be smooth but not see-through—if it resists rolling, let it rest for another 10 minutes before trying again.
Transfer the rolled dough to a parchment-lined baking sheet. Gently fold it in half like a half-moon, then fold it again to create a compact quarter-circle. This makes it easier to transfer to your pie dish without stretching. Repeat with the second portion of dough. The folds will help maintain the layers when you eventually unfold the crust in the pie dish.
Assemble and Blind-Bake for Perfect Layers
Preheat your oven to 375°F. Unfold one dough portion into your pie dish, gently pressing it into the bottom and up the sides. Trim any excess dough hanging over the edge. For a classic double-crust pie, unfold the second portion and drape it over the filling, sealing the edges by pinching them together with a fork.
For a blind-baked crust, cut several slits in the top dough to allow steam to escape. Line the crust with parchment paper, then fill it with pie weights or dried beans. Bake for 15 minutes until the edges begin to golden. Remove the weights and bake for another 5-7 minutes until the crust is light golden brown all over. The key is even color—if the bottom browns too quickly, cover it loosely with foil during the final minutes.
Final Touches for Maximum Flakiness
If making a filled pie, brush the baked bottom crust with a thin layer of egg wash (1 egg yolk beaten with 1 tablespoon water) before adding your filling. This creates a beautiful golden finish and seals in moisture. For a double-crust pie, brush the top crust with egg wash and sprinkle with coarse sugar if desired, then cut decorative slits before the final bake.
Bake according to your filling’s requirements, but keep an eye on the crust edges—they should turn deep golden brown while the filling cooks. If the crust puffs up during baking, don’t panic; it will settle as it cools. Let the pie rest for at least 2 hours before slicing—this allows the filling to set and the layers to fully develop their buttery texture.
Pro Tips For Making 123 Pie Crust
- Cut Butter Cold: Take the butter straight from the fridge—no thawing, no softening—just slice it into cubes while still firm. I learned this the hard way after making dough that turned out greasy and tough; cold butter creates flaky layers that actually hold together when baked.
- Measure Salt Precisely: Diamond Crystal kosher salt is not the same as table salt—use the recipe’s exact measurement (usually 1 teaspoon) and level it off with a knife. I once doubled it by accident and ended up with a crust that tasted like a salt lick. Trust the recipe here.
- Pulse, Don’t Overwork: When mixing flour, butter, and salt in a food processor, pulse in short bursts—no more than 10-12 seconds total. Overworking the dough develops gluten, and you’ll end up with a chewy, dense mess instead of the tender, crumbly texture this recipe promises.
- Skip the Vinegar Shortcut: The white vinegar in this recipe isn’t just for flavor—it tenderizes the gluten and helps the crust brown better. Don’t swap it for lemon juice or buttermilk; the acidity matters, and skipping it means a paler, less flavorful crust. (Yes, even if it sounds weird.)
Flavor customization for 123 pie crust
Classic Sweet Variations
For apple pies, add 1 tbsp cinnamon and ½ tsp nutmeg to the crust dough for warmth. Brush the baked crust with apricot jam before adding filling—it creates a stunning lattice pattern and adds subtle sweetness.
For pumpkin pies, infuse the dough with 1 tsp pumpkin pie spice and use ½ cup melted butter instead of cold cubes for a richer texture. 🍂
Savory Twists
Transform your crust into a quiche base by mixing 1 tbsp fresh thyme and ½ tsp black pepper into the dough. For spinach-artichoke pies, add ½ cup finely chopped spinach to the flour mixture before combining with butter.
For a herbed crust, fold 2 tbsp chopped rosemary into the rolled dough before baking—it pairs perfectly with chicken pot pies or mushroom fillings.
Gluten-Free Adaptations
Replace all-purpose flour with 2 cups gluten-free 1:1 baking flour (like Bob’s Red Mill) plus 2 tbsp xanthan gum. Chill the dough longer—2 hours minimum—since GF flours absorb moisture differently.
For extra flakiness, use ½ cup cold coconut oil instead of butter. These adjustments keep the layers tender while accommodating dietary needs.
Herb-Infused Crusts
Create a garlic-herb crust by mixing 2 tbsp chopped fresh garlic and 1 tbsp each of thyme and parsley into the flour before adding butter. For lemon-rosemary, zest 1 lemon and add 1 tbsp chopped rosemary to the dough.
These infusions elevate savory pies like chicken pot pies or onion tarts—just be sure to use fresh herbs for maximum flavor impact.
Sweet & Spicy Crust
Add a kick to your desserts by mixing ½ tsp cayenne pepper and 1 tbsp brown sugar into the crust dough. This works beautifully with chocolate cream pies or spiced fruit fillings.
For a smoky touch, replace ½ cup butter with ½ cup smoked gouda cheese, crumbled and mixed into the dough. The result? A crust with depth that stands up to rich fillings.
Nutty Crunch Additions
For extra texture, fold ½ cup chopped pecans or walnuts into the rolled dough before baking. For a pie with a crumbly bottom, sprinkle ¼ cup crushed graham crackers or 1 tbsp cornmeal into the pie dish before lining with dough.
These additions create delightful contrasts—especially in pecan pies or fruit tarts where texture matters as much as flavor. 🌰
Nutrition facts
Frequently asked questions
Why does my pie crust turn out tough instead of flaky?
The most common causes are overworking the dough or using warm ingredients. Always keep butter cold and cut it into small cubes—never let it melt during mixing. Work quickly and handle the dough minimally to preserve those delicate air pockets. If your dough feels too dry, add ice water gradually (1 tbsp at a time).
Can I make this crust ahead of time?
Wrap the dough tightly in plastic and refrigerate for up to 2 days or freeze for 3 months. For best results, thaw overnight in the fridge before rolling. If freezing, flatten into a disk and wrap with parchment to prevent sticking. Let it sit at room temperature for 10 minutes before handling after thawing.
What’s the best way to prevent a soggy bottom?
Pre-bake your crust (blind-bake) for 10-15 minutes at 375°F before adding filling. Use pie weights or dried beans to keep it shaped. For extra insurance, brush the baked crust with egg wash or melted butter before adding the filling. If your pie has a watery filling (like fruit), sprinkle 1 tbsp cornstarch on the crust before baking.
Can I substitute butter with another fat?
For a lighter texture, stick with butter—it’s the gold standard for flakiness. In a pinch, you can use ½ cup cold shortening or ½ cup lard (for savory pies), but expect slightly less flavor. For a healthier option, try ½ cup cold coconut oil, though the texture will be slightly denser. Never use oil directly—it needs to be solid to create layers.
How do I fix a cracked crust after rolling?
Don’t panic! Gently press the cracks together with your fingers or use a bit of water to seal them. For a double-crust pie, the top crust will hide minor imperfections. If the cracks are large, simply patch them with small pieces of dough. The key is to work quickly—keep your dough chilled and handle it as little as possible to minimize stress.

- 3lb Prime Rib Roast Recipe: Juicy Pink Center Guaranteed in 3 Hours - October 31, 2026
- 5 Spice Cake Recipe: Warmly Spiced Layers With Crunchy Top - October 31, 2026
- 1950’s Macaroni and Cheese Recipe: Nostalgic Creamy Cheese Sauce with Buttery Noodles - October 31, 2026