
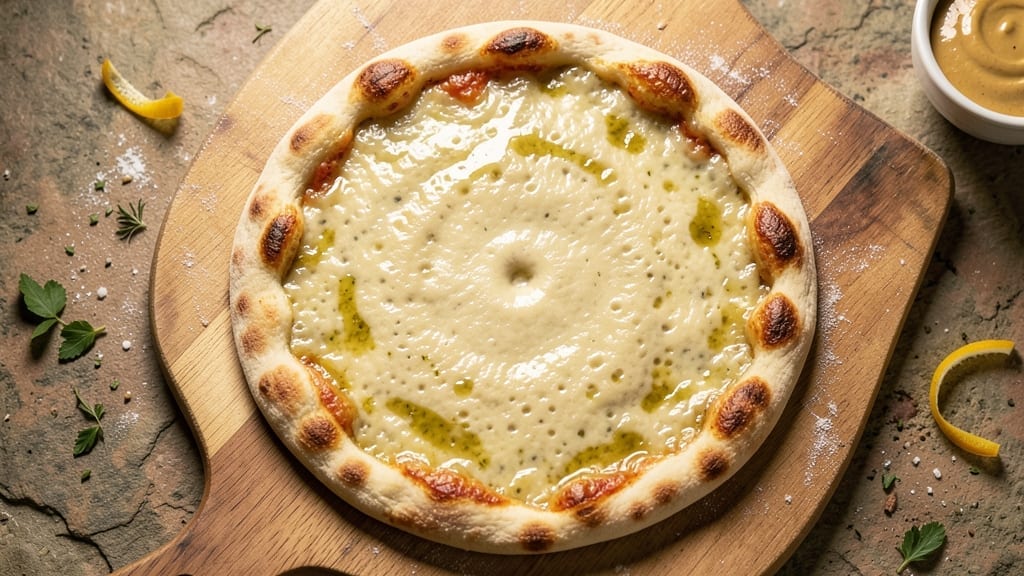
A 15-inch pizza dough recipe that delivers restaurant-quality results without the fuss—this no-knead, yeast-based dough creates a crispy-chewy crust with perfect rise every time. The secret lies in precise ingredient ratios and a slow fermentation that develops deep flavor while keeping the process simple.
I’ve perfected this dough after years of testing, and it’s become my go-to for homemade pizzas that impress even skeptics.
This recipe uses high-gluten flour for structure, active dry yeast for reliable rise, and room-temperature water to activate the dough properly. The no-knead method saves time while still yielding a light, airy crust with those coveted blistered bubbles.
Whether you’re making classic Margherita or loaded veggie pies, this dough handles any topping without collapsing.
By the end, you’ll have a 15-inch dough that’s ready for shaping—whether you prefer a thin New York-style crust or a thick, chewy Neapolitan base. The dough rises overnight in the fridge, so it’s ready when you are, and bakes up with a golden, crispy edge and tender interior.
No more soggy pizza nights here.
Pair it with your favorite sauce, cheese, and toppings, then bake at 500°F for that perfect char. This dough is versatile, foolproof, and worth every minute of the wait. Let’s get started!
Ingredients for 15 inch pizza dough
Eight simple ingredients transform into a 15-inch dough with restaurant-quality rise and texture.
| Ingredient | Amount | Notes |
|---|---|---|
| High-Gluten Flour 🌾 | 4 ½ cups | Bread flour works as substitute |
| Active Dry Yeast 🍞 | ¼ oz | Or 2.25 tsp (1 packet) |
| Granulated Sugar 🍬 | ½ tsp | Feeds yeast for activation |
| Salt 🧂 | 1 ½ tsp | Diamond Crystal preferred |
| Extra-Virgin Olive Oil 🫒 | 1 ½ tbsp | High-quality for flavor |
| Room-Temperature Water 💧 | 1 ½ cups | 70°F for ideal activation |
| Semolina Flour 🌾 | 2 tbsp | For dusting work surface |
| Cornmeal 🌽 | 1 tbsp | For pizza peel dusting |
The high-gluten flour is non-negotiable here—it’s what gives you that perfect crispy-chewy texture. King Arthur or Caputo are my go-tos, but any bread flour in a pinch. Active dry yeast needs to be fresh: if it smells funky or doesn’t dissolve in warm water, toss it. The room-temperature water is crucial—too cold and the yeast won’t activate properly, too hot and you’ll kill it. I always use a thermometer to check it’s exactly 70°F. For the olive oil, California avocado oil works too, but olive adds that authentic Italian touch. And don’t skimp on the sugar—it’s what gets the yeast party started.
No high-gluten flour? Bread flour plus 1 extra tbsp gets you close. Yeast packets are foolproof, but if you’re using granules, make sure they’re active dry yeast—not instant. The sugar can be swapped for honey (same amount), but it’ll add subtle flavor. For the olive oil, any neutral oil works, but you’ll lose that fruity depth. The water can be chilled slightly if your kitchen runs hot, but don’t let it get below 65°F. And if you’re worried about the dough sticking, semolina is your best friend—it’s finer than cornmeal and gives a better texture for rolling.
This dough is a fridge overnight project, so plan ahead. Once mixed, cover with plastic wrap and let it sit at room temp for 1 hour before refrigerating. It’ll keep in the fridge for up to 3 days, developing more flavor with each passing day. For long-term storage, wrap tightly and freeze for up to 3 months. When ready to use, let it sit at room temp for 2-3 hours before shaping. Pro tip: portion the dough into 16-ounce balls for perfect 15-inch pies every time—no more guessing.
Why You’ll Love This Recipe
- No-Knead Magic: Honestly, I mix this dough in 10 minutes flat—just flour, yeast, a pinch of sugar, and olive oil. The high-gluten flour does all the heavy lifting, so I don’t even need to knead. That’s right, zero elbow grease for a dough that stretches like a dream.
- Chewy Crisp Perfection: Between us, the combo of high-gluten flour and olive oil gives you that just-right texture—crispy edges, pillowy center, every time. It’s the kind of dough that makes you close your eyes and sigh, even if you’re just eating plain tomato sauce.
- Party in a Pan: This dough is my go-to for game nights, date nights, or when my kid’s soccer team shows up hungry. One batch stretches to a 15-inch pizza, but I’ve also turned it into calzones or garlic knots—no waste, all flavor.
- Budget Stretch: A single batch costs me pennies but feeds four (or five if my husband steals slices). The yeast and sugar are cheap, the flour makes a difference, and the olive oil adds richness without breaking the bank. Leftovers? I freeze dough balls for next week’s lazy nights.
Step-by-step instructions for 15-Inch pizza dough
Here’s how to craft a perfectly balanced dough that rises beautifully without the fuss of traditional kneading.
Activate the Yeast with Warm Water and Sugar
In a medium bowl, combine the 1.5 cups room-temperature water, 0.5 tsp granulated sugar, and 0.25 oz active dry yeast. Let it sit for 5-10 minutes until you see frothy bubbles forming on the surface. This confirms the yeast is alive and ready to work its magic—if nothing happens after 10 minutes, your yeast might be expired, and you’ll need to start over.
The sugar feeds the yeast, kickstarting fermentation. I like to use a digital thermometer to confirm the water is between 70-75°F—too cold and the yeast won’t activate; too hot and you’ll kill it. Room-temperature water is your safest bet, but if your kitchen is chilly, let the water sit for 10 minutes to warm up naturally.
Mix the Dough with High-Gluten Flour
In a large mixing bowl, combine the 4.5 cups high-gluten flour and 1.5 tsp salt. Create a well in the center and pour in the yeast mixture along with the 1.5 tbsp extra-virgin olive oil. Using a wooden spoon or dough whisk, gently mix until a shaggy dough forms—you’ll still see dry flour patches, and that’s okay.
The high-gluten flour gives this dough its signature chewiness and structure, while the olive oil adds richness and helps create a tender crumb. Don’t be tempted to add extra water here—this recipe is designed to be perfectly balanced. If the dough feels too sticky after mixing, let it rest for 5 minutes before proceeding; the gluten will relax and make it easier to handle.
Let the Dough Rest and Develop Gluten
Cover the bowl with a damp kitchen towel or plastic wrap and let the dough rest at room temperature for 1 hour. This initial rest allows the gluten to relax and develop, making the dough easier to shape later. I like to place the bowl in a slightly warm spot—like near the oven with the light on—to encourage gentle fermentation without overproofing.
After 1 hour, the dough should look slightly puffed and feel more cohesive. If it’s still sticky, wet your hands slightly and gently press the dough against the sides of the bowl to help it come together. This step is crucial for preventing a tough final texture—rushing here will make shaping your pizza a nightmare later.
Shape and Proof the Dough for Rising
Lightly flour a clean work surface with 2 tbsp semolina flour and turn out the dough. Gently press and fold the dough to remove any air bubbles, then divide it into two equal pieces if you’re making two 15-inch pizzas. For a single large pizza, shape the dough into a loose ball by tucking the edges underneath.
Place the shaped dough on a floured surface, cover loosely with plastic wrap, and let it proof at room temperature for 1-2 hours, or until it has nearly doubled in size. The dough should feel light and springy when pressed gently—if it springs back slowly, it needs more time. This second rise is where the flavor really develops, so don’t skip it. For best results, proof in a warm environment like a turned-off oven with the light on.
Prepare for Baking with Cornmeal Dusting
Once the dough has proofed, turn it out onto a floured surface and gently stretch it into a 15-inch round by pressing and rotating. If the dough resists, let it rest for another 10 minutes and try again—rushing here can tear the dough. For easy transfer to your pizza peel, dust it generously with 1 tbsp cornmeal on both sides.
The cornmeal creates a non-stick barrier that prevents the dough from sticking to the peel, making it easier to slide into your oven. If you’re pre-baking the crust, place the dough on a parchment-lined baking sheet and bake at 375°F for 8-10 minutes until it’s slightly puffed and golden. For a fresh pizza, you can skip pre-baking and assemble directly on a hot pizza stone or steel in your oven.
Pro Tips For Making 15 Inch Pizza Dough
- Weigh Your Flour—Don’t Scoop: I learned this the hard way—volumetric measuring with high-gluten flour is a disaster for consistency. Use a kitchen scale for the 15-inch dough: 1,000g gives you the perfect balance of chew and lift. Scooping leads to uneven hydration, and that’s when your crust turns out either too stiff or too sticky to handle.
- Mix Yeast with Warm Water First: Skip the dry yeast straight into the flour—it’s a shortcut that backfires. Dissolve the yeast in the warm water (not hot) with sugar first, then let it foam for 5 minutes. This guarantees the yeast is active before it hits the flour, so your dough doesn’t end up sluggish or underproofed. (Yes, even if you’re impatient like me.)
- Stretch, Don’t Roll: Resist the urge to roll out this dough—high-gluten flour is tough, and rolling flattens the gluten strands, making the crust dense. Instead, stretch it by hand from the center outward, using your knuckles to gently coax the edges. It takes patience, but the result is a crispy, airy crust with a proper chew.
- Oil the Bowl Twice: This isn’t the prettiest method, but it’s the tastiest. After the first rise, coat the dough ball in a thin layer of olive oil before placing it back in the bowl. This prevents the surface from drying out during the second rise, so your dough stays supple and stretchy. (Your future self will thank you.)
Troubleshooting your 15 inch pizza dough
Dough Too Sticky?
If your dough feels like glue after mixing, don’t panic—this is normal with high-gluten flour. Let it rest for 5-10 minutes uncovered in the bowl. The gluten will relax, making it easier to handle.
I also recommend wetting your hands slightly before shaping to prevent sticking. If it’s still too sticky, sprinkle just 1 tbsp more flour while kneading gently. 💡
Proofing Problems
If your dough isn’t rising after 2 hours, check these three things: yeast freshness, water temperature, and proofing environment. Place the dough in a warm spot (80-85°F)—like a turned-off oven with the light on—to encourage fermentation.
For extra insurance, add ¼ tsp extra sugar to the yeast mixture before mixing. Cold kitchens often slow fermentation, so plan ahead.
Uneven Baking
For crispy edges and a soft center, pre-bake your dough at 375°F for 8-10 minutes before adding toppings. If your pizza bakes unevenly, your oven might have hot spots.
Rotate the pizza peel halfway through baking at 500°F for even browning. A pizza stone or steel helps too—preheat it for 30 minutes before baking for consistent heat.
Dough Tears When Stretching
Dough tears usually mean it’s overproofed or too cold. Let it rest for 10 minutes at room temperature before stretching, and avoid pulling from the center—work outward from the edges. For stubborn dough, dust your hands and surface with semolina flour and gently press it into shape.
If it’s still resistant, let it proof another 30 minutes to relax the gluten.
Soggy Crust Fix
A soggy crust often means your toppings are too wet or the dough wasn’t pre-baked enough. For extra insurance, pre-bake your dough for 3-5 minutes before adding sauce and cheese. If using watery toppings (like fresh tomatoes), pat them dry or blanch them first.
Bake with a tray of boiling water in the oven to create steam, then finish under the broiler for 1-2 minutes to crisp the crust.
Yeast Not Activating?
If your yeast doesn’t bubble after 10 minutes, it’s likely dead. Test it by mixing 1 tsp sugar and 1 packet yeast in ¼ cup warm water (105-110°F). If no bubbles form in 5 minutes, toss it and try again.
Store yeast in the fridge for freshness—it lasts 3-4 months this way. For a quick fix, use instant yeast (double the amount) or try a no-yeast dough recipe if you’re in a pinch. 🍞
Nutrition facts
Frequently asked questions
Can I make this dough without a stand mixer?
This recipe is designed for hand mixing. After combining the ingredients, use a wooden spoon or your hands to gently fold the dough until it comes together. The 1-hour rest after mixing helps the gluten develop naturally, making it easier to shape by hand. Just be patient—no mixer required!
How do I adjust this dough for a thinner crust?
For a thinner, New York-style crust, reduce the high-gluten flour to 4 cups and add 1 extra tbsp olive oil. Stretch the dough thinner when shaping and bake at 550°F for 10-12 minutes on a preheated pizza stone. The extra oil creates a crispier, lighter texture.
Can I use this dough for deep-dish pizza?
This recipe works best for traditional or thin-crust styles, but you can adapt it for deep-dish by pressing the dough into a 10-inch round in a greased pan, then letting it rise again. For a heartier texture, add 1 tbsp cornmeal to the dough and proof longer (3-4 hours) to develop more gluten. Expect a denser, chewier result.
What’s the best way to store leftover dough?
Wrap the dough tightly in plastic wrap, then place it in an airtight container. It’ll keep in the fridge for 3 days or in the freezer for 3 months. To use frozen dough, thaw overnight in the fridge, then let it sit at room temperature for 2-3 hours before shaping. Never microwave frozen dough—it kills the yeast!
Why does my dough smell yeasty but not rise?
Cold temperatures or old yeast are the most likely culprits. Place the dough in a warm spot (80-85°F)—like a turned-off oven with the light on—to encourage fermentation. If it still doesn’t rise, test your yeast: mix 1 tsp sugar and 1 packet yeast in ¼ cup warm water (105°F). No bubbles in 5 minutes? Your yeast is dead—start fresh!

- 6 Egg Cake Recipe with Oil: Light as Air With Buttery Moisture - October 4, 2026
- 4 Bean Casserole Recipe: One-Pan Heartiness With Smoky Paprika Depth - October 4, 2026
- 3-Ingredient Keto Mug Cake Recipe: Microwave Magic in 2 Minutes - October 4, 2026