
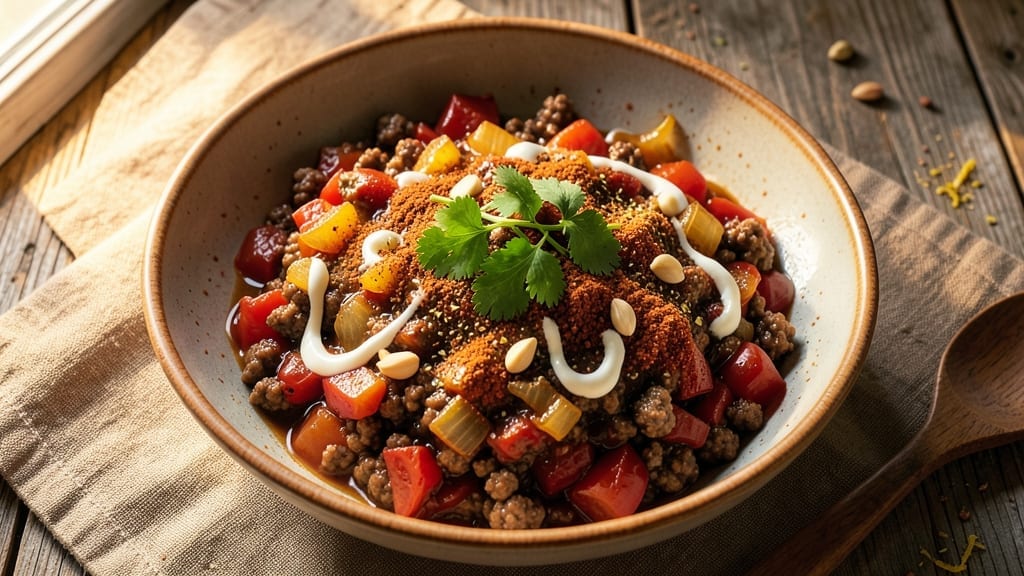
A 15-minute chili recipe delivers restaurant-quality depth without the hours of simmering—just bold spices, hearty beans, and smart shortcuts. The secret? Using pre-chopped ingredients and a one-pot approach that builds flavor in minutes, not hours.
I developed this version during a particularly busy week when I needed dinner on the table fast but refused to compromise on taste.
This chili starts with ground beef cooked down with garlic and onion, then transforms into a rich, spiced base using chili powder, cumin, and smoked paprika. Canned beans and diced tomatoes join the pot, where everything melds together in just 15 minutes—no waiting required.
The result is a chili with deep, complex flavors that rivals slow-cooked versions, but without the time commitment.
What you’ll end up with is a hearty, satisfying bowl of chili that’s perfect for weeknights, game days, or meal prep. The texture is ideal—tender beef, creamy beans, and just enough liquid to coat every bite.
Top it with your favorite fixings like shredded cheese, sour cream, or fresh cilantro for extra brightness.
This recipe scales perfectly for a crowd or leftovers—simply double the ingredients and keep the cooking time the same. The beauty of this method is that it’s foolproof and delivers restaurant-quality results without the fuss. Let’s get cooking!
Ingredients for 15 minute chili
Bold spices, hearty beans, and pre-chopped shortcuts—this chili delivers restaurant-quality depth in record time.
| Ingredient | Amount | Notes |
|---|---|---|
| Ground Beef (80/20 Lean-to-Fat Ratio) 🥩 | 1 ¼ lb | Pre-chopped for convenience, chuck works best |
| Yellow Onion 🧅 | 1 whole | Diced small, no need to peel |
| Garlic Cloves 🧄 | 4 cloves | Minced or pressed, fresh preferred |
| Chili Powder 🌶️ | 2 tbsp | Medium heat level, not cayenne |
| Ground Cumin 🌿 | 1 tbsp | Freshly toasted for deeper flavor |
| Smoked Paprika 🌶️ | 1 tbsp | For authentic smoky depth |
| Dried Oregano 🍃 | 1 tsp | Mexican oregano preferred |
| Cayenne Pepper 🔥 | ½ tsp | Adjust for heat preference |
| Black Beans (Canned) 🫘 | 1 can | Low-sodium preferred, drained |
| Kidney Beans (Canned) 🫘 | 1 can | Low-sodium preferred, drained |
| Diced Tomatoes (Canned) 🍅 | 1 can | San Marzano preferred, fire-roasted |
| Beef Broth (Low-Sodium) 💧 | 1 cup | Homemade or high-quality store-bought |
| Extra-Virgin Olive Oil 🫒 | 1 tbsp | For sautéing beef, fruity variety |
| Kosher Salt 🧂 | 1 ½ tsp | Diamond Crystal preferred |
| Ground Black Pepper 🌶️ | ½ tsp | Freshly ground for best flavor |
The beef is non-negotiable for texture—80/20 ground chuck gives you that perfect fat-to-lean ratio for juicy bites. Costco or local butchers usually have it pre-chopped, which saves time. If you’re buying whole onions, yellow onions work best here—they hold up better to cooking than red. For the spices, Penzeys or bulk bins at Whole Foods offer the freshest ground options. The smoked paprika is what gives this chili its signature depth, so don’t skimp on quality. If you’re using pre-minced garlic, rinse it first to remove excess moisture that can make your chili watery.
No chili powder? Mix 1 tbsp each of cumin and paprika with 1/2 tsp cayenne for a close substitute. Short on black beans? Pinto or chickpeas work well, though the texture will differ slightly. The canned tomatoes make this recipe foolproof—San Marzano is ideal, but any good-quality diced tomatoes will do. Trader Joe’s fire-roasted are my go-to for convenience. For the broth, low-sodium is key—you’ll be adding salt later, and you don’t want to overdo it. If you’re feeling adventurous, toast your cumin and chili powder in a dry pan for 30 seconds before adding to the pot—this deepens their flavors significantly.
This chili tastes even better the next day as flavors meld—make a double batch if you can. Store in airtight containers in the fridge for 4-5 days or freeze for up to 3 months. For meal prep, portion into individual containers so you can grab and heat. The spices lose potency over time, so replace them every 6 months for optimal flavor. If you’re serving a crowd, simply double the ingredients and keep the cooking time the same—this recipe scales perfectly without any adjustments needed.
Why You’ll Love This Recipe
- Foolproof Speed: I swear by this—no chopping, no fuss. Brown the beef in one pan, toss in the diced onion and garlic while it cooks, then dump in the spices. Fifteen minutes later, you’ve got dinner. (Yes, even on a Tuesday night.)
- Deep, Smoky Kick: That 80/20 beef? Rich, juicy, and packed with flavor. The cumin and chili powder hit just right—warm, earthy, and with a slow-building heat that lingers. Honestly, it’s the kind of chili that makes you want to eat it straight from the pot.
- Leftover Goldmine: Make a double batch and thank me later. This chili reheats like a dream—better the next day, if you ask me—and turns into tacos, nachos, or a loaded bowl with minimal effort. My kids beg for it for days.
- Budget-Friendly Powerhouse: Ground beef, onions, garlic, and spices? You’re looking at a meal that costs pennies per serving. No fancy ingredients, no wasted leftovers—just pure, satisfying chili that doesn’t break the bank. (Between us, this is how I feed a family of four for under $10.)
Step-by-step instructions for bold spiced chili
This chili comes together faster than you’d expect—rich, smoky, and packed with texture in just 15 minutes.
Sauté the Aromatics Until Fragrant
Heat the 1 tablespoon extra-virgin olive oil in a large pot over medium-high heat until shimmering. Add the whole yellow onion, cut into small dice, and cook for 3-4 minutes until softened and beginning to caramelize at the edges. This develops sweetness that balances the heat later.
Push the onions to one side of the pot and add the 4 cloves garlic cloves, minced or pressed. Stir for 30 seconds until fragrant—you should smell that pungent garlic aroma. Don’t let it brown, or it’ll turn bitter. Keep the heat at medium-high to maintain control.
Brown the Ground Beef
Break the 1.25 lb ground beef (80/20 lean-to-fat ratio) into the pot with the onions and garlic. Using a wooden spoon, break it apart into small, even crumbles. Cook for 4-5 minutes, stirring occasionally, until the beef loses its raw color and develops a deep brown crust. This step builds rich, meaty flavor that forms the chili’s foundation.
Season immediately with 1.5 teaspoons kosher salt and 0.5 teaspoon ground black pepper. The salt enhances the beef’s natural umami, while the pepper adds depth. Avoid overcrowding the pot—if needed, work in batches to ensure proper browning rather than steaming.
Build the Spice Base
Reduce heat to medium and add the 2 tablespoons chili powder, 1 tablespoon ground cumin, 1 tablespoon smoked paprika, 1 teaspoon dried oregano, and 0.5 teaspoon cayenne pepper. Stir vigorously for 1 minute to toast the spices and release their aromatic oils. This step is where the chili gets its signature bold flavor profile.
You’ll see the spices darken slightly and fill the kitchen with an earthy, smoky aroma. If the spices stick to the bottom, add 1-2 tablespoons beef broth to deglaze and lift them into the mixture. The spices should coat the beef evenly—this ensures balanced heat and depth in every bite.
Simmer with Beans and Tomatoes
Pour in the 1 cup beef broth (low-sodium) and scrape up any browned bits from the bottom of the pot. Add the 1 can black beans (drained), 1 can kidney beans (drained), and 1 can diced tomatoes (with juices). Stir well to combine, then bring the mixture to a gentle boil over high heat. Once boiling, reduce heat to medium-low and simmer uncovered for 8-10 minutes.
The chili should thicken slightly as the liquid reduces, and the flavors meld together. Taste and adjust seasoning—add more salt or cayenne if needed. The beans should be heated through, and the tomatoes should break down just enough to create a cohesive texture. Stir occasionally to prevent sticking.
Rest and Serve
Remove the pot from heat and let the chili rest for 3-5 minutes. This allows the spices to fully infuse and the flavors to settle. Serve immediately in bowls, garnished with extra smoked paprika or fresh cilantro if desired. The chili should be thick, hearty, and packed with layers of smoky, spicy, and earthy flavors.
For best results, serve with warm tortilla chips, crusty bread, or over rice. The chili will continue to deepen in flavor as it sits, so don’t hesitate to make extra—it tastes even better the next day. Each bite should deliver a perfect balance of heat, texture, and rich beefy goodness.
Pro Tips For Making 15 Minute Chili
- Cook Beef in Batches: Dump all that ground beef in at once and it’ll steam instead of brown. Split it into two piles—cook half, push to the side, then cook the second half. The extra surface area means better browning and deeper flavor in the same 15 minutes.
- Sauté Onions Until Soft: I used to rush this step, but those onions need to go from raw to translucent before garlic hits. Five minutes on medium heat—no color, just sweating. Skip this, and your chili tastes like you just dumped raw onion into a pot.
- Bloom Spices in Fat: After the onions soften, turn heat to medium-low, add your chili powder and cumin, and let them sit for 30 seconds. They’ll release their aroma and flavor, not just float in there like decorative sprinkles. (Yes, even if you’re impatient like me.)
- Use a Splatter Screen: Garlic and raw ground beef are a messy combo. Pop a splatter screen over the pan—it catches 90% of the chaos and keeps your stovetop from looking like a crime scene. Worth the $5, trust me.
Serving suggestions for this 15 minute chili
Classic Toppings
Start with a sprinkle of shredded cheddar cheese—about ¼ cup per bowl—for a creamy, melty finish. I love adding sour cream (about 2 tbsp per bowl) for a cool contrast to the spicy chili.
Fresh cilantro or green onions (about 1 tbsp chopped) brighten the dish with a fresh herbal note. 🌿
Crunchy Additions
For texture, top with tortilla chips or crushed Fritos—about ¼ cup per bowl—to add a satisfying crunch. My favorite is avocado slices (about ¼ avocado per bowl) for a creamy, rich contrast.
A dash of hot sauce (like Cholula) adds an extra kick if you want more heat. 🌶️
Bread Pairings
Serve with warm cornbread or crusty sourdough to soak up any extra chili. I like toasting the bread lightly and serving it on the side. For a heartier option, try garlic bread or cheesy grits—both pair beautifully with the bold flavors. 🍞
Side Dish Ideas
Pair your chili with a simple green salad dressed with lime and cilantro to cut through the richness. Mexican street corn (elote) with chili-lime mayo adds a smoky-sweet contrast. For a lighter option, try cilantro-lime rice—it’s a crowd-pleaser. 🥗
Drink Pairings
A cold Mexican lager like Modelo Especial or Pacifico complements the chili’s spice perfectly. For a non-alcoholic option, try sparkling limeade or iced hibiscus tea. A glass of cold milk can also help balance the heat. 🍺
Make-Ahead Serving
If serving chili at a gathering, keep it warm in a slow cooker on low heat or a chafing dish. Let guests customize their bowls with toppings set out in small bowls. For a cozy touch, serve with warm tortillas for dipping. 💛
Nutrition facts
Frequently asked questions
Can I make this chili vegetarian?
Swap the ground beef for 1.25 lb crumbled firm tofu or 1 can lentils (drained) and add 1 tbsp soy sauce or liquid smoke for depth. Use vegetable broth instead of beef broth, and consider adding mushrooms or bell peppers for extra texture. The cooking time remains the same—just 15 minutes!
Why does my chili taste bland?
Bland chili usually means the spices weren’t toasted enough or the seasoning was underdone. Always toast your spices over medium heat for 1 minute to release their flavors. Taste as you go—add more salt, cayenne, or a splash of hot sauce at the end. For extra depth, stir in 1 tsp fish sauce or 1 tbsp tomato paste while cooking.
Can I use fresh beans instead of canned?
Fresh beans work, but they require extra prep time—soak them overnight (8+ hours) or use the quick-soak method (boil for 2 minutes, then let sit for 1 hour). After cooking, simmer the chili for 2-3 minutes longer to ensure the beans are tender. For convenience, stick with canned beans—they save 30+ minutes and maintain texture perfectly.
How do I adjust the heat level?
Start with the 0.5 tsp cayenne as written, then adjust to taste. For milder heat, reduce cayenne to ¼ tsp or swap it for ½ tsp sweet paprika. For extra spice, add ½ tsp more cayenne or a pinch of chili flakes. Always taste before serving—you can always add more heat, but you can’t remove it!
Can I make this chili in a slow cooker?
Yes! Brown the beef and sauté the aromatics as directed, then transfer everything to a slow cooker. Add ½ cup extra broth and cook on high for 2 hours or low for 4 hours. The texture will be thicker, almost stew-like. For a quicker version, use the Instant Pot on “High Pressure” for 8 minutes—just release the pressure naturally.

- 3lb Prime Rib Roast Recipe: Juicy Pink Center Guaranteed in 3 Hours - October 31, 2026
- 5 Spice Cake Recipe: Warmly Spiced Layers With Crunchy Top - October 31, 2026
- 1950’s Macaroni and Cheese Recipe: Nostalgic Creamy Cheese Sauce with Buttery Noodles - October 31, 2026