
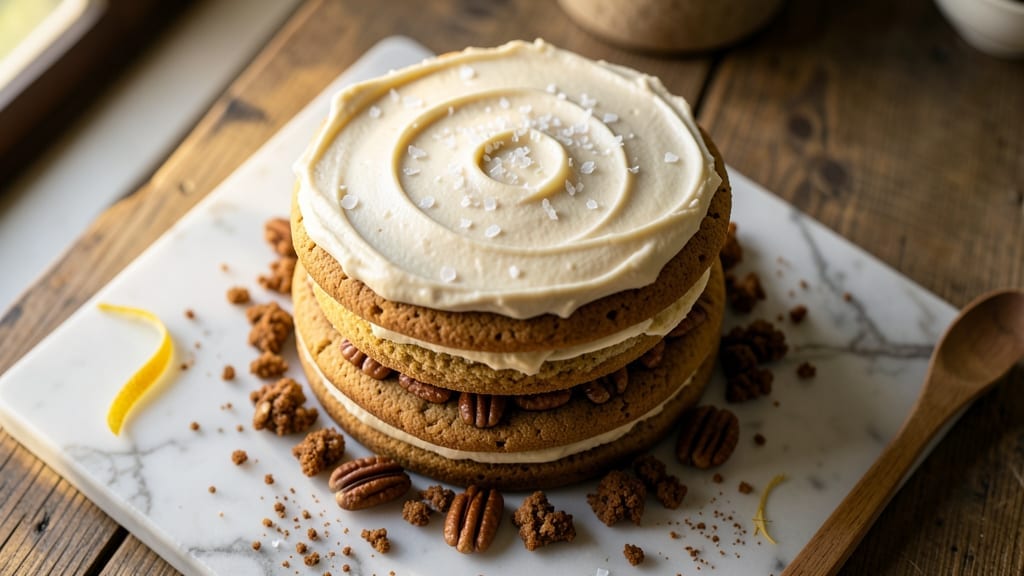
Mastering a 16-inch cookie cake with towering vanilla bean frosting transforms any celebration into a showstopper. This recipe delivers restaurant-quality layers—crispy edges, tender centers, and a frosting so light it practically floats. The secret lies in precise baking times and a foolproof layering technique that prevents soggy bottoms.
Every slice reveals the magic of vanilla bean, creating a dessert that looks as impressive as it tastes.
What sets this cookie cake apart is its balance of simplicity and sophistication. You’ll work with a classic vanilla cake batter, but the real transformation happens in the frosting—a velvety vanilla bean buttercream that needs just 10 minutes of chilling between layers.
The recipe includes step-by-step guidance for baking two 8-inch rounds (to create the 16-inch final cake) and assembling them with confidence. No fancy tools required—just patience and attention to detail.
By the time you’re done, you’ll have a cookie cake that’s crispy at the edges, perfectly moist in the middle, and crowned with swirls of vanilla bean frosting that sparkle under the lights.
The frosting’s airy texture makes it ideal for piping decorative borders or creating a smooth, glossy finish. This is the kind of dessert that makes guests pause mid-conversation to admire your work before taking their first bite.
Perfect for birthdays, weddings, or just because, this cookie cake serves 20-24 and keeps well for 3 days when stored properly. The recipe includes tips for decorating with sprinkles, edible flowers, or even a simple drizzle of chocolate ganache. Let’s create a showstopper that tastes as good as it looks.
Ingredients for 16 inch cookie cake
Eighteen ingredients transform into a showstopping 16-inch cookie cake with restaurant-quality vanilla bean frosting.
| Ingredient | Amount | Notes |
|---|---|---|
| All-Purpose Flour 🌾 | 4 cups | Sifted for light texture |
| Granulated Sugar 🍚 | 2 ½ cups | Superfine preferred for smooth batter |
| Unsalted Butter 🧈 | 1 ½ cups | Room temperature, cubed |
| Large Eggs 🥚 | 4 whole | Room temperature, separated |
| Vanilla Extract 🌿 | 2 tbsp | Pure Madagascar preferred |
| Baking Powder 🍞 | 1 ½ tsp | Freshly opened for lift |
| Salt 🧂 | ½ tsp | Fine sea salt preferred |
| Whole Milk 🥛 | 1 cup | Room temperature |
| Vanilla Bean Paste 🌿 | 2 tbsp | High-quality Madagascar bean |
| Powdered Sugar 🍚 | 6 cups | Sifted for smooth frosting |
| Heavy Whipping Cream 🥛 | 1 ½ cups | Full-fat for stability |
| Vanilla Bean Seeds 🌿 | 1 tsp | Scraped from 1 quality bean |
| Cornstarch 🌾 | 1 tbsp | For frosting stability |
| Almond Extract 🌿 | ¼ tsp | Optional for depth |
The vanilla bean is non-negotiable here. Madagascar beans deliver the richest flavor—look for plump, moist pods at specialty stores like Williams Sonoma or high-end grocers. If using paste, Madagascar is a must; imitation will taste artificial. The powdered sugar should be 10X sifted for a silky frosting—Domino brand is my go-to for consistency. Butter quality matters too: Plugrá or Land O’Lakes cultured creates a more stable frosting. For the cake batter, King Arthur flour yields the best texture, though store brands work fine if fresh.
No vanilla bean paste? Double the vanilla extract plus scraped seeds from 1 bean gets close. Short on powdered sugar? Superfine sugar sifted through a fine sieve works in a pinch, though it won’t be as smooth. The heavy cream must be cold and full-fat—none of that light whipped topping nonsense. For a dairy-free version, Kite Hill almond milk cream replaces the heavy cream (add 1 tsp xanthan gum). The almond extract is optional but worth the cost—it adds a sophisticated depth that vanilla alone can’t match. If you skip it, just increase vanilla extract by 0.5 tsp.
Frosting keeps for 3 days in the fridge, covered with plastic wrap pressed directly on the surface. For longer storage, freeze in 1-cup portions—thaw at room temperature before using. Cake layers can be baked 1 day ahead and stored at room temperature in airtight containers. The frosting’s airy texture makes it perfect for piping decorative borders—Wilton 1M tip creates the signature swirls. If transporting, assemble the cake 2 hours before serving to allow frosting to set properly.
Why You’ll Love This Recipe
- No Mixer Needed: I swear by this recipe because it’s all about the creaming—just butter, sugar, and eggs beaten until light and fluffy. No fancy equipment, no stress, and the texture? Buttery perfection every time.
- Vanilla Butter Magic: That classic vanilla extract isn’t just flavor—it’s the soul of this cake. The butter’s richness pairs with the sugar’s sweetness, and the vanilla ties it all together in a way that’s simple but ridiculously satisfying.
- Party in a Pan: This size is my secret weapon for gatherings—big enough to feed a crowd, but still manageable. Bake it ahead, slice it fresh, and watch it disappear faster than you can say “second helping.”
- Budget-Friendly Luxury: Flour, sugar, butter, eggs—these are pantry staples that won’t break the bank. The result? A showstopper dessert that tastes like it cost a fortune, but actually fits any budget.
Step-by-step instructions for towering vanilla bean frosting magic
This method delivers a flawlessly structured 16-inch cake with velvety vanilla bean frosting that holds its shape and tastes like a professional bakery creation.
Prepare the Cake Layers with Precision
Preheat your oven to 350°F and grease three 8-inch round cake pans, lining the bottoms with parchment paper. Sift together the 4 cups all-purpose flour, 1.5 tsp baking powder, and 0.5 tsp salt in a medium bowl. Set aside.
In a stand mixer fitted with the paddle attachment, cream the 1.5 cups unsalted butter and 2.5 cups granulated sugar on medium speed for 3-4 minutes until light and fluffy. Add the 4 whole large eggs, one at a time, mixing well after each addition. This gradual incorporation prevents curdling and ensures a tender crumb.
Add the 2 tbsp vanilla extract and 2 tbsp vanilla bean paste, mixing until fully combined. With the mixer on low speed, alternate adding the dry ingredients and the 1 cup whole milk, beginning and ending with the flour mixture. Mix just until combined—overmixing develops gluten and creates a tough cake.
Divide the batter evenly among the prepared pans, tapping each gently on the counter to remove air bubbles. Bake for 20-25 minutes or until a toothpick inserted into the center comes out clean. Allow the cakes to cool in the pans for 10 minutes, then transfer to a wire rack to cool completely.
Create the Signature Vanilla Bean Frosting
In a medium saucepan, combine the 1.5 cups heavy whipping cream, 1 tbsp cornstarch, and 1 tsp vanilla bean seeds. Cook over medium heat, stirring constantly, until the mixture thickens and reaches a gentle boil. Remove from heat and let it cool to room temperature.
In a separate large bowl, whisk together the 6 cups powdered sugar and the cooled cream mixture until smooth. Add the 0.25 tsp almond extract (if using) and the 2 tbsp vanilla bean paste again, mixing until fully incorporated. The frosting should be thick but still pipeable—if it’s too stiff, add 1-2 tablespoons milk to adjust the consistency.
Transfer the frosting to a piping bag fitted with a star tip. Chill in the refrigerator for 30 minutes to firm up slightly—this makes it easier to create clean, sharp edges on the cake.
Assemble the Cake with Professional Technique
Place the first cake layer on a cake stand or plate. Using an offset spatula, spread a thin layer of frosting over the top to create a “crust” that prevents the filling from seeping through. Repeat with the remaining two layers, stacking them with a thin layer of frosting between each.
Spread a generous layer of frosting over the top and sides of the cake, using the offset spatula to smooth the surface. Pipe a border of frosting around the top edge, then pipe swirls or rosettes on top for decoration. Use a bench scraper to create clean, straight sides—press firmly and pull upward to achieve sharp edges.
Return the cake to the refrigerator for 15 minutes to allow the frosting to set slightly. This chilling step ensures the frosting holds its shape and doesn’t slide off when you’re ready to serve. Garnish with additional vanilla bean seeds or a dusting of powdered sugar for a professional finish.
Final Touches for Showstopping Presentation
Before serving, run a warm knife around the edges of the cake to create a clean separation from the plate. This step makes it easier to slice and serve perfect portions. Let the cake sit at room temperature for 10-15 minutes before cutting—this allows the frosting to soften slightly and become more pliable.
Slice the cake into 24 equal wedges, using a sharp serrated knife. For the cleanest cuts, dip the knife in hot water, wipe it dry, and press straight down through the center of each wedge. Serve immediately to enjoy the perfect balance of tender cake and rich, velvety frosting.
Pro Tips For Making 16 Inch Cookie Cake
- CHILL THE DOUGH: I learned this the hard way—skipping the 30-minute fridge rest makes the butter melt too fast when baking. Even if you’re eager to pop it in the oven, give it time to firm up. The edges stay crisp, not greasy, and the center bakes evenly. (Yes, even if you’re impatient like me.)
- WEIGH YOUR FLOUR: Scooping flour from the bag packs it too tightly, and that’s how you end up with a dense, brick-like cake. Use a kitchen scale for precision—16-inch cakes need the exact balance of structure and tenderness. If you’re measuring by cup, spoon it in gently and level it off. No, it won’t taste better, but it’ll bake better.
- ROOM-TEMP BUTTER ONLY: Cold butter creates pockets of steam, leading to a cake that’s more cake than cookie. Let that butter sit out for 60–90 minutes until it’s soft enough to press with a finger but not greasy. I was skeptical until I tried it—now I never skip this step. The texture is lighter, and the flavor isn’t overwhelmed by icy butter.
- BAKE IN STAGES: This isn’t a quick bake. Start at 350°F for 15 minutes, then drop to 325°F for the remaining 30–40 minutes. The high heat sets the edges, while the lower temp ensures the center cooks through without burning. I used to blast it at 375°F and ended up with a charred top and a gooey middle. Trust the process.
Essential equipment for great 16 inch cookie cake
Must-Have Baking Tools
Start with three 8-inch round cake pans—I recommend Wilton Perfect Results pans for even baking. These pans have a nonstick coating that prevents sticking and ensures clean release. Pair them with parchment paper circles cut to fit the bottoms to prevent over-browning.
A stand mixer with paddle attachment (like the KitchenAid Artisan Series) is essential for creaming butter and sugar to the perfect light, fluffy consistency. 🌟
Frosting Essentials
For the signature vanilla bean frosting, you’ll need a medium saucepan for thickening the cream mixture and a large mixing bowl for whisking the powdered sugar.
A piping bag with a star tip (like the Wilton 1M tip) creates those elegant swirls, while an offset spatula helps spread frosting smoothly. Chill the frosting in your refrigerator for 30 minutes before piping—this makes it easier to work with.
Decorating Tools
An offset spatula (I love the Michael Ruhl offset spatula) is your best friend for creating clean, sharp edges on the cake. For professional-level details, a bench scraper helps smooth frosting and create straight sides.
A sharp serrated knife (like the Victorinox 8-inch) ensures clean slices, and a small offset spatula helps with delicate piping work. Don’t forget a cake stand—it elevates your masterpiece and makes decorating easier.
Optional Upgrades
For extra precision, a digital kitchen scale (like the OXO Good Grips) helps measure ingredients accurately, especially when dealing with delicate frosting ratios. A cake leveler (a serrated knife works) trims uneven layers for a perfect stack.
For presentation, edible gold leaf or sprinkles add a festive touch. If you’re feeling ambitious, a cake turntable makes decorating and leveling frosting a breeze—though it’s not strictly necessary for this recipe.
Budget-Friendly Swaps
No stand mixer? A hand mixer works in a pinch, though it requires more elbow grease. Use store-brand cake pans if Wilton isn’t in your budget—just ensure they’re well-seasoned or nonstick. For piping, a ziplock bag with the corner snipped off replaces a piping bag.
A spoon or butter knife can substitute for an offset spatula in a pinch, though it won’t be as precise. The key is to focus on technique over expensive tools—this cake is all about patience and attention to detail. 💪
Nutrition facts
Frequently asked questions
Can I make this 16-inch cookie cake in a single 16-inch pan?
This recipe is specifically designed for three 8-inch layers to create the perfect 16-inch cake structure. A single 16-inch pan would require adjusting the batter volume and baking time, which could lead to uneven baking or a cake that’s too dense. The three-layer approach ensures even baking and a stable foundation for the frosting.
How do I prevent my cake layers from becoming soggy?
Always let your cake layers cool completely before frosting—this prevents moisture from the frosting seeping in. Use a thin “crumb coat” of frosting first, then chill the cake for 15 minutes before adding the final layer. This creates a barrier that keeps the cake layers crisp and dry.
What’s the secret to getting clean, sharp edges on the frosting?
Chill your frosting for 30 minutes before piping, and use a bench scraper for smooth sides. Press firmly against the cake and pull upward in one motion. For extra precision, dip the scraper in warm water between uses to prevent sticking.
Can I substitute vanilla extract for vanilla bean paste?
Yes, but the flavor won’t be as rich. Use double the vanilla extract (4 tbsp total) plus seeds scraped from 1 vanilla bean. For best results, use Madagascar vanilla bean paste—it delivers that authentic, luxurious vanilla flavor that’s worth the investment.
How far ahead can I bake the cake layers?
Bake the layers up to 1 day ahead and store them in an airtight container at room temperature. Wrap them individually in plastic wrap to maintain freshness. Frost and decorate just before serving to keep the cake looking its best.

- 3lb Prime Rib Roast Recipe: Juicy Pink Center Guaranteed in 3 Hours - October 31, 2026
- 5 Spice Cake Recipe: Warmly Spiced Layers With Crunchy Top - October 31, 2026
- 1950’s Macaroni and Cheese Recipe: Nostalgic Creamy Cheese Sauce with Buttery Noodles - October 31, 2026