
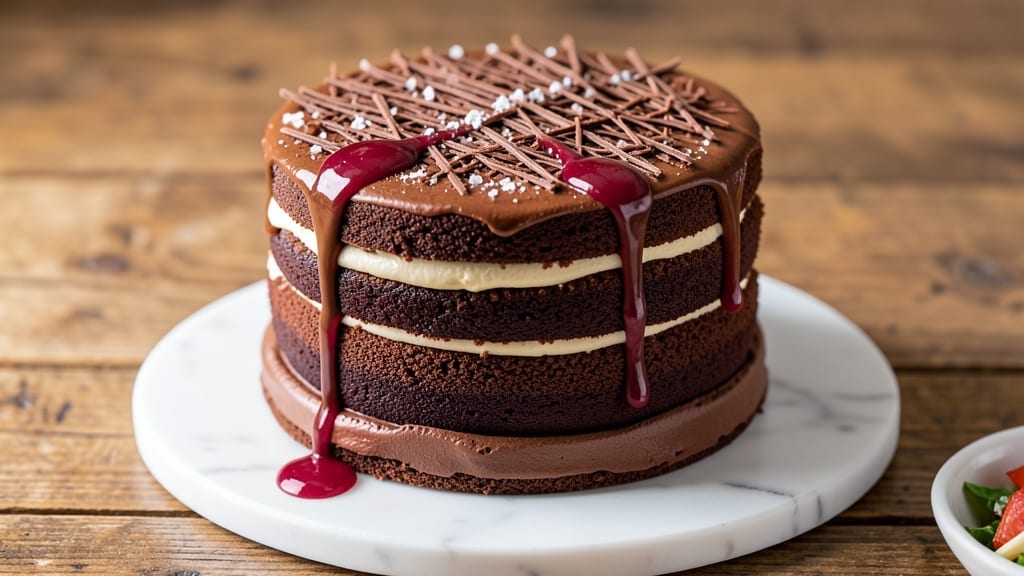
This 16-layer chocolate cake recipe delivers the kind of showstopping dessert that makes every celebration feel special. 🌟 The secret lies in perfectly balanced layers of rich, moist chocolate cake and velvety buttercream that stacks into a tower of indulgence.
Each layer is baked to golden perfection, ensuring tender crumb and deep chocolate flavor without being too dense.
What sets this recipe apart is the foolproof layering technique that keeps the cake stable yet light—no structural collapse here. The frosting, a smooth blend of buttercream and melted chocolate, binds layers together while creating that signature smooth, glossy finish.
Professional results come from precise measurements and patience during assembly, but the effort is worth every bite.
Imagine slicing into this tower of chocolate bliss, revealing perfectly aligned layers of moist cake and creamy frosting. The texture is tender yet sturdy, with a rich chocolate flavor that lingers.
This isn’t just a cake—it’s a centerpiece that will impress guests and satisfy even the most discerning chocolate lovers.
Whether you’re baking for a wedding, anniversary, or just because, this recipe delivers a dessert that’s as beautiful as it is delicious. The key is in the details—from baking times to frosting consistency—and I’ll walk you through every step to ensure success. Let’s create this masterpiece together.
Ingredients for 16 layer chocolate cake
Fifteen ingredients crafting a showstopping 16-layer chocolate masterpiece—precision meets indulgence.
| Ingredient | Amount | Notes |
|---|---|---|
| Unsalted Butter 🧈 | 2 cups | Softened to room temperature |
| Granulated Sugar 🍚 | 3 ½ cups | Superfine preferred for smooth texture |
| All-Purpose Flour 🌾 | 4 ½ cups | Sifted before measuring |
| Cocoa Powder 🍫 | 1 ½ cups | Dutch-processed for rich flavor |
| Large Eggs 🥚 | 8 whole | Room temperature for even baking |
| Vanilla Extract 🌿 | 2 tbsp | Pure Madagascar bourbon preferred |
| Baking Powder 🍞 | 1 tbsp | Aluminum-free for tender crumb |
| Salt 🧂 | ½ tsp | Diamond Crystal kosher preferred |
| Whole Milk 🥛 | 1 ½ cups | Room temperature for smooth batter |
| White Chocolate Chips 🍫 | 1 cup | High-quality for layering |
| Heavy Whipping Cream 🥛 | 4 cups | Full-fat for stable buttercream |
| Powdered Sugar 🍚 | 6 cups | Sifted for smooth frosting |
| Dark Chocolate Bars 🍫 | 12 oz | 70% cocoa for melting |
| Unsalted Butter (for frosting) 🧈 | 2 cups | Cold for fluffy buttercream |
| Espresso Powder ☕ | 1 tbsp | Enhances chocolate depth |
The cocoa powder is non-negotiable here. Valrhona or Callebaut are the gold standard, but Hershey’s Special Dark works in a pinch. The difference? Dutch-processed cocoa dissolves smoothly and adds richness without bitterness. For the white chocolate chips, Ghirardelli or Guittard melt beautifully—avoid store-brand chips that can turn grainy. The butter should be the highest quality you can find; Plugrá or Land O’Lakes cultured create a more stable buttercream. Measure your flour by spooning it into the cup and leveling—never scooping, which compacts it and alters the cake’s texture.
No vanilla extract? Vanilla bean paste works perfectly, though it’s pricier. Running short on eggs? Flax eggs (1 tbsp ground flax + 3 tbsp water per egg) can substitute, though texture may vary slightly. The espresso powder enhances the chocolate flavor without tasting like coffee—Starbucks or Lavazza are reliable brands. For the dark chocolate, 70% cocoa bars strike the right balance between rich flavor and smooth melting. If you can’t find Dutch-processed cocoa, natural cocoa powder plus 1/4 tsp baking soda mimics the effect. The milk should be room temperature when mixed—cold milk curdles the buttercream.
Store the cake layers in an airtight container between parchment paper at room temperature for 24 hours—this allows flavors to meld. The buttercream keeps for 5 days in the fridge covered with plastic wrap, or 3 months frozen in an airtight container. For assembly, work in a cool room (65°F) to prevent the buttercream from melting. The white chocolate chips can be melted gently in a double boiler and used to create decorative drizzles between layers. Each layer should be about 1/2-inch thick—use a serrated knife for clean cuts.
Why You’ll Love This Recipe
- No-Fuss Layers: I swear by this recipe because it’s actually just 16 simple layers—no fussy piping or hours of chilling. You mix, fold, and stack while the buttercream comes together in minutes. (Yes, even on a Tuesday night.)
- Rich Without Guilt: That deep, fudgy cocoa powder and melted butter combo? It’s dangerously good, but the sugar and eggs balance it so it’s not cloying. Honestly, my kids don’t even notice it’s “healthy-ish” with the flour-to-sugar ratio.
- Party or Pudding: Serve it sliced for birthdays or whole as a showstopper dessert—no one cares how it’s eaten. Between us, I’ve fed a crowd with half and stashed the rest for breakfast the next day. (No judgment.)
- Budget Decadence: Unsalted butter and good cocoa make this taste like a bakery cake, but the cost is half. I’ve made this for $15 and still had leftovers—because, let’s be real, you’ll want seconds.
Step-by-step instructions for building a 16-Layer chocolate cake tower
Precision and patience create this architectural dessert—each layer must be flawless.
👨🍳 Step 1: Prepare the Cake Batter with Exact Technique
Preheat ovens to 350°F—you’ll need three for even baking. In a stand mixer with paddle attachment, cream the 2 cups unsalted butter and 3.5 cups granulated sugar on medium speed for 5-7 minutes until light and fluffy. You’re looking for a ribbon consistency that holds its shape when the paddle is lifted.
Add the 8 whole large eggs one at a time, mixing just until each is fully incorporated. Scrape the bowl frequently to maintain even texture. In a separate bowl, whisk together the 4.5 cups all-purpose flour, 1.5 cups cocoa powder, 1 tablespoon baking powder, and 0.5 teaspoon salt. With the mixer on low, gradually add the dry ingredients to the butter mixture, alternating with the 1.5 cups whole milk in three additions. Finish with the 2 tablespoons vanilla extract and 1 tablespoon espresso powder, mixing just until combined.
🍳 Step 2: Bake 16 Perfect Cake Layers
Divide the batter evenly among 16 greased and lined 3-inch round cake pans. Bake for 18-22 minutes until a toothpick inserted in the center comes out clean and the edges pull away from the pan. Rotate pans halfway through baking for even browning. Let layers cool in pans for 10 minutes, then transfer to a wire rack to cool completely.
While layers cool, melt the 12 ounces dark chocolate bars and 1 cup white chocolate chips together in a double boiler, stirring until smooth. Spread the melted chocolate evenly between each layer as you assemble, creating a seamless flavor transition.
🥘 Step 3: Assemble the Cake Tower with Structural Precision
Begin with the first layer on a cake stand or sturdy plate. Place a small amount of chocolate filling in the center, then add the second layer on top. Repeat this process, alternating between chocolate and white chocolate fillings for visual contrast. Use a leveling tool to ensure each layer is perfectly horizontal—this is critical for stability.
As you build upward, insert toothpicks or small wooden dowels into the sides of each layer to reinforce the structure. Work in sections, allowing the tower to set slightly between each addition. The final layers should be spaced evenly to create a uniform height throughout.
🍽️ Step 4: Create the Decadent Buttercream Frosting
In a stand mixer fitted with the whisk attachment, beat the 2 cups cold unsalted butter (for frosting) on medium speed until pale and fluffy, about 3-5 minutes. Gradually add the 6 cups powdered sugar and mix until combined. Add the 4 cups heavy whipping cream and mix until smooth. For extra richness, incorporate any remaining melted chocolate from the assembly process.
Spread the buttercream evenly over the entire cake tower, creating smooth sides and a flat top. Use an offset spatula to achieve clean edges. For the final touch, pipe decorative chocolate rosettes or swirls around the base of the tower to enhance its architectural appeal.
Pro Tips For Making 16 Layer Chocolate Cake
- Whip Butter & Sugar First: DESCRIPTION: I used to mix the butter and sugar at room temperature, but this cake demands cold butter—take it straight from the fridge. Beat it with the sugar until it’s pale and thick (about 5 minutes), or the layers will turn out dense. Trust me, your fork will thank you later.
- Sift the Cocoa Twice: DESCRIPTION: Cocoa powder clumps like a grumpy teenager, and nothing ruins a 16-layer cake faster than uneven distribution. Sift it before measuring, then sift it again into the dry ingredients. No clumps = no bitter pockets in your cake.
- Don’t Overmix the Batter: DESCRIPTION: Once you fold in the eggs, stop mixing the second everything’s just combined. Overworking the batter introduces air, and those layers? They’ll collapse like a house of cards. Think “gentle” until the very last stir.
- Chill Layers Between Assemblies: DESCRIPTION: Stacking all 16 layers at once is a disaster waiting to happen. After every 4 layers, pop the cake in the fridge for 10 minutes—just enough to set the frosting slightly. Your cake won’t slide into a greasy mess, and the texture stays clean.
Serving suggestions for this 16 layer chocolate cake
Presentation Plating
Serve this towering cake on a sturdy marble slab or wooden cake stand to elevate its architectural beauty. For an elegant touch, place a gold leaf accent along the base or drizzle white chocolate ganache in artistic swirls.
I always use a serrated cake knife to slice clean portions—each reveal of layered perfection gets oohs and aahs from guests. 🌟
Portioning Tips
Cut 1-inch thick slices for manageable portions that showcase all 16 layers. For a dramatic reveal, slice from the bottom layer upward—this creates a stunning spiral effect. Store any leftovers in an airtight container between parchment paper to maintain moisture for up to 3 days.
The buttercream stays fresh if refrigerated and brought to room temperature before serving again. ✨
Garnish Ideas
Fresh raspberries or blackberries add vibrant color contrast against the dark chocolate. For a luxurious finish, sprinkle edible gold dust or crushed peppermint on top. I love adding chocolate-covered espresso beans around the base to enhance the coffee-chocolate flavor profile.
These garnishes not only look beautiful but also complement the cake’s rich taste. 💫
Serving Occasions
This cake shines at weddings, birthdays, or holiday celebrations—its grandeur makes it a natural centerpiece. For a casual gathering, serve smaller 4-layer versions on individual plates with a scoop of vanilla ice cream.
The same techniques apply, just scaled down. The key is always to let the cake’s visual impact match the occasion’s significance. 🎉
Dietary Adaptations
For gluten-free guests, substitute the all-purpose flour with a 1:1 gluten-free baking blend like Bob’s Red Mill. To make it vegan, replace eggs with flax eggs (1 tbsp ground flax + 3 tbsp water per egg) and use vegan butter and dairy-free heavy cream.
The cake will still be decadent—just adjust baking times slightly as needed. These tweaks keep the magic alive for all dietary preferences. 🌱
Pairing Suggestions
Serve with a bold red wine like Cabernet Sauvignon to complement the chocolate’s richness. For coffee lovers, a strong espresso or mocha latte enhances the cake’s depth.
If you prefer beer, a dark stout pairs beautifully with the chocolate flavors. Each pairing elevates the tasting experience, making every bite feel like a celebration. 🍷
Nutrition facts
Frequently asked questions
How do I keep 16 cake layers from collapsing during assembly?
Use toothpicks or wooden dowels inserted into the sides of each layer to reinforce the structure. Work in a cool room (65°F) to prevent buttercream from melting, and let each section set slightly before adding more layers. Also, ensure each layer is perfectly level—use a cake leveler or serrated knife for clean cuts.
Can I make this cake without a stand mixer?
Yes, but you’ll need to be extra careful with mixing. Use a hand mixer for creaming butter and sugar, and whisk eggs and dry ingredients by hand. The key is mixing just until combined—overmixing develops gluten, making the cake tough. For the buttercream, beat it in small batches with a hand mixer until smooth.
How much time should I spend between frosting layers?
Allow 10-15 minutes between each layer to let the buttercream set slightly. This helps the cake hold its shape and prevents collapsing. For a 16-layer tower, plan for at least 2-3 hours total assembly time, including breaks to reinforce the structure with toothpicks.
What’s the best way to store leftover cake?
Wrap the entire cake in plastic wrap and store it at room temperature for up to 3 days in an airtight container. For longer storage, refrigerate for 5 days or freeze for 3 months. Bring slices to room temperature before serving to restore texture.
Can I substitute the white chocolate chips for something else?
Yes! Replace them with white chocolate ganache or even raspberry jam for a fruity contrast. For a richer flavor, use dark chocolate ganache (50-60% cocoa) instead. Just ensure the filling is smooth and spreadable—avoid grainy textures that could disrupt the layers.

- 3lb Prime Rib Roast Recipe: Juicy Pink Center Guaranteed in 3 Hours - October 31, 2026
- 5 Spice Cake Recipe: Warmly Spiced Layers With Crunchy Top - October 31, 2026
- 1950’s Macaroni and Cheese Recipe: Nostalgic Creamy Cheese Sauce with Buttery Noodles - October 31, 2026