
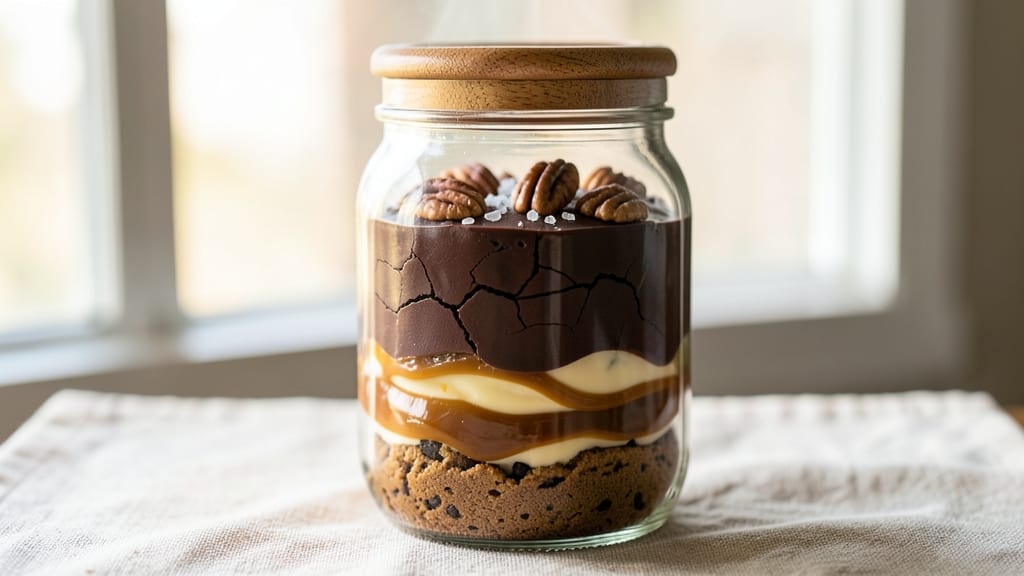
A 16-ounce cookie in a jar transforms holiday baking into a stress-free, magical experience—imagine the aroma of freshly baked cookies filling your home while you sip coffee or hot cocoa. ✨ This recipe delivers 24 to 36 cookies with that perfect vanilla-chocolate swirl, crispy edges, and chewy centers, all from a single jar of dough.
The key lies in layering the dough in the jar before baking, ensuring every bite delivers that signature swirl magic without the mess of mixing multiple batches.
What sets this method apart is its foolproof simplicity: no special equipment, no advanced techniques—just a jar, a few pantry staples, and a 30-minute prep time before popping the jar into the oven.
The dough rests overnight, allowing flavors to meld and textures to develop, while the chocolate swirl stays vibrant and gooey. Whether you’re baking for a crowd or treating yourself to a cozy night in, this recipe delivers restaurant-quality cookies with minimal effort.
The result? A batch of cookies so decadent and inviting that they’ll disappear faster than you can say “holiday season.” The vanilla base provides a tender, slightly sweet foundation, while the chocolate swirl adds richness and depth.
Each cookie emerges from the oven with a golden, crackly crust and a warm, gooey center that melts into every bite. The best part? You can customize it with nuts, sprinkles, or even a pinch of sea salt for extra flavor.
Perfect for gifting, holiday parties, or a weeknight treat, these cookies stay fresh for days and reheat beautifully. The dough can be prepped ahead, so you’re not stuck in the kitchen when guests arrive. Let’s get started—your kitchen (and taste buds) will thank you.
Ingredients for 16 oz cookie in a jar
Just 12 pantry staples and a jar—this is your shortcut to holiday magic.
| Ingredient | Amount | Notes |
|---|---|---|
| All-Purpose Flour 🌾 | 3 cups | Sifted for light texture |
| Unsalted Butter 🧈 | 1 cup | Cold, cubed for easier mixing |
| Granulated Sugar 🍚 | 1 cup | White or light brown |
| Packed Brown Sugar 🍚 | ½ cup | For chewy centers |
| Large Eggs 🥚 | 2 whole | Room temperature preferred |
| Pure Vanilla Extract 🌸 | 2 tsp | High-quality for best flavor |
| Baking Soda 🧂 | 1 tsp | Ensures proper rise |
| Salt 🧂 | ½ tsp | Kosher or sea salt |
| Semisweet Chocolate Chips 🍫 | 1 ½ cups | High-quality for gooey swirls |
| Chocolate Chips (White) 🍫 | ½ cup | Optional for contrast |
| Powdered Sugar 🍚 | ½ cup | For dusting (optional) |
| Large Quart-Sized Mason Jar 🥫 | 1 whole | With airtight lid |
The butter and sugars are your flavor anchors here—use cold butter for easier mixing, but don’t skip room-temperature eggs (they blend smoother). King Arthur flour or Bob’s Red Mill work best for that tender texture. Chocolate chips? Ghirardelli or Guittard are worth the splurge—they melt into perfect swirls. Pro tip: if you’re baking for a crowd, double the dough and use two jars. The vanilla extract should be pure, not imitation—McCormick or Nielsen-Massey are solid choices. And that jar? Ball or Le Parfait mason jars are my go-to—they handle the oven heat like champs.
No vanilla extract? Vanilla bean paste works too—just halve the amount. Short on white chocolate chips? Melted white chocolate drizzled on top after baking gives the same effect. The dough will be thick, but that’s perfect for layering. If your kitchen’s hot, chill the dough for 30 minutes before jarring. For extra decadence, fold in toasted nuts or sea salt flakes—just adjust the sugar slightly to balance flavors. And if you’re worried about the dough sticking, lightly grease the jar with butter or oil before adding the layers.
This dough keeps for up to 2 weeks in the fridge, or 3 months frozen. For freezing, wrap the jar tightly in plastic wrap, then foil. Thaw overnight in the fridge before baking. Once baked, cookies stay fresh for 5 days in an airtight container. Reheat in a 200°F oven for 5 minutes to restore that warm-from-the-oven magic. Store-bought chocolate chips? Check the expiration date—they lose flavor fast. Freshly melted chocolate always wins, but chips are the lazy baker’s best friend.
Why You’ll Love This Recipe
- No Mixing Madness: I swear by this jar method—just toss everything in and let the magic happen. No standing over a bowl, no overmixing, just dump-and-go. The butter and sugars get creamed right in the jar, and the flour mixes in just enough to form a dough that’s soft but holds together.
- Buttery-Caramel Magic: That combo of brown sugar and butter? It’s like a warm hug in cookie form. The brown sugar keeps them chewy while the butter gives them that melt-in-your-mouth richness—no fancy add-ins, just pure, old-school flavor.
- Jar-to-Oven Joy: Honestly, this is my secret for stress-free baking. Prep the dough in the jar, chill it, then bake straight from the jar when you’re ready. No extra bowls, no extra cleanup, and you can even make a batch on Sunday for cookies all week.
- Budget-Friendly Bulk: Flour, sugar, butter, eggs—these are pantry staples that won’t break the bank. A single 16 oz jar gives you dozens of cookies, and the dough keeps well for days. Perfect for when you want to treat yourself (or the kids) without overspending.
Step-by-step instructions for layered vanilla and chocolate swirl cookies
Here’s how to create your perfect 16-ounce cookie mix with swirls that’ll make everyone jealous.
👨🍳 Step 1: Prepare the Dry Ingredients
In a large bowl, whisk together the 3 cups all-purpose flour, 1 tsp baking soda, and 0.5 tsp salt. Sift the mixture through a fine-mesh sieve directly into the quart-sized mason jar to remove any lumps. This step ensures your cookies will have that perfect light texture we’re after.
Next, create two separate piles with half of the flour mixture each. You’ll use one half for your vanilla base and the other half for the chocolate swirl layer. Keep the jar handy—we’ll be adding to it shortly. The reason for dividing is to maintain that perfect balance of flavors in each bite.
👨🍳 Step 2: Mix the Wet Ingredients
In a separate mixing bowl, combine the 1 cup cold cubed unsalted butter, 1 cup granulated sugar, and 0.5 cup packed brown sugar. Using a hand mixer or stand mixer, beat on medium speed for 3-4 minutes until the mixture becomes light and fluffy. You’ll see it nearly double in volume—that’s the air we’re incorporating for that perfect cookie texture.
Add the 2 whole large eggs one at a time, mixing well after each addition. Then stir in the 2 tsp pure vanilla extract until fully combined. This is where the magic starts happening—the butter and sugars create a creamy base that will hold all those chocolate chips beautifully.
🥘 Step 3: Layer the Dry Ingredients in the Jar
Carefully spoon half of the flour mixture (about 1½ cups) into the bottom of the quart-sized mason jar. This will be your vanilla base layer. Press it down gently with a spoon or your finger to create a compact layer.
Next, add ¾ cup of the semisweet chocolate chips to the jar. Sprinkle them evenly over the flour layer, then add ¼ cup of the white chocolate chips for that beautiful contrast. Tap the jar gently on the counter to help the chips settle between the flour layers. This distribution ensures every bite will have those perfect pockets of melted chocolate.
🥘 Step 4: Add the Wet Ingredients and Final Chocolate
Pour the wet ingredient mixture from Step 2 into the jar, spreading it evenly over the chocolate chips. You’ll notice it looks like too much, but trust me—this is exactly what we want for that rich, chewy texture. Add the remaining ¾ cup semisweet chocolate chips and ¼ cup white chocolate chips on top.
Finally, add the remaining 1½ cups flour mixture to the jar. Gently tap the jar on the counter again to help everything settle. The jar should be about ¾ full at this point—this is perfect for creating those beautiful swirls when baked. Seal the jar tightly with its lid and give it a good shake to distribute everything evenly.
🔥 Step 5: Bake to Golden Perfection
Preheat your oven to 375°F and line two baking sheets with parchment paper. Using a cookie scoop or tablespoon, drop 2-tablespoon portions of the cookie mixture onto the prepared sheets, spacing them about 2 inches apart. You should get about 24 cookies from this recipe.
Bake for 10-12 minutes until the edges are golden brown but the centers still look slightly underdone. They’ll continue cooking on the hot pan after you remove them from the oven. Let them cool on the baking sheet for 5 minutes before transferring to a wire rack. The cookies will be soft when first taken out, but they’ll firm up as they cool.
Pro Tips For Making 16 Oz Cookie In A Jar
- MEASURE BROW SUGAR CORRECTLY: Packed brown sugar means no air gaps—tap your measuring cup on the counter after filling to settle it. I learned this the hard way when my first batch turned out too sweet and cakey; now I always weigh it if I’m feeling precise (16 oz is your target, not the cup’s rim).
- CREAM BUTTER AND SUGARS UNTIL PALE: Use a wooden spoon and elbow grease—this isn’t the time to be lazy. The mixture should look like wet sand, not streaky butter. I used to rush this, and my cookies always came out greasy; now I take the extra 30 seconds and notice the difference in texture.
- WEIGH THE DOUGH BEFORE BAKING: Divide the dough into 16-oz portions by weight, not volume—jars vary wildly. I skip the guesswork by using a kitchen scale; it guarantees even baking and no under/over-cooked cookies. (Yes, even if you’re impatient like me.)
- CHILL THE DOUGH 24 HOURS: This isn’t optional—it’s what makes the flavor develop. I was skeptical until I tried it; the cookies stay chewy longer and taste deeper. Wrap the jar tightly and stick it in the fridge; trust the process, even if it feels like waiting forever.
Common mistakes when making perfect results
Overmixing the Dough
The most common mistake is overmixing the wet ingredients, which leads to tough cookies. Once you add the eggs and vanilla, mix just until combined—about 30 seconds with a hand mixer. Overmixing incorporates too much air, causing the cookies to spread excessively and develop a dense texture.
I’ve ruined batches by beating the dough for 5 minutes instead of the recommended 3-4 minutes. 💫
Uneven Chocolate Distribution
Skipping the “tap the jar” step after adding chocolate chips results in clumps and uneven swirls. When you pour the wet mixture over the chips, gently tap the jar on the counter to help them settle evenly.
I learned this the hard way—my first attempt had pockets of pure chocolate in some cookies and almost none in others. For extra insurance, fold in ¼ cup extra chocolate chips directly into the wet dough before jarring.
Incorrect Jar Filling
Filling the jar beyond ¾ full causes the dough to spill over during baking, creating a messy jar and uneven cookies. The jar should have 1-2 inches of headspace at the top.
I once filled mine to the brim, and the dough overflowed when I tried to scoop portions—what a sticky mess! If your jar feels too full, chill the dough for 30 minutes before baking to help it hold its shape.
Skipping the Overnight Rest
Rushing the dough into the oven without letting it rest overnight (or at least 4 hours) leads to dense, unevenly baked cookies. The rest allows the flour to hydrate and the flavors to meld.
I once baked a batch straight away, and the cookies turned out flat and dry. For best results, refrigerate the jar overnight or at least 2 hours before baking.
Overbaking or Underbaking
Baking cookies until they’re fully set at 375°F results in dry, crumbly textures. They should look golden brown at the edges but still soft in the center. I’ve pulled cookies out too early, only for them to stay doughy, and too late, turning them into hockey pucks.
Aim for 10-12 minutes and let them cool on the sheet for 5 minutes before transferring—they’ll firm up as they rest.
Using the Wrong Jar Size
A quart-sized mason jar is ideal for this recipe, but using a smaller or larger jar throws off the proportions. A pint jar will leave you with too little dough, while a half-gallon jar will make the cookies spread too thin.
I once used a pint jar and ended up with only 12 cookies instead of the expected 24. Stick to the quart size for the perfect balance of dough and swirl distribution.
Nutrition facts
Frequently asked questions
Can I make this recipe without a mason jar?
If you don’t have a quart-sized mason jar, use a large mixing bowl or even a ziplock bag (lay it flat and layer the ingredients). The key is maintaining the same dry-wet-dry layering technique—just distribute the chocolate chips evenly between the flour layers. For the bag method, seal it tightly and knead gently to combine before scooping portions.
How do I adjust this for dietary restrictions?
For gluten-free cookies, replace the all-purpose flour with a 1:1 gluten-free blend (like Bob’s Red Mill). For vegan cookies, use vegan butter and flax eggs (1 tbsp ground flax + 3 tbsp water per egg). Reduce sugar by ¼ cup if using white chocolate chips instead of semisweet. Always check your substitutes—some brands require extra moisture or binding agents.
Can I add nuts or other mix-ins?
Yes! Fold in ½ cup chopped walnuts or pecans with the flour layers, or add ¼ cup dried cranberries for a festive twist. For extra crunch, sprinkle sea salt flakes on top before baking. Just remember: every ½ cup of add-ins replaces ¼ cup flour to maintain proper texture. Toast nuts first for maximum flavor!
Why did my cookies spread too much?
Overmixing the wet ingredients or using room-temperature butter causes excessive spreading. Always use cold cubed butter and mix wet ingredients just until combined (30-45 seconds after adding eggs). Chill the dough for 30 minutes before baking if your kitchen is warm. The oven should be fully preheated to 375°F—cold spots cause uneven baking.
How do I store leftover dough?
Seal the jar tightly with plastic wrap pressed directly against the dough, then store in the fridge for up to 2 weeks or freeze for 3 months. Thaw overnight in the fridge before baking. For extra protection, wrap the jar in foil before freezing. Leftover baked cookies stay fresh for 5 days in an airtight container—revive stale cookies by warming at 200°F for 5 minutes.

- 3lb Prime Rib Roast Recipe: Juicy Pink Center Guaranteed in 3 Hours - October 31, 2026
- 5 Spice Cake Recipe: Warmly Spiced Layers With Crunchy Top - October 31, 2026
- 1950’s Macaroni and Cheese Recipe: Nostalgic Creamy Cheese Sauce with Buttery Noodles - October 31, 2026