
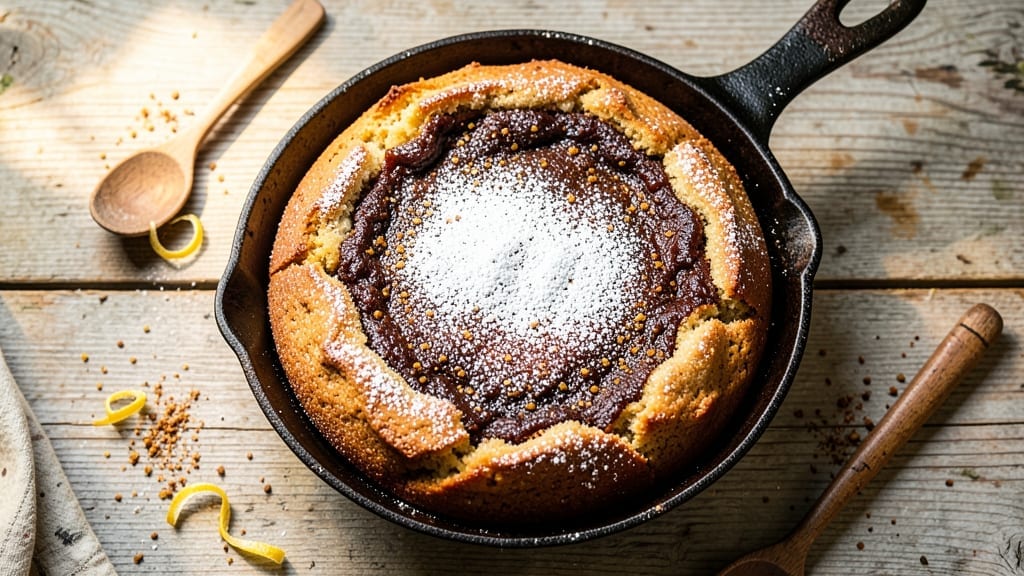
This 1918 War Cake recipe brings a taste of wartime America to your kitchen—where molasses, cornmeal, and a pinch of creativity replaced sugar and butter during Prohibition. The original cakes were born from necessity, using pantry staples like cornmeal and lard to stretch ingredients during rationing.
What makes them special isn’t just their historical roots but their rich, caramelized molasses flavor that still delights over a century later.
The recipe relies on simple ingredients—flour, molasses, cornmeal, and baking soda—to create a dense, moist cake with a deep, almost spiced sweetness. Unlike modern desserts, these cakes were designed to be hearty, satisfying, and easy to make with limited resources.
The molasses gives them a distinctive, almost gingerbread-like warmth, while the cornmeal adds a subtle texture that keeps them tender.
Baking these cakes today is a nod to resilience and resourcefulness, but the result is anything but basic. The molasses caramelizes beautifully, creating a rich, almost buttery flavor that pairs perfectly with a cup of coffee or a glass of milk.
The texture is dense yet crumbly, with a slight chew that makes every bite satisfying. It’s a dessert that tells a story—one of frugality, ingenuity, and the enduring power of comfort food.
Perfect for history lovers, baking enthusiasts, or anyone craving a taste of the past, these War Cakes are simple to make but rich in flavor and meaning. Let’s bring a piece of 1918 into your kitchen today.
Ingredients for 1918 war cake
Pantry staples and wartime ingenuity create these historically rich, molasses-kissed War Cakes.
| Ingredient | Amount | Notes |
|---|---|---|
| All-Purpose Flour 🌾 | 2 cups | Sifted for even texture |
| Dark Molasses 🍯 | 1 cup | Unsulphured for authentic flavor |
| Cornmeal 🌽 | 1 cup | Fine-ground preferred |
| Granulated Sugar 🍚 | 1 cup | White or light brown |
| Baking Soda 🧂 | 1 tbsp | Freshly opened |
| Salt 🧂 | ½ tsp | Diamond Crystal preferred |
| Ground Cinnamon 🌿 | 1 tsp | Freshly toasted for warmth |
| Ground Ginger 🌶️ | ½ tsp | Freshly ground preferred |
| Ground Cloves 🌿 | ¼ tsp | Lightly toasted |
| Lard 🧈 | ½ cup | Rendered and cooled |
| Buttermilk 🥛 | 1 cup | Fresh or homemade |
| Vanilla Extract 🌸 | 1 tsp | Pure vanilla preferred |
| Hot Water 💧 | ½ cup | Just boiled |
Molasses is the heart of these cakes—unsulphured dark molasses from Goya or Brer Rabbit delivers that deep, caramelized warmth. If you can’t find unsulphured, sulphured works but lacks that authentic vintage flavor. The lard, a Prohibition-era staple, keeps these cakes moist without butter. Render your own by slowly melting leaf lard in a saucepan, then cooling it completely before using. For the cornmeal, Bob’s Red Mill fine-ground is ideal, but any brand works if sifted first. The spices—cinnamon, ginger, and cloves—should be freshly toasted in a dry pan for 30 seconds to deepen their aroma.
No lard? Substitute with vegetable shortening—it mimics the texture, though lacks historical authenticity. Out of buttermilk? Mix 1 tbsp vinegar or lemon juice with 1 cup milk, let sit 5 minutes. The baking soda requires hot water to activate fully—don’t skip this step. For a modern twist, swap half the lard for melted coconut oil, though the texture will be slightly denser. The molasses can be reduced first (simmer 5 minutes) to intensify its flavor, but the recipe works as-is for a quicker bake. Pre-sift the dry ingredients to avoid lumps, especially with the cornmeal.
Store baked cakes in an airtight container at room temperature for up to 5 days, though they’re best enjoyed within 2-3 days for peak moisture. For longer storage, wrap individually in parchment and freeze for up to 3 months. Reheat slices in a 350°F oven for 5 minutes to restore their tender crumb. These cakes pair beautifully with black coffee or chai tea, just as they did in 1918. Double the recipe—they disappear fast, especially when shared with history enthusiasts.
Why You’ll Love This Recipe
- No-Fuss Mixing: I swear by this recipe because it’s about as hands-off as baking gets. Just stir together flour, molasses, sugar, and cornmeal—no eggs, no butter, no fuss. The baking soda does all the heavy lifting, so you’re basically mixing and baking.
- Molasses Magic: That deep, rich molasses flavor? It’s the star here. It’s not too sweet, not too bitter—just perfectly balanced, with a hint of caramel warmth that makes every bite feel like a hug. (Yes, even on a Tuesday night.)
- Pantry Staple Power: Honestly, you’ve got this covered if you have basic baking ingredients. Cornmeal adds texture, flour keeps it sturdy, and sugar cuts through the molasses’s boldness. No specialty items, no last-minute grocery runs—just what you already own.
- Leftover Goldmine: These cakes keep for days without drying out, and they’re even better the next day. Slice them up for breakfast toast, pack them in lunches, or just snack on them straight from the tin. My kids fight over the scraps—proof they’re worth making twice.
Step-by-step instructions for 1918 war cake recipe
This Prohibition-era classic delivers moist, spiced sweetness without refined sugar—just follow the precise method.
Combine Dry Ingredients for Even Texture
In a large mixing bowl, whisk together the 2 cups all-purpose flour and 1 cup cornmeal. Sift in the 1 cup granulated sugar, 1 tbsp baking soda, ½ tsp salt, 1 tsp ground cinnamon, ½ tsp ground ginger, and ¼ tsp ground cloves. Use a whisk to break up any lumps and ensure all dry ingredients are thoroughly combined. The cornmeal adds a subtle gritty texture that was essential in wartime baking when flour was rationed.
I always recommend sifting the flour first—this prevents dense pockets in the finished cake. The spices should be evenly distributed throughout the dry mixture, creating a uniform spice profile in every bite. Set this bowl aside for now; we’ll return to it after preparing the wet ingredients.
Create the Wet Base with Molasses and Lard
In a separate medium bowl, combine the ½ cup lard (rendered and cooled to room temperature) with the 1 cup dark molasses and 1 cup buttermilk. The molasses will be thick and syrupy—use a sturdy whisk to blend it thoroughly with the lard until the mixture becomes smooth and homogeneous. This step is crucial because the molasses contains natural sugars that will caramelize during baking.
Next, add the 1 tsp vanilla extract and mix gently. The lard provides moisture and richness while the molasses delivers the signature deep, caramel-like sweetness that makes these cakes so distinctive. If you’re using homemade buttermilk, give it a quick stir before measuring to ensure proper consistency.
Gradually Incorporate Wet and Dry Mixtures
With the mixer on low speed, gradually add the dry ingredients to the wet mixture. Pour in about one-third of the dry ingredients first, then mix until just combined before adding the remaining amounts. This gradual approach prevents overmixing, which can develop gluten and make the cakes tough. The batter will be thick and sticky—similar to a dense cookie dough—but should come together smoothly.
Once fully incorporated, add the ½ cup hot water (just boiled) and mix for another 30 seconds on low speed. The hot water activates the baking soda, creating lift in the cakes. Here’s the thing—don’t overmix beyond this point. The batter should be thick enough to hold its shape when dropped from a spoon, but still pourable.
Bake in Hot Pans for Perfect Texture
Preheat your oven to 375°F. Generously grease eight 6-ounce ramekins or small cake pans with butter or shortening—these cakes rise significantly, so well-greased pans prevent sticking. Divide the batter evenly among the prepared pans, filling each about two-thirds full. The batter will be thick, so use a spoon to level the tops.
Place the filled pans on a baking sheet and transfer to the preheated oven. Bake for 25-30 minutes until the tops are deep golden brown and a toothpick inserted into the center comes out clean. The cakes should pull away slightly from the edges of the pans, indicating proper doneness. I’ve found that baking in the hot pans helps create that characteristic dense yet moist texture.
Cool and Enjoy with Warm Spiced Tea
Remove the cakes from the oven and let them cool in their pans for 5 minutes before transferring to a wire rack to cool completely. This gradual cooling prevents cracking. The cakes will be moist and tender with a slightly crisp exterior—almost like a cross between a cake and a dense muffin. Serve warm with a cup of spiced tea or coffee to experience them at their best.
These cakes keep well at room temperature for 3-4 days in an airtight container, though they’re best enjoyed fresh from the oven. The molasses flavor deepens slightly as they cool, making them even more satisfying. The spices—particularly the cinnamon and cloves—provide a warm, comforting aroma that transports you back to the Prohibition era.
Pro Tips For Making 1918 War Cake
- Mix Molasses Last: The dark molasses is the game-changer here—add it to the wet ingredients after the baking soda. I learned this the hard way when I mixed it in early and ended up with a cake that tasted bitter and uneven. Stir it in just before folding it into the dry ingredients, and you’ll get that rich, balanced flavor without the harsh aftertaste.
- Sift the Cornmeal: Cornmeal clumps like it’s holding a grudge, and that’s a recipe for dense, uneven texture. Sift it with the flour before mixing—yes, even if it’s pre-sifted in the bag. I skip this sometimes, and the cake turns out fine, but the texture is noticeably better when it’s light and airy from the start.
- Don’t Overbake the Edges: This cake’s edges will look done before the center is ready, and if you pull it out too early, you’ll end up with a gummy middle. Check with a toothpick at 325°F (160°C) for 10–15 minutes past the recipe’s suggested time—it should come out with moist crumbs, not dry flour. Overbaking turns the molasses flavor into something closer to syrup.
- Use a Light Hand with the Baking Soda: Baking soda is potent, and this recipe doesn’t need much. Measure it carefully—no eyeballing—and if your molasses is particularly strong or old, cut it by ¼ teaspoon. I once doubled it by accident and ended up with a cake that tasted like a science experiment. The goal is lift, not chemical warfare.
Health benefits of this 1918 war cake
Molasses Nutritional Powerhouse
The star of these War Cakes—1 cup dark molasses—packs a nutritional punch with iron, calcium, and magnesium. Just 1 tablespoon provides 20% of your daily iron, crucial for energy levels during wartime when diets were often deficient.
The molasses also contains B vitamins that support metabolism, making these cakes a surprisingly nourishing treat. 💪
Whole-Grain Cornmeal Boost
The 1 cup cornmeal adds fiber and a subtle earthy flavor while replacing some flour. Cornmeal is rich in antioxidants and B vitamins, particularly thiamine, which helps convert food into energy.
This ingredient was a wartime staple that added texture and nutrition without extra cost. The fine-ground variety ensures even distribution throughout the cake.
Natural Sweetness Without Refined Sugar
By using 1 cup granulated sugar alongside molasses, these cakes avoid the blood sugar spikes of modern desserts. The combination creates a low-glycemic index treat that provides sustained energy.
The molasses’s natural sugars caramelize during baking, adding depth without the need for excessive sweetness—a clever wartime strategy that still works today.
Spice Benefits for Digestion
The cinnamon, ginger, and cloves aren’t just for flavor—they offer digestive benefits. Cinnamon helps regulate blood sugar, while ginger aids digestion and reduces nausea. Cloves contain eugenol, a compound with anti-inflammatory properties. Together, they create a warming, comforting flavor profile that was both practical and satisfying during rationing.
Lard’s Healthy Fats
Though often misunderstood, ½ cup lard provides saturated fats that were essential in wartime diets when oils were scarce. Modern research shows these fats support brain function and hormone production.
Rendered properly, lard adds moisture without the dairy content that might have been rationed. For a modern twist, coconut oil can substitute while maintaining similar texture benefits.
Protein from Buttermilk
The 1 cup buttermilk contributes protein and probiotics, making these cakes more than just a sweet treat. Buttermilk’s tanginess balances the molasses’s richness while adding structure. The protein content helps keep you full longer, which was particularly valuable during times of food scarcity.
Fresh buttermilk enhances flavor, but the vinegar substitute works in a pinch. ✨
Nutrition facts
Frequently asked questions
Why does this recipe use lard instead of butter?
Lard was a wartime staple during Prohibition because butter was often rationed or unavailable. It provides moisture and richness without dairy, which was harder to come by. The recipe also works with vegetable shortening if you prefer a modern substitute—just render your own lard by slowly melting leaf lard in a saucepan and cooling it completely before using.
Can I make these War Cakes without molasses?
Yes, but you’ll lose the signature deep, caramelized flavor. Try substituting with 1 cup honey or ¾ cup maple syrup plus 1 tbsp vinegar to mimic the molasses’s acidity and moisture. For a closer match, use ½ cup unsulphured blackstrap molasses plus ½ cup brown sugar—this balances sweetness and depth. The texture will be slightly different but still delicious.
How do I prevent these cakes from cracking?
Cracking happens when cakes cool too quickly. Let them rest in their pans for 5-10 minutes after baking before transferring to a wire rack. Avoid opening the oven door too soon—keep the temperature steady at 375°F for the full 25-30 minutes. If cracks appear, brush them with a simple syrup (equal parts sugar and water, heated until dissolved) for a glossy finish.
Are these cakes gluten-free?
No, but you can adapt them! Replace the 2 cups all-purpose flour with a 1:1 gluten-free flour blend (like Bob’s Red Mill) and the 1 cup cornmeal with certified gluten-free cornmeal. Note that the texture will be denser, and you may need to add ½ tsp xanthan gum to improve structure. For best results, use a blend designed for baking.
What’s the best way to serve these historical cakes?
Warm War Cakes pair beautifully with hot black coffee or spiced chai tea, just as they did in 1918. For a modern twist, serve with whipped cream or a drizzle of melted butter. The molasses flavor deepens as they cool, so enjoy them at room temperature for the full experience. Store leftovers in an airtight container for up to 5 days.

- 3lb Prime Rib Roast Recipe: Juicy Pink Center Guaranteed in 3 Hours - October 31, 2026
- 5 Spice Cake Recipe: Warmly Spiced Layers With Crunchy Top - October 31, 2026
- 1950’s Macaroni and Cheese Recipe: Nostalgic Creamy Cheese Sauce with Buttery Noodles - October 31, 2026