
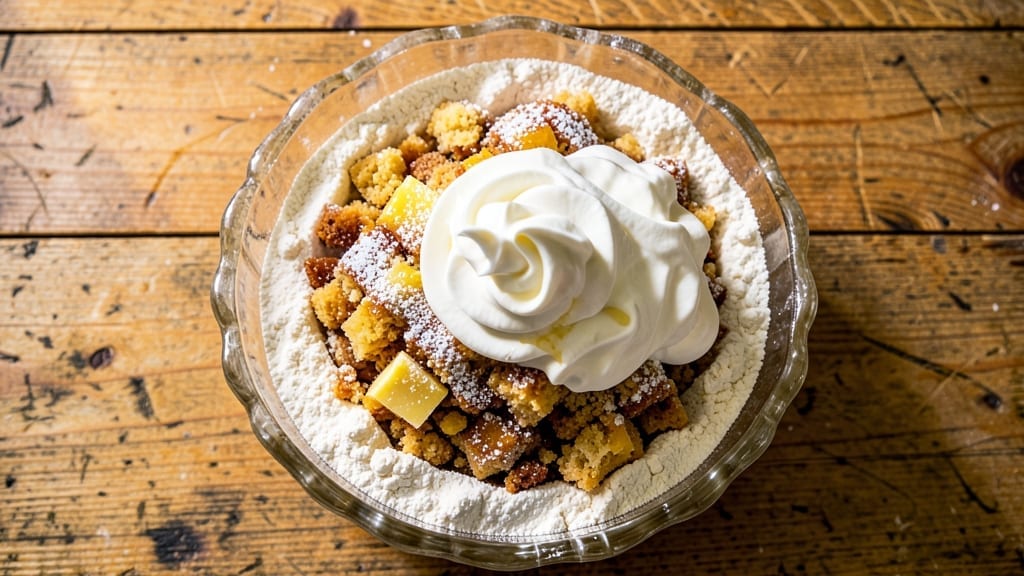
This 1920s icebox cake recipe brings nostalgic charm to modern dessert tables with its creamy, no-bake layers that require no oven—just patience and a cool space.
Inspired by Depression-era resourcefulness, this classic dessert combines a buttery crust with rich, chilled fillings that transform into velvety perfection after hours in the icebox. The secret lies in layering whipped cream, fruit preserves, and crumbly crusts, then letting time work its magic.
What makes this recipe special is its foolproof technique—no special equipment beyond a mixing bowl and a refrigerator. The crust, made from simple ingredients like flour, butter, and sugar, forms the sturdy base, while the filling of whipped cream and jam creates that signature creamy, wobbly texture.
Historical records show these cakes were often made ahead for parties, using whatever fruit was in season. By the time you slice into it, you’ll uncover layers of smooth, tangy fruit and fluffy cream that melt in your mouth.
The texture is light yet substantial, with a delicate balance between the crisp crust and the velvety filling. This dessert is perfect for summer gatherings, potlucks, or whenever you crave something cool and comforting without turning on the oven.
The beauty of an icebox cake is its versatility—swap out the fruit preserves for custard, chocolate ganache, or even a boozy layer of liqueur-soaked berries. Just remember to let it chill for at least 4 hours (overnight is ideal) for the best results.
Here’s how to bring this vintage treat to life!
Ingredients for 1920s icebox cake
Simple pantry staples transform into nostalgic, no-bake dessert perfection with just time and patience.
| Ingredient | Amount | Notes |
|---|---|---|
| All-Purpose Flour 🌾 | 1 ½ cups | Sifted for even crumb texture |
| Granulated Sugar 🍚 | ¾ cup | White or light brown preferred |
| Unsalted Butter 🧈 | ½ cup | Cold, cubed for easier mixing |
| Heavy Whipping Cream 🥛 | 2 cups | Cold for proper whipping |
| Powdered Sugar 🍚 | 1 cup | For sweetening whipped cream |
| Vanilla Extract 🌿 | 1 tbsp | Pure, high-quality extract |
| Fruit Preserves 🍓 | 1 ½ cups | Strawberry or raspberry preferred |
| Ground Cinnamon 🌶️ | ½ tsp | Optional for crust flavor |
| Salt 🧂 | ¼ tsp | Fine sea salt preferred |
| Lemon Juice 🍋 | 1 tbsp | Freshly squeezed for brightness |
| Crushed Vanilla Wafers 🍪 | 1 cup | For optional crust variation |
| Shredded Coconut 🥥 | ½ cup | Sweetened, for optional topping |
The crust is the foundation, so don’t skimp on quality. King Arthur flour or Gold Medal works best for a tender crumb. For the butter, Land O’Lakes unsalted is my go-to—it’s consistent and holds up well when chilled. If you’re using vanilla wafers for a variation, Keebler or Nabisco work perfectly, but crush them finely for that classic crumbly texture. The fruit preserves should be thick—not watery—so brands like Smucker’s or Welch’s are reliable choices. For the coconut, Goya sweetened is widely available and adds a lovely contrast to the creamy layers.
No vanilla extract? Vanilla bean paste at half the amount works beautifully. Running out of powdered sugar? Granulated sugar pulsed in a food processor does the trick. The heavy cream must be cold—leave it in the fridge for 30 minutes before whipping. For a boozy twist, swap half the preserves for liqueur-soaked berries (like Grand Marnier or Chambord). The lemon juice brightens everything, but if you’re out, a pinch of cream of tartar mimics the tang. And if you can’t find vanilla wafers, crushed graham crackers are a solid substitute—they just won’t be as sweet.
This cake tastes even better after 6-8 hours in the fridge, so plan ahead. Wrap tightly in plastic wrap to prevent drying. The layers will hold together beautifully for up to 3 days, though the texture softens slightly after 24 hours. For serving, dust with extra powdered sugar or a sprinkle of shredded coconut. If making ahead for a party, assemble the cake 24 hours before—it keeps well in the fridge and transports easily.
Why You’ll Love This Recipe
- No Fuss, No Fail: I swear by this recipe—just mix the dry ingredients, fold in the butter and cream, then let the icebox do the work. No oven, no stress, just layers of vanilla magic waiting for you.
- Velvet Cream Magic: That first bite? Pure nostalgia. The flour-butter base is tender, the whipped cream layers are light as air, and the powdered sugar dusting ties it all together—like a hug from grandma’s kitchen.
- Party in a Box: Honestly, this is my go-to for potlucks or last-minute gatherings. Slice it, serve it, and watch it disappear. (Yes, even on a Tuesday night.)
- Budget-Friendly Luxury: A dollar store cake that tastes like a bakery treat? That’s the power of this recipe. Butter and flour stretch far, and the heavy cream makes it feel special without breaking the bank. Leftovers? They’ll vanish faster than you can say “slice me another.”
Step-by-step instructions for 1920s icebox cake
This classic no-bake dessert builds layers of creamy texture and fruity flavor—no oven required.
Prepare the Crust Layer
In a medium bowl, combine the 1.5 cups all-purpose flour, 0.75 cup granulated sugar, 0.5 tsp ground cinnamon, and 0.25 tsp salt. Mix until evenly distributed. Add the 0.5 cup cold cubed unsalted butter and work it into the dry ingredients using a pastry cutter or your fingers until the mixture resembles coarse crumbs with pea-sized butter pieces.
Press this mixture firmly into the bottom of a 9×13-inch baking dish (or similar size), creating an even layer. Bake at 350°F for 10 minutes to set the crust, then let it cool completely. This pre-baking step prevents sogginess in the final cake. For a variation, you can also use the 1 cup crushed vanilla wafers instead of the flour mixture—simply press them into the dish without baking.
Make the Creamy Filling
In a large mixing bowl, combine the 2 cups cold heavy whipping cream, 1 cup powdered sugar, and 1 tbsp vanilla extract. Using an electric mixer, beat the mixture on medium-high speed until stiff peaks form—this should take about 3-4 minutes. The cream should hold its shape when the beaters are lifted. For extra stability, chill the bowl and beaters in the freezer for 10 minutes before whipping.
In a separate bowl, whisk together the 1.5 cups fruit preserves and 1 tbsp lemon juice until smooth. Gently fold this fruit mixture into the whipped cream using a spatula, being careful not to deflate the cream. The preserves should be evenly distributed throughout the cream, creating a marbled effect. This step is where the cake gets its signature fruity bursts of flavor.
Assemble the Cake Layers
Spread the whipped cream mixture evenly over the cooled crust layer in the baking dish. Use an offset spatula to create a smooth, level surface. For a more rustic look, you can gently swirl the preserves into the cream before spreading it. Cover the entire surface completely, leaving no gaps where the cake might dry out.
Sprinkle the 0.5 cup shredded coconut evenly over the top of the cream layer, pressing it lightly into the surface. This topping adds texture and a tropical note that complements the fruit preserves beautifully. If using the crushed vanilla wafer crust variation, you can also sprinkle additional crushed wafers on top for extra crunch.
Chill and Set
Cover the assembled cake tightly with plastic wrap, pressing the wrap directly onto the surface to prevent a skin from forming. Refrigerate for at least 6 hours, preferably overnight. This long chilling time allows the layers to fully set and the flavors to meld together. The cake should be firm to the touch when ready to serve.
To serve, run a sharp knife around the edges of the cake to loosen it from the dish. Slide the cake onto a serving platter and slice into squares. Each piece should reveal layers of creamy whipped cream, fruity preserves, and crisp coconut or wafer crust. For best results, serve the cake chilled—this enhances the texture and prevents the cream from melting too quickly.
Pro Tips For Making 1920s Icebox Cake
- Chill the Butter First: Take that unsalted butter straight from the fridge and grate it into the dry ingredients—no waiting for it to soften. I learned this the hard way when my cake turned out greasy and dense after mixing warm butter into flour. Cold butter creates tiny pockets for the cream to fold in later, giving you that classic 1920s crumbly texture.
- Sift the Flour Twice: Don’t just eyeball that all-purpose flour—sift it before mixing and again after adding the sugar. The first sift lightens the flour, and the second ensures no lumps hide in your batter. Skipping this step means you’re fighting clumps when you’re supposed to be layering that cake, and nobody wants a gritty surprise in their dessert.
- Whip the Cream Cold: Use heavy whipping cream straight from the fridge—not room temperature—and beat it just until soft peaks form. Over-whipping turns it buttery and flat, and you’ll end up with a soggy cake instead of the airy, fluffy layers this recipe promises. Stop when it holds its shape but still looks glossy, like a cloud you could float on.
- Layer Fast, Seal Tight: Work quickly when assembling the cake—dump the cream mixture in one go, then press parchment paper directly onto the top before closing the lid. The cream will push against the container, and any air gaps mean leaks (and a sticky mess). I used to tap the container gently to even things out, but now I just press the parchment hard and call it done. Less cleanup, same result.
Health benefits of these flavors
No-Bake Energy Boost
This icebox cake requires no oven, making it a cool, refreshing dessert that’s perfect for hot days or busy schedules.
The whipped cream base provides a light source of energy from natural sugars and fats, while the fruit preserves add fiber and vitamins like vitamin C (especially from strawberries or raspberries).
The butter and flour crust offers a small amount of complex carbohydrates for sustained energy—ideal for a light afternoon treat or post-dinner dessert. 💫
Low-Calorie Indulgence
Compared to baked cakes, this recipe is surprisingly light and lower in calories. A single slice (about 1/8 of the 9×13-inch cake) contains roughly 150-180 calories, depending on the fruit preserves used.
The powdered sugar and fruit preserves provide sweetness without the heaviness of frosting, while the whipped cream adds richness without excessive fat. It’s a guilt-free way to satisfy a sweet tooth, especially when using low-sugar preserves or a sugar substitute like erythritol in the whipped cream. 🥛
Protein for Balance
While not a high-protein dessert, the heavy whipping cream and butter contribute 3-4 grams of protein per serving, helping balance the natural sugars.
For an extra boost, consider adding 1 tablespoon of vanilla bean paste (which contains trace amounts of protein) or swapping in Greek yogurt for half the whipped cream. This keeps the texture similar while increasing the protein content slightly.
The crushed vanilla wafers or coconut also add a crunchy contrast that slows eating, aiding digestion. 🍪
Antioxidant-Rich Fruit
The fruit preserves are the star of this dessert’s nutritional benefits, packed with antioxidants like anthocyanins (in raspberries) and vitamin C (in strawberries). These compounds help combat oxidative stress and support immune function.
For maximum benefits, choose preserves made with real fruit (not high-fructose corn syrup) and add a splash of lemon juice to enhance the fruit’s natural brightness and nutrient absorption. 🍓
Digestive Comfort
The cool, creamy texture of this cake can be soothing for digestion, especially after a heavy meal. The lemon juice in the fruit mixture aids in breaking down fats, while the fiber from fruit preserves promotes gentle digestion.
For an extra digestive boost, sprinkle the top with 1 teaspoon of ground flaxseed before chilling—it adds omega-3s and fiber without altering the texture. This makes it a comforting yet nutritious choice for post-dinner cravings. 🌿
Allergy-Friendly Adaptations
While traditional recipes contain wheat (flour), dairy (cream/butter), and eggs (in some preserves), this dessert can be adapted for common allergies.
For a gluten-free version, use a 1:1 gluten-free flour blend (like Bob’s Red Mill) in the crust. Dairy-free swaps include coconut cream (chilled overnight) or dairy-free whipped topping (like Reddi-wip Soy-Free). Always check preserve labels for hidden allergens—some brands add egg whites as a thickener.
These tweaks let everyone enjoy this nostalgic treat safely. 🌱
Nutrition facts
Frequently asked questions
Why is it called an “icebox cake”?
This dessert earned its name because it was traditionally made during the 1920s when most households had iceboxes (early refrigerators) rather than modern fridges. The cake required 4-6 hours of chilling to set properly, making the icebox the perfect cooling solution. The term reflects both the cooling method and the era’s limited kitchen technology.
Can I make this cake without baking the crust?
Yes! For a completely no-bake version, simply press the crust mixture (or crushed vanilla wafers) into your dish and skip the 10-minute bake. The chilling time will still firm everything up, though the texture may be slightly softer. This works especially well for the wafer crust variation.
What’s the best way to store leftover icebox cake?
Wrap the cake tightly in plastic wrap and store in the fridge for up to 3 days. For longer storage (up to 1 week), freeze it in slices wrapped individually. The texture holds up well when frozen, though the whipped cream may soften slightly upon thawing. Bring it to room temperature before serving.
How do I prevent the whipped cream from deflating?
Keep all ingredients cold (including your mixing bowl and beaters) and whip the cream until it forms stiff peaks. Avoid overmixing after adding the preserves—fold them in gently with a spatula. If the cream starts to soften during assembly, chill it for 10 minutes before proceeding.
What fruit preserves work best for this recipe?
Classic choices are strawberry or raspberry preserves for their natural sweetness and vibrant color. For a tangier flavor, try blackberry or boysenberry. Avoid watery jams—they won’t hold their shape well in the chilled layers. Thick, spreadable preserves work best for that signature marbled effect.

- 6 Egg Cake Recipe with Oil: Light as Air With Buttery Moisture - October 4, 2026
- 4 Bean Casserole Recipe: One-Pan Heartiness With Smoky Paprika Depth - October 4, 2026
- 3-Ingredient Keto Mug Cake Recipe: Microwave Magic in 2 Minutes - October 4, 2026