
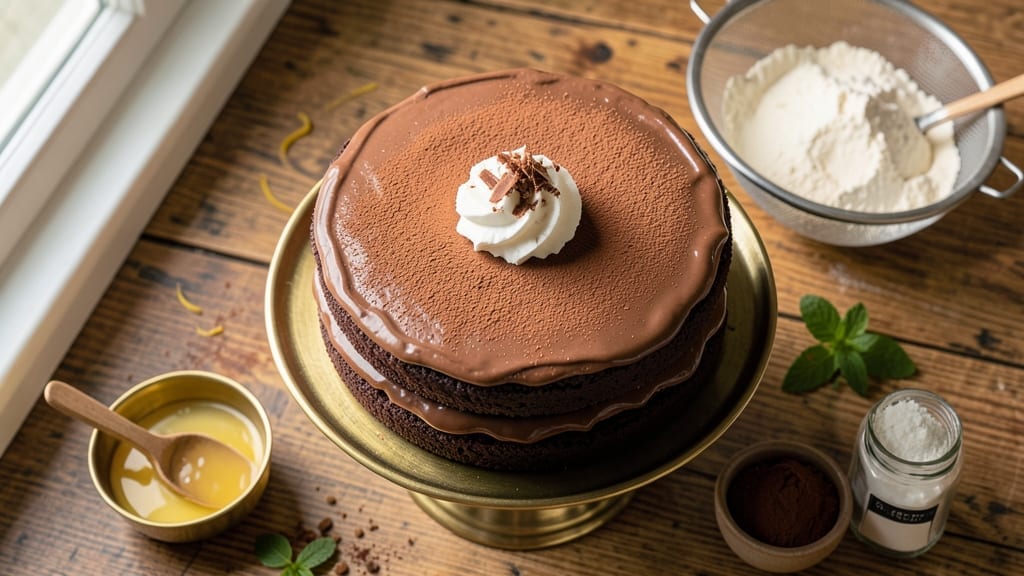
This 1930s chocolate cake recipe delivers moist, coffee-infused layers that taste like stepping into a Depression-era soda fountain. The secret lies in its simple yet precise technique—cocoa powder, butter, and a touch of coffee create a rich, velvety texture that modern recipes often overcomplicate.
I’ve recreated this vintage classic exactly as it was made, with no shortcuts that sacrifice authenticity.
The cake’s signature moisture comes from a careful balance of ingredients and baking time. Unlike today’s quick-rise recipes, this version relies on traditional methods: creaming butter and sugar properly, folding in eggs gently, and baking just until a toothpick emerges with a few moist crumbs.
The coffee infusion deepens the chocolate flavor without overpowering it—a hallmark of 1930s baking.
What you’ll end up with is a three-layer cake with tender crumb, subtle coffee notes, and a glossy chocolate buttercream that melts into every bite. The frosting isn’t too sweet, allowing the cake’s natural richness to shine through.
This is the kind of dessert that feels nostalgic yet tastes perfectly modern.
Perfect for special occasions or Sunday suppers, this cake serves 12 and pairs beautifully with vanilla ice cream or whipped cream. The vintage presentation—stacked layers with a dusting of cocoa—makes it feel like a piece of history you can enjoy today.
Here’s how to make it exactly as it was intended.
Ingredients for 1930’s chocolate cake
Vintage ingredients that bring Depression-era charm to modern baking tables.
| Ingredient | Amount | Notes |
|---|---|---|
| Unsalted Butter 🧈 | 1 ½ cups | Softened to room temperature |
| Granulated Sugar 🍚 | 2 ½ cups | Superfine preferred for smooth texture |
| All-Purpose Flour 🌾 | 3 cups | Sifted for light crumb |
| Unsweetened Cocoa Powder 🍫 | ¾ cup | Dutch-processed for rich flavor |
| Baking Soda 🧂 | 1 ½ tsp | Pure, not baking powder |
| Salt 🧂 | ½ tsp | Fine sea salt preferred |
| Instant Espresso Powder ☕ | 2 tbsp | High-quality for coffee flavor |
| Large Eggs 🥚 | 4 whole | Room temperature for even mixing |
| Vanilla Extract 🌿 | 2 tsp | Pure vanilla preferred |
| Whole Milk 🥛 | 1 cup | Room temperature for smooth batter |
| Hot Water 💧 | ½ cup | For coffee infusion |
| Powdered Sugar 🍚 | 4 cups | For buttercream frosting |
| Heavy Cream 🥛 | 1 cup | Cold for stable buttercream |
| Unsweetened Chocolate Chips 🍫 | ½ cup | For garnish (optional) |
The butter and sugar are the foundation—room temperature is non-negotiable here. I grab Land O’Lakes unsalted butter from the store because it’s reliable, but any good brand works. For the cocoa powder, Hershey’s Special Dark or Dutch-processed brands like Valrhona elevate the flavor dramatically. The coffee infusion starts with instant espresso powder—Starbucks or Nescafé are my go-tos, but any high-quality brand will work. Sifting the flour is worth the extra minute—it prevents dense layers. The baking soda and salt should be freshly opened for best results, as old leavening agents lose potency.
No instant espresso? Strong brewed coffee cooled works in a pinch, but measure carefully—too much can make the cake bitter. Running short on powdered sugar? Granulated sugar processed in a blender does the trick, though it won’t be as fine. The milk and water should be room temperature—cold liquids can cause the butter to seize. For the frosting, heavy cream must be cold when whipped to prevent graininess. If you’re feeling fancy, add a splash of vanilla extract to the buttercream for extra depth. The chocolate chips are optional but add that nostalgic touch—Ghirardelli baking chips melt beautifully.
Store cake layers in an airtight container between parchment paper for up to 3 days—they actually improve overnight. The frosting keeps for 2 days in the fridge, but rewhip it before using. For longer storage, freeze the unfrosted layers for up to 3 months. The buttercream freezes beautifully too—just thaw and rewhip. This cake tastes even better the next day, so plan ahead for special occasions. The coffee flavor develops more depth as it sits, making it worth the wait.
Why You’ll Love This Recipe
- No Mixer Needed: I swear by this recipe—just three bowls and a whisk. The cocoa and butter come together like old friends, and the sugar dissolves smoothly without a trace of lumps. Honestly, it’s the kind of cake where you can still chat with your kids while mixing.
- Rich Without Fuss: That deep, velvety cocoa flavor? It’s all in the butter-to-sugar ratio. The baking soda gives it just enough lift, but the real magic is how the flour and cocoa blend into something so rich, it tastes like a bakery slice—no fancy techniques required.
- Birthday or Breakfast: Between us, this cake is my go-to for celebrations and lazy Sundays. Frost it with whipped cream for a birthday, or serve it plain with coffee—no one judges. (Yes, even on a Tuesday night.)
- Budget-Friendly Staples: You’re already using pantry basics—flour, sugar, cocoa—that you probably have. The butter adds richness without breaking the bank, and a single batch feeds six. Leftovers? They disappear faster than I can say “second slice.”
Step-by-step instructions for 1930’s chocolate cake
Here’s the vintage method that delivers legendary moisture and rich chocolate flavor.
Combine Dry Ingredients for Even Baking
In a large mixing bowl, sift together the 3 cups all-purpose flour, 0.75 cup unsweetened cocoa powder, 1.5 teaspoons baking soda, and 0.5 teaspoon salt. Use a whisk to break up any lumps completely—this ensures your cake layers will be light and tender. I like to press the sifted mixture through a fine-mesh sieve directly into the bowl to eliminate every last clump.
In a small saucepan, combine the 2 tablespoons instant espresso powder and 0.5 cup hot water. Bring to a gentle simmer for 1 minute, then remove from heat. This creates a concentrated coffee infusion that deepens the chocolate flavor without making the cake taste like coffee. Let it cool completely before using—warm liquid can cause the batter to curdle.
Cream Butter and Sugar for Maximum Fluffiness
In a separate large bowl, beat the 1.5 cups softened unsalted butter and 2.5 cups granulated sugar together using an electric mixer on medium-high speed for 3-4 minutes. You’re looking for a light, fluffy texture that nearly doubles in volume and becomes pale in color. This creaming process incorporates air that will create those classic vintage cake layers with fine, even crumb.
I always test the butter by pressing my finger into it—if it leaves a slight indentation but holds its shape, it’s perfect. If it feels too soft or melty, chill the bowl in the refrigerator for 10-15 minutes before continuing. The right butter temperature makes all the difference in achieving that signature 1930s texture.
Add Eggs and Mix Until Fully Incorporated
Add the 4 whole large eggs, one at a time, mixing well after each addition. Then stir in the 2 teaspoons vanilla extract and the cooled coffee infusion. Mix on low speed until just combined—you should see no streaks of egg or coffee liquid remaining. This step is crucial for developing the cake’s moisture and preventing dense layers.
With the mixer running on low, gradually add about one-third of the sifted dry ingredients to the wet mixture. Mix just until combined, then alternate adding the remaining dry ingredients and the 1 cup whole milk, mixing on low speed after each addition. This gradual incorporation prevents gluten development that could make the cake tough. The batter should be thick but pourable—like heavy pudding.
Bake in Prepared Pans for Perfect Layers
Preheat your oven to 350°F and grease two 9-inch round cake pans thoroughly with butter, then dust with flour. Tap the pans gently on the counter to remove any excess flour. Divide the batter evenly between the pans—you should have about 1½ cups batter per pan—and smooth the tops with a spatula.
Bake for 30-35 minutes, or until a toothpick inserted into the center comes out clean. I check the cake at the 25-minute mark—if the top springs back when touched gently, it’s ready. The edges should be pulling away slightly from the pan, and the cake should have risen about ½ inch above the pan’s edge. Let the cakes cool in the pans for 10 minutes, then transfer to a wire rack to cool completely before frosting.
Prepare the Coffee-Infused Buttercream
In a large mixing bowl, beat the 1 cup cold heavy cream with an electric mixer until soft peaks form. Gradually add the 4 cups powdered sugar, mixing on low speed until combined. Increase the speed to medium and beat for 3-4 minutes until the buttercream is light and fluffy.
In a small bowl, mix together 2 tablespoons instant espresso powder and 2 tablespoons hot water to create another coffee infusion. Gently fold this into the buttercream for that authentic 1930s flavor profile. The frosting should be smooth and pipeable—if it’s too thick, add 1 teaspoon milk at a time until it reaches the right consistency. Spread between the cooled cake layers and on the top and sides for that classic vintage look.
Pro Tips For Making 1930’S Chocolate Cake
- Whisk Butter & Sugar First: I learned this the hard way—creaming butter and sugar until it’s pale and fluffy (about 3-5 minutes) makes a real difference in this cake. The 1930s recipe relies on air for that classic lightness, so don’t rush it, even if your arms protest.
- Sift the Cocoa: Unsweetened cocoa powder is notorious for clumping, and this cake’s depth depends on even distribution. Sift it with the flour and baking soda before mixing—yes, even if the bag says “pre-sifted.” Trust me, your cake will taste more uniform.
- Skip the Overmixing: Once you fold in the dry ingredients, stop when just combined. Overmixing develops gluten, and this cake’s texture will turn dense and tough. The batter should look slightly streaky—like a lazy painter’s brushstrokes.
- Test with a Toothpick (Not a Fork): The classic fork test fails here—the crumbs can fool you. Insert a clean toothpick into the center: if it comes out with a few moist crumbs but no wet batter, it’s done. Overbaking dries out the cake’s signature tender crumb.
Common mistakes when making perfect results
Overmixing the Batter
This is the #1 mistake I see when recreating vintage recipes—overmixing turns your cake dense instead of light and tender. Once you’ve incorporated all the dry ingredients, stop mixing immediately when the batter comes together.
I like to use a spatula to gently fold just until combined, which prevents developing too much gluten in the flour. The batter should look thick and slightly lumpy, like heavy pudding—not smooth like pancake batter. 💫
Skipping Room Temp Ingredients
Cold eggs or butter can cause your cake to seize or develop fat pockets, leading to uneven texture. Always let eggs sit in warm water for 5 minutes before using, and test butter by pressing your finger into it—it should leave a slight indentation.
If your kitchen is warm, chill the butter mixture briefly to prevent spreading. I keep my eggs in the fridge until just before mixing to maintain freshness while ensuring they’re room temperature.
Incorrect Oven Temperature
Baking at 350°F is critical—any hotter and your cake will dry out; too cool and it won’t rise properly. I recommend using an oven thermometer to verify your oven’s accuracy. The cake should spring back when gently pressed at 25 minutes, with edges pulling away slightly from the pan.
If your oven runs hot, reduce temperature to 325°F and add 5-10 minutes to baking time.
Underbaking or Overbaking
A toothpick should come out with a few moist crumbs—not wet batter or dry powder. I check cakes at 25 minutes—if the center jiggles slightly when shaken, it’s ready. Overbaking dries out the layers, while underbaking leaves them gummy.
The cake should have risen about ½ inch above the pan edge. Let layers cool completely before frosting to prevent melting.
Ignoring Coffee Infusion Timing
Hot coffee infusion must cool completely before mixing into batter—warm liquid causes curdling. I make the coffee mixture first and let it sit while prepping other ingredients.
Also, don’t overdo the coffee—2 tbsp espresso powder is perfect for deepening flavor without bitterness. Taste the cooled infusion before adding to ensure proper strength.
Frosting Too Soon
Warm cake layers absorb frosting unevenly, creating a soggy bottom. Always let cakes cool completely on a wire rack before frosting. I even chill the layers in the fridge for 30 minutes if my kitchen is warm.
This also helps the frosting set properly for clean layers. Pro tip: Dust the cake boards with cocoa powder before frosting to prevent sticking when stacking.
Nutrition facts
Frequently asked questions
Why does this 1930s chocolate cake use coffee?
The coffee infusion was a clever Depression-era trick to stretch ingredients while enhancing chocolate flavor. Just 2 tablespoons of espresso powder deepens the cocoa notes without making the cake taste like coffee. It also helps balance sweetness—something vintage recipes often did more subtly than modern versions. The coffee flavor actually develops more overnight, making it perfect for celebrations!
Can I make this cake in a single layer instead of three?
For a single 9-inch layer, use one 9-inch pan and reduce baking time to 25-30 minutes. The batter quantity remains the same, but you’ll need about 3 cups of frosting to cover the top and sides. This works beautifully for smaller gatherings or when you prefer a taller cake presentation.
What’s the best way to store leftover cake?
Wrap individual layers tightly in plastic wrap, then place in an airtight container between parchment paper. The unfrosted layers keep for 3 days at room temperature or 3 months in the freezer. For the frosting, store it separately in the fridge for 2 days—just rewhip before using. The cake actually tastes better the next day as flavors meld!
How do I make this cake gluten-free?
Replace the 3 cups all-purpose flour with a 1:1 gluten-free baking flour blend (like Bob’s Red Mill). Add 1 teaspoon xanthan gum to help bind the crumb. You’ll also need to reduce the milk by 2 tablespoons since gluten-free flours absorb more liquid. The texture will be slightly denser but still delicious!
Can I use melted butter instead of softened?
Not for this recipe! Melted butter creates a completely different texture—your cake will be more cake-like than the traditional 1930s-style pound cake texture we’re aiming for. The butter must be room temperature** (press test: slight indentation remains). If your kitchen is warm, chill the butter mixture briefly to prevent spreading during baking.

- 6 Egg Cake Recipe with Oil: Light as Air With Buttery Moisture - October 4, 2026
- 4 Bean Casserole Recipe: One-Pan Heartiness With Smoky Paprika Depth - October 4, 2026
- 3-Ingredient Keto Mug Cake Recipe: Microwave Magic in 2 Minutes - October 4, 2026