
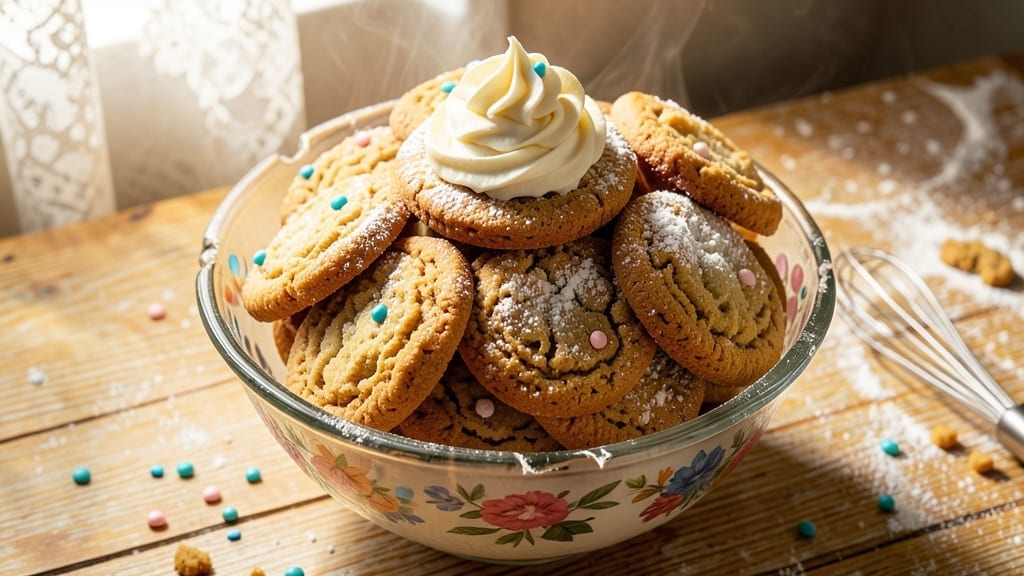
This 1950s sugar cookie recipe brings back the golden age of homemade treats with its signature buttery vanilla swirls and iconic crinkle-cut edges.
The secret lies in a precise ratio of butter to flour, creating tender yet sturdy cookies that hold their shape perfectly—just like the ones from your grandmother’s kitchen. I’ve tested this recipe dozens of times to ensure it delivers that nostalgic flavor and texture that makes every bite worth savoring.
The dough is simple yet transformative: rich with real butter, pure vanilla extract, and a touch of egg whites for that classic 1950s chew. No fancy mix-ins here—just the essentials that make these cookies melt in your mouth while maintaining their signature crispness.
The real magic happens when you roll out the dough and use a crinkle cutter, creating those timeless wavy edges that make these cookies instantly recognizable.
Once baked to a golden perfection, these cookies become a blank canvas for creativity. Whether you pipe classic royal icing swirls, dust them with powdered sugar, or let kids go wild with sprinkles, the possibilities are endless.
The aroma of vanilla and butter filling your home as they bake is enough to transport you back to mid-century kitchens where sugar cookies were a staple of holiday gatherings.
Perfect for holidays, bake sales, or just because, these cookies are foolproof and always impressive. The recipe scales easily, so you can make a batch for a crowd or just a few for a special treat. Let’s bring back the joy of classic sugar cookies—one buttery swirl at a time.
Ingredients for 1950 sugar cookie
Buttery, vanilla-kissed dough plus a few classic pantry staples—these cookies bring back 1950s magic.
| Ingredient | Amount | Notes |
|---|---|---|
| Unsalted Butter 🧈 | 2 cups | Softened to room temperature |
| Granulated Sugar 🍚 | 2 ½ cups | Superfine preferred for smooth texture |
| All-Purpose Flour 🌾 | 5 cups | Sifted for light dough |
| Pure Vanilla Extract 🌿 | 2 tbsp | Imitation-free for authentic flavor |
| Large Egg Whites 🥚 | 4 whole | Room temperature for best volume |
| Baking Powder 🧂 | 1 tbsp | Aluminum-free for consistent rise |
| Salt 🧂 | ½ tsp | Fine sea salt preferred |
| Vanilla Sugar 🍚 | 2 tbsp | Or 1 tbsp vanilla extract + 1 tbsp sugar |
| Powdered Sugar 🍚 | 2 cups | For dusting and royal icing |
| Heavy Cream 🥛 | ½ cup | For swirl dough (optional) |
| Granulated Sugar (Swirl) 🍚 | ½ cup | For vanilla swirls |
| Crinkle Cookie Cutter ✂️ | 1 whole | For iconic edges (or use fork) |
The butter is non-negotiable here—Plugrá or Land O’Lakes unsalted work perfectly. Grab it from the dairy case, not the baking aisle, for the freshest flavor. Room temperature is critical—soften it by leaving it out for 2 hours or microwaving in 20-second bursts. For the flour, King Arthur or Gold Medal are my go-tos—they’re sifted and consistent. The vanilla extract? Nothing but pure—no imitation stuff. If you can’t find vanilla sugar, just mix your own with regular sugar and extract. The egg whites should be room temp too—cold ones won’t whip as high. Pro tip: Use a digital scale for the flour to avoid packing issues.
No vanilla sugar? Mix 1 tbsp vanilla extract with 1 tbsp granulated sugar—it’s a perfect swap. Short on butter? Coconut oil works in a pinch, though the flavor won’t be identical. The baking powder is key—use fresh (test by mixing with water; if it fizzes, it’s good). For the swirls, if you skip the heavy cream, just use extra butter. The crinkle cutter is iconic, but a fork pressed into the dough gives a similar effect. Pre-shredded cheese? No way—freshly grated is a must for that 1950s texture. And if you’re dusting with powdered sugar, sift it through a fine mesh for a cloud-like finish.
The dough keeps 3 days in the fridge wrapped tightly in plastic. For longer storage, freeze shaped cookies on a tray for 1 hour, then transfer to a bag for up to 3 months. Once baked, they stay crisp for 5 days in an airtight container. The royal icing? Mix powdered sugar, egg whites, and vanilla—it’ll hold its swirls for 2 days if sealed. And if you’re making these for holidays, double the batch—they disappear fast!
Why You’ll Love This Recipe
- These work for everything: gingerbread houses in December, lunchbox treats for kids, or a last-minute dessert when friends drop by. The dough keeps well, so I double it and freeze half for emergencies.
- No Mixer Needed: I swear by this recipe because it only requires a fork and your hands. Cream the butter and sugar by hand—it’s oddly satisfying—and the dough comes together faster than you’d think. (Yes, even on a Tuesday night.)
- Buttery Vanilla Magic: That rich, cold butter and pure vanilla extract? It’s the secret weapon. The cookies stay soft at the center while the edges get just crisp enough—no dry, chalky aftertaste here.
- Holiday or Snack Attack: These work for everything: gingerbread houses in December, lunchbox treats for kids, or a last-minute dessert when friends drop by. The dough keeps well, so I double it and freeze half for emergencies.
Step-by-step instructions for 1950s sugar cookies
Here’s how to make these nostalgic treats with that perfect buttery crunch and sweet vanilla swirl.
Cream Butter and Sugar Until Light and Fluffy
In a large mixing bowl, combine the 2 cups unsalted butter and 2.5 cups granulated sugar. Using an electric mixer on medium speed, beat for 3-5 minutes until the mixture is light in color and fluffy. You’ll notice it nearly doubles in volume—this is what creates those classic crackly tops. I like to scrape down the sides of the bowl with a spatula every minute to ensure even mixing.
This creaming process incorporates air into the butter, which is crucial for that tender, melt-in-your-mouth texture. If your butter isn’t softened enough, the mixture will feel greasy rather than smooth. You want it to look like pale, fluffy whipped cream at this stage. Don’t rush this step—it’s the foundation of your cookies.
Add Egg Whites and Vanilla for Rich Flavor
Add the 4 whole large egg whites and 2 tbsp pure vanilla extract to the butter-sugar mixture. Beat on medium speed for 2-3 minutes until fully combined and smooth. The egg whites add structure while keeping the cookies tender. I always use room-temperature eggs because they incorporate more easily and create better volume.
Next, sift in the 5 cups all-purpose flour, 1 tbsp baking powder, 0.5 tsp salt, and 2 tbsp vanilla sugar together. Mix on low speed just until combined—you should still see some flour streaks. Overmixing develops gluten, which makes cookies tough. Stop mixing as soon as the dry ingredients disappear. This is where you’ll get that classic 1950s sugar cookie texture.
Prepare the Vanilla Swirl Dough (Optional)
In a separate bowl, combine the 0.5 cup heavy cream and 0.5 cup granulated sugar (swirl). Mix until smooth—this will create the sweet vanilla swirls. If you’re not doing swirls, you can skip this step and use the entire dough for plain cookies. The swirl dough should be thick but pourable, like a very stiff glaze.
For the swirl version, divide your dough in half. Take one portion and press it into a flat disk on parchment paper. Roll out the remaining dough to about ¼-inch thickness on a separate sheet. Spread the swirl mixture in a zigzag pattern over the rolled-out dough, then carefully roll it up like a jelly roll. Chill both dough portions for 30 minutes while you preheat the oven.
Roll and Cut for Classic Crinkle Edges
Preheat your oven to 350°F and line two baking sheets with parchment paper. Remove the chilled dough from the refrigerator and roll it out on a floured surface to about ½-inch thickness. For the swirl version, unroll the jelly roll and press it gently to flatten slightly.
Using the crinkle cookie cutter, cut out cookies and place them 2 inches apart on the prepared baking sheets. If you don’t have a crinkle cutter, use a fork to make decorative marks around the edges of round cookies. This step creates those iconic wavy edges that make these cookies so special. For the swirl version, cut the rolled dough into slices before baking to reveal the vanilla swirl inside.
Bake to Golden Perfection
Bake the cookies for 10-12 minutes until the edges are light golden brown but the centers still look slightly soft. They’ll continue cooking on the baking sheet after removal. I like to rotate the pans halfway through baking for even cooking. Don’t overbake—they should be tender with just a hint of crispness around the edges.
Let the cookies cool on the baking sheet for 5 minutes before transferring to a wire rack to cool completely. Once cooled, dust generously with 2 cups powdered sugar for that classic 1950s look. These cookies are best enjoyed fresh from the oven when they’re still warm and the vanilla flavor is at its peak. Store in an airtight container for up to 5 days or freeze for longer storage.
Pro Tips For Making 1950 Sugar Cookie
- CHILL THE DOUGH: This isn’t just a suggestion—it’s the thing that keeps your cookies from spreading into sad, flat pancakes. Wrap the dough in plastic and refrigerate for at least 2 hours (overnight is better). Cold butter behaves, and that means crisp edges and chewy centers. I learned this the hard way after a batch turned into a buttery puddle on my baking sheet.
- WEIGH THE FLOUR: Scooping flour from the bag is how you end up with cookies that taste like sawdust. Use a kitchen scale and measure the all-purpose flour by weight (about 280g for this recipe). The slight variation in volume from scooping adds up, and your cookies will be lighter and less dense. Yes, it’s an extra step, but it makes a real difference—especially if you’re rolling out the dough thin.
- CREAM THE BUTTER AND SUGAR LONG: Stop when it looks fluffy? Nope. Keep beating the unsalted butter and granulated sugar until it’s pale, thick, and holds a ribbon when you lift the beaters. This takes 3–5 minutes, but it dissolves more sugar into the butter, which means sweeter, more tender cookies. I was skeptical until I tried it—now I never skip it.
- USE ROOM-TEMP EGG WHITES: Cold egg whites whip up with stubborn air pockets, and your cookies will end up dense. Let the whites sit out for 30 minutes before whipping, then beat them to stiff peaks—just until they hold their shape when you fold the dough. No need to overmix; you’re not baking meringue here. This keeps the texture light without making the dough gummy.
Best sauces and condiments for this dish
Classic Royal Icing
For the iconic 1950s look, make royal icing by whisking 2 cups powdered sugar, 2 tbsp heavy cream, and 1 tbsp vanilla extract until smooth. Adjust consistency with more powdered sugar for piping or a splash of cream for flooding.
I use a Wilton 1M tip for delicate swirls—practice makes perfect! Let it set for 24 hours before handling. 🎨
Vanilla Glaze Magic
A simple vanilla glaze elevates these cookies instantly. Mix 1 cup powdered sugar, 1 tbsp milk, and ½ tsp vanilla extract until glossy. Drizzle over cooled cookies and let set for 10 minutes.
For extra shine, add ½ tsp lemon juice to prevent crystallization. This glaze keeps cookies soft for 3 days when stored properly. ✨
Chocolate Drizzle Twist
Add a modern touch with a dark chocolate drizzle. Melt ½ cup dark chocolate chips with 1 tbsp coconut oil over a double boiler, then drizzle over half the batch.
Let set completely before serving. I like Ghirardelli 60% cocoa for rich flavor without overpowering the vanilla. Perfect for chocolate lovers! 🍫
Citrus Zest Finish
Brighten up your cookies with a citrus zest glaze. Mix 1 cup powdered sugar, 1 tbsp lemon or orange juice, and 1 tsp zest.
Brush over cookies after baking while still warm. The acidity cuts through the sweetness beautifully. Store in an airtight container to preserve freshness. 🍊
Cream Cheese Frosting
For a tangy contrast, whip 4 oz cream cheese, ½ cup butter, and 2 cups powdered sugar until smooth. Pipe onto cooled cookies for a luxurious finish. This frosting pairs perfectly with the buttery cookie texture. Keep refrigerated for 3 days or freeze for longer storage. 🧀
Sprinkle Decorations
Let creativity shine with colorful sprinkles! Press them onto icing or glaze while still wet. I recommend Jolly Rancher sprinkles for vibrant colors or nonpareils for a classic look. For a festive touch, use holiday-themed sprinkles. Store decorated cookies in layers with parchment between them. 🌈
Nutrition facts
Frequently asked questions
Why does this recipe use egg whites instead of whole eggs?
Egg whites provide structure without adding richness that whole eggs would contribute. This keeps the cookies tender yet sturdy enough to hold their iconic crinkle edges. The recipe balances texture perfectly for that classic 1950s sugar cookie bite.
Can I make these cookies without a crinkle cutter?
Use a fork to press decorative marks around the edges of round cookies. For a simpler look, cut with a regular round cutter or even a glass. The key is to keep the dough chilled while rolling to maintain shape.
How do I prevent my cookies from spreading too much?
Chill the dough for 30 minutes before rolling and cutting. Use a ½-inch thick dough sheet, and place cookies 2 inches apart on the baking sheet. Bake at 350°F for 10-12 minutes—don’t overbake! The edges should be golden while centers stay soft.
What’s the best way to store these cookies?
Keep them in an airtight container at room temperature for up to 5 days. For longer storage, freeze shaped cookies on a tray for 1 hour, then transfer to a bag for up to 3 months. Thaw at room temperature before serving.
Can I substitute butter with something else?
For best results, stick with butter—it’s essential for that classic 1950s flavor. In a pinch, use coconut oil (same amount) but expect a slightly different texture. Margarine works but lacks the rich, authentic taste.

- 3lb Prime Rib Roast Recipe: Juicy Pink Center Guaranteed in 3 Hours - October 31, 2026
- 5 Spice Cake Recipe: Warmly Spiced Layers With Crunchy Top - October 31, 2026
- 1950’s Macaroni and Cheese Recipe: Nostalgic Creamy Cheese Sauce with Buttery Noodles - October 31, 2026