
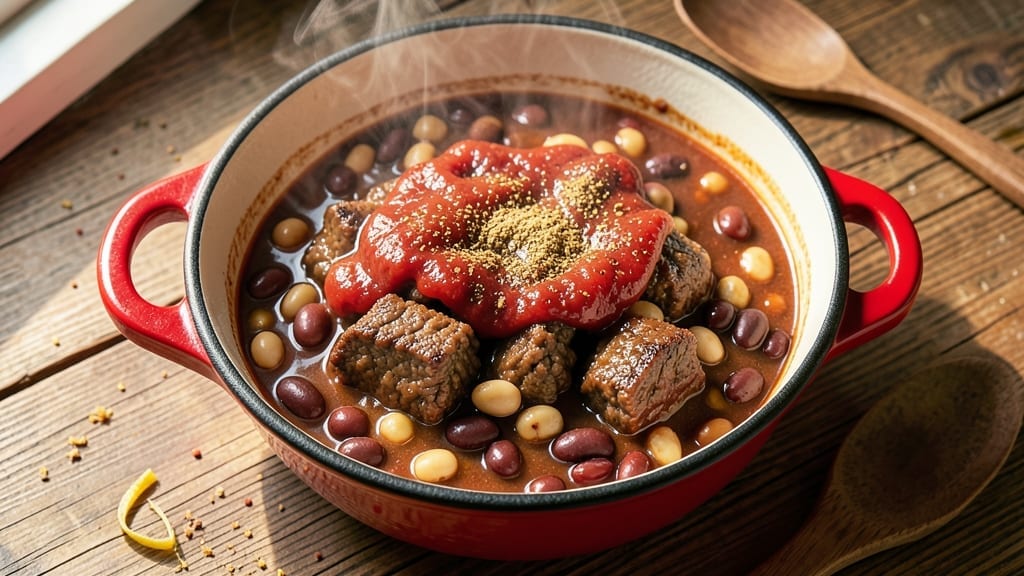
This 1950s chili recipe brings back the hearty, smoky comfort of mid-century American kitchens—where one-pot meals fed families and neighbors alike. The secret lies in slow-simmered ground beef, kidney beans, and a blend of spices that create that signature nostalgic depth.
I’ve recreated this classic using traditional techniques that make every bite taste like a slice of history.
What makes this chili special is its simplicity and versatility. With just five core ingredients—ground beef, tomatoes, beans, and a spice mix of cumin, chili powder, and garlic—you’ll achieve a rich, smoky flavor that’s both comforting and satisfying.
The slow cook ensures tender meat and perfectly seasoned beans, while optional toppings like shredded cheese or a dollop of sour cream add modern flair.
The result is a hearty, flavorful chili that’s perfect for chilly evenings or potluck gatherings. Serve it with cornbread or crackers for the full 1950s experience, or enjoy it as-is for a meal that’s equal parts nostalgic and delicious.
This recipe is a testament to how simple ingredients can create something truly special.
Whether you’re cooking for a crowd or craving a taste of the past, this chili delivers restaurant-quality flavor with minimal effort. The best part? It’s a dish that brings people together—just like it did in the 1950s. Let’s get cooking!
Ingredients for 1950s chili
Five core ingredients and a spice blend that brings back mid-century comfort in every bite.
| Ingredient | Amount | Notes |
|---|---|---|
| Ground Beef (Chuck) 🥩 | 1 ½ lb | 80/20 fat ratio preferred |
| Kidney Beans (Dry) 🌱 | 1 ½ cups | Soaked overnight for best texture |
| Tomato Paste 🍅 | ½ cup | High-quality, no sugar added |
| Chicken Broth 💧 | 2 cups | Low-sodium preferred |
| Ground Cumin 🌿 | 1 tbsp | Toasted for deeper flavor |
| Chili Powder 🌶️ | 2 tbsp | Smoked variety for authenticity |
| Garlic Cloves 🧄 | 4 cloves | Minced for even distribution |
| Onion (Yellow) 🧅 | 1 whole | Diced finely for even cooking |
| Bay Leaves 🌿 | 2 whole | Remove before serving |
| Salt 🧂 | 1 ½ tsp | Diamond Crystal kosher salt |
| Black Pepper 🌶️ | ½ tsp | Freshly cracked preferred |
| Dark Brown Sugar 🍯 | 1 tbsp | For subtle depth of flavor |
| Apple Cider Vinegar 🍎 | 1 tbsp | Brightens the flavor profile |
| Olive Oil 🫒 | 1 tbsp | For initial browning |
The ground beef is non-negotiable—80/20 chuck gives that classic richness, while leaner cuts can get rubbery. I grab mine from Costco in bulk, but any grocery store carries it. For the beans, dry kidney beans soak up flavors better than canned, but in a pinch, two 15-oz cans drained and rinsed work fine. The tomato paste? Muir Glen is my go-to—it’s consistent and has no weird additives. Skip the sugar-free versions; you want that subtle sweetness to balance the heat. Toast your cumin and chili powder in a dry pan for 30 seconds before adding to the pot—that’s the secret to authentic 1950s depth.
No cumin? Smoked paprika at double the amount gets you close, though it won’t be the same. Running low on vinegar? Lemon juice works 1:1, but the tang won’t be identical. The onion and garlic can be swapped for 1 tbsp onion powder and 1 tsp garlic powder if you’re short on time, though fresh is always better. For a smokier kick, add ½ tsp liquid smoke—just don’t overdo it. And if you’re making this ahead, freeze the chili in portions—it reheats like a dream, with flavors deepening overnight.
This chili tastes even better the next day, so make a double batch if you’re feeding a crowd. Store leftovers in the fridge for 5-6 days or freeze for up to 3 months. I always portion mine into glass jars with a layer of olive oil on top—keeps it fresh and adds richness when reheated. For serving, shredded cheddar and sour cream are classic, but I like adding a sprinkle of fresh cilantro for a modern twist. The cornbread? That’s a whole other story.
Why You’ll Love This Recipe
- No-Fuss Pantry Staples: I swear by this recipe because it uses what’s already in my cupboard—no fancy ingredients, just chuck roast, dried beans, and a few jars. Honestly, the only thing I need to buy fresh is the tomato paste, and that’s it.
- Deep, Earthy Richness: That cumin and tomato paste combo? It’s where the magic happens. The beef browns up into these little flavor bombs, and the beans soak up all that smoky, spiced broth—like a warm hug in a bowl.
- Leftovers That Still Shine: This chili actually gets better the next day. I make a double batch on Sundays, and by Wednesday, it’s transformed into crispy-topped chili cheese fries or loaded nachos. No sad, watery leftovers here.
- Budget-Friendly Crowd-Pleaser: A pound of chuck, a can of beans, and a jar of paste stretch to feed four for under $10. Between us, this is the dish I turn to when friends drop by last-minute or the kids’ friends are starving after soccer practice.
Step-by-step instructions for 1950s chili recipe
Here’s how to craft that classic, smoky chili with deep, spiced layers—just like grandma used to make.
Brown the Ground Beef with Olive Oil
Heat a large Dutch oven over medium-high heat and add the 1 tablespoon olive oil. Once shimmering, add the 1.5 pounds ground beef (chuck) and break it apart with a wooden spoon. Cook for 5-7 minutes, stirring occasionally, until the beef loses its raw color and becomes deep brown in spots.
Here’s the thing—don’t drain the fat. That rendered beef fat is flavor gold and will help build a rich, velvety chili. If the pan gets too crowded, work in batches. You want those beef pieces to develop a crusty exterior for maximum flavor. Once fully browned, drain excess fat if needed, leaving about 1-2 tablespoons in the pot for cooking.
Sauté Aromatics and Build the Base
Add the 1 whole yellow onion, diced finely, to the pot with the beef. Cook for 4-5 minutes until softened and translucent. Then add the 4 cloves garlic, minced, and cook for 30 seconds until fragrant—don’t let it burn. Stir in the 2 tablespoons chili powder and 1 tablespoon ground cumin, letting the spices toast in the beef fat for 1 minute to deepen their aroma.
Next, pour in the 0.5 cup tomato paste and stir vigorously to coat everything evenly. Cook for 2 minutes, scraping up any browned bits from the bottom of the pot. This step is crucial—it creates the rich, thick base that defines classic chili. The tomato paste will darken slightly as it cooks, intensifying the flavor.
Combine Liquids and Seasonings
Pour in the 2 cups chicken broth, then add the 1.5 teaspoons salt, 0.5 teaspoon black pepper, 1 tablespoon dark brown sugar, and 1 tablespoon apple cider vinegar. Stir everything together until the tomato paste is fully incorporated and the mixture is smooth. Taste at this point—you should notice the spices and acidity coming through, but the chili will deepen as it simmers.
Add the 2 whole bay leaves and bring the mixture to a gentle boil. Once boiling, reduce heat to low and let it simmer uncovered for 20 minutes. This initial simmer helps meld all the flavors together. Skim off any foam that rises to the surface—it’s just impurities from the beef fat.
Add Beans and Simmer to Perfection
After the initial simmer, add the 1.5 cups soaked kidney beans (drained if you soaked them) to the pot. Stir gently to combine, then return the heat to low. Let the chili simmer uncovered for 1 to 1.5 hours, stirring occasionally. The beans will soften and absorb all that rich, spiced liquid, creating a thick, hearty texture.
Here’s where patience pays off. The chili should reduce slightly, becoming thicker and more concentrated in flavor. You’re looking for a consistency where the beans are tender but still hold their shape, and the liquid coats the back of a spoon. Taste again around the 45-minute mark—adjust seasoning if needed, adding more salt or vinegar if the flavors need balancing.
Finish and Serve with Confidence
Once the chili reaches your desired thickness and the beans are tender, remove the 2 bay leaves with a slotted spoon. Let the chili sit off the heat for 5 minutes to allow flavors to settle. The chili will continue thickening slightly as it rests—this is normal and actually improves the texture.
Serve the chili hot, topped with shredded cheese, sour cream, or chopped green onions if you like. The deep, smoky flavor of the spices should be balanced by the slight tang from the vinegar and the sweetness of the brown sugar. Each spoonful should deliver that nostalgic, comforting taste of classic 1950s chili—rich, hearty, and full of character. Store leftovers in the refrigerator for up to 5 days, or freeze for longer storage. The flavors only get better with time!
Pro Tips For Making 1950s Chili
- CRISP THE BEANS: Soak those dry kidney beans overnight—yes, even if you’re in a hurry. I used to skip this and end up with a mushy, split-bean disaster. A quick rinse after soaking removes excess starch, and they’ll hold their shape while absorbing flavor.
- BROWN THE MEAT: Don’t skimp on browning that chuck—high heat for 8-10 minutes until it’s dark and crispy. After burning three batches, I finally figured out: this isn’t just for flavor, it’s the foundation. Use a 12-inch skillet, not a crowded pot.
- STIR THE PASTE: Whisk that tomato paste into the broth first, then add it to the pot. I learned this the hard way—dumping it in clumps means you’ll have stringy, uneven texture. A splash of cold water thins it out before mixing.
- SIMMER, DON’T BOIL: Low and slow is the rule here—keep it at a gentle bubble, not a rolling boil. I was skeptical until I tried it: 45 minutes at a steady simmer lets the cumin and broth meld without breaking the beans or making the broth bitter.
Perfect pairings for this recipe
Classic Toppings
Shredded cheddar cheese and a dollop of sour cream are the ultimate 1950s chili toppings—just like your grandparents served it. I like adding ½ cup shredded sharp cheddar per bowl, letting it melt slightly from the heat.
For a tangy kick, a spoonful of sour cream adds richness without overpowering the smoky flavors. 🧀
Bread Pairings
A warm homemade cornbread is the perfect companion to this chili, soaking up every last drop of that thick, spiced sauce. I make mine with 1 cup cornmeal, 1 cup all-purpose flour, and a touch of honey for sweetness.
For a shortcut, Jiffy cornbread mix works in a pinch—just add an egg and milk. 🌽
Crunchy Additions
Fresh chopped green onions or cilantro add brightness and texture to each bite. I sprinkle 2 tablespoons chopped green onions on top for a fresh, oniony crunch. For extra heat, add ¼ teaspoon crushed red pepper flakes—just enough to wake up your taste buds. 🌶️
Drink Pairings
A cold light beer like Budweiser or Coors Light cuts through the richness of the chili beautifully. For a non-alcoholic option, iced tea with lemon or a ginger ale adds a refreshing contrast. The effervescence helps cleanse your palate between bites. 🍺
Modern Twists
For a contemporary touch, try adding avocado slices or crumbled queso fresco on top. I also love a sprinkle of toasted pumpkin seeds for extra crunch and a nutty flavor. These toppings add depth while keeping the dish true to its nostalgic roots. 🥑
Serving Suggestions
Serve this chili in hearty stoneware bowls for an authentic 1950s feel, or in cast-iron skillets for a rustic touch. For a potluck, bring it in a slow cooker or Dutch oven—it stays warm and delicious for hours. 🍽️
Nutrition facts
Frequently asked questions
Why does the recipe call for dry kidney beans instead of canned?
Dry kidney beans absorb flavors better, creating that authentic 1950s depth. Soaking overnight removes anti-nutrients and reduces cooking time. For convenience, use two 15-oz cans drained and rinsed—just know the flavor will be slightly less concentrated. The texture difference is minimal, but purists swear by the dry version!
Can I make this chili in a slow cooker?
Brown the beef first, then transfer everything to your slow cooker. Cook on low for 6-8 hours or high for 3-4 hours. The slow cooker’s gentle heat enhances the smoky flavors. For best results, skip the vinegar until serving—it can curdle slightly during long cooking.
What’s the deal with toasting the spices?
Toasting the cumin and chili powder in the beef fat for 1 minute unlocks their aromatic oils, creating that signature 1950s chili depth. Skip this step? The spices will still work, but you’ll miss out on the rich, toasty notes that make this chili special. Think of it as flavor insurance!
How do I fix chili that’s too thin or too thick?
For thin chili, simmer uncovered for 10-15 minutes to reduce. Too thick? Stir in 2-3 tablespoons broth or water at a time until reaching desired consistency. The key is patience—the chili will continue thickening as it rests. Never add flour or cornstarch to 1950s-style chili!
What makes this chili different from modern recipes?
This recipe uses 80/20 ground beef (not lean ground turkey), tomato paste (not diced tomatoes), and a spice toast technique that creates authentic depth. The apple cider vinegar and brown sugar balance the heat without overpowering, while the long simmer develops complex flavors modern recipes often skip.

- 3lb Prime Rib Roast Recipe: Juicy Pink Center Guaranteed in 3 Hours - October 31, 2026
- 5 Spice Cake Recipe: Warmly Spiced Layers With Crunchy Top - October 31, 2026
- 1950’s Macaroni and Cheese Recipe: Nostalgic Creamy Cheese Sauce with Buttery Noodles - October 31, 2026