
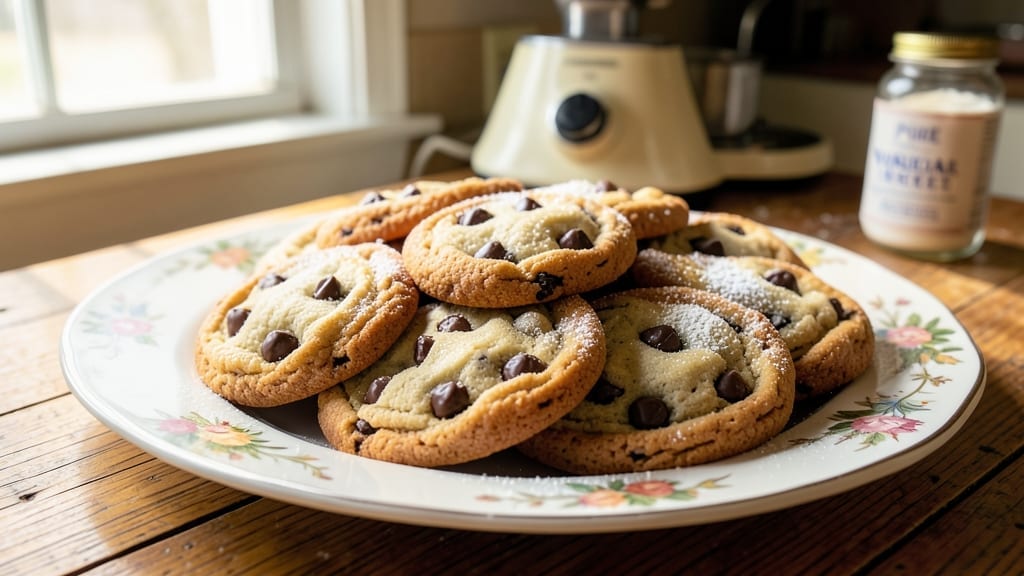
This 1950s chocolate chip cookie recipe brings back the golden era of buttery, crisp-edged cookies with soft, melty centers—just like your grandmother used to make. The secret lies in the perfect balance of brown and white sugar, which creates that signature caramelized flavor while maintaining the classic texture.
I’ve recreated this vintage recipe using authentic proportions and techniques that were standard in mid-century kitchens, ensuring every bite delivers that nostalgic crunch.
The recipe relies on simple, high-quality ingredients like real butter, vanilla extract, and semi-sweet chocolate chips—no shortcuts here. The dough is mixed just until combined (no overworking!) and baked at a precise temperature to achieve that iconic 1950s cookie profile: crisp edges with a tender, chewy center.
This method preserves the cookie’s structural integrity while keeping the chocolate chips gloriously melty, just as they were intended.
What makes these cookies truly special is their buttery richness and the way the sugar caramelizes during baking, creating pockets of flavor in every bite. The vanilla adds warmth, while the brown sugar contributes to that deep, molasses-like sweetness that defines classic American cookies.
These aren’t just cookies—they’re a piece of culinary history, perfect for sharing or enjoying with a glass of cold milk.
Whether you’re baking for a family gathering or simply craving a taste of the past, this recipe delivers restaurant-quality results with a homemade touch. The dough can be chilled for easier handling, and the cookies stay fresh for days when stored properly.
Let’s bring back the magic of 1950s baking—one perfectly golden cookie at a time.
Ingredients for 1950s chocolate chip cookie
High-quality butter, sugars, and vanilla bring back the nostalgic crunch of 1950s chocolate chip cookies.
| Ingredient | Amount | Notes |
|---|---|---|
| Unsalted Butter 🧈 | 1 cup | Cold, cubed for even mixing |
| Granulated White Sugar 🍚 | ¾ cup | Superfine preferred for smooth texture |
| Packed Brown Sugar 🍯 | ¾ cup | Light or dark molasses flavor |
| Pure Vanilla Extract 🌿 | 2 tsp | High-quality, no imitation |
| Large Eggs 🥚 | 2 whole | Room temperature for even mixing |
| All-Purpose Flour 🌾 | 3 ½ cups | Sifted, spooned and leveled |
| Baking Soda 🧂 | 1 tsp | Pure, no aluminum |
| Diamond Crystal Kosher Salt 🧂 | ½ tsp | Fine grain preferred |
| Semi-Sweet Chocolate Chips 🍫 | 2 cups | Enjoy Life brand for allergies |
| Toasted Walnuts 🥜 | 1 cup | Chopped, optional for texture |
The butter is the foundation—Land O’Lakes or Plugrah work best for that authentic richness. Grab the unsalted kind (the salted variety throws off the delicate balance). The sugars? Domino brand superfine sugar dissolves perfectly, but regular granulated works if you pulse it in a food processor. Brown sugar should be packed—tap the cup on the counter to settle it. Vanilla extract matters too; McCormick or Nielsen-Massey are reliable. For the chocolate chips, Ghirardelli or Nestlé Toll House deliver classic flavor, but the Enjoy Life brand is a must if you’re avoiding allergens. Walnuts add texture, but skip them if you prefer classic chocolate chip cookies.
No superfine sugar? Pulse regular granulated sugar in a food processor for 30 seconds—it’ll break down the crystals. Short on butter? Coconut oil solidified in the fridge works in a pinch, though it lacks the authentic flavor. The baking soda and salt are non-negotiable—they balance the sweetness and activate the leavening. For chocolate alternatives, white chocolate chips or butterscotch chips add fun variations. If you’re making these for a crowd, double the recipe—but bake in batches to avoid overcrowding the pan, which ruins the crisp edges. The dough should hold together when pressed but not be sticky; if it is, chill it for 30 minutes.
Store dough in an airtight container in the fridge for up to 48 hours—it actually improves in flavor. Baked cookies stay fresh for 5-7 days in a sealed container at room temperature, or freeze for 3 months between parchment layers. For serving, let them cool completely on the pan (they’ll firm up) before transferring. These cookies reheat beautifully in a 350°F oven for 5 minutes—just watch closely to avoid burning. The walnuts? Toast them separately for 3-4 minutes until fragrant, then chop while warm for maximum flavor.
Why You’ll Love This Recipe
- You’re using pantry basics here: butter, sugar, eggs. No specialty ingredients, no markup. A single batch costs less than takeout, and the leftovers? They disappear faster than I can say “third helping.” My wallet thanks me every time.
- No-Mix Magic: I swear by this dough—just cream butter and sugars until fluffy, then fold in everything else. No food processor, no fancy techniques, just a bowl and a spoon. My kids “help” by cracking eggs (sometimes on the floor), but the cookies still turn out buttery perfection.
- Butter-Sugar Bliss: That classic combo of cold butter and both white and brown sugar? It’s the secret to chewy centers and crisp edges. The vanilla ties it all together like a warm hug—honestly, I’ve made these with imitation before, and I regret it.
- Party in a Jar: Freeze half the dough in balls for last-minute treats—no thawing needed if you bake straight from frozen. Pack them in a jar for teachers, neighbors, or your own “I deserve this” stash. (Yes, even on a Tuesday night.)
Step-by-step instructions for 1950s chocolate chip cookies
Here’s the classic method that delivers the perfect balance of buttery crunch and melty chocolate centers.
Cream the Butter and Sugars
In a stand mixer fitted with the paddle attachment, beat the 1 cup unsalted butter on medium speed until completely smooth and creamy, about 2-3 minutes. This ensures even distribution of fat throughout the dough. Add the 0.75 cup granulated white sugar and 0.75 cup packed brown sugar and continue beating on medium speed for 3-4 minutes until the mixture is light and fluffy.
You’ll notice the mixture nearly doubles in volume and becomes pale in color. This creaming process incorporates air, which creates those signature crackly tops and helps the cookies spread properly in the oven. Don’t rush this step—properly creamed butter is the foundation of authentic 1950s texture.
Add Eggs and Vanilla
Add the 2 whole large eggs, one at a time, mixing on low speed for 30 seconds after each addition until fully incorporated. The mixture may look slightly curdled at first, but this will resolve when you add the dry ingredients. Add the 2 teaspoons pure vanilla extract and mix for another 10 seconds until fully combined.
This is where the classic vanilla flavor develops fully. I always use high-quality pure vanilla extract—imitation won’t give you that authentic 1950s home-baked taste. The eggs provide structure while keeping the cookies tender, and the vanilla adds that nostalgic depth of flavor that defines vintage chocolate chip cookies.
Combine Dry Ingredients
In a separate bowl, whisk together the 3.5 cups all-purpose flour, 1 teaspoon baking soda, and 0.5 teaspoon diamond crystal kosher salt. With the mixer on low speed, gradually add the dry ingredients to the wet mixture, mixing just until combined. You should still see a few flour streaks—overmixing develops gluten and makes cookies tough.
This is the moment that matters: the baking soda reacts with the acids in the brown sugar to create lift, while the salt enhances all the flavors. The flour provides structure but shouldn’t be overworked. Use a silicone spatula to gently fold in the 2 cups semi-sweet chocolate chips and 1 cup toasted walnuts by hand, ensuring even distribution throughout the dough.
Chill the Dough
Cover the mixing bowl with plastic wrap and refrigerate for at least 1 hour, or up to 24 hours. This chilling step is non-negotiable for authentic 1950s texture. The cold dough prevents excessive spreading in the oven and allows the flour to fully hydrate, creating that perfect balance of crisp edges and soft centers.
I know it seems like too much, but trust me—this step makes all the difference. The butter solidifies slightly, which prevents the cookies from becoming too flat. If you’re short on time, you can freeze the dough balls for 30 minutes as a substitute, but chilling overnight develops the best flavor.
Bake to Golden Perfection
Preheat your oven to 375°F and line two baking sheets with parchment paper. Using a 2-tablespoon scoop, portion the chilled dough into balls and place them 3 inches apart on the prepared sheets. Gently flatten each ball with your palm to create 3-inch diameter cookies with slightly thicker centers.
Bake for 10-12 minutes until the edges are golden brown but the centers still look slightly underdone. They’ll continue cooking on the hot pan after removal. Let them cool on the baking sheet for 5 minutes before transferring to a wire rack. The walnuts should be toasted and the chocolate chips should be just beginning to melt in the centers.
Pro Tips For Making 1950s Chocolate Chip Cookie
- CREAM THE BUTTER WELL: I learned this the hard way—skipping the 3-5 minutes of beating the butter and sugars until it’s light and fluffy leads to dense, flat cookies. Use a wooden spoon to check: lift the dough with it, and if it holds a peak, you’re good. (Yes, even if you’re impatient like me.)
- MEASURE BROWN SUGAR PACKED: That “packed” in the recipe isn’t optional. Scoop the brown sugar into the cup, then press it down firmly with a butter knife—no air gaps. I used to eyeball it, and my cookies turned out sticky and underbaked. This guarantees the right moisture balance.
- BAKE UNTIL EDGES ARE GOLDEN: Pull them out when the edges are set but the centers still look soft—they’ll firm up as they cool. Overbaking is the fast track to dry, brittle cookies. My grandmother swore by the “two-tone test”: edges golden, centers just pale. Trust it.
- CHILL THE DOUGH FIRST: This isn’t the prettiest method, but it’s the tastiest. Roll the dough into balls, pop them in the fridge for 30 minutes, then bake. Skipping this? Your cookies will spread too much and turn out thin. (Your future self will thank you.)
Serving suggestions for 1950s chocolate chip cookie
Classic Milk Pairing
Nothing complements these vintage cookies like a tall glass of cold whole milk—just as they served in the 1950s. The richness of the butter and chocolate pairs beautifully with milk’s creamy texture, creating a nostalgic flavor experience.
I like to use organic whole milk for the best taste, but any brand works. Serve it chilled in glass mason jars or classic glassware for that old-school diner feel. 🥛
Warm Vanilla Ice Cream
For a decadent twist, serve warm cookies with a scoop of homemade vanilla ice cream. The contrast between the warm, buttery cookie and the cold, creamy ice cream is pure magic. I recommend using Blue Bell vanilla or Ben & Jerry’s Phish Food for that authentic 1950s-inspired flavor.
Let the cookies cool slightly before serving to prevent melting. This combo is perfect for summer gatherings or cozy family nights.
Coffee or Tea Pairings
If you prefer something warm, a cup of black coffee or Earl Grey tea balances the sweetness beautifully. The bitterness of coffee enhances the caramelized edges of the cookies, while the floral notes of tea complement the vanilla.
I often brew a French press coffee or steep Twinings Earl Grey for the best results. Serve with a side of whipped cream for extra indulgence.
Garnishes for Presentation
Elevate your serving with simple garnishes that highlight the cookies’ nostalgic charm. A sprinkle of flaky sea salt on top adds a sophisticated touch, while a drizzle of melted chocolate ties everything together.
For extra flair, place cookies on a wooden board with a few fresh mint leaves scattered around. These details make your cookies look as good as they taste! ✨
Make-Ahead Serving
These cookies stay fresh for days, making them perfect for parties or meal prep. Store them in an airtight container at room temperature for up to 5 days or freeze for 3 months. To serve, let them sit at room temperature for 10 minutes before presenting.
For a festive touch, arrange them on a tiered serving tray with a few sprigs of rosemary for a vintage-inspired look. Your guests will love the effortless elegance! 💫
Kids’ Fun Twist
Turn serving into a fun activity by letting kids decorate their own cookies. Set out small bowls of sprinkles, crushed nuts, or mini M&M’s and let them sprinkle toppings on warm cookies.
This is a great way to keep little ones engaged while enjoying the classic treat. Serve with chocolate milk for a playful, nostalgic experience that brings back the joy of 1950s childhood treats.
Nutrition facts
Frequently asked questions
Why does the 1950s recipe use both brown and white sugar?
The brown sugar adds deep molasses flavor and moisture, while the white sugar creates crisp edges and helps caramelize for that classic 1950s crunch. This sugar combo was standard in vintage recipes to balance sweetness and texture. The brown sugar also reacts with baking soda for extra lift!
Can I make these cookies without butter?
You can substitute 1 cup solid coconut oil (chilled) or 1 cup shortening for butter, but the flavor won’t be authentic. Butter creates the signature rich, buttery taste of 1950s cookies. If you must omit butter, use equal parts oil and reduce milk by 2 tablespoons to maintain texture.
How do I prevent my cookies from spreading too much?
Chill the dough for at least 1 hour (or overnight) to firm up the butter. Use a 2-tablespoon scoop and flatten cookies to 3-inch diameter with slightly thicker centers. Bake at 375°F for 10-12 minutes—they’ll set as they cool. Avoid overbaking!
What’s the best way to store these cookies?
Keep them in an airtight container at room temperature for 5-7 days. For longer storage, freeze dough balls (unbaked) for 3 months or baked cookies (separated by parchment) for 2 months. Thaw frozen cookies at room temperature for 10 minutes before serving.
Can I add other mix-ins like nuts or raisins?
The recipe includes walnuts, but you can swap in pecans, almonds, or raisins. For best results, toast nuts first (3-4 minutes) and chop while warm. Keep total mix-ins to 1.5 cups to maintain cookie structure. Classic 1950s variations often included raisins!

- 3lb Prime Rib Roast Recipe: Juicy Pink Center Guaranteed in 3 Hours - October 31, 2026
- 5 Spice Cake Recipe: Warmly Spiced Layers With Crunchy Top - October 31, 2026
- 1950’s Macaroni and Cheese Recipe: Nostalgic Creamy Cheese Sauce with Buttery Noodles - October 31, 2026