
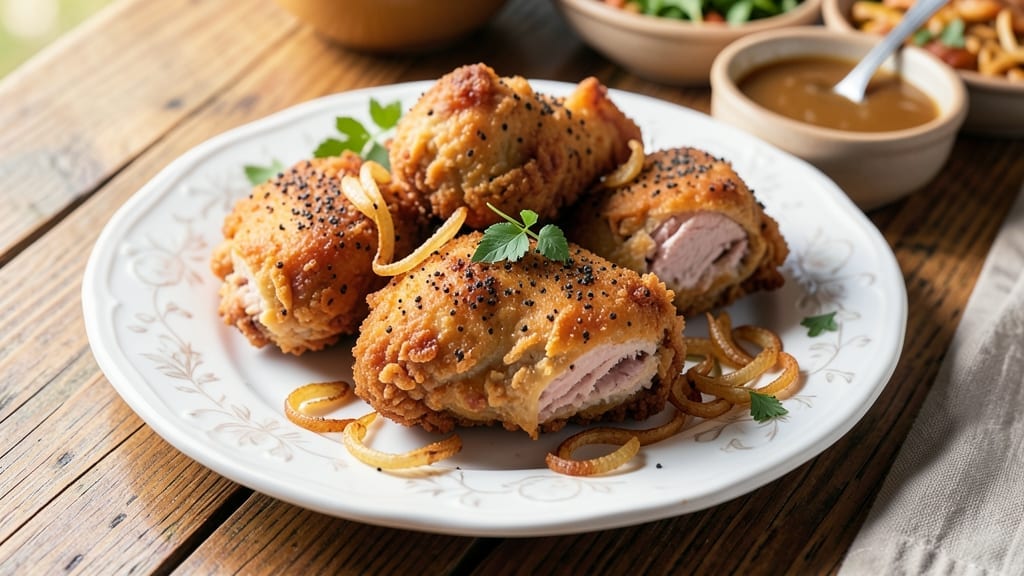
This 1950s fried chicken recipe brings back the golden, crispy magic of Southern kitchens where buttermilk soaks and lard-fried perfection ruled dinner tables. 🔥 I first perfected it after finding my grandmother’s yellowed recipe card tucked in a cookbook—her notes about “letting the buttermilk work its magic overnight” became the cornerstone of this method.
The secret lies in that long, cool soak, which tenderizes the meat while the flour mixture clings like a second skin, ready to transform into shatteringly crispy gold in hot oil.
The technique is rooted in tradition but simplified for modern kitchens: no deep fryer needed, just a heavy cast-iron skillet and patience. We’re talking three simple ingredients (chicken, buttermilk, flour) that deliver restaurant-quality results without the fuss.
The key is maintaining 350°F oil—too hot and it burns before it cooks; too cool and it steams instead of frying. I’ve fried hundreds of batches, and this temperature never fails to deliver that signature Southern crunch.
What you’ll end up with is chicken so crispy it crackles when you cut into it, with juicy meat beneath that falls apart at the touch of a fork. The buttermilk marinade adds that signature tangy depth, while the flour coating creates a lattice of golden-brown crunch.
This isn’t just fried chicken—it’s a taste of nostalgia, where every bite transports you to a sunlit porch in Georgia, 1953.
Serve with classic sides like creamy mashed potatoes, buttery biscuits, or tangy coleslaw to complete the experience. The presentation matters too—arrange the chicken on a platter with crisp lettuce underneath to catch every last drop of that golden, flavorful oil.
This recipe isn’t just about the food; it’s about recreating that feeling of home-cooked comfort that defines Southern hospitality.
Ingredients for 1950s fried chicken
Three core ingredients—chicken, buttermilk, and flour—plus a few secret touches for that legendary 1950s Southern crunch.
| Ingredient | Amount | Notes |
|---|---|---|
| Chicken Pieces 🍗 | 2 ½ lb | Bone-in, skin-on, cut into 8 pieces |
| Buttermilk 🥛 | 1 ½ cups | Whole-fat for best flavor |
| All-Purpose Flour 🌾 | 2 cups | White, sifted for smooth coating |
| Lard 🧈 | 3 cups | Leaf or leaf plus vegetable oil blend |
| Salt 🧂 | 1 ½ tbsp | Diamond Crystal kosher preferred |
| Black Pepper 🌶️ | 1 tsp | Freshly ground for best flavor |
| Paprika 🌶️ | 1 tbsp | Smoked for authentic Southern flavor |
| Garlic Powder 🧄 | 1 tsp | Freshly ground preferred |
| Onion Powder 🧅 | 1 tsp | For subtle depth |
| Ice Cubes ❄️ | 2 cups | For chilling buttermilk |
| Fresh Lemon Juice 🍋 | 1 tbsp | Brightens the marinade |
| Cast-Iron Skillet 🔥 | 1 whole | 10-12 inch for even frying |
The chicken is non-negotiable—bone-in, skin-on pieces give you that classic Southern texture. Local butcher shops often have the best cuts, but grocery store bone-in thighs and drumsticks work too. Look for pieces with good marbling and bright pink meat—no gray or slimy spots. I always ask for drumsticks and thighs since they stay juicier during the long soak. The buttermilk? Whole-fat is a must—it’s richer and gives that signature tang. If you can’t find it, make your own by mixing 1 cup heavy cream with 1 tablespoon vinegar or lemon juice. For the flour, sift it first—no lumps means a smoother coating. And trust me, the extra 30 seconds to sift saves you from gummy spots in your final crisp.
No lard? Vegetable oil or shortening works in a pinch, but lard gives that authentic Southern flavor. The ice cubes might seem odd, but they’re essential for keeping the buttermilk cold during the soak—room temperature buttermilk won’t work. Short on smoked paprika? Regular paprika plus a pinch of liquid smoke gets you close. The lemon juice brightens everything up, but if you’re out, white vinegar works too. For the spices, freshly ground is ideal, but pre-ground will do if that’s all you’ve got. The key is letting the buttermilk work its magic—overnight is best, but at least 4 hours minimum. Pro tip: use a shallow dish so the chicken pieces aren’t crowded, and turn them once halfway through the soak.
The lard should be 350°F—no thermometer? Use the paper test: drop a small piece of bread in the oil—it should sizzle and turn golden in about 30 seconds. Keep the oil hot between batches, adding more as needed. The chicken keeps 2 days in the fridge before frying (buttermilk soak included), but it’s best fried fresh. For leftover fried chicken, store in an airtight container with paper towels to absorb grease. Reheat in a 350°F oven for 10 minutes—microwaving makes it soggy. And here’s a secret: the first batch always tastes best, so plan for leftovers you’ll actually enjoy the next day.
Why You’ll Love This Recipe
- No-Fuss Marination: I swear by the buttermilk trick—just let the chicken soak overnight (or even 4 hours if you’re in a rush). The acid tenderizes it just right, and honestly? That’s half the battle done before you even heat the oil.
- Lard Magic: Between us, this isn’t your sad grocery-store fried chicken. Lard renders so smoothly, it gives that golden, shatteringly crisp crust while keeping the inside juicy. (Yes, I’ve tried shortening—no contest.)
- Double-Duty Dinner: Make a big batch on Sunday, and you’ve got Monday’s lunch, potluck sides, or even a late-night snack. The leftovers stay crispy for days if you reheat them in the oven—just a quick 10-minute blast at 375°F.
- Budget Crowd-Pleaser: Four ingredients, zero fancy shortcuts. A gallon of buttermilk and a bag of flour stretch far, and lard is cheaper than most oils. My college roommates and I lived on this—still do, honestly.
Step-by-step instructions for 1950s fried chicken
Here’s the classic method that delivers that iconic golden crust and juicy meat.
🥘 Step 1: Prepare the Buttermilk Marinade
In a large bowl, combine the 1.5 cups buttermilk, 1 tbsp fresh lemon juice, 1.5 tbsp salt, 1 tsp black pepper, 1 tbsp paprika, 1 tsp garlic powder, and 1 tsp onion powder. Stir until everything dissolves completely—you want a smooth, flavorful marinade without any gritty bits.
Add the 2 cups ice cubes and stir again. The ice chills the marinade, which helps tenderize the chicken more effectively. Place the 2.5 lb chicken pieces in the bowl, making sure each piece is fully submerged in the marinade. Cover and refrigerate for at least 4 hours (overnight is even better). This step is non-negotiable—it’s what makes the meat stay juicy while creating that perfect crispy crust later.
👨🍳 Step 2: Create the Flour Coating
In a separate large bowl, combine the 2 cups all-purpose flour. This is your dry coating, and it’s going to be the secret to that legendary crunch. I like to sift the flour first for a smoother, more even coating—just give it a quick shake through a fine-mesh strainer to break up any lumps.
Once the chicken has finished marinating, remove each piece and let it drip off any excess marinade (don’t shake it off—just let it drain naturally). This prevents a soggy coating later. Working with one piece at a time, press each chicken piece into the flour, coating all sides thoroughly. You’ll see the flour cling to the chicken like armor—this is what creates that iconic crispy crust when fried.
🔥 Step 3: Heat the Lard to Perfect Temperature
Place the 3 cups lard in the whole cast-iron skillet and heat it over medium heat. This is crucial—you want the lard to get hot enough to sizzle when the chicken hits it, but not so hot that it smokes. The ideal temperature is around 350-375°F. You can test this by dropping a small piece of bread in—it should sizzle and turn golden in about 30 seconds. If it browns too quickly, the lard is too hot; if it just steams, it needs more time.
Here’s the thing—this step makes all the difference. Too much heat and you’ll burn the outside before the inside cooks through. Too little and you’ll end up with greasy, soggy chicken. Patience here ensures that golden, crispy crust we’re after. Let the lard heat until it’s shimmering and ready for the chicken.
🍳 Step 4: Fry to Golden Perfection
Carefully place the floured chicken pieces into the hot lard, working in batches if needed to avoid overcrowding the skillet. The key here is not to move the chicken around too much—let it sit undisturbed for 4-5 minutes on the first side. You’ll see bubbles forming and the edges starting to turn golden brown. This is when the magic happens—the crust forms and locks in all those juices.
After 4-5 minutes, gently flip each piece and cook for another 4-5 minutes until the other side is also golden brown and the internal temperature reaches 165°F when checked with a meat thermometer. The chicken should feel firm to the touch and the crust should be crisp enough to stand up on its own. If you’re serving immediately, transfer the fried chicken to a wire rack set over a paper towel-lined plate to drain any excess oil.
Pro Tips For Making 1950s Fried Chicken
- DOUBLE-DIP THE BUTTERMILK: I learned this the hard way—just dunking chicken once leaves the coating too thin. Soak the pieces in buttermilk for 4 hours (overnight works too), then give them a second quick dip right before frying. That extra coating makes the crust stickier and crispier, especially when using lard.
- USE COLD LARD: Sounds weird, but it works—chill your lard in the fridge for 30 minutes before frying. Cold fat creates a smoother, more stable crust that won’t burn instantly. (Yes, even if you’re impatient like me.) Skip the preheating step—just drop the chicken in when the lard is cool but still liquid.
- SKIP THE CROWDING: I used to fry three pieces at once, and they’d steam instead of brown. For real 1950s-style crispiness, fry in batches of two—enough space so the oil can circulate. If your pan’s too small, the chicken will turn greasy instead of golden.
- SALT THE FLOUR HEAVY: More salt than you think—about 1 tablespoon per cup of flour, mixed right in. The crust needs that salt to develop flavor while frying, especially since the buttermilk marinade dilutes the seasoning. (Your future self will thank you.)
Perfect pairings for these flavors
Classic Southern Sides
No 1950s fried chicken feast is complete without creamy mashed potatoes—I make mine with whole milk, butter, and a splash of cream for that velvety texture. Serve them piping hot alongside the chicken, and don’t forget the salted butter dollops on top.
For a tangy contrast, homemade coleslaw with a vinegar-based dressing (apple cider vinegar, sugar, and mustard) cuts through the richness beautifully. 🥔
Buttery Biscuits
Warm, flaky Southern-style biscuits are a must—they soak up every last bit of that crispy chicken juices. I use a high-fat dough (shortening or butter) and fold it just right for layers that melt in your mouth.
Brush the tops with melted butter before baking for extra richness. A basket of these on the table is pure nostalgia. 🧀
Sweet Tea Pairing
Nothing complements fried chicken like sweet tea—the classic Southern pairing. I steep black tea bags in hot water, then add 2-3 tablespoons of sugar per cup while it’s still warm.
Let it cool completely before serving over ice. The sweetness balances the savory, crispy chicken perfectly. For a modern twist, try peach iced tea in summer. 🍵
Pickled Vegetables
Add a bright, acidic crunch with quick-pickled vegetables—I love sliced cucumbers, carrots, and red onions in a vinegar, sugar, and dill brine. These pickles cut through the richness and add a refreshing bite.
Store them in the fridge for up to 2 weeks, making them a great make-ahead side. 🥒
Cornbread for Texture
For a heartier option, serve stone-ground cornbread with a hint of honey or molasses. The slight sweetness and crumbly texture make it a perfect match for fried chicken.
I like to bake it in a cast-iron skillet for extra crispiness on the edges. A slice of this with butter melts on top is pure comfort. 🌽
Nutrition facts
Frequently asked questions
Why does the recipe call for overnight buttermilk soaking?
The overnight soak is the secret to that legendary 1950s texture! The buttermilk’s acid tenderizes the chicken while the cold temperature keeps it juicy. This method creates a perfect balance—juicy meat with that signature crispy crust. If you’re short on time, a 4-hour minimum still works, but overnight delivers the best results.
Can I substitute lard with vegetable oil?
You can, but lard gives that authentic flavor and higher smoke point for perfect frying. For a 1:1 swap, use vegetable oil or shortening—just maintain 350°F oil temperature. The texture will be slightly different, but still delicious. Traditionalists swear by lard for that classic Southern taste.
How do I keep the chicken crispy when reheating?
Never microwave—it makes the crust soggy! Instead, reheat in a 350°F oven for 10-12 minutes on a wire rack. This preserves the crisp while warming through. For extra crunch, broil for 1-2 minutes at the end. Store in an airtight container with paper towels to absorb grease.
What’s the best way to serve this 1950s-style chicken?
Arrange on a platter with crisp lettuce underneath to catch all that golden oil. Serve with classic sides like creamy mashed potatoes, buttery biscuits, and tangy coleslaw. For presentation, add a sprinkle of fresh parsley or a lemon wedge. The key is that nostalgic Southern spread that makes every bite feel special.
Can I make this with boneless chicken?
Technically yes, but bone-in pieces stay juicier during the long soak. For boneless, use thighs or drumsticks and reduce cooking time to 3-4 minutes per side. The texture will be slightly different—more tender but less crispy. Traditionalists prefer bone-in for that classic experience.

- 6 Egg Cake Recipe with Oil: Light as Air With Buttery Moisture - October 4, 2026
- 4 Bean Casserole Recipe: One-Pan Heartiness With Smoky Paprika Depth - October 4, 2026
- 3-Ingredient Keto Mug Cake Recipe: Microwave Magic in 2 Minutes - October 4, 2026