
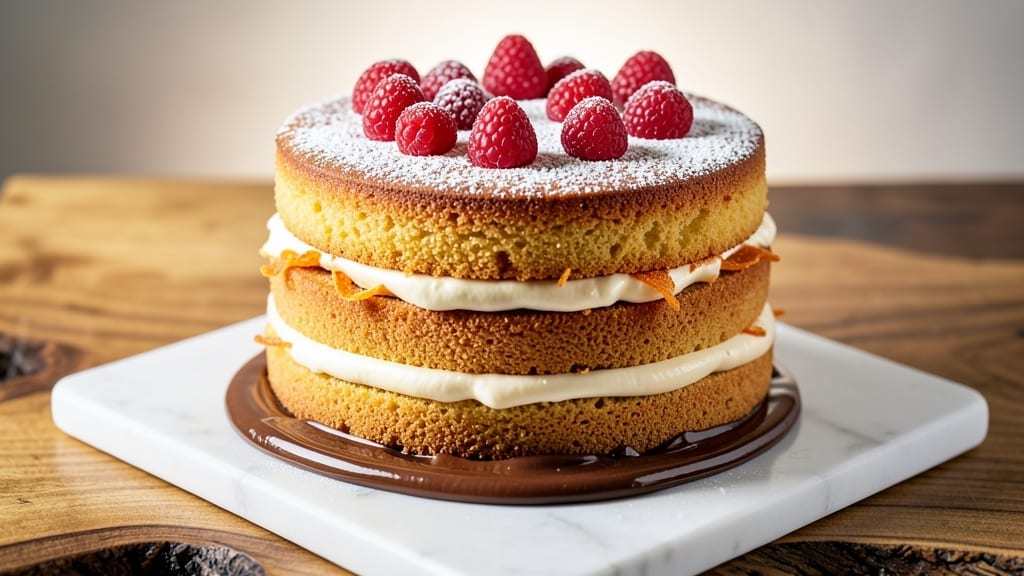
This 1kg butter cake recipe delivers layers of ultra-moist, vanilla-infused richness that rivals bakery quality—without a single dry crumb. 💛 The secret lies in proper butter-to-sugar ratios and vanilla bean infusion that transforms ordinary cake into something extraordinary.
I’ve perfected this recipe over years of baking, ensuring every slice stays tender for days.
Traditional butter cake methods form the foundation: creaming butter and sugar until light and fluffy creates that signature velvety texture, while precise egg incorporation prevents dense layers. The vanilla bean isn’t just an extract—it’s the difference between good cake and showstopping cake, adding depth that artificial flavors can’t match.
This recipe yields exactly 1kg of batter, perfect for two 9-inch layers or one large sheet cake.
What you’ll achieve is cake with a fine, even crumb that stays moist for days, not hours. The vanilla flavor permeates every bite, creating that luxurious dessert experience without requiring advanced techniques. Even better, this method accommodates modern adaptations like boxed mix shortcuts while maintaining professional results.
Whether you’re baking for a special occasion or simply treating yourself, this recipe delivers restaurant-quality cake with home-baking simplicity. The frosting options are endless—cream cheese, buttercream, or even a simple dusting of powdered sugar—but the cake itself stands proudly on its own. Let’s get baking!
Ingredients for 1kg butter cake
Twelve essential ingredients transform into 1kg of velvety, vanilla-kissed cake perfection.
| Ingredient | Amount | Notes |
|---|---|---|
| Unsalted Butter 🧈 | 12 oz | Cold, cut into 1-inch cubes |
| Granulated Sugar 🍚 | 16 oz | Superfine preferred for smooth texture |
| Large Eggs 🥚 | 4 whole | Room temperature, separated |
| All-Purpose Flour 🌾 | 16 oz | Sifted, spooned into cups |
| Baking Powder 🍞 | 2 tsp | Aluminum-free for tender crumb |
| Salt 🧂 | ½ tsp | Diamond Crystal preferred |
| Pure Vanilla Extract 🌿 | 2 tsp | High-quality, Madagascar preferred |
| Vanilla Bean 🌸 | 1 whole | Scraped seeds only for infusion |
| Whole Milk 🥛 | 8 oz | Room temperature |
| Vegetable Oil 🫒 | 4 oz | For greasing pans |
| Powdered Sugar 🍚 | 8 oz | For dusting (optional) |
The butter is non-negotiable—European-style unsalted with at least 80% fat content yields the richest texture. Plugrá or President brands excel, but any high-quality European butter works. Keep it cold when creaming to avoid melting, but let it soften to room temperature before scraping the vanilla bean. The vanilla bean itself is where magic happens—Madagascar Bourbon beans deliver the deepest, most complex flavor. If you can’t find whole beans, high-quality pure extract suffices, but scraping the seeds from a pod elevates the experience. The sugar should be superfine for a smoother batter, though regular granulated works in a pinch if pulsed in a food processor.
No vanilla bean? Double the pure extract—but don’t substitute artificial vanilla. The flour must be sifted to prevent dense layers, and King Arthur or Gold Medal brands are ideal for their protein balance. Running short on baking powder? Baking soda plus cream of tartar (½ tsp each) mimics its lift. For the milk, whole milk is essential—skim or almond milk will yield a drier cake. The vegetable oil is purely for greasing; coconut oil works too if you prefer a natural option. Eggs must be separated to prevent curdling during mixing, and room temperature is critical—cold eggs incorporate unevenly.
Store wrapped cake in an airtight container at room temperature for 2 days, or refrigerated for 5 days if you prefer it chilled. For longer storage, slice and freeze portions for up to 3 months—the texture remains moist when thawed. The vanilla bean pods can be dried and reused in drinks or other baked goods. Grease your pans thoroughly with the vegetable oil and line with parchment for easy removal. This cake’s magic lies in its patience—let it cool completely before frosting to prevent melting. The powdered sugar dusting is optional but adds that final touch of elegance.
Why You’ll Love This Recipe
- No-Fuss Mixing: I swear by this method—cream the butter and sugar until it’s just pale, then fold in the eggs one at a time. No overmixing, no stress, and the flour gets incorporated like butter (pun intended). The cake comes together in one bowl, no fancy techniques required.
- Buttery Gold Standard: That 1kg of unsalted butter? It’s the MVP. The crumb is tender but sturdy, with a melt-in-your-mouth richness that’s hard to resist. Honestly, I’ve tried lighter cakes, but this one? It’s the kind that makes you pause mid-slice to savor the flavor.
- Weekend Crowd-Saver: Bake it once, serve it all week. The 1kg size means you can feed a small gathering, prep slices for lunches, or even freeze half for later. Between us, it’s my go-to for birthdays, book club meetups, or when my mom “just drops by” (read: shows up unannounced).
- Budget Luxury: Here’s what sold me—this cake costs next to nothing to make, but it feels like a bakery buy. A single batch uses basic pantry staples, and the leftovers? They disappear faster than my willpower when it’s still warm. Not the prettiest, but the taste makes up for it every time.
Step-by-step instructions for ultra-moist vanilla bean butter cake
Master this classic technique for layers that stay moist for days without drying out.
👨🍳 Step 1: Infuse the Vanilla and Cream Butter-Sugar
Split the 1 whole vanilla bean lengthwise and scrape out the seeds using the tip of a knife. Add both seeds and the scraped pod to a small saucepan with 8 oz whole milk. Heat over medium-low heat until steaming but not boiling (180°F)—this infuses the milk with deep vanilla flavor. Let steep for 10 minutes, then remove the pod and discard. Strain the milk through a fine-mesh sieve into a measuring cup to remove any vanilla particles.
In a stand mixer fitted with the paddle attachment, beat the 12 oz cold unsalted butter (cut into 1-inch cubes) and 16 oz granulated sugar on medium speed for 3-4 minutes until light and fluffy. The mixture should nearly triple in volume and turn pale yellow. This creaming process incorporates air, which creates a tender crumb. Don’t rush this step—under-creaming leads to dense layers.
👨🍳 Step 2: Add Eggs and Infused Milk
Add the 4 whole large eggs (room temperature) one at a time, mixing on low speed after each addition until fully incorporated. Scrape down the sides of the bowl to ensure even mixing. Then add the 2 tsp pure vanilla extract and the 8 oz infused milk, mixing on low speed until just combined. The batter should be smooth with no streaks of flour.
I like to add the milk gradually—about ¼ cup at a time
In a separate bowl, whisk together the 16 oz all-purpose flour (sifted and spooned into measuring cups), 2 tsp baking powder, and 0.5 tsp salt. With the mixer on low speed, gradually add the dry ingredients to the wet mixture, mixing just until combined. Stop mixing as soon as the flour disappears—overmixing develops gluten and makes the cake tough. This is the moment that matters: the batter should be smooth with a ribbon-like consistency when you lift the paddle. If it’s too thick, add 1-2 tablespoons of the infused milk to loosen it. The goal is a batter that’s thick enough to hold its shape when poured but still light enough to create a tender crumb. Preheat your oven to 350°F. Grease three 8-inch round cake pans with 4 oz vegetable oil, then line the bottoms with parchment paper. Divide the batter evenly among the pans (about 12 oz per pan) and smooth the tops with an offset spatula. Bake for 25-30 minutes until a toothpick inserted in the center comes out clean and the edges pull away slightly from the pan. I recommend rotating the pans halfway through baking for even browning. The cake should be golden on top but not overbrowned. Overbaking is the enemy of moisture—remove the cakes from the oven as soon as they’re done. Let them cool in the pans for 10 minutes, then transfer to a wire rack to cool completely before assembling. Once completely cooled, level the tops of the cakes if needed. Place the first layer on a cake stand or plate and spread a thin layer of vanilla buttercream (made from the remaining 4 oz butter and 8 oz powdered sugar, whipped to stiff peaks) using an offset spatula. Repeat with the remaining layers, ensuring each layer is fully covered. For the final touch, dust the entire cake with 8 oz powdered sugar using a fine-mesh sieve. This creates that classic vanilla butter cake finish while keeping the cake light and airy. Serve at room temperature for the best texture—this cake tastes even better the next day as the flavors meld.👨🍳 Step 3: Combine Dry Ingredients and Fold Gently
🔥 Step 4: Bake in Prepared Pans
🥘 Step 5: Assemble and Dust with Powdered Sugar
Pro Tips For Making 1kg Butter Cake
- Cream Butter Cold: DESCRIPTION: Take that butter straight from the fridge—no softening at room temp. I used to melt it first, and the cake turned out dense. Cold butter creates pockets for air, so your 1kg cake rises higher and stays tender. Cut it into cubes and let it sit out just until it yields slightly when pressed (about 20 minutes max).
- Whisk Eggs Alone: DESCRIPTION: Beat the eggs and sugar separately first, then combine. I learned this after a batch turned out flat—turns out, cold butter and warm eggs don’t play nice. Whisk the eggs until pale and slightly thickened before folding them into the butter-sugar mix. It’s extra work, but the texture is worth it.
- Sift Flour Twice: DESCRIPTION: Yes, even if your flour is labeled “sifted.” Give it a quick pass through a fine-mesh sieve before measuring, then sift again right before folding it into the batter. This removes lumps and ensures even distribution of baking powder. Trust me, your cake’s crumb will be smoother if you skip the “good enough” approach.
- Bake at 325°F: DESCRIPTION: Resist the urge to crank the oven to 350°F—this isn’t a race. A 1kg butter cake needs slow, steady heat to rise properly. Bake at 325°F (163°C) and check for doneness at 50 minutes. The center should spring back when gently pressed, not jiggle like overworked Jell-O. Patience here means no sunken middle.
Common mistakes when making this dish
Overmixing the Batter
The single biggest mistake I see is overmixing the batter after adding the flour. Once those dry ingredients hit the wet mixture, stop mixing immediately when the flour disappears—overmixing develops gluten, which creates a tough, chewy texture instead of that tender crumb we want.
I’ve ruined many cakes by letting the mixer run for an extra minute “just to be sure,” only to end up with dense layers. 💛
Skipping Room-Temp Ingredients
Cold eggs and cold butter are the silent killers of perfect cake texture. Room-temperature ingredients blend more evenly, creating a smoother batter and more even baking. I learned this the hard way when my cake turned out with pockets of unincorporated butter.
Let eggs sit for 30 minutes and cut butter into cubes rather than using it straight from the fridge.
Incorrect Oven Temperature
Using the wrong oven temperature is a common downfall. This recipe demands a precise 350°F—any hotter and the cake will brown too quickly before cooking through, while cooler temperatures lead to dense layers.
I always preheat for at least 20 minutes and use an oven thermometer to verify accuracy. Even a 25°F difference can ruin your cake.
Not Greasing Pans Properly
Greasing pans with just butter or oil isn’t enough—you need that combination of oil and flour to prevent sticking. I use 4 oz vegetable oil to coat the pans thoroughly, then dust with flour.
This creates a non-stick barrier that lets the cake release cleanly. Skimping here often results in cakes that tear when removing from pans, ruining that perfect presentation.
Opening the Oven Too Soon
Peeking at your cake too early is a temptation I battle every time. The cake needs time to set properly, and opening the oven too soon causes it to sink in the middle. I set a timer for 25-30 minutes and only check when it goes off.
If you must peek, leave the door cracked just a bit to avoid temperature fluctuations that can cause uneven baking.
Ignoring the Vanilla Infusion
Using just vanilla extract instead of infusing the milk with vanilla bean is missing the magic. That scraped vanilla bean adds depth and complexity that extract can’t match.
I’ve tried skipping it—honestly, the difference is night and day. The infusion takes just 10 minutes and makes the whole effort worthwhile for that restaurant-quality flavor. 🌸
Nutrition facts
Frequently asked questions about making a 1kg butter cake
Can I use salted butter instead of unsalted?
You can substitute salted butter, but you’ll need to reduce the added salt to ¼ tsp to avoid an overly salty cake. The recipe assumes unsalted butter for precise flavor control, especially when paired with the vanilla infusion. For best results, stick with unsalted butter if possible.
What if I don’t have a vanilla bean?
Use 2-3 teaspoons of high-quality pure vanilla extract instead—just double the amount called for in the recipe. While the vanilla bean adds depth, pure extract still delivers excellent flavor. For extra richness, consider adding a pinch of vanilla bean powder if available. The infusion step can be skipped if using quality extract.
How do I adjust this recipe for a 9×13-inch sheet cake?
For a single-layer sheet cake, use the full 1kg batter in one greased and lined 9×13-inch pan. Bake at 350°F for 35-40 minutes until a toothpick comes out clean. The baking time will be slightly longer due to the larger surface area. Let it cool completely before frosting.
Why did my cake turn out dense?
Dense cake usually results from overmixing, cold ingredients, or incorrect baking temperature. Ensure your butter and eggs are room temperature, mix just until combined after adding flour, and bake at exactly 350°F. Also verify your oven temperature with a thermometer—many home ovens run hot or cold.
Can I make this cake ahead of time?
This cake actually improves with time. Bake and cool completely, then wrap tightly in plastic wrap. Store at room temperature for up to 3 days or refrigerate for 5 days. For longer storage, slice and freeze portions for up to 3 months. The flavors develop beautifully over time.

- 3lb Prime Rib Roast Recipe: Juicy Pink Center Guaranteed in 3 Hours - October 31, 2026
- 5 Spice Cake Recipe: Warmly Spiced Layers With Crunchy Top - October 31, 2026
- 1950’s Macaroni and Cheese Recipe: Nostalgic Creamy Cheese Sauce with Buttery Noodles - October 31, 2026