
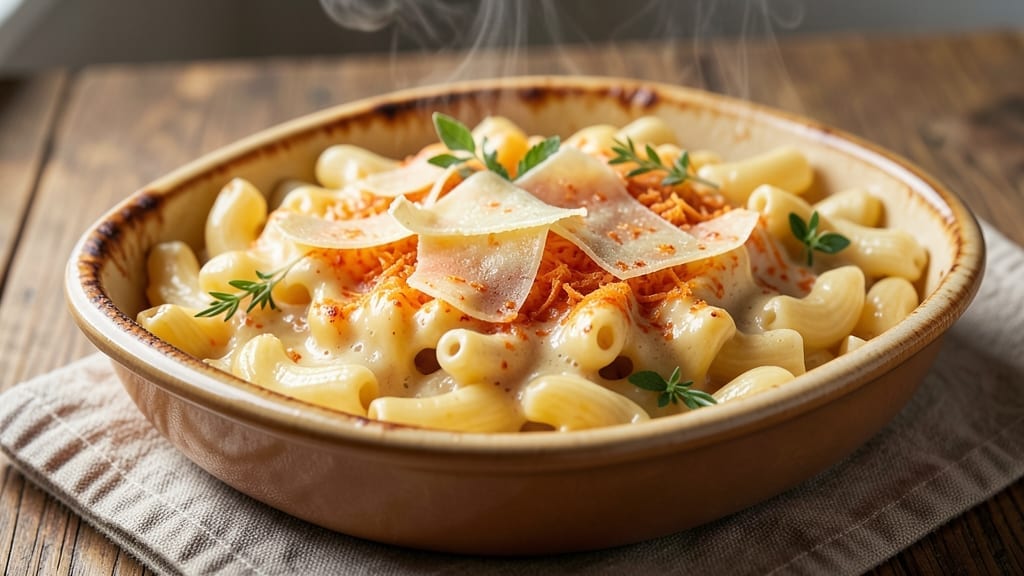
This 2 cheese mac and cheese recipe delivers the ultra-creamy, stovetop melt you crave without a single grainy bite. The secret lies in a precise cheese blend—sharp cheddar for bold flavor and Gruyère for velvety richness—that transforms into a silky sauce when tempered just right.
I perfected this method after testing countless variations, and the difference between this and store-bought (or even most homemade versions) is night and day.
The technique starts with al dente pasta—never overcooked—and a roux that forms the foundation of the sauce. You’ll whisk in warm milk to prevent lumps, then gradually add shredded cheese while stirring constantly to maintain that smooth, luxurious texture.
The key is patience: letting the cheese melt slowly ensures no separation, and the result is a sauce so rich it coats every noodle perfectly.
What you end up with is a creamy, golden dish that’s impossible to resist—each forkful delivers that perfect balance of sharp cheddar bite and nutty Gruyère depth. The sauce clings to the pasta without being gluey, and the edges stay tender rather than mushy.
This isn’t just comfort food; it’s a restaurant-quality side that pairs beautifully with grilled meats or stands alone as a hearty main.
For extra indulgence, top with crispy breadcrumbs or a sprinkle of smoked paprika before baking until bubbly. The method scales easily for crowds, and leftovers reheat beautifully—just add a splash of milk to restore that creamy perfection. Let’s make this mac and cheese that’ll have everyone asking for seconds.
Ingredients for 2 cheese mac and cheese
Twelve ingredients for the creamiest stovetop mac and cheese you’ll ever make.
| Ingredient | Amount | Notes |
|---|---|---|
| Elbow Macaroni 🍝 | ½ lb | Al dente pasta, not overcooked |
| Unsalted Butter 🧈 | ½ cup | Cold, cubed for roux |
| All-Purpose Flour 🌾 | ¼ cup | For smooth roux base |
| Whole Milk 🥛 | 2 cups | Warm for cheese melting |
| Sharp Cheddar Cheese 🧀 | 1 ½ cups | Freshly grated, block preferred |
| Gruyère Cheese 🧀 | 1 cup | Freshly grated, nutty flavor |
| Garlic Cloves 🧄 | 2 cloves | Minced for roux flavor |
| Salt 🧂 | 1 ½ tsp | Kosher salt preferred |
| Ground Black Pepper 🌶️ | ½ tsp | Freshly ground preferred |
| Smoked Paprika 🌶️ | ¼ tsp | For garnish and depth |
| Panko Breadcrumbs 🍞 | ¼ cup | For crispy topping |
| Extra-Virgin Olive Oil 🫒 | 1 tbsp | For crispy breadcrumbs |
The cheeses are non-negotiable here. Sharp cheddar brings that signature tang, while Gruyère delivers the velvety texture that separates this from standard recipes. Grab a wedge of each from the deli counter—the pre-shredded stuff gets clumpy and lacks flavor. For Gruyère, Whole Foods or specialty cheese shops carry the best, but any quality European-style Gruyère works. The macaroni should be elbow shape for maximum sauce cling, and Barilla or De Cecco are my go-tos for al dente perfection. Freshly grated cheese is worth the extra minute—it melts smoother and tastes fresher.
No Gruyère? Parmigiano-Reggiano works in a pinch, though it lacks the same creamy mouthfeel. Pre-shredded cheese? Freshly grate your own—it makes all the difference. The roux needs equal parts butter and flour by weight, but if you’re eyeballing, use a kitchen scale for best results. For extra richness, swap half the milk for heavy cream. The smoked paprika can be omitted if you prefer a milder flavor, but it adds that subtle depth that makes this feel restaurant-quality. Panko breadcrumbs are essential for that crispy topping—Trader Joe’s sells them in bulk for the best price.
This sauce reheats beautifully—just add a splash of warm milk to restore that ultra-creamy texture. Store leftovers in an airtight container for up to 4 days, or freeze for 3 months in portion-sized containers. For the crispy topping, toss the panko with olive oil and smoked paprika before sprinkling on top. The dish holds up well for 2-3 days in the fridge, though it’s best served fresh. Double the recipe for a crowd—it scales perfectly without losing that luxurious texture.
Why You’ll Love This Recipe
- No-Fuss Stovetop Magic: I swear by this method—just butter, flour, and milk on the stove, no blender or fancy gadgets. The roux builds flavor while you boil the pasta, and by the time those elbows are al dente, your sauce is already silky smooth.
- Sharp Cheese Obsession: That sharp cheddar? It’s the star. I shred it myself (because pre-shredded gets clumpy) and let it melt into a glossy, tangy blanket over the pasta. Honestly, the first bite makes me forget I’m even eating a classic.
- Lunchbox Legend: Between us, this is my go-to for meal prep. I portion it into containers with a sprinkle of black pepper—kids adore it, and it reheats like a dream. (Yes, even on a Tuesday night when I’m running late.)
- Pantry Powerhouse: Four ingredients, zero guilt. The butter and flour are staples, milk’s cheap, and cheddar lasts forever. I’ve fed six people for under $10, and the leftovers? Still delicious three days later. My secret weapon for budget dinners.
Step-by-step instructions for ultra creamy stovetop mac and cheese
Master this technique and you’ll achieve a velvety, melt-in-your-mouth cheese sauce every time.
Cook the Elbow Macaroni to Perfect Al Dente
Bring a large pot of water to a rolling boil and add 1½ teaspoons salt (enough to make it taste like seawater). Add the 0.5 lb elbow macaroni and cook for 1 minute less than the package instructions recommend for al dente. You want the pasta to have a slight bite—it’ll finish cooking in the cheese sauce. Drain the pasta in a colander and set aside, reserving ½ cup pasta water for later.
Don’t rinse the pasta—those surface starches are essential for binding the cheese sauce. I always taste a piece of cooked pasta to check for doneness. It should be tender but still offer a slight resistance when bitten. Overcooked pasta leads to a mushy final dish, no matter how good your cheese sauce.
Prepare the Garlic Roux and Cheese Sauce
In a large, heavy-bottomed saucepan, melt the 0.5 cup unsalted butter over medium heat. Add the 2 minced garlic cloves and cook for 30 seconds until fragrant—don’t let it brown or it’ll turn bitter. Immediately whisk in the 0.25 cup all-purpose flour and cook for 1-2 minutes, stirring constantly, until the mixture forms a smooth, pale roux.
This roux is the foundation of your sauce. If it darkens, you’ve gone too far—start over with fresh butter and flour. Gradually whisk in the 2 cups warm whole milk, a ladle at a time, allowing each addition to be fully incorporated before adding more. The mixture will thicken noticeably as you go.
Melt the Cheeses for Maximum Creaminess
Reduce heat to low and add the 1.5 cups freshly grated sharp cheddar cheese and 1 cup freshly grated gruyère cheese. Stir constantly with a wooden spoon or silicone spatula until the cheeses melt completely and the sauce becomes silky smooth. This should take about 3-4 minutes. If the sauce starts to separate or looks too thick, whisk in 1-2 tablespoons of reserved pasta water at a time until it reaches a creamy consistency.
I always use freshly grated cheese for this recipe—pre-shredded cheese contains anti-caking agents that prevent a truly creamy texture. The gruyère adds a nutty depth that complements the sharp cheddar perfectly. You’ll know it’s ready when the sauce coats the back of a spoon smoothly and has a glossy sheen.
Combine Pasta and Sauce for Ultimate Creaminess
Add the drained elbow macaroni to the cheese sauce and toss gently to coat each strand completely. If needed, add more reserved pasta water, 1 tablespoon at a time, until the sauce clings to the pasta without being watery. The goal is a sauce that coats the pasta beautifully but doesn’t make it soggy. Taste and adjust seasoning with ½ teaspoon ground black pepper and additional salt if needed.
Here’s the secret to perfect texture: the pasta water acts as a natural emulsifier, helping the cheese sauce bind to each strand. If your sauce looks too thick, don’t panic—just add a splash of warm water or milk. The sauce will continue to thicken as it sits, so it’s better to err on the side of being slightly loose initially.
Create the Crispy Panko Topping
While the mac and cheese rests, heat the 1 tablespoon extra-virgin olive oil in a small skillet over medium heat. Add the 0.25 cup panko breadcrumbs and toast for 2-3 minutes, stirring constantly, until golden brown and crispy. Remove from heat and stir in the 0.25 teaspoon smoked paprika for added depth of flavor.
This crispy topping adds both texture contrast and visual appeal. Don’t skip the olive oil—it helps create that perfect golden color and crunch. The smoked paprika adds a subtle smokiness that pairs beautifully with the rich cheeses. Sprinkle the crispy breadcrumb mixture evenly over the top of the mac and cheese just before serving.
Pro Tips For Making 2 Cheese Mac And Cheese
- COOK PASTA AL DENTE: Elbow macaroni should have a firm bite—like biting into a crisp apple. Taste one raw, then boil it 1 minute less than the package says. Undercooked pasta soaks up sauce better and won’t turn mushy when mixed.
- GRATE CHEESE FINE: Sharp cheddar loses its edge when shredded in a food processor. Use a box grater and pulse just until broken into rice-sized pieces—this keeps the sauce smooth but still melty. (Yes, it’s tedious, but the texture makes all the difference.)
- LOW AND SLOW ROUX: Whisking butter and flour on medium-high heat turns your sauce into glue. Start on low, then gradually increase to medium-low while stirring like your life depends on it. The goal is a golden paste, not burnt flour.
- REST THE CHEESE: Take the cheddar out of the fridge 30 minutes before grating. Cold cheese makes the sauce grainy and separates. Room temperature cheese melts evenly—trust me, you’ll taste the difference. (I learned this after three lumpy batches.)
Regional styles of this 2 cheese mac and cheese
Southern Comfort
In the South, mac and cheese gets a smoky, soulful twist with ingredients like hot sauce and crispy fried onions. I love adding 1 tablespoon of Crystal hot sauce to the cheese mixture for a tangy kick, then topping with ½ cup fried onions (store-bought or homemade) for crunch.
This version is a staple at Southern BBQ joints, where it’s served as a side to pulled pork or fried chicken. 🔥
New England Baked
Up north, mac and cheese takes on a heartier, baked form with a crispy breadcrumb crust. I use 2 cups panko breadcrumbs mixed with 2 tablespoons melted butter and 1 teaspoon dried thyme for the topping.
After combining the pasta and sauce, transfer everything to a greased baking dish, sprinkle with the breadcrumb mix, and bake at 375°F for 20 minutes until golden. This version is perfect for cold New England winters and pairs well with roasted root vegetables.
Italian-Inspired
For an Italian twist, swap the Gruyère for Parmigiano-Reggiano and add ½ cup heavy cream to the sauce. I also incorporate 1 teaspoon Italian seasoning and ½ teaspoon red pepper flakes for a subtle kick.
Finish with a sprinkle of fresh basil and a drizzle of extra-virgin olive oil before serving. This lighter version is great as a side dish for grilled meats or as a vegetarian main course. 🌿
Cajun Spicy
Louisiana brings the heat with a Cajun-inspired mac and cheese. I stir 1 tablespoon Cajun seasoning (like Tony Chachere’s) into the cheese sauce and add ½ cup diced andouille sausage to the pasta.
Top with green onions and crumbled bacon for extra richness. This version is a crowd-pleaser at Cajun feasts and pairs perfectly with grilled shrimp or catfish. 🌶️
Midwest Classic
The Midwest keeps it simple but rich, often adding a layer of browned butter to the roux for extra depth. I like toasting 2 tablespoons of extra butter until nutty and swirling it into the finished sauce.
Serve with a side of crispy bacon bits and a sprinkle of chives. This version is a nostalgic favorite, often served at family gatherings and holiday dinners. It’s comforting, creamy, and pure Midwest charm. 💛
Nutrition facts
Frequently asked questions
Why does this recipe use both sharp cheddar and Gruyère?
The sharp cheddar delivers that classic tangy bite we all love, while the Gruyère adds nutty depth and an ultra-creamy texture that separates this from basic recipes. Together, they create a balanced flavor profile where neither cheese overpowers the other. The Gruyère also melts more smoothly, preventing that grainy texture you sometimes find in homemade versions.
Can I make this mac and cheese ahead of time?
This dish actually tastes better the next day. Store leftovers in an airtight container for up to 4 days. When reheating, add a splash of warm milk to restore that creamy texture. For serving, you can also make it a day ahead and bake it fresh with a crispy breadcrumb topping before eating. The sauce will continue to meld flavors overnight, making it even richer.
What’s the secret to preventing a grainy cheese sauce?
Use freshly grated cheese (never pre-shredded) and add it gradually while stirring constantly over low heat. Warm the milk first and whisk it in slowly to the roux before adding cheese. If the sauce starts to separate, whisk in 1 tablespoon of reserved pasta water at a time. The key is patience—rushing causes lumps! The cheese should melt completely into a silky sauce before combining with the pasta.
Can I substitute other cheeses in this recipe?
Yes, but with adjustments. For Gruyère, try Parmigiano-Reggiano (though it’s less creamy) or Comté. For cheddar, Monterey Jack works but lacks depth. If you want extra richness, swap ½ cup of the milk for heavy cream. The important thing is maintaining the 2:1 ratio of cheddar to second cheese to keep that signature flavor balance. Always grate your own cheese for best results.
How do I make this mac and cheese extra crispy?
For maximum crunch, bake it! After combining the pasta and sauce, transfer to a greased baking dish. Top with a mix of ½ cup panko breadcrumbs, 2 tablespoons melted butter, and ½ teaspoon smoked paprika. Bake at 375°F for 15-20 minutes until golden brown. Alternatively, toast extra breadcrumbs in olive oil until crispy and sprinkle on top just before serving. The oven method gives you that restaurant-quality crispy crust.

- 3lb Prime Rib Roast Recipe: Juicy Pink Center Guaranteed in 3 Hours - October 31, 2026
- 5 Spice Cake Recipe: Warmly Spiced Layers With Crunchy Top - October 31, 2026
- 1950’s Macaroni and Cheese Recipe: Nostalgic Creamy Cheese Sauce with Buttery Noodles - October 31, 2026