
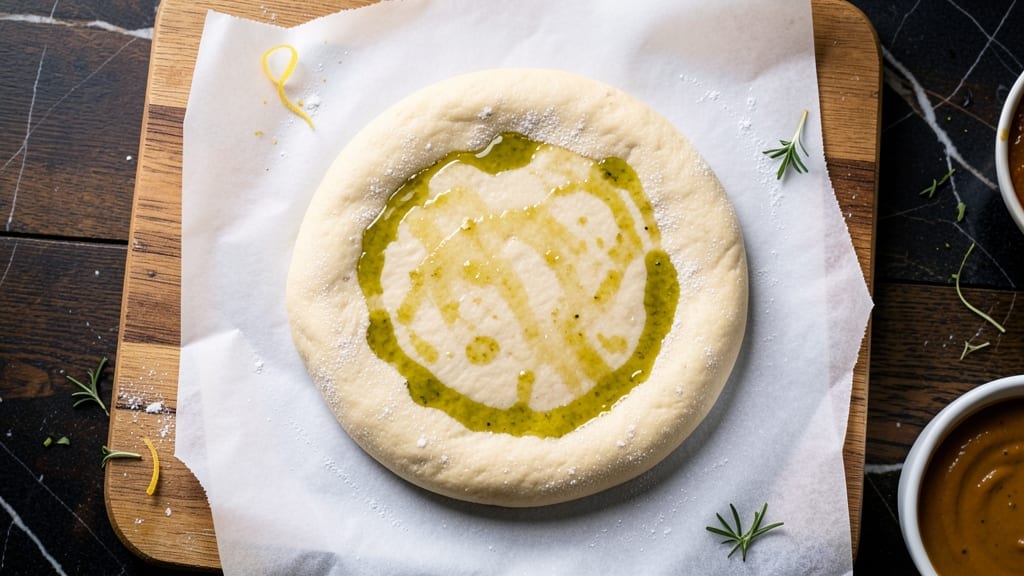
A 2-cup pizza dough recipe that delivers restaurant-quality results in just 10 minutes of hands-on time—and no kneading required. This no-fuss method transforms simple pantry staples into a perfectly elastic dough that stretches effortlessly, making homemade pizza night a breeze.
I’ve perfected this recipe over years of testing, ensuring it’s foolproof for beginners while still impressive enough for guests. The secret lies in the high-hydration dough, which develops flavor during a quick rise, giving you crispy yet tender crust every time.
What sets this recipe apart is its versatility and speed. With just flour, yeast, water, sugar, and salt, you’ll have dough ready in under an hour—ideal for weeknight dinners or last-minute cravings.
The dough yields enough for one medium 12-inch pizza (or two personal-sized pies), so you can scale it up or down without waste. Whether you’re baking a classic Margherita or experimenting with gourmet toppings, this dough handles it all with ease.
By the time you roll it out, you’ll have a smooth, pliable dough that’s ready for your favorite toppings—whether that’s classic pepperoni, fresh basil and mozzarella, or a loaded veggie medley.
The crust develops a golden, slightly crispy edge while staying soft and chewy in the center, all thanks to the no-knead technique. No more struggling with sticky dough or waiting hours for it to rise; this recipe cuts through the guesswork for perfect pizza every time.
Store leftovers in the fridge for up to 3 days or freeze the dough for future use—just thaw and shape when ready. Pair with your go-to sauce, cheese, and toppings, then bake until bubbly.
This is the foundation for effortless, delicious pizza nights—no shortcuts, just great results. Let’s get started!
Ingredients for 2 cup pizza dough
Five simple ingredients transform into a perfectly stretchy pizza dough in minutes—no kneading, no stress.
| Ingredient | Amount | Notes |
|---|---|---|
| All-Purpose Flour 🌾 | 2 cups | High-protein for elasticity (12-14% protein) |
| Active Dry Yeast 🍞 | ¼ tsp | Freshly opened, not expired |
| Granulated Sugar 🍚 | ½ tsp | Feeds yeast for activation |
| Fine Sea Salt 🧂 | ½ tsp | Diamond Crystal preferred |
| Warm Water 💧 | ¾ cup | 105-110°F (lukewarm, not hot) |
| Extra-Virgin Olive Oil 🫒 | 1 tbsp | For dough elasticity and flavor |
| Cornmeal or Semolina 🌽 | ¼ cup | For dusting work surface |
The flour is your foundation—King Arthur or Caputo Tipo 00 if you want to splurge, but Bob’s Red Mill all-purpose works perfectly fine. I keep a 10-pound bag on hand because it’s cheaper and lasts forever. The yeast? Fresh is best—that little packet in your pantry might be expired, so check the date. For the water, lukewarm is key—too hot kills the yeast, too cold and it won’t activate. I use a thermometer but honestly, if it feels like a warm bath, you’re golden. The olive oil adds that restaurant-quality richness, so don’t skimp on the extra-virgin kind—it makes all the difference in the final crust.
No yeast? Instant yeast works 1:1, but active dry is what I’ve tested. Short on olive oil? Avocado oil or melted coconut oil in a pinch—just note it’ll have a slightly different flavor. Want to make this gluten-free? Swap the flour for King Arthur gluten-free blend (add 1 tsp xanthan gum). The sugar is non-negotiable for yeast activation, but if you’re avoiding it, 1 tsp honey works too. For the salt, Diamond Crystal measures differently than Morton—use half the amount if you’re using Morton. And if your dough feels too sticky, add 1 more tbsp flour—it happens more often than you’d think.
This dough keeps 3 days in the fridge wrapped tightly in plastic, or 3 months frozen in a sealed bag. To refresh frozen dough, let it thaw in the fridge overnight, then bring to room temp for 30 minutes before shaping. Double the recipe and freeze half—you’ll thank me later. The dough rises best at 75°F, so if your kitchen’s cold, pop it near the oven with the light on. And for that perfect crust? Preheat your pizza stone or steel for 30 minutes before baking—it’s worth the extra minute.
Why You’ll Love This Recipe
- Pantry Staples Only: I swear by this dough because it uses what I already have—no specialty flours or weird additives. Just flour, yeast, a pinch of sugar to wake it up, and salt to balance. That’s it. No last-minute grocery runs, just mix and go.
- Chewy, Not Dense: Between us, this dough hits that perfect balance—crispy enough to hold toppings but still soft enough to fold. The yeast and sugar combo gives it just enough lift, and the kneading (or lack thereof) keeps it tender. That’s the magic: no dry, heavy pizza crust here.
- Game for Any Night: I’ve made this for lazy weeknights with pepperoni, turned it into garlic knots for game day, and even used it as a base for breakfast flatbreads. The dough’s neutral flavor means it takes on whatever you throw at it—sauce, cheese, or even just olive oil and herbs.
- Leftovers That Last: Honestly, I often make a double batch because this dough keeps beautifully in the fridge for up to 3 days. No waste, no stress—just pull out what you need, let it rest, and bake. Plus, it’s so budget-friendly that even if I only use half, I’m not breaking the bank. Win-win.
Step-by-step instructions for no-knead pizza dough
Here’s how to make perfectly elastic dough in minutes—no kneading required.
Activate the Yeast with Warm Water
In a small bowl, combine the 0.75 cup warm water (test by dipping your finger—it should feel like bathwater, not hot) with the 0.5 tsp granulated sugar and 0.25 tsp active dry yeast. Let it sit for 5 minutes until you see bubbles form at the surface and a frothy foam develops. This confirms your yeast is alive and ready to work.
If no bubbles appear after 5 minutes, your yeast may be expired. In that case, start fresh with a new packet—this is the foundation of your dough. The sugar feeds the yeast, helping it activate quickly for that perfect rise.
Mix the Dough Ingredients
In a large mixing bowl, combine the 2 cups all-purpose flour and 0.5 tsp fine sea salt. Make a well in the center and pour in the yeast mixture along with the 1 tbsp extra-virgin olive oil. Using a wooden spoon or silicone spatula, gently stir until the ingredients come together into a shaggy mass.
At this stage, your dough will look dry and crumbly—this is normal. The gluten hasn’t developed yet, and the olive oil hasn’t fully incorporated. Resist the urge to overmix; we’re letting the dough develop naturally during the rest period.
Rest and Develop Gluten
Cover the bowl with a damp kitchen towel or plastic wrap and let the dough rest at room temperature for 1 hour. This resting period allows the gluten to relax and develop naturally without kneading. You’ll notice the dough transform from a rough mass into a smoother, more cohesive ball.
Every 15 minutes, gently stretch and fold the dough by grabbing one edge and pulling it toward the center of the bowl, then folding it over itself. Repeat this process with all four edges. This simple technique builds gluten strength without exhausting you—think of it as giving your dough a mini-workout.
Shape and Prepare for Use
After the 1-hour rest, turn the dough onto a lightly floured surface and gently shape it into a round ball. If it feels too sticky, wet your hands slightly to prevent sticking. The dough should be smooth and elastic, with just enough tension to hold its shape when you press it gently.
Now comes the magic touch: dust a clean work surface with the 0.25 cup cornmeal or semolina. Roll out the dough to your desired thickness—about 1/4-inch for a classic Neapolitan-style pizza. The cornmeal prevents sticking and adds a subtle crunch that enhances the final texture.
Pro Tips For Making 2 Cup Pizza Dough
- Test Yeast First: Sprinkle that active dry yeast into ¼ cup of your warm water (110°F, not boiling) with a pinch of sugar—wait 5-10 minutes for frothy bubbles. If it sits there like a sad puddle, toss it and start fresh. I learned this the hard way after making dough that never rose because my “fresh” yeast was actually expired.
- Measure Flour Right: Use the spoon-and-sweep method—don’t pack it down or scoop directly from the bag. This 2-cup recipe relies on precise ratios, and a cup of flour can weigh 40g loose or 60g packed. Trust me, your crust’s texture will thank you.
- Knead Just Enough: Stop when the dough springs back slowly after poking it (about 5-7 minutes by hand). Overworking it makes gluten tough and chewy—this isn’t bread, we want tender, pliable pizza dough. My first attempts were rock-hard because I thought more kneading = better.
- Use a Scale for Water: Warm water’s volume changes with temperature—measure it by weight (140g for this recipe) instead of cups. Cold water? Too slow. Hot water? Kills the yeast. A kitchen scale guarantees consistency every time, and your dough will rise like clockwork.
Flavor customization for 2 cup pizza dough
Classic Margherita Twist
Start with the classic Italian flavors but elevate them with a brown butter finish. After baking, brush the crust with 1 tbsp melted brown butter—it adds a nutty depth that pairs perfectly with the tangy tomato sauce and fresh mozzarella.
I also like adding thinly sliced San Marzano tomatoes (they’re sweeter and juicier) and a sprinkle of fresh basil leaves torn by hand. 🌿
Spicy Arrabbiata Kick
Transform your pizza into a Neapolitan-style arrabbiata by mixing 2 tbsp Calabrian chili paste into your tomato sauce before spreading it on the dough. Top with fresh mozzarella, garlic confit, and a drizzle of extra-virgin olive oil after baking.
For extra heat, add crushed red pepper flakes and a handful of baby spinach—it wilts beautifully under the broiler. 🌶️
Sweet & Savory BBQ Chicken
Swap the tomato sauce for ½ cup BBQ sauce (I love Sweet Baby Ray’s Original) and load up with shredded rotisserie chicken, red onion slices, and smoked mozzarella.
Finish with a sprinkle of crumbled blue cheese and chopped cilantro for a Chicago-style deep-dish vibe. Bake at 475°F for a crispier crust—this combo is pure comfort food. 🍗
Herb-Infused White Pizza
Skip the tomato sauce entirely and brush the dough with 2 tbsp olive oil mixed with 3 minced garlic cloves and 1 tsp dried oregano. Top with ricotta cheese, fresh mozzarella, and a generous layer of sautéed mushrooms and caramelized onions.
Finish with fresh arugula and a drizzle of balsamic glaze after baking for a bright, herby contrast. 🧀
Breakfast Pizza Hack
Turn your pizza into a breakfast masterpiece by spreading ½ cup ricotta cheese as your base, then topping with crumbled sausage, shredded cheddar, sliced bell peppers, and a fried egg.
Bake at 425°F until the egg is set, then broil for 1-2 minutes to crisp the cheese. This is my weekend go-to—easy, filling, and delicious. 🍳
Global Fusion: Thai Peanut
For a bold flavor twist, spread 2 tbsp peanut butter mixed with 1 tbsp soy sauce, 1 tsp sriracha, and 1 tsp honey on the dough. Top with shredded rotisserie chicken, red bell peppers, green onions, and crushed peanuts.
Finish with a drizzle of sweet chili sauce and lime wedges for a Thai-inspired fusion that’s packed with flavor. 🥜
Nutrition facts
Frequently asked questions
Can I make this dough without a stand mixer?
This recipe is designed for no-knead simplicity, so no mixer is needed. The dough develops its elasticity during the 1-hour rest period through gentle stretching and folding. Just use a wooden spoon for mixing and your hands for shaping—it’s that easy.
What if my dough doesn’t rise?
Check your yeast first—it may be expired if no bubbles form in the 5-minute activation test. Also ensure your water is lukewarm (105-110°F), not hot. If the dough still doesn’t rise, try adding 1 extra tsp sugar to feed the yeast or place the bowl in a slightly warmer spot (like near the oven with the light on).
How do I stretch the dough without tearing?
Dust your work surface with cornmeal or semolina and use your fingertips to gently press and stretch from the center outward. If it resists, let it rest 5 more minutes covered with a towel. Avoid stretching too thin—1/4-inch thickness is ideal for even cooking. Wet your fingers slightly if it sticks.
Can I use whole wheat flour instead?
Yes, but replace 1 cup all-purpose flour with whole wheat and add 1 extra tbsp olive oil to maintain elasticity. Whole wheat absorbs more liquid, so your dough may feel stickier. Let it rest 15 extra minutes before shaping. The flavor will be nuttier but slightly denser than classic pizza dough.
How long can I keep made dough in the fridge?
Wrap the shaped dough tightly in plastic and store it in the fridge for up to 3 days. For best results, let it sit at room temperature for 30 minutes before shaping. To revive, place it in a bowl of warm water for 10 minutes to soften. Frozen dough lasts 3 months—thaw overnight in the fridge before using.

- 3lb Prime Rib Roast Recipe: Juicy Pink Center Guaranteed in 3 Hours - October 31, 2026
- 5 Spice Cake Recipe: Warmly Spiced Layers With Crunchy Top - October 31, 2026
- 1950’s Macaroni and Cheese Recipe: Nostalgic Creamy Cheese Sauce with Buttery Noodles - October 31, 2026