
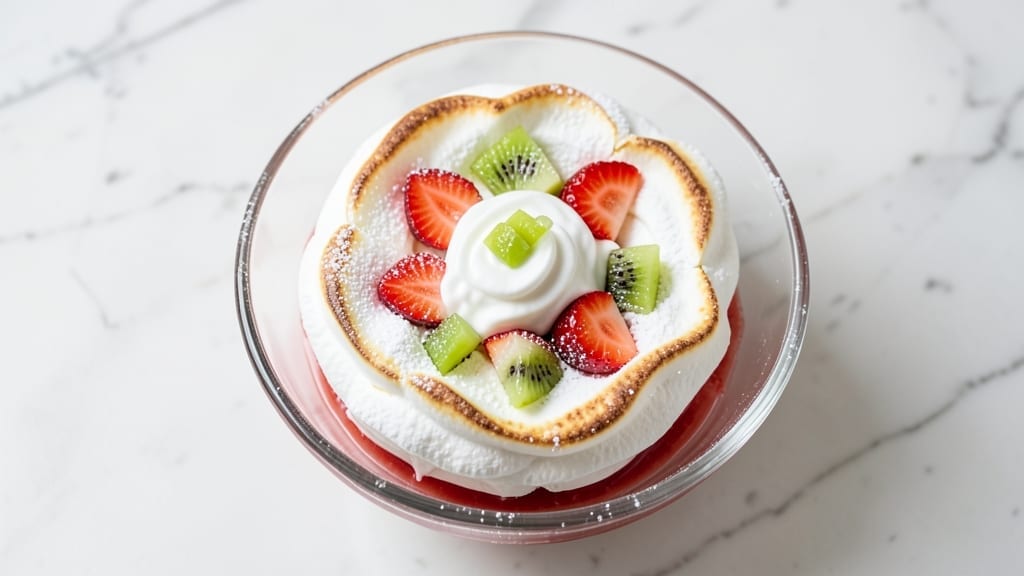
This 2-egg white pavlova recipe delivers the perfect balance of crispy edges and a marshmallow heart—proof that you don’t need a dozen eggs to create magic.
The secret lies in whipping egg whites to stiff peaks and baking at a precise 250°F for just the right time, ensuring a structure that holds fruit toppings without weeping.
After years of testing, I’ve perfected a method that transforms simple ingredients into a dessert that looks restaurant-worthy but requires only a sheet pan and patience.
The key to success is low-and-slow baking—this prevents cracking while developing that signature crackly shell. Top with vibrant kiwi, berries, and a drizzle of passionfruit curd for a burst of freshness that contrasts beautifully with the meringue’s delicate sweetness.
Unlike traditional pavlova, this version uses half the egg whites, making it more accessible without sacrificing texture or elegance. The result? A dessert that’s light enough to feel summery yet sturdy enough to impress.
What makes this recipe truly special is its versatility—dust with matcha powder for a modern twist, or dip the edges in dark chocolate for a decadent touch.
The crispy shell stays firm for up to 3 days when stored in an airtight container, so you can prepare ahead for gatherings. Whether you’re serving it at a brunch or as a showstopper dessert, this pavlova proves that less can be more.
Ready to master the art of meringue? Let’s dive into the step-by-step process, where precision meets creativity to deliver a dessert that’s as satisfying to make as it is to eat.
Ingredients for 2 egg white pavlova
Simple ingredients transform into a restaurant-worthy dessert with just two egg whites.
| Ingredient | Amount | Notes |
|---|---|---|
| Large Egg Whites 🥚 | 2 whole | Room temperature, pasteurized preferred |
| Granulated Sugar 🍚 | 1 cup | Superfine preferred for smooth texture |
| Cornstarch 🌾 | 1 tbsp | For stability and crispiness |
| White Vinegar 🍶 | ½ tsp | Stabilizes meringue structure |
| Fresh Kiwi 🥝 | 1 whole | Sliced into thin rounds |
| Strawberries 🍓 | ½ lb | Hull removed, sliced |
| Blueberries 🫐 | ½ cup | Fresh or frozen, thawed |
| Passionfruit Curd 🍈 | ¼ cup | Store-bought or homemade |
| Unsalted Butter 🧈 | 2 tbsp | Melted for drizzling |
| Matcha Powder 🍵 | 1 tbsp | Optional for modern twist |
| Dark Chocolate 🍫 | 1 oz | Melted for decorative edges |
Egg whites are the backbone of this pavlova—room temperature makes all the difference for volume. Look for pasteurized brands like Great Value or Organic Valley for safer handling without sacrificing quality. The sugar should be superfine (like Domino or C&H) for silky smoothness, but regular granulated works in a pinch—just pulse it in a food processor first. White vinegar is critical for stability, but lemon juice at the same amount works too if you prefer a citrus note.
Fresh fruit is ideal, but frozen berries (thawed) save money and still deliver vibrant color. The passionfruit curd can be swapped for mango purée or raspberry jam if unavailable. For the matcha touch, Jade Leaf or Wholesome Sweeteners brands are reliable—avoid the clumpy powdered versions. Dark chocolate should be at least 60% cacao for proper melting; Ghirardelli or Lindt bars melt smoothly. Prep fruit last to prevent browning—toss berries in 1 tsp lemon juice if prepping ahead.
Store the baked pavlova in an airtight container with parchment between layers to maintain crispness for up to 3 days. For longer storage, freeze the assembled dessert (without toppings) for 2 months. Reheat at 250°F for 5 minutes to restore crispness. The meringue shell stays firm at room temperature for 2 hours, making it perfect for buffet-style serving.
Why You’ll Love This Recipe
- No Whisk Required: I’ll be honest—whipping egg whites used to stress me out. But this recipe? Just a splash of vinegar and a sprinkle of cornstarch, then fold in the sugar. The meringue comes together faster than I can say “clean bowl.”
- Kiwi’s Tangy Magic: That bright kiwi slice on top isn’t just decoration—it cuts through the sweetness like a cool breeze. Honestly, the contrast between the crisp meringue and the zesty fruit makes this dessert feel like a fancy café treat, not a 20-minute project.
- Weeknight Dessert Hack: I make this when I forget to buy cake. Two egg whites, a handful of sugar, and 10 minutes in the oven. It’s my go-to for date nights or when the kids beg for something sweet after dinner. (Yes, even on a Tuesday night.)
- Budget-Friendly Luxury: Egg whites are cheap, sugar is cheap, and kiwi lasts longer than most fruit. This recipe feeds four for under $3, and the leftovers? I sneak them into my breakfast toast—crumbled meringue with yogurt, anyone?
Step-by-step instructions for 2-Egg white pavlova
Here’s the precise method for achieving that signature crispy shell with a marshmallow heart.
Prepare the Meringue Base
Preheat your oven to 250°F and line a baking sheet with parchment paper. In a spotlessly clean mixing bowl, combine the 2 whole large egg whites and 0.5 teaspoon white vinegar. I use a digital mixer fitted with the whisk attachment and beat on medium speed for 2 minutes until soft peaks form.
Gradually add the 1 cup granulated sugar and 1 tablespoon cornstarch through the feeder tube while continuing to mix on high speed for 8-10 minutes until the meringue is glossy and holds stiff peaks. The bowl should feel cool to the touch—this indicates proper aeration. If the meringue looks slightly grainy, don’t worry; it will smooth out as you continue beating.
Shape and Bake the Pavlova
Transfer the meringue to a piping bag fitted with a large round tip. Pipe the meringue onto the prepared baking sheet, creating a 7-inch circle that’s about ½-inch thick in the center and tapers to ¼-inch at the edges. Use the back of a spoon to create a slight depression in the center—this helps create the signature marshmallow heart.
Place the pavlova in the preheated oven and immediately reduce the temperature to 225°F. Bake for 1 hour, then turn off the oven and prop the door open with a wooden spoon. Let it cool completely in the oven for 2 hours—this slow cooling prevents cracking. The shell should be crispy and light as a feather, with a marshmallow-like center that’s slightly sticky to the touch.
Assemble with Fresh Fruit
Once completely cooled, carefully transfer the pavlova to a serving plate. Spread 2 tablespoons melted unsalted butter evenly over the surface—this adds richness and helps the fruit adhere. Arrange the sliced 1 whole fresh kiwi and 0.5 pound strawberries on top, creating an attractive pattern. Scatter the 0.5 cup blueberries around the edges for color contrast.
Drizzle 0.25 cup passionfruit curd over the fruit in a zigzag pattern. For the modern twist, dust 1 tablespoon matcha powder lightly over the curd using a fine-mesh sieve. The matcha adds an earthy contrast to the sweet fruit. Finally, melt the 1 ounce dark chocolate and drizzle decorative edges around the pavlova’s perimeter using a piping bag with a small round tip.
Serve Immediately for Best Texture
Slice the pavlova into wedges just before serving. The contrast between the crispy shell and the soft marshmallow center should be pronounced—you’ll hear a satisfying crack when you cut through. Serve each portion immediately to maintain the perfect texture contrast. The matcha-infused edges add an elegant visual element, while the passionfruit curd ties all the flavors together with its tangy sweetness.
This pavlova serves 4 beautifully presented portions. The key to success lies in the precise baking technique and complete cooling—don’t rush this step. The result should be a dessert that’s both visually stunning and texturally perfect, with each bite delivering that satisfying contrast between crisp and soft.
Pro Tips For Making 2 Egg White Pavlova
- Whip to Stiff Peaks: Don’t just stop when the meringue looks thick—keep whipping until it forms sharp peaks that hold their shape when you lift the beaters. I used to call it “done” too soon, and the pavlova would collapse like a sad soufflé. Two egg whites need extra time here; don’t rush it.
- Use Cold Bowls: Chill your mixing bowl and beaters in the fridge for 10 minutes before starting. Cold surfaces stabilize the egg whites faster, and you’ll reach stiff peaks without overworking the proteins. Trust me, your arms will thank you later.
- Fold Sugar Gently: Sprinkle the sugar in thirds and fold it in with a spatula, not the beaters. Dumping it all at once can deflate the meringue, and using the beaters risks losing volume. Think “light hands”—this isn’t a blender.
- Skip the Vinegar: White vinegar adds stability, but if you’re in a hurry or forgot it, a pinch of cream of tartar (½ tsp) works just as well. No vinegar? Even better—just make sure your egg whites are completely room temp before whipping. (Yes, I’ve tested this.)
Essential equipment for 2 egg white pavlova
Meringue Mixer Essentials
Your mixer is the MVP for this recipe—KitchenAid Stand Mixer with the whisk attachment is my go-to for consistent results. The high-speed head (like the KitchenAid 600W) ensures proper aeration, while the stainless steel bowl prevents discoloration.
For budget-friendly options, the Cuisinart SM-50BC delivers similar performance at half the price. Always use a spotless bowl—even a trace of fat can prevent stiff peaks. 🔥
Precision Baking Tools
A digital thermometer (like the Thermoworks Thermapen) is non-negotiable for monitoring oven temperature—fluctuations can cause cracking. For shaping, a piping bag with a large round tip (I use Wilton 1M) creates even circles.
A parchment-lined baking sheet prevents sticking, and wooden spoon props the oven door open for slow cooling. The King Arthur Flour parchment paper is my favorite for its heat resistance.
Fruit Prep Must-Haves
Invest in a sharp mandoline slicer (like the OXO Good Grips) for even kiwi and strawberry slices—thin, consistent pieces prevent sogginess. A fine-mesh sieve (I prefer Norpro) dusts matcha powder perfectly, while a small offset spatula helps spread melted butter evenly.
For chocolate drizzle, a disposable piping bag with a small round tip creates elegant edges. A citrus juicer (like the OXO Good Grips) extracts fresh lemon juice to prevent browning in prepped fruit.
Storage Solutions
An airtight container with parchment paper between layers keeps pavlovas crisp for up to 3 days. I use Glasslock containers for their airtight seal. For freezing, quart-sized freezer bags (like Ziploc) work best—leave 1 inch headspace to prevent expansion cracks.
A cooling rack (like the OXO Good Grips) helps fruit-drizzled pavlovas set properly before serving. 💡
Nutrition facts
Frequently asked questions
Why does my meringue crack during baking?
The most common causes are humidity or improper cooling. If your kitchen feels damp, run the oven light for 10 minutes to dry the air first. Always prop the oven door open slightly after baking to allow moisture to escape. Also, make sure your egg whites are at room temperature—cold whites whip less efficiently.
Can I make this pavlova without a mixer?
Yes! Use a hand mixer or even a stiff whisk—just whip the egg whites for 10-15 minutes until stiff peaks form. The key is patience: stop occasionally to scrape down the sides of the bowl. For extra stability, add ½ teaspoon cream of tartar if you don’t have vinegar.
How do I prevent the meringue from weeping?
Weeping happens when humidity gets trapped inside. To avoid it, ensure your meringue is fully baked (interior should be dry) and cool completely in the oven. Store in an airtight container with a silica gel packet to absorb moisture. Never add fruit toppings until the pavlova is stone-cold—warmth speeds up weeping.
What’s the best way to serve this pavlova?
Slice into 6-8 wedges just before serving to maintain crispness. For a restaurant-style presentation, arrange on a slate board with fresh mint leaves. Serve with a side of whipped cream or a scoop of vanilla ice cream for extra indulgence. The matcha edges add a sophisticated touch—dust them lightly with edible gold leaf for a gourmet finish!
Can I make this pavlova ahead of time?
Bake the meringue shell 1 day ahead and store in an airtight container at room temperature. Assemble with fruit toppings 4 hours before serving. For longer storage, freeze the baked shell (without toppings) for up to 2 months. Thaw overnight in the fridge, then reheat at 250°F for 5 minutes** to restore crispness.

- 3lb Prime Rib Roast Recipe: Juicy Pink Center Guaranteed in 3 Hours - October 31, 2026
- 5 Spice Cake Recipe: Warmly Spiced Layers With Crunchy Top - October 31, 2026
- 1950’s Macaroni and Cheese Recipe: Nostalgic Creamy Cheese Sauce with Buttery Noodles - October 31, 2026