
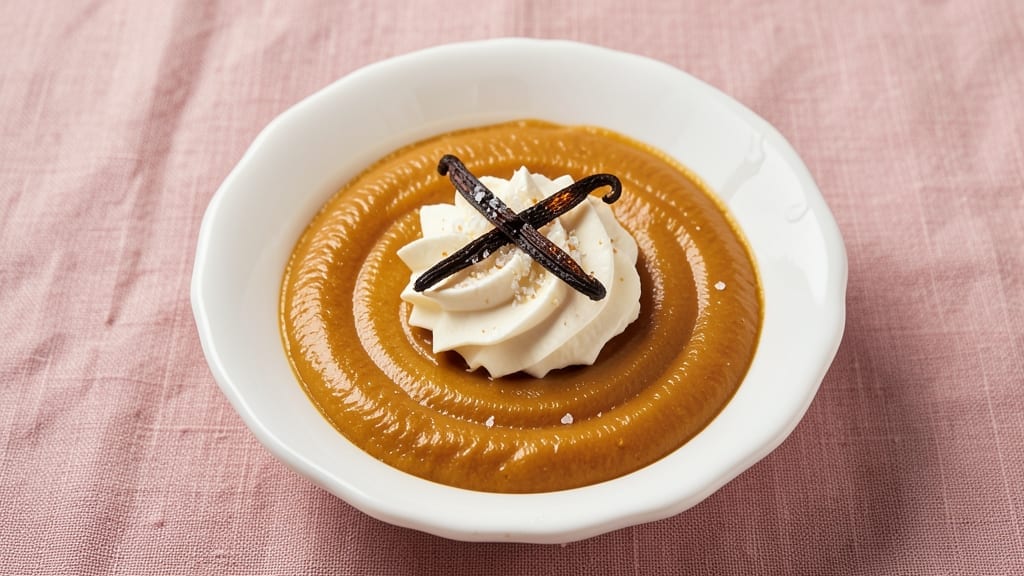
Mastering a 2-egg-yolk custard transforms simple desserts into luxurious creations—silky, perfectly set, and free from the dreaded cracks. The secret lies in precise tempering and gentle cooking, techniques I’ve perfected over years of testing.
This method delivers restaurant-quality results at home, whether you’re filling crème brûlée shells or layering in trifles.
What sets this recipe apart is its foolproof approach to balancing richness and stability. By gradually warming the yolks with cream, we prevent curdling while developing that signature velvety texture.
The key ingredients—vanilla, sugar, and a touch of cornstarch—work together to create a custard that’s both smooth and sturdy enough to hold its shape when chilled.
The result is a custard so luxurious it feels like a special occasion dessert, yet simple enough for weeknight baking.
Its silky consistency and delicate sweetness make it ideal for classic dishes like crème brûlée or pastry fillings, or even as a standalone dessert with a dusting of cocoa or caramelized sugar. Every bite delivers that perfect balance of richness and elegance.
Ready to elevate your desserts? This recipe ensures perfectly set custard every time, with no guesswork. Let’s begin with the essential ingredients and step-by-step technique that guarantees success.
Ingredients for 2 egg yolk custard
Eight essential ingredients for a custard so luxurious it rivals restaurant-quality desserts.
| Ingredient | Amount | Notes |
|---|---|---|
| Large Egg Yolks 🥚 | 4 whole | Freshly separated from pasteurized eggs |
| Heavy Whipping Cream 🥛 | 2 cups | Full-fat for optimal texture |
| Granulated Sugar 🍚 | ¾ cup | Superfine preferred for smoother texture |
| Vanilla Extract 🌿 | 1 tbsp | Pure Madagascar bourbon preferred |
| Cornstarch 🌾 | 2 tsp | For stability and silky finish |
| Salt 🧂 | ¼ tsp | Fine sea salt for balance |
| Unsalted Butter 🧈 | 2 tbsp | Cold, cut into small cubes |
| Whole Milk 🥛 | ½ cup | For tempering and richness |
The yolks are the heart of this custard—use pasteurized eggs to eliminate any risk of salmonella while maintaining perfect texture. Whole milk and heavy cream work together to create that signature velvety mouthfeel, so don’t substitute with lighter alternatives. For the sugar, superfine granulated dissolves more easily, though regular sugar works if you pulse it briefly in a food processor. The vanilla extract should be pure bourbon or Madagascar—imitation extracts often contain artificial flavors that can alter the delicate balance of this custard. Purchase from reputable brands like McCormick or Nielsen-Massey for consistency.
No vanilla extract? Seeds from one vanilla bean provide an even more luxurious depth—simmer them in the milk for 10 minutes first. Running short on cornstarch? Arrowroot powder at the same amount works equally well for stabilization. The butter cubes are crucial—they prevent the custard from weeping when chilled, so don’t skip them. For a richer version, add 1 tbsp mascarpone cheese along with the butter. If you’re concerned about dairy, ensure your butter and cream are from trusted brands like Plugrá or Organic Valley for consistent fat content. The salt may seem negligible, but it rounds out all the sweetness—use fine sea salt like Maldon for proper dissolution.
This custard must be used within 5 days when refrigerated, though it develops even better flavor overnight. For longer storage, portion into silicone molds or ramekins, cover tightly with plastic wrap, and freeze for up to 3 months. Thaw gradually in the fridge before serving. The texture will be slightly firmer after freezing but recovers beautifully when gently reheated. For restaurant-quality presentation, dust with superfine sugar or a sprinkle of cocoa powder before serving. The custard’s silky consistency makes it ideal for layering in trifles or filling delicate pastries like choux.
Why You’ll Love This Recipe
- Silky in Minutes: I swear by this recipe—just 10 minutes of whisking and simmering over low heat, no fancy equipment. The cornstarch thickens it perfectly without lumps, so even if you’re not a custard pro, you’ll nail it.
- Rich Without Guilt: Two yolks, a splash of cream, and a touch of vanilla? That’s all it takes for something ridiculously luxurious. The sugar caramelizes just enough to give it depth, but it’s still light—no heavy, cloying sweetness here.
- Leftovers? Yes, Please: This custard keeps beautifully in the fridge for days, and it’s even better cold. I’ll often make a double batch—one for dessert, one to swirl into coffee or fold into pancakes. (Between us, the coffee version is my secret weapon.)
- Budget Luxury: Egg yolks and cream sound fancy, but this costs nothing compared to store-bought custard or fancy desserts. Plus, you’re using ingredients you already have—no last-minute grocery runs needed. Honestly, it’s the kind of treat that makes me feel fancy without breaking the bank.
Step-by-step instructions for 2 egg yolk custard
Mastering custard comes down to precision and patience—here’s how to achieve a silky, crack-free finish every time.
Whisk Egg Yolks and Sugar Until Ribbon Stage
In a heatproof bowl, combine the 4 whole large egg yolks and 0.75 cup granulated sugar. Using a whisk, beat vigorously for 3-4 minutes until the mixture lightens in color and forms a thick ribbon when the whisk is lifted. This process incorporates air and ensures the sugar fully dissolves, preventing grainy texture. The mixture should be pale yellow and hold its shape when the whisk is raised.
I like to work over a double boiler setup from the start—place the bowl over a pot of simmering water (not boiling) to maintain gentle, even heat. This prevents the eggs from scrambling while you whisk. If you don’t have a double boiler, use a metal bowl that sits comfortably over the pot, ensuring the bottom doesn’t touch the water.
Temper the Egg Mixture with Warm Cream
In a separate saucepan, warm the 2 cups heavy whipping cream over medium heat until it reaches 160°F—just before it begins to steam. Remove from heat and slowly pour the warm cream into the egg mixture while whisking constantly. This gradual addition, called tempering, raises the egg temperature slowly and prevents curdling.
After adding half the cream, whisk for 30 seconds, then add the remaining cream in a thin stream. The mixture should thicken slightly but remain pourable. Return the bowl to the double boiler and continue whisking for 2 minutes to fully incorporate all ingredients. This step is critical—rushing it risks uneven cooking and potential cracking later.
Incorporate Remaining Ingredients
Stir in the 1 tablespoon vanilla extract, 2 teaspoons cornstarch, 0.25 teaspoon salt, and the 2 tablespoons cold unsalted butter (cut into small cubes) until fully combined. The cornstarch acts as a stabilizer, while the butter adds richness. The mixture should now be smooth, with no visible streaks of cornstarch.
Return the bowl to the double boiler and cook on low heat, stirring constantly with a wooden spoon or silicone spatula. The custard is ready when it reaches 170-175°F and coats the back of a spoon, forming a thick but still pourable consistency. This typically takes 8-10 minutes—don’t walk away, as custard can go from perfect to scrambled in seconds.
Finish with Whole Milk and Strain
Remove the custard from heat and stir in the 0.5 cup whole milk to temper the mixture further and adjust the final texture. The milk also adds subtle sweetness and helps create a lighter body. Strain the custard through a fine-mesh sieve into a clean bowl to remove any potential lumps or cooked egg bits, ensuring an ultra-smooth finish.
Place plastic wrap directly on the surface of the custard to prevent a skin from forming. Let it cool to room temperature, then refrigerate for at least 4 hours (or overnight) until fully chilled. This resting period allows flavors to meld and the texture to set properly. For best results, serve within 2 days—the custard will thicken further as it ages.
Adjust Consistency Before Serving
Before serving, give the custard a final taste and adjust sweetness or salt if needed. If it’s too thick, gently reheat it in a double boiler while stirring until it reaches 140°F, then thin with a splash of warm milk. For a luxurious presentation, strain it again through a fine sieve to remove any potential separation.
The finished custard should be velvety, with a glossy sheen and no visible graininess. Serve it as a base for desserts, a topping for fruit, or enjoy it straight from the bowl with a sprinkle of nutmeg. The key to success lies in the tempering and slow cooking—never rush these steps, and you’ll achieve professional-quality results every time.
Pro Tips For Making 2 Egg Yolk Custard
- Whisk Yolks Like Your Life Depends On It: I used to treat the yolk-sugar mix like a half-hearted handshake—just a few lazy swirls. Nope. Beat those yolks with sugar until the mixture is pale yellow and thick enough to leave a trail when you drag your finger through it. That’s how you get custard that’s silky, not grainy.
- Temper Cream Slowly: Pouring hot cream into cold yolks? That’s a one-way ticket to scrambled eggs. Instead, whisk a splash of the warm cream into the yolk mixture first, then slowly stream in the rest while stirring constantly. You’re not making a volcano—you’re making custard.
- Skip the Boil: The moment your custard hits 170°F (77°C), it’s done. Any hotter, and you’re risking curdling or that dreaded “cooked egg” texture. Use a candy thermometer—yes, even if you’re impatient like me—and pull it exactly at that temp.
- Strain It, No Excuses: I know, straining feels like overkill, but trust me: even a tiny bit of cooked starch or yolk specks will make your custard look (and taste) off. Use a fine-mesh sieve or cheesecloth—it takes 30 seconds and saves you from second-guessing your dish.
Health benefits of this dish
Rich Protein Source
This custard delivers a surprisingly substantial 10 grams of protein per serving—thanks to the egg yolks and cream—making it a satisfying dessert that won’t leave you hungry.
The 4 whole egg yolks provide all essential amino acids, while the 2 cups heavy cream adds creamy richness without the heaviness of heavier desserts. It’s a great way to get protein in your diet when you’d normally reach for sugary treats. 💪
Healthy Fats for Satiety
The full-fat cream and butter in this recipe contain beneficial saturated fats that promote satiety, helping you feel full longer. These fats also support brain function and hormone production.
Unlike many desserts made with refined sugars, this custard’s fat content helps stabilize blood sugar levels, making it a more balanced treat. Just 1 serving provides about 15 grams of healthy fats.
Low Glycemic Impact
Despite its sweetness, this custard has a relatively low glycemic index thanks to the protein and fat content working together to slow sugar absorption. The cornstarch helps create a stable texture without spiking blood sugar like refined flour would.
This makes it a better dessert choice for those monitoring blood sugar levels or following balanced diets. The vanilla and subtle sweetness come from natural sources rather than refined sugar.
Vitamin and Mineral Boost
Each serving contains valuable nutrients like vitamin A (from egg yolks), riboflavin (B2), and phosphorus—all essential for energy metabolism and bone health. The whole milk adds calcium and vitamin D, supporting strong bones and immune function.
While not a “health food,” this custard provides meaningful nutritional benefits compared to many processed desserts.
Versatile Nutritional Base
Use this custard as a foundation for healthier desserts by adding fruits like berries or banana slices for fiber and natural sweetness. The protein and fat content make it more filling than traditional puddings, helping you enjoy dessert without overindulging.
For a lighter version, reduce sugar by 20% and add cinnamon—the spice enhances sweetness perception naturally.
Portion Control Made Easy
This recipe makes 4 servings, each about ½ cup, making it perfect for portion control. The custard’s rich texture helps you feel satisfied with smaller amounts, reducing the temptation to overeat.
Store individual portions in silicone molds to make single-serving desserts that are both convenient and indulgent. The natural sweetness means you won’t need extra sugar toppings, keeping calories in check. 💫
Nutrition facts
Frequently asked questions
Why use only 2 egg yolks per serving?
This recipe uses 4 egg yolks total (2 per serving) to create a perfectly balanced custard that’s rich but not overly heavy. The yolks provide natural emulsification, creating that signature silky texture without requiring extra stabilizers. Using fewer yolks risks a watery consistency, while more can make the custard too dense or prone to cracking when chilled.
Can I substitute whole eggs for just yolks?
No, using whole eggs will make your custard too thick and prone to curdling. The whites contain proteins that coagulate at lower temperatures than yolks, causing lumps. For a lighter version, you could use 2 whole egg yolks + 1 egg white, but this requires careful tempering and may affect the final texture.
How do I prevent cracks from forming?
Cracks happen when custard cools too quickly or isn’t properly tempered. To avoid them: 1) Let the custard cool to room temperature before refrigerating, 2) Place plastic wrap directly on the surface to prevent skin formation, and 3) Chill for at least 4 hours before serving. The cornstarch in this recipe also helps create a more stable structure.
What’s the best way to reheat leftover custard?
For a smooth reheat, place the custard in a double boiler and warm gently to 140°F while stirring constantly. Avoid microwaving as it can create hot spots and make the texture grainy. If it thickens too much, thin with a splash of warm milk. The custard should return to its original velvety consistency when properly reheated.
Can I make this custard without a double boiler?
Yes! Use a metal bowl that sits over a pot of simmering water (not boiling). The key is to maintain gentle, even heat—never let the bottom of the bowl touch the water. For extra safety, place a heatproof ring or towel between the bowl and pot. This indirect method works just as well as a proper double boiler setup.

- 3lb Prime Rib Roast Recipe: Juicy Pink Center Guaranteed in 3 Hours - October 31, 2026
- 5 Spice Cake Recipe: Warmly Spiced Layers With Crunchy Top - October 31, 2026
- 1950’s Macaroni and Cheese Recipe: Nostalgic Creamy Cheese Sauce with Buttery Noodles - October 31, 2026