
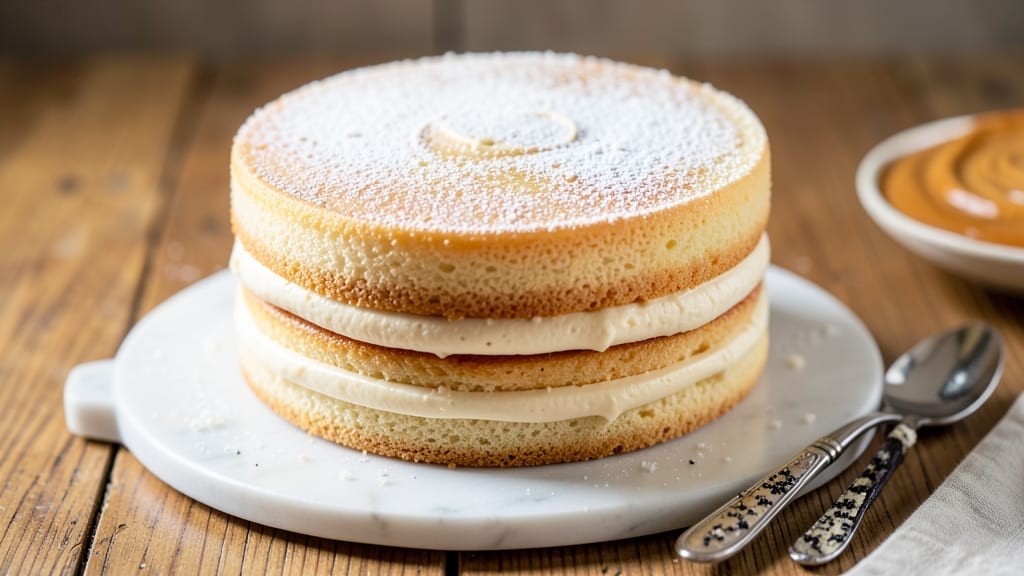
This 2-layer vanilla cake recipe from scratch delivers restaurant-quality results with pillowy layers and a vanilla bean-infused frosting that tastes like a bakery secret—no shortcuts, just foolproof steps. guarantee even layers and a smooth finish every time.
I’ve perfected this recipe through years of baking trials, and it’s become a crowd-pleaser for celebrations and special occasions alike.
The foundation starts with a light, airy batter that bakes up tender yet sturdy enough to support the frosting. We’ll use a vanilla bean paste for depth of flavor, not just extract, and a buttercream frosting that’s rich but not overly sweet.
The secret to perfect layers? Baking time consistency and a quick cooling trick that prevents sinking. This isn’t just a cake—it’s a showstopper that impresses even experienced bakers.
By the time you’re done, you’ll have two moist, golden layers with a velvety frosting that’s smooth enough for piping or spreading. The vanilla bean infusion adds a subtle complexity that makes this cake taste like it came from a professional kitchen.
Each slice will be light yet rich, with that perfect balance of sweetness and vanilla flavor that makes it irresistible.
This recipe scales beautifully for any occasion, from birthdays to weddings, and includes tips for even frosting and garnishing like a pro. Let’s get started—your guests won’t believe it’s homemade!
Ingredients for 2 layer vanilla cake recipe from scratch
Pantry staples meet bakery secrets for this showstopping 2-layer vanilla cake.
| Ingredient | Amount | Notes |
|---|---|---|
| All-Purpose Flour 🌾 | 3 cups | Sifted for lightness, not pre-sifted |
| Granulated Sugar 🍚 | 2 cups | Superfine for smoother texture |
| Unsalted Butter 🧈 | 1 ½ cups | Room temperature, not melted |
| Large Eggs 🥚 | 6 whole | Room temperature, separated |
| Vanilla Bean Paste 🌿 | 2 tbsp | High-quality, not extract |
| Baking Powder 🍞 | 2 tsp | Freshly opened package |
| Salt 🧂 | ½ tsp | Fine sea salt preferred |
| Whole Milk 🥛 | 1 cup | Room temperature |
| Vanilla Bean Seeds 🌿 | 1 whole | Scraped from 1 vanilla bean |
| Heavy Whipping Cream 🥛 | 2 cups | Cold, for frosting |
| Powdered Sugar 🍚 | 4 cups | Sifted for smooth frosting |
| Vanilla Extract 🌿 | 1 tbsp | Pure vanilla extract |
The flour is non-negotiable here—King Arthur or Gold Medal are my go-tos for that perfect crumb. Butter matters too: Plugrá or Land O’Lakes unsalted work best when room temperature, not melted. Grab a high-quality vanilla bean paste from Williams Sonoma or Sur La Table—the difference is night and day compared to extract. For the eggs, separate them the night before and refrigerate the whites; they’ll whip better cold. The vanilla bean seeds? Scrape them fresh—don’t use pre-packaged seeds, they’re often stale.
No vanilla bean paste? Double the extract plus a pinch of vanilla powder gets you close, but it won’t have that same depth. Swap whole milk for evaporated milk or heavy cream if needed, but the texture will be slightly richer. For the frosting, powdered sugar from Domino or C&H is ideal—sift it to avoid lumps. Short on heavy cream? Whipped topping from a can works in a pinch, but it won’t be as stable. And if you’re worried about overmixing the batter, use a stand mixer with the paddle attachment—it’s foolproof for even layers.
Store the cake layers wrapped in plastic wrap in the fridge for up to 3 days before frosting—this prevents them from drying out. The frosting can be made 1 day ahead and stored in an airtight container in the fridge; just rewhip it briefly before using. For long-term storage, freeze the unfrosted layers for up to 3 months. Thaw overnight in the fridge before assembling. Pro tip: Keep a damp towel over the cake while you’re frosting to prevent it from drying out from the air.
Why You’ll Love This Recipe
- No Mixer Needed: I swear by this recipe because it’s the only vanilla cake I’ve ever made that doesn’t require a stand mixer. Creaming butter and sugar by hand? Totally doable, and the result is that perfect, fluffy crumb—no electric help required.
- Vanilla Love Bomb: That vanilla bean paste isn’t just flavor—it’s a moment. One teaspoon of it turns a basic cake into something rich and aromatic, like a warm hug in dessert form. (And honestly, if you’ve never split a vanilla bean, this is your sign to try it.)
- Birthday Party Ready: This cake holds its shape like a champ, so it’s my go-to for celebrations—no last-minute bakery runs. The layers stay moist for days, and the frosting (if you add it) looks chef’s kiss without requiring pastry school skills.
- Budget-Friendly Luxury: You’d never guess how affordable this is. Butter and eggs make it taste indulgent, but the ingredient list is simple—no pricey specialty items. Leftovers? They disappear faster than you can say “second slice.”
Step-by-step instructions for 2-Layer vanilla cake from scratch
Here’s how to bake a cake so light it practically floats—with layers infused with real vanilla bean.
Prepare the Cake Batter
Preheat your oven to 350°F and grease two 8-inch round cake pans, then line the bottoms with parchment paper. In a medium bowl, whisk together the 3 cups all-purpose flour, 2 tsp baking powder, and 0.5 tsp salt. Set aside—this is your dry mix.
In a large mixing bowl, beat the 1.5 cups unsalted butter and 2 cups granulated sugar on medium speed until light and fluffy, about 3-4 minutes. Add the 6 whole large eggs, one at a time, mixing well after each addition. Scrape down the sides of the bowl as needed. This creaming process incorporates air, which gives your cake that signature pillowy texture.
Add the 1 cup whole milk and 2 tbsp vanilla bean paste, mixing until just combined. Gradually add the dry mix to the wet ingredients, mixing on low speed until just incorporated—don’t overmix or your cake will be dense. Fold in the 1 whole vanilla bean seeds using a spatula. Divide the batter evenly between the prepared pans.
Bake to Perfection
Bake the cakes for 25-30 minutes, or until a toothpick inserted into the center comes out clean. Rotate the pans halfway through baking for even browning. The cakes should be golden on top with a slightly domed shape—this indicates they’ve risen properly.
Let the cakes cool in their pans for 10 minutes, then transfer them to a wire rack to cool completely. This gradual cooling prevents cracking. While they cool, prepare your frosting—patience here ensures your layers stay intact when assembling.
Make the Vanilla Bean Frosting
In a large bowl, beat the 2 cups heavy whipping cream until soft peaks form. Gradually add the 4 cups powdered sugar and 1 tbsp vanilla extract, mixing until smooth and glossy. The frosting should hold its shape when spooned—if it’s too soft, chill the bowl for 10 minutes and beat again.
This is where the magic happens: the real vanilla bean seeds add depth of flavor that extract can’t match. For extra richness, you can even infuse the cream by heating it with scraped vanilla bean seeds for 5 minutes before whipping, then straining. But the paste and extract combo here gives you that authentic vanilla aroma without fuss.
Assemble the Cake
Place the first cake layer on a serving plate. Spread a thin layer of frosting (about ¼ cup) over the top to create a “crust” that prevents sogginess. This is called the “crumb coat,” and it’s essential for professional-looking cakes. Use an offset spatula to smooth it evenly.
Add the second cake layer on top and frost the entire cake with the remaining frosting. Use a bench scraper to create clean, straight sides. For extra flair, pipe decorative rosettes or swirls on top with leftover frosting. Chill the cake in the refrigerator for 30 minutes before slicing—this helps the frosting set and makes clean cuts.
Serve and Enjoy
Slice the cake with a sharp, hot knife (run it under hot water and wipe dry between cuts) for clean, professional-looking pieces. The layers should be moist but not wet, with a tender crumb that melts in your mouth. Serve at room temperature for the best texture—cold frosting can make the cake taste bland.
This cake keeps well in an airtight container in the refrigerator for up to 3 days, though I doubt it’ll last that long. For a special touch, dust the top with a little powdered sugar or garnish with fresh berries. The vanilla bean infusion makes every bite taste like you’ve been baking for hours—without the effort!
Pro Tips For Making 2 Layer Vanilla Cake Recipe From Scratch
- WEIGH YOUR FLOUR: I learned this the hard way—scooping flour from the bag packs it too tightly, and that’s how you end up with a cake that’s dense as a brick. Use a kitchen scale and measure by weight (1 cup all-purpose flour = ~125g). The difference in texture is night and day, and it’s the one thing that actually changes the outcome.
- CREAM BUTTER AND SUGAR LOW: Sounds weird, but it works: mix your butter and sugar at medium speed until light and fluffy, then bump the mixer to high for 30 seconds. The butter should feel like it’s melting into the sugar, not just getting whipped. If you rush this, your cake will taste greasy instead of rich—trust the process.
- DON’T OVERMIX THE BATTER: Stop mixing as soon as the flour disappears. I used to think more mixing = better cake, but that’s how you end up with a tough, chewy mess. The moment the batter looks uniform, pull the bowl away. Overmixing develops gluten like you’re kneading bread dough, and that’s the last thing you want in a tender vanilla cake.
- LET THE CAKE COOL STRATEGICALLY: Skip the urge to pull it out of the pans right away. Give it a solid 10 minutes in the pans, then transfer to a wire rack to cool completely. I was skeptical until I tried it—cooling the cake this way keeps it from collapsing when you go to frost it. (Yes, even if you’re impatient like me.)
Troubleshooting this dish
Cracked Cake Layers
Cracks appear when cakes cool too quickly or the oven isn’t properly preheated. Always preheat your oven to 350°F for 15 minutes before baking. After removing cakes from the oven, let them cool in their pans for 10 minutes before transferring to a wire rack.
This gradual cooling prevents sudden temperature shifts that cause cracking. If cracks do appear, simply fill them with leftover frosting—they’ll be hidden once assembled! 💡
Dense or Dry Texture
Overmixing the batter or using old baking powder are the most common causes. Mix the batter just until combined—stop as soon as the flour disappears. Use freshly opened baking powder (test it by mixing with water; it should bubble).
For extra moisture, brush the cooled layers with 2 tbsp simple syrup before frosting. This adds tenderness and prevents dryness. 🌱
Uneven Baking
Hot spots in your oven can lead to unevenly baked cakes. Rotate the pans halfway through baking for even browning. If your oven has hot spots, place a baking sheet on the lower rack during baking to reflect heat upward.
Also, check that both cake pans are identical in size—8-inch pans work best for even layers. 🔥
Frosting Too Soft
If your frosting isn’t holding its shape, it’s likely too warm. Chill the bowl and beaters for 10 minutes before whipping the cream. For extra stability, add 1 tsp meringue powder to the powdered sugar mixture.
If the frosting still separates, start over with cold heavy cream and ensure all ingredients are at room temperature except the cream. ✨
Soggy Layers
Sogginess happens when frosting soaks into the cake. Always apply a crumb coat (thin layer of frosting) first and let it set for 10 minutes before adding the final layer.
This creates a barrier between the cake and frosting. Also, ensure your cake layers are completely cooled before assembling to prevent condensation. 💧
Cake Sticking to Pans
Grease your pans thoroughly with butter or baking spray, then line the bottoms with parchment paper. For extra insurance, dust the pans with flour or cocoa powder after greasing.
If the cake still sticks, run a thin knife around the edges before removing it from the pan. This helps release the cake cleanly without tearing. 🧈
Nutrition facts
Frequently asked questions about 2-Layer vanilla cake
Can I make this cake without a stand mixer?
Use a hand mixer or even whisk for the butter and sugar until light and fluffy (about 5-7 minutes of vigorous mixing). For the frosting, beat the cream by hand in a chilled bowl until soft peaks form—just work in short bursts to avoid overheating. The key is patience and using cold bowls to keep ingredients stable.
How do I adjust the recipe for a 3-layer cake?
Increase the batter to make 3 layers using 4 cups flour, 2.5 cups sugar, 2 cups butter, and 8 eggs. Use three 8-inch pans or two 8-inch pans and one 6-inch pan for proportion. Double the frosting to 8 cups powdered sugar and 4 cups cream. Bake the smaller layer 5-10 minutes less than the larger ones.
Why does my cake sink in the middle?
Oven temperature fluctuations or opening the oven too soon are usually to blame. Always preheat for 15 minutes and avoid opening the door until 20 minutes in. If your oven runs hot, reduce temperature to 325°F and bake 5-10 minutes longer. For extra support, bake on the middle rack where heat is most even.
Can I substitute buttercream with cream cheese frosting?
Yes, but adjust the recipe! Replace 1 cup butter with 8 oz softened cream cheese and add 1 tbsp lemon juice to balance richness. Use 3 cups powdered sugar and 1 cup heavy cream instead of the full 4 cups. Whip the cream cheese and sugar first, then fold in the cream and vanilla. This version has a tangy twist that pairs beautifully with vanilla cake.
How do I store leftover cake?
Keep unfrosted layers wrapped in plastic in the fridge for 3 days or freeze for 3 months. Frosted cake stays fresh in an airtight container for 2 days at room temperature or 5 days refrigerated. For longer storage, freeze the fully assembled cake (without garnishes) for up to 1 month. Thaw overnight in the fridge before serving.

- 3lb Prime Rib Roast Recipe: Juicy Pink Center Guaranteed in 3 Hours - October 31, 2026
- 5 Spice Cake Recipe: Warmly Spiced Layers With Crunchy Top - October 31, 2026
- 1950’s Macaroni and Cheese Recipe: Nostalgic Creamy Cheese Sauce with Buttery Noodles - October 31, 2026