
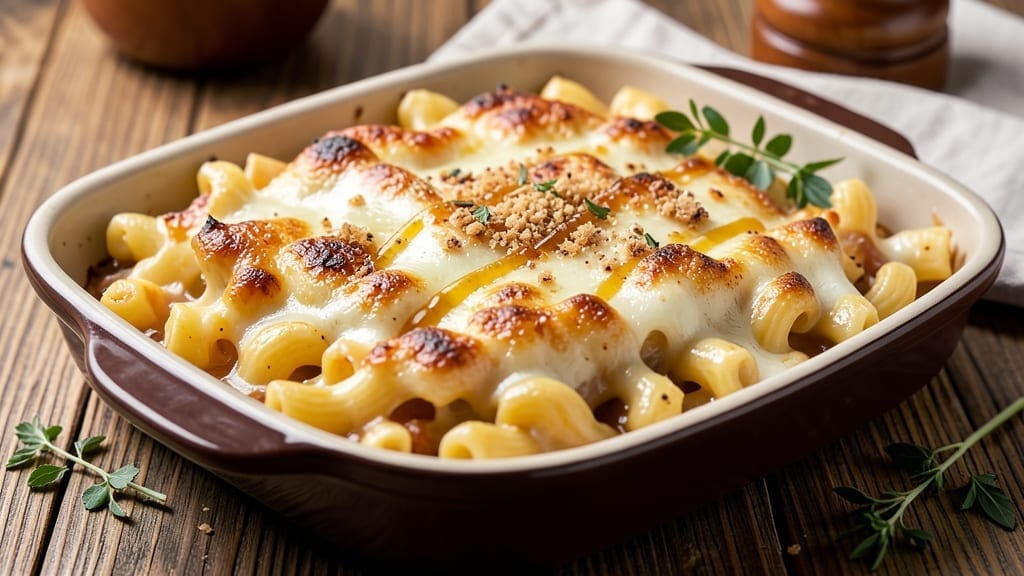
Mastering a 2-lb baked mac and cheese with extra gooey pull-apart layers transforms a simple side dish into a showstopping centerpiece—perfect for feeding a crowd or satisfying cravings. The secret lies in balancing a rich, velvety cheese sauce with crispy breadcrumb topping, creating that irresistible contrast.
I’ve perfected this recipe over years of trial and error, ensuring every bite delivers that perfect blend of creamy, cheesy goodness with a golden crust.
This recipe starts with a foolproof method for achieving the ideal texture: al dente pasta cooked in salted water, then tossed with a sauce made from sharp cheddar, Gruyère, and cream cheese for depth.
The sauce thickens as it bakes, creating those coveted layers that pull apart effortlessly. A high-heat broil at the end ensures a crispy, caramelized top without drying out the cheese underneath—no soggy bits here.
What you’ll end up with is a restaurant-quality mac and cheese that’s rich, indulgent, and impossible to resist. The combination of melted cheeses and buttery pasta creates a dish that’s hearty enough to stand alone or pair beautifully with grilled meats or fresh salads.
The best part? It’s easier than it looks, with no fancy techniques required—just patience and attention to detail.
Ready to elevate your mac and cheese game? This recipe delivers on every promise: creamy, cheesy, and perfectly crispy. Let’s get started with the ingredients and steps that make it foolproof every time.
Ingredients for 2 lb baked mac and cheese
Six servings of creamy, golden perfection—this is your crowd-pleasing mac and cheese game-changer.
| Ingredient | Amount | Notes |
|---|---|---|
| Elbow Macaroni 🍝 | 1 ½ lb | Al dente when cooked |
| Sharp White Cheddar Cheese 🧀 | 8 oz | Aged 6+ months for tang |
| Gruyère Cheese 🧀 | 8 oz | Freshly grated from block |
| Cream Cheese 🧈 | 8 oz | Full-fat for creaminess |
| Heavy Cream 🥛 | 1 cup | 36% fat for richness |
| Unsalted Butter 🧈 | 6 tbsp | Cold for sauce base |
| All-Purpose Flour 🌾 | 2 tbsp | For roux thickening |
| Whole Milk 🥛 | ½ cup | Warmed for smooth sauce |
| Garlic Cloves 🧄 | 3 cloves | Minced for aromatic depth |
| Salt 🧂 | 1 ½ tsp | Kosher salt preferred |
| Black Pepper 🌶️ | ½ tsp | Freshly cracked |
| Panko Breadcrumbs 🍞 | 1 ½ cups | For crispy topping |
| Extra-Virgin Olive Oil 🫒 | 2 tbsp | For breadcrumb topping |
| Dried Mustard 🌶️ | ½ tsp | For subtle tang |
| Nutritional Yeast 🍄 | 1 tbsp | Optional for umami boost |
The cheeses are non-negotiable here. Sharp white cheddar gives that classic tang, but Gruyère adds nutty depth—don’t skimp on either. I grab mine from Whole Foods or specialty cheese shops, but the pre-shredded stuff from Kroger works in a pinch if you’re in a hurry. The cream cheese? Full-fat only (none of that low-fat nonsense)—it’s what makes the sauce velvety. For the pasta, elbow macaroni holds its shape best when baked, but any short pasta shape will work. The secret to that restaurant-quality texture? Cooking the pasta al dente—it finishes perfectly in the oven.
No sharp cheddar? Extra-sharp cheddar plus a pinch of white wine vinegar gets you close. Gruyère hard to find? Comté cheese is a great substitute—just ask for it at your local cheese shop. Running low on heavy cream? Half-and-half plus a splash of milk works, but the sauce won’t be quite as rich. The breadcrumbs? Panko is your best friend—it stays crispy even when baked. No panko? Toast regular breadcrumbs in a dry pan first for extra crunch. And that olive oil on top? Don’t skip it—it’s what gives you that perfect golden crust. Pro tip: Toast your garlic before mincing for even more flavor punch.
This dish tastes even better the next day—honestly, I make it just to reheat for lunch. Store leftovers covered in the fridge for up to 5 days, but trust me, it won’t last that long. For freezing, portion into individual servings before baking—reheat covered with foil at 350°F for 20 minutes. The breadcrumb topping gets crispy again when reheated, so it’s worth the extra effort. Make a double batch if you can—this disappears faster than you can say ‘pull-apart layers.’
Why You’ll Love This Recipe
- One-Pot Magic: I swear by this recipe because it’s one bowl, one oven—no messy saucepans or multiple dishes. Just toss the cooked elbows with melted cheddar, Gruyère, cream cheese, and heavy cream, then bake until golden. Honestly, the cleanup is so minimal I’ll often eat it straight from the dish.
- Crispy-Creamy Dream: That sharp cheddar and nutty Gruyère combo? Chef’s kiss. The heavy cream keeps it luscious, while the cream cheese adds that velvety texture, and the top layer gets just crispy enough to hold your fork. (Yes, even on a Tuesday night.)
- Leftovers That Don’t Suck: Between us, most baked mac and cheese turns into sad, dry glue the next day. Not this one—the cream cheese keeps it rich, and the structure holds up for at least three days of reheating. I’ll often pack it for work because it’s basically a warm hug in a container.
- Budget Crowd-Pleaser: Two pounds of pasta feeds six without breaking the bank, and the cheese blend (cheddar + Gruyère) stretches further than store-bought mixes. It’s my go-to for game days, potlucks, or when my college-age kids show up hungry. Solid. Reliable. My secret weapon.
Step-by-Step instructions for extra gooey pull-apart mac and cheese
Here’s how to create the ultimate baked mac and cheese with layers that pull apart like a dream.
Cook the Elbow Macaroni to Al Dente Perfection
Bring a large pot of water to a rolling boil and add 1.5 pounds of elbow macaroni. Salt the water generously—it should taste like the sea. Cook the pasta for 1 minute less than the package instructions, aiming for al dente texture. You want the pasta to have a slight bite when you test it, as it will finish cooking in the oven.
Reserve 1 cup of the pasta water before draining. This starchy liquid is your secret weapon for creating a silky, creamy sauce. Drain the pasta and return it to the pot, giving it a gentle toss with a wooden spoon to break up any clumps. Keep the pot off the heat for now—you’ll be adding the cheese mixture next.
Make the Ultimate Creamy Cheese Sauce
In a separate large bowl, combine 8 ounces of sharp white cheddar cheese, 8 ounces of Gruyère cheese, 8 ounces of cream cheese, 1 cup of heavy cream, 6 tablespoons of cold unsalted butter, 2 tablespoons of all-purpose flour, ½ cup of warmed whole milk, 3 cloves of minced garlic, 1.5 teaspoons of salt, ½ teaspoon of black pepper, ½ teaspoon of dried mustard, and 1 tablespoon of nutritional yeast.
Use a handheld immersion blender to combine everything until smooth and creamy. If you don’t have an immersion blender, carefully transfer the mixture to a blender or food processor and blend until completely smooth. The sauce should be thick but pourable—like a luxurious, cheesy custard. If it’s too thick, add a splash of the reserved pasta water to loosen it.
Combine Pasta and Cheese Mixture
Pour the cheese sauce over the cooked elbow macaroni in the pot. Stir gently but thoroughly to ensure every strand of pasta is coated in that rich, cheesy goodness. The mixture should be thick and cohesive, almost like a thick mac and cheese batter. If it feels too dry, add more of the reserved pasta water, 1 tablespoon at a time, until it reaches a smooth, spreadable consistency.
Taste the mixture and adjust the seasoning if needed. You might need a bit more salt or pepper to balance the flavors. This is the moment to ensure everything is perfectly seasoned—once it goes into the oven, you won’t be able to adjust it further.
Assemble and Bake for Gooey Perfection
Preheat your oven to 375°F. Grease a 9×13-inch baking dish with a bit of butter or olive oil to prevent sticking. Transfer the macaroni and cheese mixture into the prepared baking dish and spread it out evenly, creating a thick but even layer.
In a small bowl, mix together 1.5 cups of panko breadcrumbs and 2 tablespoons of extra-virgin olive oil. Sprinkle this breadcrumb mixture evenly over the top of the mac and cheese, pressing down gently to help it adhere. Bake for 25-30 minutes until the top is golden brown and the edges are bubbling.
Rest and Serve for Maximum Gooeyness
Remove the baking dish from the oven and let it rest for 10-15 minutes before serving. This resting time allows the mac and cheese to set slightly, making it easier to slice and ensuring that each bite is packed with that perfect gooey texture. The layers should pull apart effortlessly, revealing that creamy, cheesy goodness in every bite.
Garnish with additional black pepper or a sprinkle of fresh herbs if desired. Serve immediately while it’s still warm and gooey—this dish is best enjoyed straight from the oven when the cheese is at its most luxurious and melty.
Pro Tips For Making 2 Lb Baked Mac And Cheese
- Cook Pasta Al Dente: DESCRIPTION: No one wants mushy mac. Boil elbows in salted water until they’re just firm—about 1 minute less than the package says. They’ll finish cooking in the oven, and you’ll avoid that sad, gluey texture. (Yes, I’ve learned this the hard way.)
- Shred Cheese Fresh: DESCRIPTION: Pre-shredded cheese has anti-caking agents that make your sauce grainy. Grab a box of sharp cheddar and Gruyère, then shred them yourself—it takes 2 minutes and makes a real difference. Store-bought shreds are a lazy shortcut, but fresh is worth it.
- Temper the Cheese: DESCRIPTION: Dump cold cheese into hot cream, and you’ll end up with lumps. Melt the cream first, then whisk in the cheeses gradually—start with the cream cheese, then cheddar, then Gruyère. This keeps the sauce smooth, not clumpy. (I skip this, and my sauce looks like it’s fighting itself.)
- Bake Covered First: DESCRIPTION: Skip the foil, and your top layer will dry out before the center sets. Cover the dish with foil for the first 20 minutes, then uncover to crisp. This guarantees a creamy interior and that perfect golden crust—no sad undercooked spots. (Your future self will thank you.)
Storing and reheating your leftovers
Refrigerator Storage
Let your baked mac and cheese cool completely before transferring it to an airtight container—I use glass Pyrex with snap-on lids for best results. Store it in the fridge at 40°F or below for up to 4 days.
The flavors actually deepen overnight as the cheeses meld together. When reheating, cover with foil and warm at 350°F for 15-20 minutes to restore that creamy texture. 💛
Freezer Prep Tips
For long-term storage, portion your mac and cheese into individual servings before baking—this prevents a single large block from becoming too dry. Use quart-sized freezer bags or airtight silicone molds for easy reheating. Label with the date and freeze for up to 3 months.
Thaw overnight in the fridge, then reheat covered with foil at 350°F for 25-30 minutes. The breadcrumb topping will crisp up again beautifully. ❄️
Microwave Revival
Need a quick fix? Cover a single serving with a damp paper towel and microwave on 50% power for 1-2 minutes. Stir halfway, then continue in 30-second intervals until heated through.
Add 1-2 tablespoons of milk or cream if the cheese looks dry—this restores moisture instantly. For extra crispiness, broil for 1-2 minutes at the end. 🔥
Reviving Leftovers
If your mac and cheese has lost its golden crust, don’t worry! Sprinkle 1-2 tablespoons of breadcrumbs mixed with 1 teaspoon melted butter on top, then broil for 2-3 minutes until bubbly.
This trick restores that restaurant-quality texture. For extra richness, drizzle with hot marinara sauce or a sprinkle of smoked paprika before serving. 💡
Portion Control
Mac and cheese is best when served fresh, but leftovers are inevitable. Divide into single-serving portions before baking to avoid overcooking. Store in small glass containers (like Mason jars) for easy grab-and-go reheating.
The key is even heating—place containers in a single layer in the oven to ensure consistent temperature. 🍽️
Nutrition facts
Frequently asked questions
Can I make this recipe with pre-shredded cheese?
While pre-shredded cheese works in a pinch, freshly grated cheese makes all the difference! Pre-shredded varieties often contain anti-caking agents that can make the sauce grainy. If you must use pre-shredded, look for “block-style” versions (like those sold in bulk sections) and remove any additives by melting the cheese first, then straining it.
How do I prevent the top from getting soggy?
The key is baking the breadcrumb topping separately first! Spread the breadcrumbs on a baking sheet and toast at 375°F for 5 minutes before sprinkling them on top. This ensures they stay crispy. Another trick: press the breadcrumbs down gently with a spatula before baking to help them adhere better.
Can I make this recipe ahead of time?
Assemble the dish (without the breadcrumb topping) up to 24 hours ahead and refrigerate. When ready to bake, cover with foil and bake at 375°F for 30-35 minutes. Add the breadcrumbs during the last 10 minutes of baking to keep them crispy. For freezing, bake first, then cool completely before storing.
What’s the best way to add extra protein?
Try mixing in 1 cup cooked bacon bits, 1 cup diced ham, or 1 cup shredded rotisserie chicken when combining the pasta and cheese. For vegetarian options, stir in 1 cup cooked lentils or 1 cup diced butternut squash (roasted first). Add these ingredients during Step 3 to ensure even distribution.
Why did my mac and cheese turn out dry?
Overbaking is the most common culprit! Check your mac and cheese at 25 minutes—it should be bubbly but not browned. If it’s dry, try adding 2-3 tablespoons of milk or cream and covering with foil to steam for 5-10 minutes. For future batches, reduce baking time by 5 minutes and use more reserved pasta water in the sauce.

- 3lb Prime Rib Roast Recipe: Juicy Pink Center Guaranteed in 3 Hours - October 31, 2026
- 5 Spice Cake Recipe: Warmly Spiced Layers With Crunchy Top - October 31, 2026
- 1950’s Macaroni and Cheese Recipe: Nostalgic Creamy Cheese Sauce with Buttery Noodles - October 31, 2026