
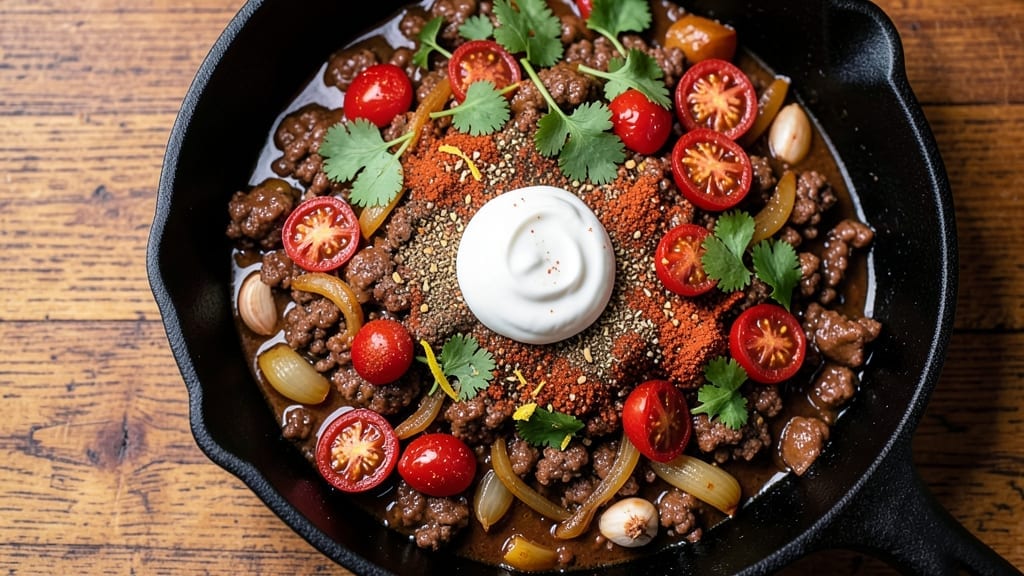
A 2 lb beef chili recipe that delivers deep, smoky flavor and meat so tender it practically dissolves with a spoon?
That’s exactly what this hearty, slow-simmered chili brings to the table. 🔥 The secret lies in browning the beef first—those caramelized edges pack a flavor punch that transforms ordinary ground beef into something restaurant-worthy.
I’ve perfected this over years of chili cook-offs, and it’s the one recipe my family begs for when temperatures drop.
What makes this chili special is the layered approach: toasted spices bloom in the oil to release their aromas, while the tomatoes and beans simmer long enough to meld into a rich, velvety base.
No shortcuts here—just 30 minutes of active prep followed by 2+ hours of hands-off simmering (or 8 hours in a slow cooker) to let the flavors deepen. The result? A chili so rich and satisfying, it turns a simple weeknight dinner into a cozy, crowd-pleasing feast.
By the time you’re done, you’ll have a pot of chili with meat that falls apart at the touch, a thick, flavorful broth, and just the right balance of heat and smokiness. The aroma alone will have everyone gathering around the table, and the first bite?
That’s when they’ll ask for seconds. Trust me, this isn’t your average chili—it’s the kind that sticks with you long after the last spoonful. Serve it with crusty cornbread, tortilla chips, or even over rice for extra heartiness. The best part?
Leftovers taste even better the next day, making it the ultimate make-ahead meal. Let’s get cooking!
Ingredients for 2 lb beef chili
Pantry staples plus a few key ingredients that turn ordinary beef into melt-in-your-mouth chili magic.
| Ingredient | Amount | Notes |
|---|---|---|
| Ground Chuck 🥩 | 2 lb | 80/20 fat ratio preferred |
| Yellow Onion 🧅 | 1 whole | Diced, medium size |
| Garlic Cloves 🧄 | 6 cloves | Minced, fresh preferred |
| Chili Powder 🌶️ | 2 tbsp | Smoked or mild variety |
| Ground Cumin 🌿 | 1 tbsp | Toasted for depth |
| Dried Oregano 🍃 | 1 tsp | Mexican preferred |
| Cayenne Pepper 🔥 | ½ tsp | Adjust for heat |
| Salt 🧂 | 1 ½ tsp | Kosher or sea salt |
| Black Pepper 🌶️ | ½ tsp | Freshly ground |
| Tomato Paste 🍅 | 2 tbsp | Squeeze tube or can |
| Canned Tomato Sauce 🍅 | 1 can | 28 oz, San Marzano if possible |
| Beef Broth 💧 | 2 cups | Low-sodium preferred |
| Dark Brown Sugar 🍚 | 1 tbsp | For depth, not sweetness |
| Black Beans 🫘 | 1 can | 15 oz, drained and rinsed |
| Kidney Beans 🫘 | 1 can | 15 oz, drained and rinsed |
| Vegetable Oil 🫒 | 2 tbsp | For browning beef |
The beef is non-negotiable here—ground chuck with 80/20 fat ratio is your golden ticket for that fall-apart texture. Costco or Walmart usually have it pre-packaged in 2 lb bags, which saves time. If you’re buying a whole chuck roast to grind yourself, look for good marbling—it melts into flavor. The onions and garlic? Yellow onions work best for chili, and fresh garlic is worth the extra minute to mince. I always grab a whole head and freeze what I don’t use—Trader Joe’s sells them pre-minced for lazy days, but fresh has more punch.
No chili powder? Mix smoked paprika, cumin, and a pinch of cinnamon for a close substitute. The tomato paste can be the squeeze-tube kind from Trader Joe’s—it’s perfect for single servings and keeps forever. Short on beans? Double the black beans and skip kidney, or use pinto beans. The broth matters—low-sodium is key so you can control the salt. If you’re feeling fancy, make your own with beef bones and herbs. For heat, adjust cayenne to taste—start small and add more later if needed. The brown sugar might seem odd, but it deepens the flavor without sweetening.
This chili tastes even better the next day—make a double batch if you can. Store in airtight containers in the fridge for 5 days or freeze for 3 months. I portion mine into individual containers so lunches are ready to grab. For freezer storage, cool it completely first to prevent ice crystals. Reheat gently on the stove with a splash of broth to keep it moist. The longer it simmers, the deeper the flavor—don’t rush it. Trust me, the wait is worth it.
Why You’ll Love This Recipe
- The secret’s in the layers: the chuck gets tender and rich, the onions caramelize just enough to sweeten the heat, and that toasted cumin? It’s like a hug in a bowl. Between us, I’ve made chili that’s too spicy or too bland—this one hits exactly right every time.
- Here’s what sold me: this chili tastes better the next day. I’ll make a double batch on Sundays, freeze half, and still crave it midweek. My husband even sneaks bites straight from the pot—no shame in admitting this is the kind of meal people ask for seconds of.
Step-by-step instructions for 2 lb beef chili
Let’s build this rich, meaty chili where every bite delivers deep flavor and tender beef.
🔥 Step 1: Brown the Ground Chuck Perfectly
Heat the 2 tablespoons vegetable oil in a large, heavy pot over medium-high heat. Add the 2 lb ground chuck and break it up with a wooden spoon, working it into small, even crumbles. Let it cook undisturbed for 5-6 minutes until the meat loses its raw color and starts to brown deeply.
Here’s the thing—don’t rush this step. You want those meat pieces to develop a rich, crusty exterior that will carry all the chili flavors. Once the chili starts to brown, use a wooden spoon to break it up further, creating smaller pieces that will cook more evenly. When the meat is fully browned, drain it in a colander over the sink, leaving all that precious rendered fat behind—it’s flavor gold.
👨🍳 Step 2: Sauté Onions and Garlic for Depth
Return the browned chuck to the pot and reduce heat to medium. Add the diced yellow onion and cook for 5 minutes, stirring occasionally, until softened and translucent. This is where the sweetness of the onions starts to caramelize slightly, building that rich base flavor.
Add the minced garlic cloves and cook for another 30 seconds until fragrant. You’ll know it’s ready when your kitchen smells like a Mexican street corner. Be careful not to let the garlic burn—it turns bitter fast. Once the garlic is golden and aromatic, sprinkle in the 2 tablespoons chili powder, 1 tablespoon ground cumin, 1 teaspoon dried oregano, 0.5 teaspoon cayenne pepper, 1.5 teaspoons salt, and 0.5 teaspoon black pepper. Stir everything together and let the spices toast in the meat mixture for 1 minute—this wakes up their flavors.
🍳 Step 3: Build the Chili Base
Stir in the 2 tablespoons tomato paste and cook for 2 minutes until it darkens slightly. This step deepens the chili’s color and intensifies its flavor. Pour in the 1 can canned tomato sauce and 2 cups beef broth, scraping up any browned bits from the bottom of the pot. These bits are packed with flavor—don’t miss them!
Add the 1 tablespoon dark brown sugar and bring everything to a gentle simmer. Here’s where the magic happens: let the chili bubble away uncovered for 30 minutes, stirring occasionally. You want the liquid to reduce by about a third, concentrating those flavors. The chili should smell incredible at this point—like a warm, spicy hug in a pot.
🥘 Step 4: Add Beans and Simmer to Perfection
Stir in the 1 can black beans and 1 can kidney beans (drained and rinsed). Give everything a good mix and return to a simmer. Now it’s time to let the chili develop its signature texture and depth. Cook uncovered for 1 hour to 1 hour 15 minutes, stirring occasionally, until the chili has thickened to your desired consistency.
Here’s the test for doneness: the chili should coat the back of a spoon but still be loose enough to ladle easily. If it’s too thick, add a splash of water or broth. If it’s too thin, let it simmer uncovered a bit longer. The beans should be heated through but still hold their shape. Taste and adjust seasoning if needed—you might want a bit more salt or cayenne to reach your perfect heat level.
⏰ Step 5: Rest and Serve
Remove the pot from heat and let the chili rest for 10-15 minutes. This resting period allows all the flavors to meld together beautifully. The chili will continue to thicken slightly as it sits, so don’t worry if it looks a bit loose when you take it off the stove.
Serve your chili hot with all the fixings: shredded cheese, sour cream, chopped green onions, and crusty bread for dipping. Each bowl should deliver that perfect balance of tender beef, smoky spices, and hearty beans. The meat should be so tender it practically melts in your mouth—exactly what we’re aiming for. Enjoy your rich, flavorful chili that tastes like it’s been simmering all day!
Pro Tips For Making 2 Lb Beef Chili
- CRACK THE MEAT FIRST: Start with a screaming-hot pan—no half-measures—and let the ground chuck sizzle until it loses its raw look (about 5 minutes). I used to low-and-slow this, but the meat gets greasy and loses that deep, caramelized flavor that makes chili sing.
- TOAST THE SPICES: Bloom your chili powder and cumin in the same pot after browning the meat—just 30 seconds until fragrant. This isn’t optional; it’s how you wake up those spices so they don’t just sit there like wallpaper. (Yes, even if you’re impatient like me.)
- DON’T SKIP THE ONION CRUST: Cook the diced onion until it’s golden-brown, not just soft—about 10 minutes with occasional stirring. The Maillard reaction here makes a real difference, even if it feels like forever. (Your future self will notice.)
- SIMMER LOW AND LONG: After adding broth and tomatoes, reduce heat to a bare simmer (tiny bubbles, not a rolling boil) and walk away for at least 45 minutes. Chili tastes better when it’s patient—rushing this step is how you end up with a mushy, one-note stew. (I learned this the hard way.)
Common mistakes when making great 2 lb beef chili
Skipping the Browning
One of the biggest mistakes is skipping the browning step entirely. When you cook the ground chuck until deeply browned, you create the Maillard reaction, which develops rich, complex flavors.
If you just dump raw meat into your chili, you’ll end up with bland, gray beef that soaks up flavors instead of contributing its own.
I’ve seen this happen when people rush or use leaner ground beef—always stick with 80/20 fat ratio chuck and give it that 5-6 minute browning. 🔥
Overcrowding the Pot
Another common error is overcrowding the pot while browning the beef. When you add too much meat at once, the temperature drops, and the meat steams instead of browning properly. This leads to pale, soggy beef that lacks texture.
To avoid this, cook the chuck in batches if needed, and always use a pot large enough to give the meat room to develop that golden crust. A 6-quart Dutch oven works perfectly for this recipe.
Ignoring the Spice Toast
Many recipes call for adding spices directly to the broth, but the real magic happens when you toast them first. When you sprinkle the chili powder, cumin, and oregano over the browned meat and let them toast for 1 minute, their flavors deepen dramatically.
Skipping this step means your chili will taste flat and one-dimensional. Think of it like blooming flowers—you’re waking up those spices to release their full potential.
Rushing the Simmering
Chili needs time to develop its signature depth, and rushing the simmering process is a recipe for disappointment. If you cook it for less than 1 hour after adding the beans, the flavors won’t meld properly, and the meat won’t become tender.
I’ve seen people walk away from the stove too soon, only to end up with a chili that tastes more like a quick soup than a rich, hearty dish. Patience is key—let it simmer uncovered and stir occasionally to build that perfect texture.
Forgetting to Rest
The final mistake is serving chili immediately after taking it off the heat. Letting it rest for 10-15 minutes allows the flavors to settle and the chili to thicken slightly. If you skip this step, you’ll end up with a thinner, less cohesive dish.
I always let mine rest while I set the table—it’s a small habit that makes a big difference in the final result. The chili will thank you with a richer, more satisfying bite. ✨
Skipping the Tomato Paste
Some recipes omit tomato paste entirely, but it’s a game-changer for depth and color. The paste adds a concentrated tomato flavor that enhances the overall richness of the chili. If you skip it, your chili might taste more like broth than the bold, flavorful dish you’re aiming for.
Cook the paste for just 2 minutes to let it darken slightly—this intensifies its flavor even more. It’s a small step with a big payoff! 💫
Nutrition facts
Frequently asked questions
Can I use ground turkey or chicken instead of beef?
For a lighter version, replace the beef with 2 lb ground turkey or chicken, but reduce the cooking time to 45-60 minutes after adding beans. Use 1 tablespoon extra tomato paste to compensate for the leaner meat. The texture will be slightly different but still delicious—just avoid overcooking to prevent dryness.
How do I adjust the spice level for kids or sensitive eaters?
Start by reducing the cayenne pepper to ¼ teaspoon or omit it entirely. For extra mildness, use 1 teaspoon sweet paprika instead of half the chili powder. Always taste as you go—you can add more heat later if needed, but you can’t remove it! Serve with extra sour cream or cheese to balance any lingering spice.
Can I make this chili in a slow cooker?
Yes! Brown the meat first in a skillet, then transfer everything to the slow cooker. Cook on low for 6-8 hours or high for 3-4 hours after adding beans. The slow cooker’s gentle heat enhances tenderness without drying out the beef. Add ½ cup broth if it gets too thick during cooking.
Why did my chili turn out too thin?
This usually happens from over-simmering or not reducing the liquid enough. Next time, simmer uncovered for 30 minutes before adding beans to thicken the base. If it’s still too thin, make a roux (mix 1 tbsp flour with 1 tbsp oil, cook 2 mins, then stir into chili) or use 1 tbsp cornstarch slurry. Stir in and simmer 5 more minutes.
What’s the best way to reheat leftover chili?
Gently reheat on the stove over medium-low heat with a splash of broth or water to prevent drying. Never microwave directly from the fridge—it creates a rubbery texture. For best results, reheat just until hot, then let it sit covered for 5 minutes to redistribute flavors. Stir occasionally to prevent sticking.

- 3lb Prime Rib Roast Recipe: Juicy Pink Center Guaranteed in 3 Hours - October 31, 2026
- 5 Spice Cake Recipe: Warmly Spiced Layers With Crunchy Top - October 31, 2026
- 1950’s Macaroni and Cheese Recipe: Nostalgic Creamy Cheese Sauce with Buttery Noodles - October 31, 2026