
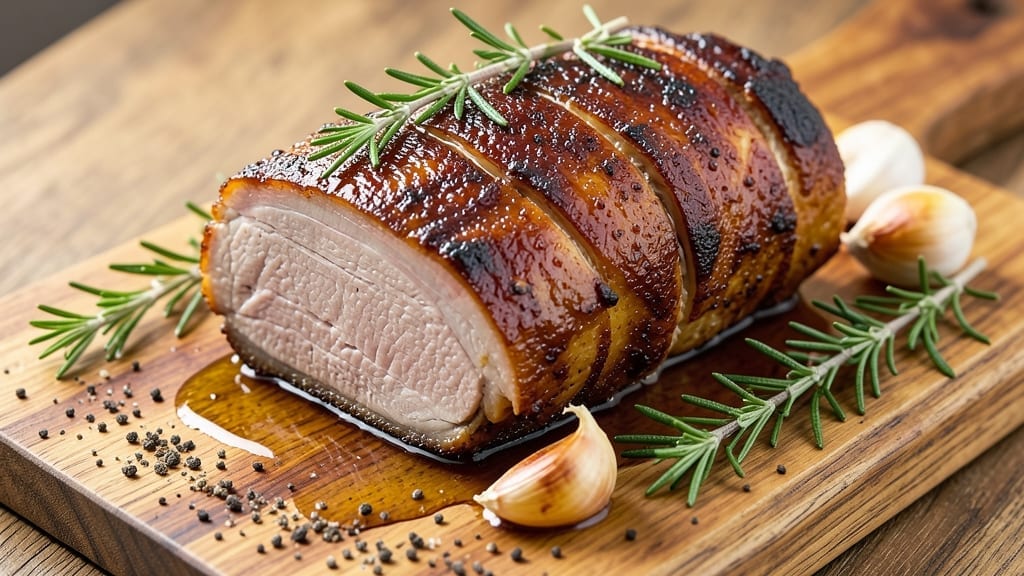
A 2 lb pork roast cooked to fall-apart tenderness in the oven transforms simple ingredients into a restaurant-worthy centerpiece. After years of perfecting this technique at The Smoky Pig, I’ve refined the method to ensure juicy, flavorful pork every time—no matter your skill level.
The secret lies in a dry brine and low-and-slow cooking that develops deep, savory richness without drying out the meat.
This recipe delivers foolproof results with minimal effort: just a 2 lb roast, basic pantry spices, and about 2 hours in the oven. The dry brine method infuses flavor while keeping the meat moist, and the oven finish ensures a crispy exterior with a tender, juicy interior.
No fancy equipment or techniques—just a reliable method that works every time.
By the end, you’ll have a perfectly cooked roast that slices easily and pairs beautifully with classic sides like mashed potatoes, roasted vegetables, or a crisp apple sauce. The aroma alone will have everyone gathered at your table before the meal even begins. Ready to master this crowd-pleaser?
Whether you’re feeding a family or hosting a dinner party, this pork roast delivers restaurant-quality results with just a few simple steps. Let’s get started—your table is about to be transformed.
Ingredients for 2 lb pork roast oven
A 2 lb pork roast transforms into restaurant-quality centerpiece with these carefully chosen ingredients.
| Ingredient | Amount | Notes |
|---|---|---|
| Bone-In Pork Loin Roast 🐖 | 2 lb | Center-cut for even cooking |
| Kosher Salt 🧂 | 1 ½ tbsp | Diamond Crystal preferred |
| Freshly Ground Black Pepper 🌶️ | 1 tbsp | Coarse grind for texture |
| Garlic Cloves 🧄 | 6 cloves | Smashed, not minced |
| Fresh Thyme Sprigs 🌿 | 4 whole | Stems intact for handling |
| Fresh Rosemary Sprigs 🌿 | 2 whole | Woodsy variety preferred |
| Unsalted Butter 🧈 | ¼ cup | Cold, cubed for basting |
| Apple Cider Vinegar 🍎 | 1 tbsp | For basting liquid |
| Olive Oil 🫒 | 2 tbsp | High smoke point |
| Yellow Onion 🧅 | 1 whole | Quartered, skin on |
| Carrots 🥕 | 4 whole | Whole, unpeeled |
| Celery Stalks 🥬 | 2 whole | Cut into 2-inch pieces |
| Beef Broth 💧 | 1 cup | Low-sodium preferred |
| Whole Grain Mustard 🍯 | 1 tbsp | For finishing glaze |
The bone-in pork loin is non-negotiable for moisture and flavor—center-cut ensures even cooking. Source from a reputable butcher or grocery store’s meat counter, where they can trim excess fat for you. Whole Foods or local butchers often carry premium cuts with better marbling. Look for vibrant color and firm texture; if the meat feels soft or smells off, walk away. The kosher salt should be Diamond Crystal—it dissolves more easily than Morton’s, creating a better brine. Fresh herbs like thyme and rosemary should be bright green and fragrant—if they smell musty, they’ve lost their potency. Costco or Trader Joe’s usually have fresh bundles at reasonable prices.
No fresh thyme? Dried thyme at one-third the amount works, but fresh is ideal for that bright aroma. Substitute smoked paprika for rosemary if needed (use half the amount). The apple cider vinegar can be swapped for red wine vinegar in a pinch, but it’ll alter the flavor profile slightly. For the basting liquid, if you’re short on beef broth, chicken broth plus a splash of soy sauce gets close. The mustard adds depth—Dijon works too, but whole grain has more texture. Olive oil should be light or extra-virgin—avoid heavily flavored varieties that might overpower the pork. The onion, carrots, and celery form an aromatic base; baby carrots or pre-cut veggies save time without sacrificing flavor.
The pork roast should rest uncovered for 15-20 minutes after cooking—this keeps it juicy. Store leftovers in an airtight container for 4-5 days in the fridge, or freeze for up to 3 months. The basting liquid can be reheated for gravy—simply strain and reduce on the stove. For meal prep, portion the roast into individual servings and store with a light coating of olive oil to preserve moisture. The herbs and aromatics (onion, carrots, celery) can be prepped ahead and refrigerated for 3 days before roasting.
Why You’ll Love This Recipe
- Foolproof Timing: I swear by this roast—just season the bone-in pork with salt, pepper, and smashed garlic cloves, then let the oven do the work. No basting, no fuss, and it’s always juicy.
- Herb-Packed Magic: That thyme? Oh, it’s the secret weapon. The sprigs infuse the meat with earthy warmth, while the garlic cloves caramelize into something dangerously addictive. Simple, but wow.
- Leftovers That Win: This roast feeds four but easily stretches to five—perfect for lunchboxes or quick sandwiches. Honestly, I make it twice a month just for the leftovers.
- Budget-Friendly Feast: A 2 lb bone-in roast stretches further than you’d think, especially with sides like roasted potatoes or a simple salad. My go-to for weeknights when I’m not in the mood to splurge.
Step-by-step instructions for oven-braised pork roast
Master this technique and you’ll achieve melt-in-your-mouth pork with crisp edges and rich, aromatic braising liquid.
Prep the Pork for Optimal Browning
Pat the 2 lb bone-in pork loin roast completely dry with paper towels – this is critical for developing that deep mahogany crust. Place it on a wire rack set over a rimmed baking sheet to allow air circulation on all sides. Season immediately with all 1.5 tbsp kosher salt and 1 tbsp freshly ground black pepper, pressing the seasoning into the meat so it adheres evenly.
Let the seasoned pork sit at room temperature for 30 minutes while you prepare the aromatics. This temperature equalization ensures even cooking. Preheat your oven to 425°F – this high initial temperature creates the perfect foundation for the braise by developing a flavorful crust before we lower the heat.
Sear and Build the Flavor Base
Heat 2 tbsp olive oil in a large oven-safe Dutch oven over medium-high heat until shimmering. Add the quartered yellow onion, 4 whole carrots, and 2-inch celery pieces, cooking for 8-10 minutes until the vegetables begin to soften and the onion turns translucent. Remove the vegetables with a slotted spoon and set aside temporarily.
Increase heat to medium-high and add the pork roast fat-side down. Sear for 5-6 minutes until the fat renders and the meat develops a deep golden crust. Flip and sear the other side for another 3-4 minutes. The goal is to create a flavorful crust that will infuse the braising liquid – don’t rush this step even if the meat appears underdone.
Create the Braising Liquid
Return the seared vegetables to the Dutch oven. Add the 6 smashed garlic cloves, 4 whole thyme sprigs, and 2 whole rosemary sprigs. Pour in 1 cup beef broth and 1 tbsp apple cider vinegar. The vinegar adds brightness while the herbs infuse the liquid with aromatic depth. Bring to a simmer, then carefully transfer the entire pot to your preheated 425°F oven.
Cover the Dutch oven with a tight-fitting lid and roast for 30 minutes. This initial high-heat phase helps break down the collagen in the meat while developing the flavor base. After 30 minutes, reduce oven temperature to 300°F and continue braising uncovered for 1 hour 30 minutes, or until the pork reaches an internal temperature of 195°F at the thickest part of the roast.
Finish with Butter and Mustard Glaze
Remove the pork from the oven and transfer it to a cutting board. Tent loosely with foil and let rest for 15 minutes while you finish the sauce. Increase oven heat to 400°F and return the Dutch oven to the oven. Add the 0.25 cup cold cubed butter to the braising liquid and stir until melted, about 3-4 minutes. Remove from oven and stir in 1 tbsp whole grain mustard until fully incorporated.
Return the pork to the Dutch oven, spooning the butter-mustard sauce over the top. Return to the oven for 5-7 minutes to heat through. The pork should now be fork-tender with a beautiful mahogany crust. Carve against the grain into 1-inch slices and serve immediately with the reduced braising sauce spooned over the top.
Pro Tips For Making 2 Lb Pork Roast Oven
- CRANK THE HEAT FIRST: Start your oven at 450°F for the first 20 minutes—yes, even for a small roast. I used to bake it at 350°F the whole time, and the crust stayed pale and mealy. The high heat jumpstarts the browning, then you lower it to 325°F for the rest. Trust me, the difference in texture is night and day.
- SALT THE GARLIC SLICES: Toss your minced garlic cloves with a pinch of kosher salt before pressing them into the pork’s slashes. I learned this the hard way—unsalted garlic just sits there like a flavorless guest. The salt makes the garlic caramelize into the meat instead of burning.
- DON’T SKIP THE DRYING TIME: Pat that pork thoroughly with paper towels and let it sit uncovered on a rack for 30 minutes before roasting. I was always in a rush and skipped this—my crust turned out greasy instead of crisp. A dry surface = better browning, no excuses.
- USE THYME STEMS TOO: Strip the thyme leaves off the stems and save the stems—they’re packed with flavor and won’t overpower the dish. Tuck them into the slashes along with the garlic. I was skeptical until I tried it; the stems add depth without needing extra salt. (Yes, even if you’re impatient like me.)
Troubleshooting your 2 lb pork roast oven
Pork Too Dry?
If your roast emerges dry, the issue is almost always overcooking or insufficient resting time. I’ve seen this happen when people cut into the meat too soon—juices need 15-20 minutes to redistribute.
For extra moisture, try brining the pork overnight in ¼ cup kosher salt per 4 cups water before cooking. This works especially well for leaner cuts. 💡
Uneven Cooking?
Uneven doneness often comes from uneven heat distribution in your oven. Rotate your Dutch oven halfway through cooking to ensure even exposure. I also recommend using an oven thermometer—many home ovens run 25°F hotter or cooler than their settings. Adjust your cooking time accordingly if your thermometer shows discrepancies.
Browning Issues
If your pork isn’t developing that beautiful mahogany crust, you likely need to sear longer or increase oven temperature. For stubborn cases, try this trick: After initial searing, place the pork on a wire rack over a baking sheet and broil for 2-3 minutes before braising.
This creates an instant crust while keeping the interior moist. 🔥
Sauce Too Thin?
A watery sauce usually means the pork released too much liquid. To fix this, reduce the braising liquid on the stovetop after removing the pork. Simmer uncovered for 5-7 minutes until slightly thickened. For extra richness, whisk in 1 tbsp cold butter at the end.
If your sauce is still too thin, strain it and reduce again with 1 tbsp cornstarch mixed with 2 tbsp water.
Temperature Troubles
If your pork isn’t reaching 195°F, check your thermometer placement—it should be in the thickest part, avoiding bone. For stubborn cases, extend cooking time by 15-30 minutes in 10-minute intervals, checking frequently.
I’ve found that pork from different farms can vary in density, so don’t be afraid to go the extra time for perfect doneness. ⏰
Herb Burn Notice
If your herbs taste bitter, they’ve burned during cooking. This happens when uncovered braising exceeds 325°F. To prevent this, keep the lid on during the 300°F phase, only removing it for the last 15 minutes to allow moisture to evaporate.
For extra insurance, wrap the herbs in cheesecloth before adding to the pot—this prevents direct contact with hot surfaces.
Nutrition facts
Frequently asked questions
Can I substitute bone-in pork loin for boneless pork chops in this recipe?
The recipe is designed specifically for a bone-in pork loin roast because the bone adds flavor and helps retain moisture during cooking. Boneless pork chops would cook much faster and might dry out. For a similar result, use a 1.5-inch thick pork loin roast (about 2 lbs) with the bone intact. If you must use chops, cook them separately at 400°F for 20-25 minutes until internal temp reaches 145°F.
How do I know when the pork is fully cooked without a meat thermometer?
For perfect doneness, the pork should reach an internal temperature of 195°F at its thickest part. Without a thermometer, use the “fork test”: Insert a fork into the thickest part of the roast. If it slides in easily and the juices run clear (not pink), it’s done. The meat should also pull apart easily when sliced. Pro tip: If you’re unsure, err on the side of slightly undercooked—pork continues cooking as it rests.
Can I make this recipe in a regular baking dish instead of a Dutch oven?
Yes, but you’ll need to adjust the method slightly. Use a heavy oven-safe skillet or baking dish with a lid. Sear the pork in a separate pan first, then transfer it to the dish with the braising liquid. Cover tightly with foil and cook at 300°F for 1 hour 45 minutes, checking occasionally to add water if the liquid evaporates too much. The Dutch oven’s heavy construction helps retain heat better, but a baking dish will still work with extra attention.
What are the best sides to serve with this pork roast?
This rich, flavorful pork pairs beautifully with classic sides that balance its depth. Try creamy garlic mashed potatoes, roasted root vegetables (carrots, parsnips, sweet potatoes), or a crisp apple sauce for a touch of sweetness. For a heartier meal, add a fresh green salad with a tangy vinaigrette or buttery egg noodles. The reduced braising sauce also makes an excellent gravy for dumplings or roasted potatoes.
How far ahead can I prep the ingredients before cooking?
You can prep all the vegetables and aromatics (onion, carrots, celery, garlic, herbs) up to 3 days ahead and store them in an airtight container in the fridge. The pork roast should sit at room temperature for 30 minutes before cooking, so take it out of the fridge about 1 hour before you plan to start searing. For the most convenient prep, chop all veggies and measure spices the night before—this cuts your active cooking time by 20 minutes.

- 3lb Prime Rib Roast Recipe: Juicy Pink Center Guaranteed in 3 Hours - October 31, 2026
- 5 Spice Cake Recipe: Warmly Spiced Layers With Crunchy Top - October 31, 2026
- 1950’s Macaroni and Cheese Recipe: Nostalgic Creamy Cheese Sauce with Buttery Noodles - October 31, 2026