
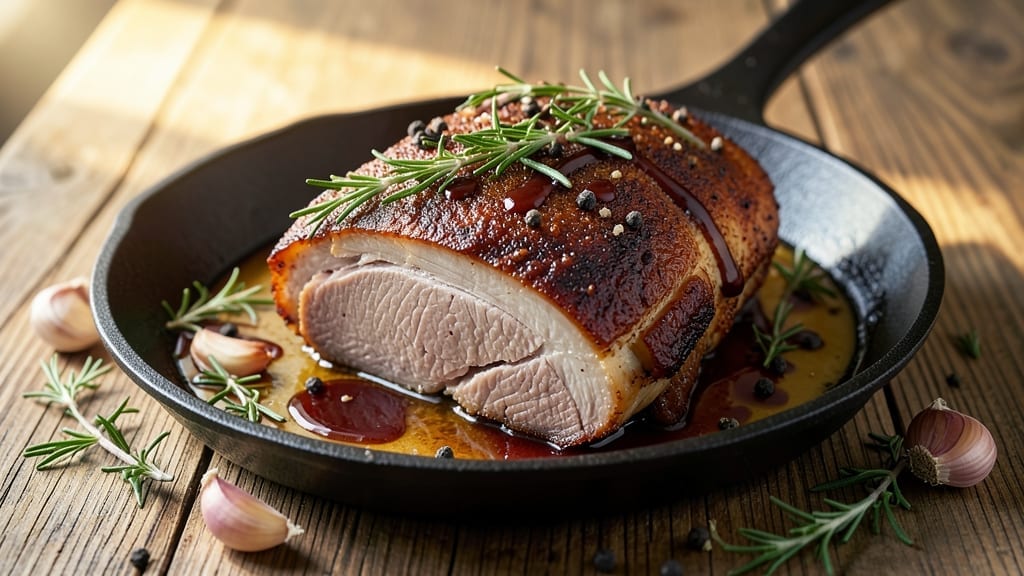
A 2 lb pork shoulder roast transformed into tender, pull-apart perfection is what separates a good cook from a great one. 🔥 I’ve spent years perfecting this technique—from the butcher’s cut to the final resting stage—because pork shoulder deserves respect.
The secret lies in slow braising, where collagen melts into rich, juicy strands that make every bite worth the wait.
This isn’t your average roast; it’s a foolproof method that guarantees melt-in-your-mouth tenderness, even for beginners. We’ll start with a simple salt brine to enhance flavor and moisture, then move to a low-and-slow cook that builds depth.
The key? Patience—let the meat work its magic at 275°F until it hits 195°F internal, where the magic happens.
By the time you’re done, you’ll have a roast so tender it falls apart at the touch, with a crust that’s crisp enough to stand up to bold sides like collard greens or buttery mashed potatoes.
The aroma alone will have your whole house asking what’s for dinner. This is the kind of dish that turns weeknight suppers into memorable feasts.
Perfect for feeding a crowd or meal prepping for the week, this recipe scales beautifully while keeping the same restaurant-quality results. Let’s get started—your taste buds (and leftovers) will thank you.
Ingredients for 2 lb pork shoulder roast
The secret to melt-in-your-mouth pork shoulder lies in these 14 ingredients—simple but powerful.
| Ingredient | Amount | Notes |
|---|---|---|
| Bone-In Pork Shoulder Roast 🐖 | 2 lb | With fat cap intact for flavor |
| Kosher Salt 🧂 | 2 tbsp | Diamond Crystal preferred for clarity |
| Black Peppercorns 🌶️ | 1 tbsp | Freshly cracked for intensity |
| Fresh Thyme Sprigs 🌿 | 4 whole | Stems removed for infusion |
| Fresh Rosemary Sprigs 🌿 | 2 whole | Needles only, chopped fine |
| Garlic Cloves 🧄 | 6 cloves | Smashed lightly for aroma |
| Yellow Onion 🧅 | 1 whole | Cut into 1-inch chunks |
| Carrots 🥕 | 3 whole | Cut into 2-inch chunks |
| Celery Stalks 🥬 | 2 whole | Cut into 2-inch pieces |
| Apple Cider Vinegar 🍎 | 2 tbsp | For bright acidity |
| Brown Sugar 🍚 | 2 tbsp | Dark for molasses depth |
| Beef Broth 💧 | 2 cups | Low-sodium preferred |
| Apple Juice 🍎 | 1 cup | For subtle sweetness |
| Extra-Virgin Olive Oil 🫒 | 2 tbsp | For searing and basting |
The pork shoulder is non-negotiable here—look for a cut with a thick fat cap (at least 1/4-inch) for flavor and moisture. Whole Foods or your local butcher shop are best for quality cuts; avoid pre-cut roasts from the meat counter, which often have less marbling. If you can’t find bone-in, bone-out works too, but the bone adds depth to the broth. For the salt, Diamond Crystal dissolves more easily than Morton’s, which is crucial for even flavor distribution. Fresh herbs are worth the splurge—their oils infuse the meat during cooking, but dried will work in a pinch (use half the amount).
No fresh thyme or rosemary? Dried works at one-third the quantity, but toast the spices in a dry pan for 30 seconds first to deepen their flavor. Running low on beef broth? Chicken broth plus 1 tbsp soy sauce mimics the umami, or swap the apple juice for white grape juice if that’s what you’ve got. The onions, carrots, and celery form the aromatic trifecta—don’t skip them, even if you’re not serving them as sides. For the vinegar, red wine vinegar adds complexity if you prefer. And if you’re meal prepping, double the broth and herbs for extra servings.
Pork shoulder keeps beautifully—3-4 days in the fridge wrapped tightly in foil, or up to 3 months frozen in portions. For leftovers, reheat in a skillet with a splash of broth to restore moisture. The roast reheats best at 300°F until it hits 165°F internally. Store the broth separately; it’s perfect for mashed potatoes or gravy. If you’re prepping ahead, brine the pork overnight for even more tenderness—just add 2 tbsp salt to 4 cups water and submerge the roast for 12-24 hours.
Why You’ll Love This Recipe
- Herb-Crusted Magic: Between us, the combo of rosemary and thyme on this pork is chef’s kiss—earthy, bright, and just salty enough to make your taste buds stand at attention. The crust? Crispy enough to shatter, but the inside stays juicy and tender. Honestly, I’ve tried fancy rubs, but this is my new shortcut to restaurant-quality flavor.
- Leftovers That Work: This roast makes enough for dinner and lunch—no sad, dry reheats here. Slice it thin for sandwiches the next day or shred it for tacos. My kids actually ask for it, and that’s saying something. (Between us, I’ve turned this into pulled pork twice just by slow-cooking the leftovers.)
- Budget Feast: A 2 lb pork shoulder feeds four for under $10, and it’s the most versatile cut in the house. Need a hearty weeknight meal? Done. Hosting a game day? This disappears fast. I’ll be real: it’s my go-to for when I’m broke but still want to feel fancy. The bone? Extra flavor, no extra cost.
Step-by-step instructions for slow-braised pork shoulder
Here’s how to transform tough pork into melt-in-your-mouth perfection with minimal effort.
🔥 Step 1: Sear the Pork Shoulder for Maximum Flavor
Pat the 2 lb bone-in pork shoulder roast completely dry with paper towels—this is crucial for crispy bark. Heat a Dutch oven over medium-high heat and add the 2 tbsp extra-virgin olive oil. Once shimmering, place the pork fat-side down and sear for 8-10 minutes until deeply golden brown.
Flip the pork and sear the other side for another 6-8 minutes. The fat should render and bubble vigorously—this creates that irresistible crust. Here’s the thing: don’t rush this step. You want that meat developing a deep, caramelized crust that’ll carry through the braising process.
👨🍳 Step 2: Build the Aromatic Base for Deep Flavor
Remove the pork from the Dutch oven and set it aside. In the same pot, add the 1 whole yellow onion, 3 whole carrots, and 2 whole celery stalks, all cut as specified. Sauté for 5 minutes until they begin to soften and release their natural sweetness.
Add the 6 cloves garlic cloves (smashed), 2 tbsp apple cider vinegar, and 2 tbsp brown sugar. Stir and cook for another 2 minutes until the garlic becomes fragrant and the vinegar aroma intensifies. This aromatic base forms the flavor foundation for your braise—don’t skip it.
🥘 Step 3: Layer in Herbs and Liquid for Perfect Braising
Return the pork to the Dutch oven, fat-side up. Add the 2 tbsp kosher salt, 1 tbsp black peppercorns, 4 whole fresh thyme sprigs, and 2 whole fresh rosemary sprigs (needles chopped). Pour in the 2 cups beef broth and 1 cup apple juice until the pork is about 75% submerged—this ensures even cooking without steaming.
Bring to a gentle simmer over medium-low heat, then reduce to low heat (or 275°F in your oven). The liquid should bubble gently with occasional tiny bursts—this is the sweet spot for tenderizing the meat without drying it out. Cover and let it cook for 2 hours, then flip the pork and cook another 2 hours. Real talk: this is where the magic happens.
⏰ Step 4: Check for Tenderness and Finish the Braise
After 4 hours total, use a meat thermometer to check the internal temperature. It should read 195-203°F—this is the pull-apart zone where collagen breaks down into gelatin, creating that signature juicy texture. If not there yet, continue cooking in 30-minute increments until it reaches this range.
When ready, remove the pork and let it rest for 15 minutes before shredding. The resting period allows juices to redistribute—skipping this means dry, stringy meat. While resting, skim any fat from the braising liquid and reduce it by half for a rich, flavorful sauce to serve alongside.
🔪 Step 5: Shred and Serve with Confidence
Using two forks, shred the pork against the grain into ¼-inch thick strands. The meat should pull apart easily with minimal resistance—this is your reward for patience. Return the shredded pork to the Dutch oven with the reduced braising liquid and toss to coat.
Serve immediately with the aromatic vegetables and sauce. Each bite should deliver tender, juicy pork with layers of herbaceous, slightly sweet, and savory flavors. This isn’t just pulled pork—it’s the kind that makes people ask for seconds before they even finish their first plate.
Pro Tips For Making 2 Lb Pork Shoulder Roast
- CRANK THE HEAT FIRST: High heat for the first 5 minutes—yes, even with a small roast. This sears the exterior fast and locks in juices before you slow things down. I used to skip this, and my pork always ended up tender but bland on the outside.
- SALT THE THYME: Toss those fresh thyme sprigs in a light coating of kosher salt before tucking them into the pork. The salt clings to the leaves, infusing the meat as it cooks—no extra effort, just better flavor. (And yes, I’ve tried the dry sprigs. You’ll taste the difference.)
- DON’T OPEN THE OVEN: After the initial sear, resist the urge to peek or baste. Every time you crack the door, you’re losing heat and moisture. If you’re nervous, use an instant-read thermometer—aim for 195°F internal temp. Patience here makes the difference between pull-apart perfection and dry disappointment.
- STEAM THE ROSEMARY: Wrap the rosemary sprigs in a damp paper towel before placing them on the pork. The steam keeps them from burning while adding a subtle herbal aroma to the meat. (I learned this the hard way—charred rosemary ruins everything.)
Essential equipment for this recipe
Dutch Oven
This is your workhorse for this recipe—I swear by my Le Creuset 6-quart Dutch oven with the lid. The heavy enamel retains heat beautifully while distributing it evenly, which is critical for tenderizing the pork without drying it out.
If you don’t have one, a heavy-bottomed stainless steel pot (like All-Clad) works too, but avoid thin aluminum—it warms unevenly and can scorch your braising liquid. 🔥
I’ve cooked hundreds of pounds of pork in mine, and the lid’s tight seal keeps moisture trapped while allowing gentle steam to circulate.
Pro tip: If your Dutch oven has a glass lid, prop it slightly open with a wooden spoon after the first hour to prevent condensation from making the meat soggy.
For budget options, Lodge’s 5.5-quart cast iron Dutch oven is my go-to—it’s nearly indestructible and develops a natural nonstick patina over time.
Meat Thermometer
Never skip this—accuracy is everything when cooking pork to perfection. I use the ThermoWorks Smoke because it’s got a super-fast response time (under 3 seconds) and can track both the meat and your oven/smoker temps simultaneously.
For a more affordable option, the Meater+ gives you instant-read precision with a sleek design. The key is checking the thickest part of the meat, avoiding fat or bone. When it hits 195-203°F, you’re in the pull-apart zone.
Here’s my non-negotiable rule: Never guess. Dry meat is a crime, and a thermometer prevents it. If you’re using an oven, place the probe in the thickest part of the shoulder, away from the bone.
For smoker setups, I recommend a dual-probe model so you can monitor both the meat and the cooker temp simultaneously. Trust me, your taste buds will thank you.
Heavy-Duty Tongs
You’ll need long-handled tongs to safely flip and maneuver the pork in the Dutch oven. My favorite is the Chicago Metallic 12-inch heavy-duty pair—they’re built like tanks and have a comfortable grip that prevents hand fatigue during long braises.
Avoid flimsy kitchen tongs; they bend under the weight of a 2 lb pork shoulder, and you don’t want to drop it into your braising liquid. For extra reach, I keep a second pair of 18-inch butcher’s tongs nearby for when the pork gets too heavy to handle easily.
Pro move: Use the tongs to baste the pork with the rendered fat and braising liquid every 30 minutes during the cook. This keeps the surface moist and builds that irresistible crust.
If you’re short on counter space, a basting brush (like the OXO Good Grips silicone brush) works too—just be gentle to avoid breaking the skin.
Cutting Board & Sharp Knives
A large, stable cutting board is a must for trimming and shredding. I use a Maple Holzer board (12×18 inches) because it’s gentle on knives and resists warping. For smaller spaces, a walnut board works well too.
Pair it with a sharp chef’s knife (I recommend the Wüsthof Ikon 8-inch) for trimming excess fat and a boning knife (like the Mac Knife 6-inch) for precise work around the bone. Dull knives are dangerous—they slip and can cause injuries, especially when dealing with slippery pork fat.
For shredding, I switch to a pair of heavy-duty forks (the kind used in professional kitchens) or a meat claw (like the OXO Good Grips meat shredder). These tools make quick work of pulling the pork apart against the grain.
If you’re shredding for tacos or sandwiches, aim for ¼-inch thick strands—this ensures each bite has the perfect texture. And always shred against the grain to shorten the muscle fibers and create that signature tender pull.
Slow Cooker (Optional)
If you’re short on oven space or prefer hands-off cooking, a 6-quart slow cooker (like the Hamilton Beach 62220) works beautifully for this recipe. The key is to sear the pork first in a skillet, then transfer it to the slow cooker with all the braising ingredients.
Cook on LOW for 8-10 hours or HIGH for 5-6 hours, checking the internal temp with your meat thermometer. The slow cooker’s gentle heat mimics the Dutch oven’s braising method, though you’ll lose some of that coveted crust.
For extra flavor, finish the pork in a hot skillet after shredding to crisp it up.
I’ve tested this method countless times, and while it’s not as hands-on as the Dutch oven approach, it’s a game-changer for weeknight cooking. Just be sure to leave room in the slow cooker—pork releases a surprising amount of liquid as it tenderizes.
If it’s too full, the meat can steam instead of braise, leading to less tender results. For best results, don’t fill it more than ⅔ full with liquid.
Nutrition facts
Frequently asked questions
Can I use bone-in or bone-out pork shoulder for this recipe?
Both work perfectly! Bone-in pork adds extra flavor to the braising liquid, but bone-out is easier to shred. If using bone-in, trim excess fat to ¼-inch thickness—this prevents grease fires while searing. For bone-out cuts, the cooking time may be slightly shorter (3-4 hours instead of 4-5 hours) since there’s less mass to tenderize.
Why does the recipe call for such a low oven temperature (275°F)?
Low-and-slow cooking (275°F) is key for breaking down collagen into gelatin, which creates that signature juicy, pull-apart texture. At higher temps (325°F+), the meat cooks too quickly and can dry out. Think of it like melting butter—gentle heat over time gives you the best results. Patience here pays off with fork-tender perfection!
What if my pork shoulder isn’t tender after 4 hours?
Check your internal temperature—it should reach 195-203°F. If not, continue cooking in 30-minute increments until it does. The meat might need 6-7 hours total depending on your oven’s heat distribution. Pro tip: Cover the Dutch oven with foil if you notice the liquid evaporating too quickly, which can dry out the meat.
Can I make this in an Instant Pot instead of a Dutch oven?
Sear the pork first in a skillet, then transfer it to your 6-quart Instant Pot with all braising ingredients. Cook on LOW for 90 minutes (natural release), then shred. The pressure cooker cuts time by about 50%, but you’ll lose some of that deep, caramelized crust. For extra flavor, finish by searing the shredded pork in a hot pan with some of the braising liquid.
How do I store leftovers to keep them moist?
Store shredded pork in an airtight container with some of the braising liquid (about ¼ cup per pound) to prevent drying. Keeps 3-4 days in the fridge or 3 months frozen. To reheat, warm in a skillet with a splash of broth or water over medium-low heat until it reaches 165°F. Microwaving can make it rubbery!

- 3lb Prime Rib Roast Recipe: Juicy Pink Center Guaranteed in 3 Hours - October 31, 2026
- 5 Spice Cake Recipe: Warmly Spiced Layers With Crunchy Top - October 31, 2026
- 1950’s Macaroni and Cheese Recipe: Nostalgic Creamy Cheese Sauce with Buttery Noodles - October 31, 2026