
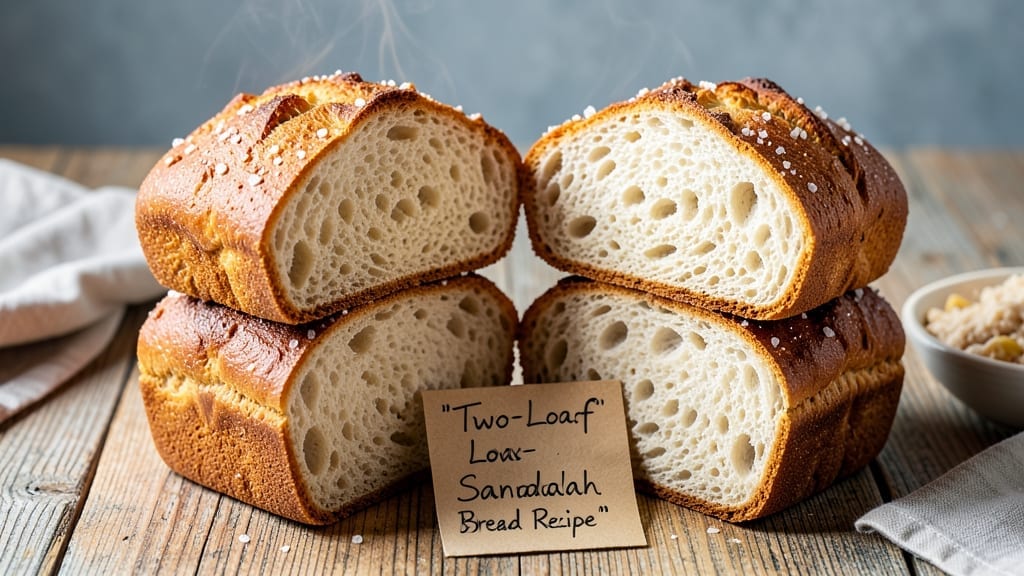
Mastering a 2 loaf sandwich bread recipe with no-knead rise transforms your kitchen into a bakery—crusty exterior, soft interior, and slices that hold every filling perfectly. The secret lies in precise hydration and a slow fermentation that develops deep flavor without requiring kneading.
I’ve refined this method over years, ensuring each loaf yields tender, even slices with that coveted artisan texture.
This recipe delivers two standard loaves (about 1 pound each) using simple ingredients: all-purpose flour, instant yeast, honey, and whole milk for richness. The no-knead technique saves time while creating a lighter crumb, and shaping the dough into classic sandwich loaves guarantees perfect slices every time.
Bake at 375°F for 25-30 minutes until golden and hollow-sounding when tapped.
What you’ll achieve is bread so tender it practically melts in your mouth, yet sturdy enough to hold thick sandwich fillings without collapsing. The crust develops a satisfying crunch while the interior remains soft for days, making this the ultimate homemade sandwich bread.
Perfect for breakfast toast, grilled cheese, or meal prep sandwiches.
For even better results, let the dough ferment overnight in the fridge—this enhances flavor and makes shaping easier. Once baked, store wrapped at room temperature for 2 days or freeze for up to 3 months. Ready to bake your first loaves? Here’s everything you need to get started.
Ingredients for 2 loaf sandwich bread
Nine simple ingredients transform your kitchen into an artisan bakery with perfect sandwich bread slices.
| Ingredient | Amount | Notes |
|---|---|---|
| All-Purpose Flour 🌾 | 6 cups | Sifted for even texture |
| Instant Yeast 🍞 | 2 ¼ tsp | Single-use packet preferred |
| Honey 🍯 | 2 tbsp | For natural sweetness |
| Whole Milk 🥛 | 1 ½ cups | Room temperature preferred |
| Large Eggs 🥚 | 2 whole | Room temperature for best rise |
| Unsalted Butter 🧈 | ¼ cup | Softened for easy mixing |
| Diamond Crystal Kosher Salt 🧂 | 1 ½ tsp | Adjust to taste |
| Olive Oil 🫒 | 1 tbsp | For dough shaping |
| Cornmeal 🌽 | ¼ cup | For dusting work surface |
| Coarse Cornmeal 🌽 | ½ cup | For bread scoring |
| Water 💧 | ½ cup | Warm for hydration |
The flour is the foundation—King Arthur or Gold Medal brands yield the best texture for sandwich bread. King Arthur has slightly higher protein for that tender yet sturdy crumb you want. Instant yeast ensures quick activation without proofing, while honey adds subtle sweetness that enhances fermentation. Whole milk contributes richness, but oat milk works too if you prefer dairy-free. For the butter, Plugra or Land O’Lakes are reliable choices—just make sure it’s unsalted so you control the seasoning. The eggs? Room temperature is non-negotiable—they mix better and help develop gluten faster.
No instant yeast? Active dry yeast works too—just proof it in warm water with a pinch of sugar first. Short on honey? Maple syrup or agave at the same amount keeps things balanced. The olive oil is purely functional here, but avocado oil works equally well if you prefer its neutral flavor. Cornmeal for dusting? Polenta works in a pinch, though it’s messier. For scoring, a sharp razor blade or lame creates clean cuts—no need for fancy tools, though. And if you’re making this for a crowd, double the recipe—just scale all ingredients proportionally.
This dough is best when shaped and refrigerated overnight—up to 24 hours—for maximum flavor development. Once baked, let the loaves cool completely before slicing to prevent gumminess. Store wrapped in a clean kitchen towel at room temperature for 2-3 days or freeze for up to 3 months. For reheating, wrap slices in foil and warm in a 350°F oven for 5-10 minutes—they’ll taste fresh-baked every time. The crust stays crisp for days, while the interior remains soft enough for perfect grilled cheese.
Why You’ll Love This Recipe
- Five-Ingredient Magic: I swear by this list—flour, yeast, honey, milk, and eggs. That’s it. No weird substitutions or hidden pantry raids. The honey gives it just enough sweetness to balance the buttery richness, and the whole milk keeps it tender without being gummy.
- Crusty-Creamy Payoff: Between us, this bread has layers. The outside gets that satisfying golden crunch, while the inside stays soft enough to squish with your thumb. Honestly? It’s the kind of texture that makes you pause mid-bite just to appreciate it.
- Meal Prep MVP: I bake two loaves at once—perfect for sandwiches all week. Freeze one for lazy mornings or pop it in the toaster when you’re running late. The yeast does most of the work, so you’re not stuck kneading for hours.
- Budget-Friendly Staple: All-purpose flour and whole milk are cheap, but this bread feels like a treat. I make it every couple of weeks, and it’s always the first to disappear. Plus, the leftovers? Toast them, turn them into croutons, or just eat them cold with butter. No waste.
Step-by-step instructions for artisan-style sandwich bread
Here’s how to transform simple ingredients into two perfect loaves with a crisp crust and airy crumb.
Combine Wet Ingredients for Maximum Flavor
In a large bowl, whisk together the 1.5 cups whole milk, 2 tbsp honey, and 2 whole large eggs until fully combined and slightly frothy. The honey helps activate the yeast while adding subtle sweetness that carries through the bread. I like to warm the milk to 100°F first—just until tiny bubbles form around the edges—because this temperature helps the yeast work more efficiently.
Add the 2.25 tsp instant yeast and let the mixture sit for 5 minutes until it becomes bubbly. You’ll see small bubbles form along the surface and the mixture will look slightly effervescent—this confirms your yeast is active. If it doesn’t bubble, your yeast may be dead, and you’ll need to start over with fresh yeast.
Incorporate Dry Ingredients and Develop Gluten
In a separate large bowl, sift together the 6 cups all-purpose flour and 1.5 tsp diamond crystal kosher salt to remove any lumps and aerate the flour. This creates a lighter texture in the finished bread. Make a well in the center and pour in the wet ingredients along with the 0.25 cup softened unsalted butter.
Using a wooden spoon or dough whisk, gradually incorporate the dry ingredients into the wet, mixing just until a shaggy dough forms. You’ll notice the dough will look dry and crumbly at first—that’s normal. Let it rest for 10 minutes while you prepare your work surface. This brief rest allows the flour to fully hydrate and makes the next mixing step much easier.
Shape and Proof the Dough for Perfect Rise
Lightly dust your work surface with 0.25 cup cornmeal and turn out the dough. Gently shape it into a rough rectangle about 12×16 inches. Fold the dough over itself like a letter, sealing the edges, then turn it 90 degrees and repeat. This folding technique develops gluten without kneading, creating that signature artisan crumb.
Transfer the shaped dough to a lightly greased bowl, cover with a damp towel, and let it proof at room temperature for 1-2 hours until it has nearly doubled in size. You’ll know it’s ready when you poke the dough gently and it springs back slowly, leaving a slight indentation. The proofing time can vary based on your kitchen temperature—warmer kitchens will proof faster.
Divide, Shape, and Final Proof for Crisp Crust
Divide the dough into two equal pieces. On a lightly floured surface, shape each piece into a 10×14-inch rectangle. Roll each rectangle up tightly from the short end, sealing the seam to form a log. Place the loaves seam-side down in two greased 9×5-inch loaf pans, covering them with damp towels. Let them proof for another 30-45 minutes until they’ve risen about 1 inch above the pans.
Preheat your oven to 375°F while the loaves proof. Just before baking, use a sharp knife or razor to score the tops of the loaves in a diamond pattern using the 0.5 cup coarse cornmeal. This creates steam channels that give you that beautiful artisan crust. The cornmeal also adds a subtle crunch that complements the soft interior.
Bake to Golden Perfection with Steam
Place the loaves in the preheated oven and immediately pour 0.5 cup water into the bottom of the oven to create steam. Bake for 30-35 minutes until the bread reaches an internal temperature of 190-200°F and the crust is deep golden brown. The steam helps create that crisp exterior while keeping the interior moist.
For best results, I like to bake the loaves on the middle rack. Rotate the pans halfway through baking to ensure even browning. When done, transfer the loaves to a wire rack to cool completely before slicing. The bread will continue to set as it cools, making it easier to achieve those clean, professional slices perfect for sandwiches.
Pro Tips For Making 2 Loaf Sandwich Bread
- Warm the Milk First: Dump cold whole milk straight into the dough mix, and you’re fighting yeast sluggishness from the start. Heat it to about 110°F (just warm to the touch) before adding—this jumpstarts fermentation and gives you a lighter rise. I learned this the hard way when my first batch took three hours to proof instead of 90 minutes.
- Measure Honey by Weight: That “2 tablespoons” of honey? It’s a guess unless you’re using a kitchen scale. Honey’s density varies wildly—some brands are thick syrup, others runny. Weigh it (about 35-40g for 2 tbsp) to keep your dough’s sweetness consistent and prevent overproofing from uneven sugar content.
- Don’t Over-Knead the Dough: After 5-6 minutes of kneading by hand (or 3-4 minutes in a stand mixer with a dough hook), the dough should spring back slowly when poked—not bounce like a basketball. Overwork it, and you’ll develop too much gluten, making the bread dense instead of soft and pillowy. I used to knead until my arm gave out. Now I set a timer.
- Proof in a Warm Spot: Your oven’s lightbulb or a turned-off oven with a bowl of hot water works better than leaving dough on the counter. Aim for 80-85°F—too cool, and it’ll take hours; too hot, and it’ll overproof before baking. I keep a thermometer nearby now, but even without one, a lightly fogged-up window means it’s ready.
Regional styles of this 2 loaf sandwich bread
Southern-Style Sandwich Bread
In the South, sandwich bread is all about that perfect balance of sweetness and texture—think of the classic white bread used for fried chicken sandwiches or pulled pork. Here, I swap the honey for ¼ cup molasses and add 1 tsp cinnamon to the dough for a subtle warmth.
The result? A loaf with just enough sweetness to complement smoky meats or tangy pickles. I also brush the baked loaves with melted butter mixed with 1 tsp cinnamon while still warm for that iconic Southern crust. 🌶️
Italian Ciabatta Loaves
For a twist on classic sandwich bread, transform this recipe into Italian-style ciabatta by reducing the flour to 5 cups and adding 1 tbsp olive oil to the wet ingredients.
After the initial proof, shape the dough into two oval loaves with dimples pressed into the top—this creates those signature air pockets. Bake at 400°F for 20-25 minutes until golden and crisp. These loaves are perfect for hearty sandwiches or dipping in olive oil. 🍞
New York-Style Everything Bagel Bread
Inspired by New York delis, this variation turns sandwich bread into a bagel-like experience. After shaping the loaves, boil them in water for 30 seconds per side before baking at 375°F for 25 minutes.
Brush the baked loaves with 1 egg wash mixed with 1 tbsp water and sprinkle with 1 tbsp poppy seeds, sesame seeds, and garlic powder. The result? A bread with a chewy interior and a crisp, seed-studded crust that’s ideal for Reuben sandwiches or bagel-style toast. 🥯
Herbed French Baguette-Style
For a French-inspired take, shape the dough into two long, thin loaves (about 12 inches each) and bake on a preheated baking sheet at 425°F for 15-20 minutes. Before baking, mix 1 tbsp chopped fresh rosemary or thyme into the dough for an aromatic twist.
Brush the baked loaves with garlic-infused olive oil while warm. These baguette-style loaves are perfect for croutons, garlic bread, or open-faced sandwiches. 🌿
Savory Garlic-Herb Loaves
Skip the honey entirely and infuse the dough with 2 minced garlic cloves and 1 tbsp chopped fresh parsley or chives during mixing. Shape into loaves as directed and bake as usual.
The result is a savory bread with a subtle garlic aroma that pairs beautifully with soups, stews, or as the base for a grilled cheese sandwich. For extra flavor, brush the baked loaves with garlic butter before serving. 🧄
Nutrition facts
Frequently asked questions
Why does this recipe use whole milk instead of water?
Whole milk adds richness and tenderness to the bread that water can’t match. The fat content creates a softer crumb and helps develop a more flavorful crust. For a lighter version, you can substitute with 2% milk or even oat milk—just ensure it’s room temperature for best results.
Can I make this recipe without a stand mixer?
This no-knead method requires minimal mixing—just combine ingredients until a shaggy dough forms. A wooden spoon or dough whisk works perfectly. The folding technique during shaping develops gluten without needing a mixer. For even better texture, do the folds by hand for 5-6 minutes total.
What if my dough doesn’t rise properly?
Check these three things first: 1) Yeast freshness—test it by mixing with warm water and sugar; 2) Temperature—dough should be 75-80°F; 3) Proofing time. If your kitchen is cold (65°F), extend proofing to 2-3 hours. For faster rise, place the dough in a warm oven with the light on (80°F) for 30-45 minutes.
How do I store the bread to keep it fresh longest?
Wrap cooled loaves tightly in plastic wrap or a clean kitchen towel and store at room temperature for 2-3 days. For longer storage, freeze slices wrapped in parchment paper for up to 3 months. To reheat, wrap slices in foil and warm at 350°F for 5 minutes—they’ll taste fresh-baked every time.
Can I make this recipe gluten-free?
While possible, the texture will differ significantly. Use a 1:1 gluten-free flour blend (like Bob’s Red Mill) and add 1 tsp xanthan gum per cup of flour. Expect a denser crumb and potentially shorter shelf life. For best results, bake immediately after shaping and avoid freezing, as gluten-free bread absorbs moisture differently.

- 3lb Prime Rib Roast Recipe: Juicy Pink Center Guaranteed in 3 Hours - October 31, 2026
- 5 Spice Cake Recipe: Warmly Spiced Layers With Crunchy Top - October 31, 2026
- 1950’s Macaroni and Cheese Recipe: Nostalgic Creamy Cheese Sauce with Buttery Noodles - October 31, 2026