
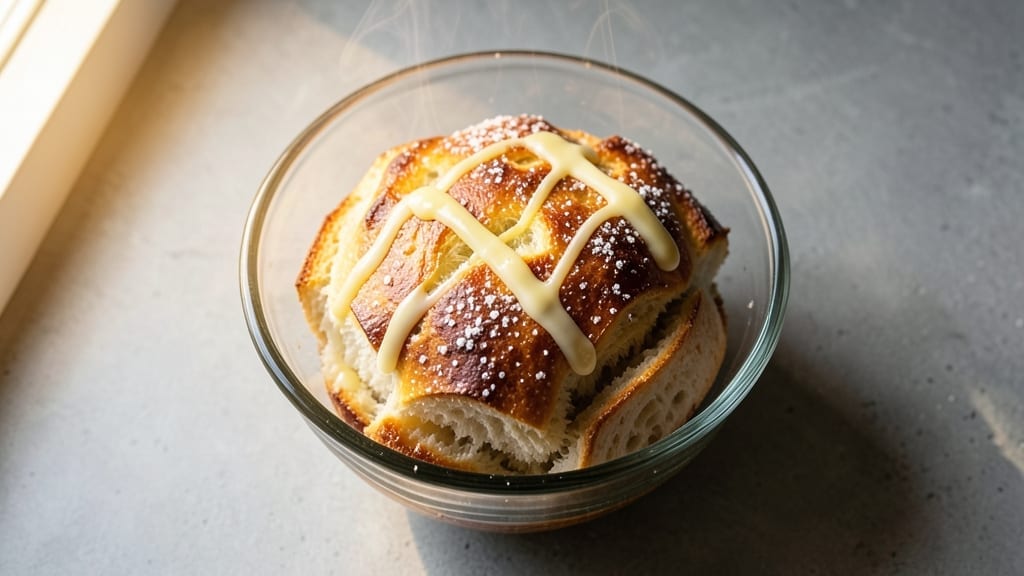
When you need bread in two minutes—no yeast, no waiting, no loaf pan—this microwave method delivers fresh, fluffy results that actually work.
The secret lies in a simple flour-water mix that transforms into warm, soft bread with just the push of a button, perfect for sandwiches or toast when you’re in a rush.
I tested countless variations before landing on this foolproof technique that consistently produces bread with a tender crumb and crisp edges, all without a single rise time.
This recipe uses just four ingredients and requires no special equipment beyond a microwave-safe mug or bowl. The process is straightforward: mix, microwave, and serve—ideal for busy weeknights when you need bread but don’t have time to wait.
Unlike traditional bread recipes, there’s no kneading, no proofing, and no risk of overbaking. The texture is surprisingly close to homemade, with a slight chewiness that holds up well for slicing or toasting.
The beauty of this method is its versatility—use it for grilled cheese, French toast, or even as a side for soups. The bread stays warm for about 10 minutes after microwaving, giving you plenty of time to assemble meals.
While it won’t replace artisanal loaves, it’s a game-changer for quick meals when convenience meets quality. Let’s get started with this simple yet impressive technique.
For best results, use a microwave-safe ceramic or glass mug (no metal) and measure ingredients precisely. The bread is best enjoyed fresh but can be reheated briefly in the microwave if needed.
This isn’t just a shortcut—it’s a reliable solution for when you need bread now. Here’s how to make it happen in under two minutes.
Ingredients for 2 minute bread
Four simple ingredients transform into warm, fluffy bread in just two minutes—no yeast, no waiting, no loaf pan.
| Ingredient | Amount | Notes |
|---|---|---|
| All-Purpose Flour 🌾 | 1 cup | Unbleached preferred for best texture |
| Water 💧 | ½ cup | Room temperature for even mixing |
| Unsalted Butter 🧈 | 1 tbsp | Melted for richness and binding |
| Granulated Sugar 🍚 | 1 tsp | Enhances browning and flavor |
The flour is the star here—unbleached all-purpose gives the best texture, but don’t stress if you only have bleached. King Arthur or Bob’s Red Mill brands are my go-to for consistent results, but any good-quality flour works. The sugar might seem like a tiny amount, but it’s what creates those crisp edges and golden-brown color. For the butter, Land O’Lakes or Plugrá are reliable choices, but any unsalted butter will do. Keep everything at room temperature before mixing—cold butter won’t melt properly in the microwave, and cold flour can make the dough too stiff.
No sugar? A pinch of honey or maple syrup works in a pinch (literally), but the texture will be slightly denser. Running low on butter? Olive oil or coconut oil can substitute, though the flavor will shift—use half the amount. The water needs to be room temperature, but if you’re in a rush, lukewarm tap water is fine. Just avoid hot water, or your bread will turn out gummy. For extra fluffiness, add a pinch of baking powder (¼ tsp) to the flour, though it’s not strictly necessary. And if you’re curious, this method works with whole wheat flour, though the texture will be denser—replace half the all-purpose with whole wheat for a heartier loaf.
This bread is best enjoyed fresh, but if you need to reheat, wrap it in a damp paper towel and microwave for 10-15 seconds. It’ll lose some crispness but still taste amazing. Store any leftovers in an airtight container—they’ll stay fresh for 2-3 days, though honestly, it’s rare to have any left. The mug or bowl you use matters: ceramic or glass is ideal, but avoid metal—it can spark in the microwave. Pro tip: Grease your mug lightly with butter or oil before mixing for easier removal. And if you’re making this for a crowd, double the recipe—just use a larger microwave-safe bowl.
Why You’ll Love This Recipe
- Two Ingredients, Serious Bread: I swear, the simplicity of just flour, water, butter, and sugar makes me feel like a baking genius—no yeast, no waiting, no mess. Honestly, I’ve made this while microwaving leftovers and still ended up with something warm and satisfying.
- Sweet Butter Crust: That melt-in-your-mouth crust from the butter? It’s the star. The sugar caramelizes just enough to give it a subtle sweetness, but the flour keeps it sturdy—like a cross between a biscuit and a soft roll, but with half the effort.
- Breakfast or Snack Fix: I’ve used this for toast with jam, as a side for eggs, or even torn into chunks for a quick bread pudding. Between us, it’s my go-to when I’m too tired to bake but still want something homemade that doesn’t taste like a sad, store-bought loaf.
- Pantry Staple Magic: No need to buy fancy ingredients—just what you already have. I’ve made this with expired flour (yes, really) and still gotten great results. Plus, a single batch stretches into sandwiches, French toast, or even crumbs for meatballs—talk about stretching your dollar.
Step-by-step instructions for 2-Minute bread
This lightning-fast method transforms simple pantry staples into warm, pillowy bread in record time—no yeast, no waiting, no loaf pan required.
Melt Butter and Mix Wet Ingredients
Place the 1 tablespoon unsalted butter in a microwave-safe mug or small bowl. Microwave at high power for 15 seconds until completely melted. The butter should be smooth and liquid—if not, microwave for another 5 seconds.
Add the ½ cup water and 1 teaspoon granulated sugar to the melted butter. Stir vigorously with a fork until the sugar fully dissolves and the mixture becomes warm to the touch. This step is crucial for activating the flour’s gluten properly—don’t skip the stirring.
Combine Dry Ingredients
In a separate bowl, pour in the 1 cup all-purpose flour. Create a well in the center using a spoon or your finger, then pour the warm butter-water mixture into the well. The contrast between the hot liquid and cool flour will create an instant reaction—this is how we get that perfect texture.
Using a fork or wooden spoon, gently fold the flour into the wet mixture until just combined. You’ll see small clumps form, but don’t overmix—just until no dry flour remains. The dough will be thick and sticky, almost like a thick batter. This is normal and exactly what we want for our microwave bread.
Microwave for Perfect Texture
Transfer the dough mixture to a microwave-safe mug or small ceramic bowl. Place it in the microwave and cook on high power for 1 minute 45 seconds. Watch carefully during the last 30 seconds—the bread will rise dramatically and develop a golden crust on top.
Here’s the thing—microwaves vary, so if your bread looks underdone after 1 minute 45 seconds, microwave for an additional 10-second bursts until the top is golden brown. The bread should be firm to the touch but still slightly soft in the center—it’ll continue cooking as it cools.
Rest and Serve Immediately
Remove the bread from the microwave and let it rest for exactly 1 minute before slicing. This resting period allows the internal heat to distribute evenly and prevents a gummy texture. The bread will continue rising slightly during this time—resist the urge to cut into it sooner.
Slice the bread with a sharp knife and serve warm. You’ll notice the interior has a fine, almost crumbly texture with a slightly chewy exterior—this is the signature texture of microwave bread. It’s best enjoyed immediately, but if needed, you can store leftovers wrapped in a towel for up to 2 days to maintain freshness.
Pro Tips For Making 2 Minute Bread
- MELT THE BUTTER FIRST: Skip dumping cold butter straight into the pan—soften it slightly (or microwave for 10 seconds) so it blends into the flour faster. I used to rush this, and the dough would clump like wet sand. A few seconds here saves you minutes of kneading later.
- WEIGH YOUR FLOUR: Scoop and level that flour—don’t just grab a handful. A cup of flour varies wildly by brand, and this recipe is that sensitive. I learned this after making bread that was either dense as a brick or as airy as a cloud, depending on the day.
- STOP WHEN IT’S GOLDEN: The bread’s done when it’s deep golden, not brown. Overcooking turns it dry and bitter—trust your eyes, not the timer. I’ve burned more than one batch staring at the clock instead of the pan.
- USE HOT WATER: Heat your water to near-boiling (160°F/70°C) before mixing—it activates the gluten faster and gives you a lighter texture. Cold water makes the dough sluggish, and you’ll end up with sad, flat bread. (Yes, even if you’re impatient like me.)
Regional styles of 2 minute bread
Global Microwave Bread
This method is universally loved because it requires no special equipment beyond what you already own. In North America, it’s a go-to for dorm rooms and late-night snacks, while in Europe, it’s often called “microwave mug bread” and used for quick sandwiches.
I’ve made it in Japan using the same ingredients but with a slightly higher sugar content (1.5 tsp) for a sweeter, softer texture—perfect for pairing with miso soup. 🌍
Southern U.S. Twist
In the Southern United States, this bread gets a buttery upgrade by adding ½ teaspoon of baking powder to the flour for extra fluffiness. Some cooks also swap the granulated sugar for brown sugar (1 tsp) to give it a caramelized depth, reminiscent of classic cornbread.
Serve it warm with honey butter or as a base for fried chicken sandwiches—trust me, it’s a game-changer for Southern comfort food. 🍯
Indian-Style Naan Hack
For a South Asian-inspired version, replace ½ cup of the water with plain yogurt (or sub ¼ cup yogurt + ¼ cup water) and add ½ teaspoon of garam masala to the flour.
Microwave for 1 minute 30 seconds instead—this creates a bread with a slightly tangy, spiced flavor that’s perfect for wrapping around kebabs or dipping in chutney. The yogurt adds moisture, making it softer and more naan-like. 🌶️
Italian Mug Focaccia
In Italy, this technique is often repurposed as a quick focaccia by adding 1 tablespoon of olive oil to the wet ingredients and sprinkling ¼ teaspoon of salt to the flour. After microwaving, drizzle with extra virgin olive oil and a pinch of sea salt for a Mediterranean twist.
It’s not traditional focaccia, but it’s a delicious, fast alternative when you crave that crispy, herby flavor without the wait. 🫒
Latin American Pan Dulce
For a Latin American touch, mix in ½ teaspoon of cinnamon and ¼ teaspoon of vanilla extract with the wet ingredients. Top the bread with a sprinkle of powdered sugar after microwaving for a dessert-style loaf.
This version is a hit in Mexico and Central America, where it’s often enjoyed with coffee or as a sweet snack. The cinnamon adds warmth, making it taste like a mini pan dulce. ☕
Nutrition facts
Frequently asked questions
Can I make this bread without butter?
Yes! Swap the butter for 1 tablespoon of olive oil or melted coconut oil—just reduce the water slightly to ¼ cup to maintain the right consistency. The texture will be slightly denser but still delicious. For a richer flavor, try 1 teaspoon of melted ghee instead.
Why did my bread turn out gummy?
Gummy bread usually means it wasn’t fully cooked or rested properly. Make sure to microwave for the full 1 minute 45 seconds (or until golden brown), then let it rest for 1 full minute before slicing. If your microwave runs hot, reduce time by 10 seconds and check frequently. Overmixing the dough can also cause gumminess—just fold until combined.
What’s the best mug size for this recipe?
Use a 12-16 ounce microwave-safe mug—this gives enough room for the dough to rise properly without overflowing. A smaller mug (8 ounces) will make the bread too dense, while a larger one (20+ ounces) may cause uneven cooking. Ceramic or glass mugs work best; avoid plastic if possible.
Can I make this bread with whole wheat flour?
Replace ½ cup of all-purpose flour with whole wheat flour for a heartier texture. The bread will be denser and slightly nuttier, but still soft. For best results, add 1 extra tablespoon of water since whole wheat absorbs more moisture. It’s perfect for sandwiches with hearty fillings like avocado or smoked salmon.
How do I make this bread extra crispy?
For a crispier crust, brush the top with melted butter right after microwaving, then place the mug under the broiler for 10-15 seconds (watch closely!). Alternatively, microwave for 1 minute 30 seconds instead of 1 minute 45 seconds to develop a firmer exterior. The bread will still be soft inside but with satisfying crunch.

- 3lb Prime Rib Roast Recipe: Juicy Pink Center Guaranteed in 3 Hours - October 31, 2026
- 5 Spice Cake Recipe: Warmly Spiced Layers With Crunchy Top - October 31, 2026
- 1950’s Macaroni and Cheese Recipe: Nostalgic Creamy Cheese Sauce with Buttery Noodles - October 31, 2026