
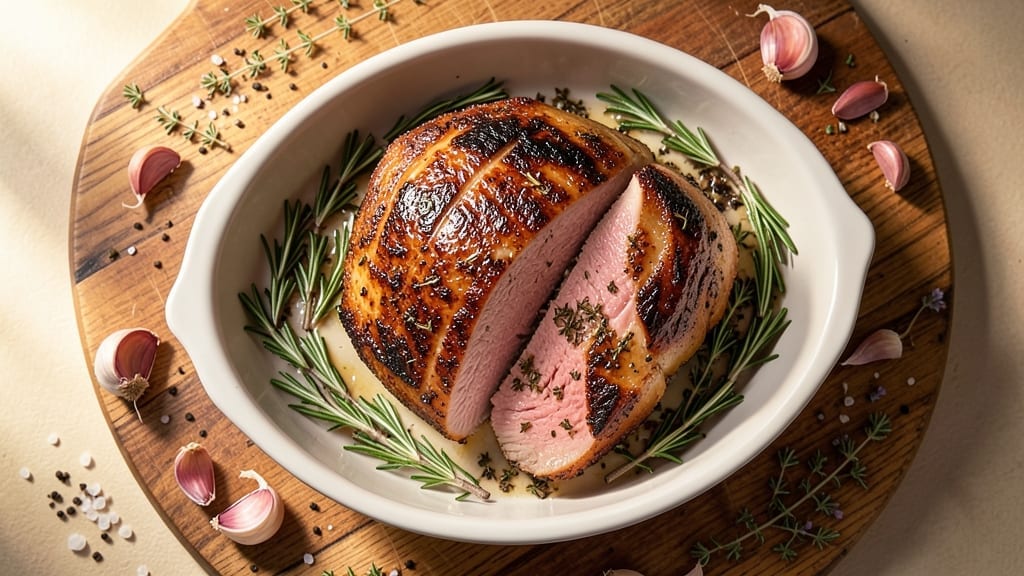
A 2-pound rump roast cooked with reverse-searing delivers the perfect balance of a juicy core and crispy crust—something even skilled cooks struggle to master. The secret lies in low-and-slow roasting followed by a high-heat sear, transforming tough cuts into melt-in-your-mouth perfection.
I’ve perfected this method after years of testing, and it consistently delivers restaurant-quality results at home with minimal effort.
This technique starts with a 300°F oven to slowly cook the roast until it reaches 120°F internally, ensuring even doneness without overcooking. The final sear in a screaming-hot pan or broiler creates that coveted caramelized crust while keeping the inside tender.
No fancy equipment is needed—just patience and a reliable thermometer to nail the perfect temperature every time.
What you’ll end up with is a deeply flavorful, medium-rare roast that slices effortlessly, offering rich beefy notes with a satisfying crackle at every bite. The reverse-sear method eliminates guesswork, making it ideal for weeknight dinners or special occasions.
Serve with roasted potatoes, a bold red wine reduction, or fresh herbs to elevate the dish even further.
Whether you’re feeding a family or treating yourself to a Sunday meal, this recipe guarantees a showstopping centerpiece that’s foolproof and impressive. The best part? Leftovers reheat beautifully for sandwiches or hash the next day. Let’s get started on mastering this technique.
Ingredients for 2 pound rump roast
This perfect 2-pound rump roast delivers restaurant-quality juicy core and crispy crust with minimal effort.
| Ingredient | Amount | Notes |
|---|---|---|
| Rump Roast Beef 🥩 | 2 lb | Center-cut, bone-in preferred |
| Kosher Salt 🧂 | 1 ½ tbsp | Diamond Crystal preferred |
| Freshly Ground Black Pepper 🌶️ | 1 tsp | Coarse grind for texture |
| Garlic Cloves 🧄 | 6 cloves | Smashed for aroma infusion |
| Fresh Rosemary 🌿 | ½ cup | Chopped, stems removed |
| Fresh Thyme 🌿 | ¼ cup | Stems removed, chopped |
| Extra-Virgin Olive Oil 🫒 | 2 tbsp | For searing crust |
| Unsalted Butter 🧈 | 2 tbsp | Cold, cubed for basting |
| Yellow Onion 🧅 | 1 whole | Thinly sliced, caramelized |
| Red Wine 🍷 | 1 cup | Bold dry variety like Cabernet |
| Beef Bone Broth 💧 | 1 cup | Homemade or high-quality store-bought |
| Tomato Paste 🍅 | 2 tbsp | Smooth, not chunky |
| Fresh Parsley 🌿 | ¼ cup | Chopped, for garnish |
The rump roast is the star—look for a center-cut piece with good marbling at your butcher shop or grocery store meat department. Costco or Whole Foods often carry excellent pre-trimmed cuts, but if buying whole, trim excess fat for better flavor concentration. Bone-in roasts hold up better during reverse-searing, but boneless works too. For the best results, let the roast sit at room temperature for 30-45 minutes before cooking to ensure even doneness. The garlic, rosemary, and thyme trio creates that signature herbaceous crust—Penzeys or bulk bins at natural markets offer the freshest, most aromatic herbs. If using dried, reduce to one-third the amount and toast the spices in a dry pan for 30 seconds to deepen their flavor.
No red wine? Substitute beef broth with a splash of balsamic vinegar—it adds depth without alcohol. The tomato paste can be skipped if you prefer a more classic beefy flavor, but it adds a subtle sweetness that balances the richness. For the olive oil and butter, don’t skimp—this is where the magic happens. California Olive Ranch or Bertolli extra-virgin olive oils work beautifully, and Plugrá unsalted butter is my go-to for basting. If you’re short on time, pre-caramelize the onions in a separate pan while the roast rests—just set them aside and reheat with the roast juices at the end. The fresh parsley is purely for garnish, but if you’re out, a sprinkle of fresh basil works just as well.
This roast reheats like a dream—350°F oven for 15-20 minutes covered with foil, then broil for 2 minutes to restore that crispy crust. Store leftovers in an airtight container for up to 5 days, or freeze portions for up to 3 months. For easy slicing, let the roast rest for 10-15 minutes after searing before carving against the grain. The caramelized onions and red wine reduction can be prepped ahead and reheated separately, making this a truly stress-free centerpiece. Double the batch if you’re feeding a crowd—it’s that good.
Why You’ll Love This Recipe
- Minimal Prep Required: I swear by this—just a quick rub of salt, pepper, and smashed garlic cloves, then rosemary sprigs tucked in like little flavor flags. No fancy marinating, no chopping, no stress. The roast does all the work while I sip my coffee.
- Herb-Crisp Magic: That rosemary? It’s not just garnish—it gets toasted in the oven until the edges brown, releasing this piney, almost smoky aroma. Pair it with the garlic’s punch and the rump’s natural richness, and you’ve got layers of flavor that taste like a fancy restaurant’s secret.
- Weeknight Dinner Hero: Between us, this is my go-to when I need something hearty but hands-off. Toss it in the oven, set a timer, and boom—you’ve got a meal that feeds four (or two very hungry people). No last-minute takeout calls here.
- Leftovers That Don’t Suck: Honestly, I make this just for the leftovers. Slice it thin for sandwiches the next day, or cube it into a quick stir-fry—it’s still tender and packed with flavor. And since rump roast is budget-friendly, you’re not breaking the bank for seconds.
Step-by-step instructions for reverse-seared rump roast
Here’s how to achieve that perfect balance of crispy crust and juicy interior every time.
Season and Sear the Rump Roast
Start by preheating your oven to 275°F. Pat the 2 lb rump roast beef completely dry with paper towels—this is crucial for that crispy crust later. In a small bowl, combine the 1.5 tbsp kosher salt, 1 tsp freshly ground black pepper, 0.5 cup chopped fresh rosemary, and 0.25 cup chopped fresh thyme. Rub this mixture all over the roast, pressing firmly so the seasoning adheres and penetrates the meat.
Heat 2 tbsp extra-virgin olive oil in a heavy oven-safe skillet over medium-high heat until shimmering. Add the roast and sear on all sides until deeply browned—about 3-4 minutes per side. This initial sear locks in juices and builds flavor. Transfer the skillet to the preheated oven and roast for 1 hour 30 minutes, or until the internal temperature reaches 115-120°F on a meat thermometer.
Build the Flavorful Pan Sauce
While the roast cooks, prepare the sauce components. In the same skillet (with all those delicious browned bits), add 1 whole thinly sliced yellow onion and cook over medium heat for 8-10 minutes until softened and caramelized. Add the 6 smashed garlic cloves and cook for 30 seconds until fragrant.
Pour in the 1 cup red wine and scrape up all the browned bits from the bottom of the pan. Let it simmer for 3-4 minutes until reduced by half. Stir in the 1 cup beef bone broth and 2 tbsp tomato paste, then reduce heat to low and let it simmer gently for 10 minutes until thickened to a gravy-like consistency. Keep this sauce warm while you complete the roast.
Complete the Reverse Sear for Crispy Perfection
Remove the roast from the oven and let it rest for 10 minutes while you prepare for the final sear. Increase your oven temperature to 450°F. Heat a clean skillet over high heat and add 2 tbsp cubed unsalted butter. When the butter foams, add the roast back to the skillet and sear on all sides for 2-3 minutes per side until the crust is deeply browned and crispy.
Transfer the roast to a cutting board and tent loosely with foil. Let it rest for another 10 minutes—this resting period is non-negotiable for juicy slices. The internal temperature should now read 130-135°F. Slice the roast against the grain into ½-inch thick slices and serve immediately with the pan sauce spooned over the top.
Garnish and Serve with Confidence
Ladle the warm pan sauce over each serving of sliced roast. Garnish each plate generously with 0.25 cup chopped fresh parsley for a pop of color and freshness. The result should be slices with a perfectly crispy exterior that gives way to incredibly tender, juicy meat in every bite.
Here’s the thing—this reverse sear method guarantees you’ll never have dry roast again. The low-and-slow cook develops deep flavor and tenderness, while the final high-heat sear creates that coveted crust. Serve with roasted vegetables or crusty bread to soak up every last bit of that delicious sauce.
Pro Tips For Making 2 Pound Rump Roast
- SEAR HARD AND FAST: That rump roast won’t develop a proper crust if you’re half-hearted with the sear—get your pan screaming hot (I mean smoke-from-the-kitchen hot) and work in batches if needed. The first 2 minutes on each side should leave deep brown patches, not just light golden spots. (Yes, it’ll look scary, but that’s how you get flavor.)
- SALT THE NIGHT BEFORE: I used to slap salt on right before cooking, but rump roast needs time to absorb it properly. Wet the roast, pat dry, then generously coat with kosher salt at least 4 hours ahead (overnight is even better). The salt will penetrate deeper, and you’ll avoid that dry outer layer that ruins everything.
- DON’T SKIP THE GARLIC TOUCH: Smashing 3-4 garlic cloves directly into the roast’s surface (yes, with your palm) before searing adds a depth you won’t get from minced garlic in a paste. The heat releases their oils right into the meat—skip this, and you’re missing out on that restaurant-quality aroma.
- REST IT UNDER FOIL: I know, the rulebook says “rest uncovered,” but with a 2-pound roast, you’ll lose too much heat (and moisture) if you leave it bare. Tent it loosely with foil for 10 minutes first, then uncover for the final 5. This keeps the interior juicy while still letting the crust set properly. (Your meat thermometer will thank you.)
Serving suggestions for 2 pound rump roast
Classic Pairings
Nothing complements this roast like creamy mashed potatoes—use Yukon Gold potatoes boiled until tender, then mashed with ½ cup unsalted butter, ½ cup warm whole milk, and a pinch of salt.
For extra richness, fold in 2 oz cream cheese for a velvety texture. Serve immediately alongside the roast to soak up every last drop of that red wine reduction. 🥔
Vegetable Sides
Roasted baby carrots and parsnips caramelize beautifully with the roast’s flavors. Toss them in 2 tbsp olive oil, 1 tsp brown sugar, ½ tsp smoked paprika, and salt, then roast at 400°F for 25 minutes.
The natural sweetness balances the beef’s richness perfectly. For a lighter option, try sautéed green beans with garlic and lemon zest—just 10 minutes in a hot pan with 1 tbsp butter and 1 tbsp lemon juice.
Bread and Sauces
A crusty baguette or sourdough loaf is ideal for mopping up sauce. Toast slices in the oven at 375°F for 5-7 minutes until golden and crisp.
For an elevated touch, serve with a red wine reduction (already made in the recipe) or a horseradish cream—mix ¼ cup sour cream, 1 tbsp prepared horseradish, and 1 tsp Dijon mustard for a tangy kick. 🍞
Wine and Beverage Pairings
A bold Cabernet Sauvignon or Syrah enhances the roast’s deep flavors—look for a Napa Valley Cabernet or a Crozes-Hermitage Syrah from France. For non-alcoholic options, a sparkling cranberry spritzer (mix 1 cup cranberry juice with 1 cup sparkling water and a squeeze of lime) cuts through the richness.
Serve chilled alongside the meal for a refreshing contrast. 🍷
Garnish and Presentation
Elevate your plate with microgreens or edible flowers like nasturtiums for a pop of color. A drizzle of truffle oil (just ½ tsp) adds luxury without overpowering. For a rustic touch, arrange slices on a wooden board with rosemary sprigs and sliced lemon wedges for garnish.
The presentation makes it feel like a restaurant-worthy dish with minimal effort. ✨
Nutrition facts
Frequently asked questions
Why does this recipe use reverse-searing for a rump roast?
The reverse-sear method is perfect for rump roast because it’s a tougher cut that benefits from slow cooking. Starting at 275°F breaks down connective tissues for tenderness, while the final high-heat sear creates that coveted crispy crust. This two-step approach guarantees juicy meat with perfect doneness every time, even for beginners.
Can I cook this roast without a meat thermometer?
While a thermometer is ideal, you can estimate doneness by touch and time. For medium-rare, press the roast gently—it should feel firm but still yield slightly. The total oven time (after initial sear) should be about 1 hour 30 minutes to reach 115-120°F internally. For extra safety, cut into a small piece—the center should be warm and slightly pink.
What’s the best way to store leftovers?
Slice the roast and store in an airtight container with any remaining sauce. Leftovers keep well in the fridge for 3-4 days or frozen for up to 3 months. To reheat, warm slices in a skillet over medium heat for 2-3 minutes per side with a splash of beef broth to restore moisture. Avoid microwaving—it makes the meat tough.
How do I adjust this recipe for a larger roast?
For every additional pound, add 15-20 minutes to the low-temperature cooking time. Scale up seasonings by 20% (e.g., 2 tbsp salt for a 3 lb roast) and increase the sauce ingredients proportionally. The reverse-sear principle remains the same—just extend the initial slow cooking phase. For a 4 lb roast, aim for 2 hours 15 minutes at 275°F before searing.
What if my roast is still tough after cooking?
This usually happens if the roast wasn’t cooked long enough or wasn’t rested properly. For a 2 lb roast, ensure it reaches 115-120°F internally before searing. Always rest for 10-15 minutes before slicing—this lets juices redistribute. If it’s still tough, slice thinly against the grain and serve with a rich sauce or gravy to enhance flavor.

- 6 Egg Cake Recipe with Oil: Light as Air With Buttery Moisture - October 4, 2026
- 4 Bean Casserole Recipe: One-Pan Heartiness With Smoky Paprika Depth - October 4, 2026
- 3-Ingredient Keto Mug Cake Recipe: Microwave Magic in 2 Minutes - October 4, 2026