
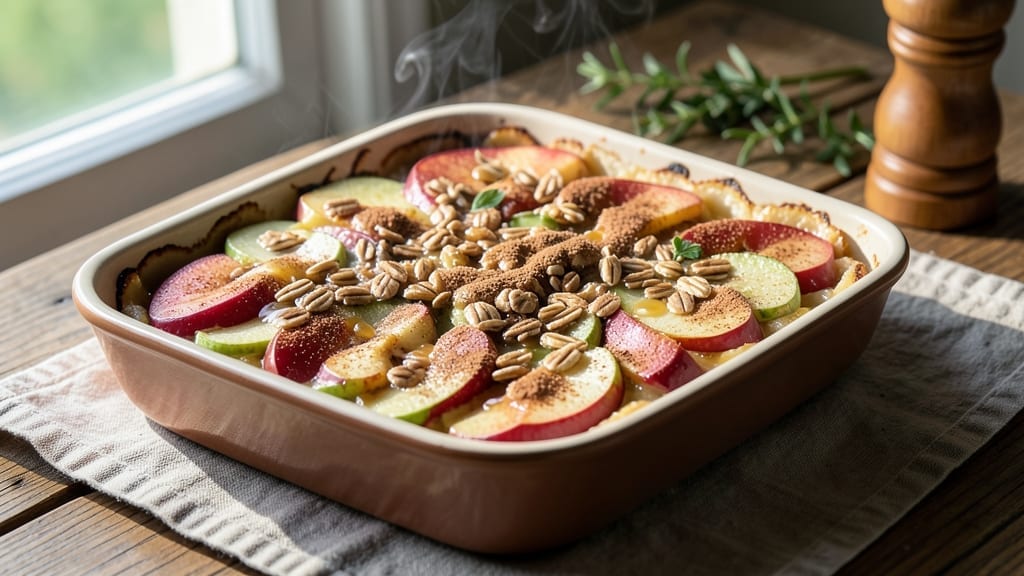
This 2-serving apple crisp recipe delivers all the cozy, spiced apple goodness without making a single extra serving you won’t use. 🍏 The secret lies in balancing tender apples with a buttery oat topping that crisps to golden perfection—no overbaked edges or soggy bottoms here.
I’ve tested this exact portion size for years, and it’s the ideal balance between restaurant-worthy dessert and weeknight simplicity.
The filling starts with a mix of sweet and tart apples (think Honeycrisp or Granny Smith) tossed in cinnamon, lemon juice, and just enough sugar to enhance their natural flavors.
While those apples soften, the topping comes together with a simple blend of old-fashioned oats, brown sugar, melted butter, and a pinch of salt—no fancy ingredients, just foolproof texture. The result? A crisp with a perfectly crispy topping that stays crunchy while the filling remains tender.
Baking at 375°F for 35 minutes ensures the apples break down just enough to release their juices while the streusel topping turns a beautiful caramelized brown.
The aroma alone will have everyone gathering in the kitchen, and the first bite delivers that perfect contrast of warm, spiced apples with every flaky, buttery bite of topping. Serve warm with a scoop of vanilla ice cream or a dollop of whipped cream for the ultimate cozy dessert.
This recipe is designed to be flexible—swap in your favorite apples, add a sprinkle of nuts to the topping, or even make it ahead and bake it fresh when you’re ready.
The portion size makes it perfect for date night, a quiet weekend treat, or when you’re craving dessert but don’t want to make a crowd-pleaser. Let’s get baking!
Ingredients for 2 serving apple crisp
Two apples, a handful of pantry staples—this is your cozy dessert night solved.
| Ingredient | Amount | Notes |
|---|---|---|
| Honeycrisp Apples 🍏 | 2 medium | Peeled, cored, sliced |
| Granny Smith Apples 🍏 | 1 medium | Peeled, cored, sliced |
| Old-Fashioned Rolled Oats 🌾 | ½ cup | Not quick oats |
| Light Brown Sugar 🍚 | ¼ cup | Packed, not scooped |
| Unsalted Butter 🧈 | ½ cup | Cold, cubed |
| Ground Cinnamon 🌿 | 1 ½ tsp | Freshly ground preferred |
| Granulated Sugar 🍚 | 2 tbsp | For apples, not topping |
| Lemon Juice 🍋 | 1 tbsp | Freshly squeezed |
| Salt 🧂 | ¼ tsp | Fine sea salt preferred |
| Vanilla Extract 🍯 | ½ tsp | Pure vanilla preferred |
| Chopped Walnuts 🌰 | ¼ cup | Optional for crunch |
The apples are everything. Honeycrisp and Granny Smith balance sweet and tart perfectly—Honeycrisp for that juicy bite, Granny Smith to keep things bright. If you can’t find Honeycrisp, Fuji or Gala work in a pinch, but they won’t be as juicy. I always grab apples at Whole Foods or the local farmers market when they’re in season—vibrant color means better flavor. Peeled or unpeeled? Your call, but peeling gives that restaurant-quality look. Slice them 1/4-inch thick for even cooking.
No brown sugar? White sugar plus a pinch of molasses works, but it won’t caramelize as nicely. The oats are non-negotiable—old-fashioned rolled oats give that perfect chewy texture, while quick oats turn mushy. Butter matters here too: cold, cubed butter creates flaky layers, but if you’re in a rush, softened butter still works (just don’t overmix). Want extra crunch? Toss in chopped pecans or toasted oats with the walnuts. The lemon juice keeps the apples from browning while they wait for baking—don’t skip this step.
This keeps 3 days in the fridge, but honestly? It’s best fresh out of the oven. Reheat at 350°F for 10 minutes to revive the crispiness. Make ahead tip: Assemble the crisp, refrigerate overnight, then bake straight from the fridge—add 5-10 minutes to baking time. Portion into two 8-ounce ramekins for individual servings, or one 9×9-inch pan for sharing. Leftovers? Freeze for up to 3 months—just thaw at room temp before reheating.
Why You’ll Love This Recipe
- No-Chop Shortcut: I swear by this—just core the apples, slice them thick, and toss in the pan. No peeling, no fuss, and you’re done faster than ordering takeout. (Honestly, I’ve made it while scrolling through my phone.)
- Sweet-Tart Magic: That Honeycrisp-Granny Smith combo? It’s like autumn in your mouth—juicy, crisp, and just enough tartness to cut through the buttery oat topping. The brown sugar caramelizes into a sticky, golden blanket that begs for seconds.
- Weeknight or WOW: Make it for yourself on a lazy Sunday or bring it to a potluck—same effort, different vibes. The portions are perfect for two, but double it if you’re feeding a crowd. (Between us, it’s my go-to for book club nights because it’s always a hit.)
- Leftovers That Last: This keeps for days in the fridge, and reheats like a dream—crispy edges stay crispy, apples stay tender. Plus, it’s cheap: apples last longer, oats are a pantry staple, and butter stretches farther than you’d think. My budget and my taste buds win.
Step-by-step instructions for apple crisp
Here’s how to make the crispiest, most flavorful apple crisp you’ve ever tasted—perfect for two servings.
🍳 Step 1: Toss and Season the Apples
In a large bowl, combine the 2 medium Honeycrisp Apples and 1 medium Granny Smith Apples that you’ve already peeled, cored, and sliced into ¼-inch thick pieces. The Granny Smith adds that perfect tart contrast to the sweet Honeycrisp.
Drizzle over the 1 tablespoon Lemon Juice and sprinkle with the 2 tablespoons Granulated Sugar. This sugar helps caramelize the apples during baking, giving them that beautiful golden color. Toss everything together gently but thoroughly—you want the lemon juice and sugar evenly distributed. I like to use my hands for this part so I can feel when the apples are well-coated.
👨🍳 Step 2: Prepare the Buttery Streusel Topping
In a separate bowl, cut the ½ cup Unsalted Butter into small cubes—this helps it distribute evenly in the topping. Add the ½ cup Old-Fashioned Rolled Oats, ¼ cup Light Brown Sugar, 1½ teaspoons Ground Cinnamon, ¼ teaspoon Salt, and ½ teaspoon Vanilla Extract.
Here’s the thing—use your fingers to work the butter into the dry ingredients until you get a crumbly texture with pea-sized butter pieces throughout. If you overwork it, the topping will get gummy. The walnuts are optional, but I always add the ¼ cup Chopped Walnuts for that extra crunch. Fold them in at the end so they stay whole and crispy.
🥘 Step 3: Assemble and Bake to Golden Perfection
Transfer the seasoned apples to a 9-inch pie dish or similar baking pan. Spread them out evenly in a single layer—this ensures they cook through without steaming. Then sprinkle the streusel topping evenly over the apples, pressing down very gently with your fingers. You want it distributed but not compacted.
Bake at 375°F for 35-40 minutes until the apples are tender when pierced with a fork and the topping is golden brown with crisp edges. The first 20 minutes are critical—don’t open the oven door! This is when most of the browning happens, and peeking lets out steam that can make your crisp soggy.
⏰ Step 4: Rest and Serve Warm
Remove the crisp from the oven and let it cool for 10-15 minutes before serving. This resting time allows the juices to redistribute, preventing a runny bottom. The topping will firm up slightly as it cools, but it’ll still be wonderfully crispy.
Serve warm with a scoop of vanilla ice cream or a dollop of whipped cream. The contrast of warm crisp with cold ice cream is what makes this dessert truly special. And here’s a pro tip: if you have any leftovers (unlikely with this perfect portion), reheat them in the oven for 5-10 minutes at 350°F to restore that crispy texture.
Pro Tips For Making 2 Serving Apple Crisp
- Cut Apples in Even Slices: Use a mandoline or sharp knife to slice apples into ¼-inch pieces—consistent thickness means even cooking and no mushy spots in one part while others stay crunchy. I learned this the hard way after serving a crisp where half the apples turned to sauce.
- Toast Oats First: Spread the rolled oats on a dry pan over medium heat for 3–4 minutes until they’re golden and smell nutty. This adds depth of flavor and prevents a bland topping—no need to wait for the oven later.
- Don’t Skip the Brown Sugar Moisture: Pack the brown sugar into the apple mixture before adding the topping—it keeps the filling juicy instead of dry. I used to sprinkle it on top, and the crisp always ended up like a dessert version of cardboard.
- Bake Until Bubbly, Not Brown: Pull the crisp from the oven when the edges are golden but the center still jiggles slightly—it’ll finish cooking while cooling. Overbaking turns the oat topping into a crispy shell while the apples stay undercooked. (Yes, even if it looks underdone.)
Make-ahead tips for this recipe
Prep Ahead Strategy
Assemble the entire crisp—apples and topping—up to 24 hours in advance and refrigerate in an airtight container. This lets flavors meld beautifully, and the cold start actually enhances the caramelization during baking.
Just add 5-10 extra minutes to baking time when ready, as cold ingredients take longer to heat through. 🌟
Freezer-Friendly Method
For maximum convenience, assemble the crisp in a freezer-safe dish, cover tightly with plastic wrap and foil, and freeze for up to 3 months. Thaw completely in the fridge overnight before baking at 375°F for 45-50 minutes—the extra time accounts for the frozen state.
I use this method when hosting unexpected guests!
Portion Control Tips
Divide the crisp into two 8-ounce ramekins before baking for perfectly portioned individual servings. Bake in a 350°F oven for 30-35 minutes—ramekins conduct heat differently than pie dishes. The smaller size also means faster reheating if needed. For extra drama, sprinkle with flaky sea salt after baking.
Reheating Secrets
Microwave reheating works in a pinch, but for best results, cover loosely with foil and warm at 350°F for 10 minutes. The foil prevents over-browning while restoring that perfect crispy texture.
If using the microwave, heat for 20-30 seconds on 50% power—just enough to warm through without making the topping soggy. 🔥
Make-Ahead Serving Ideas
Prep the crisp ahead and store components separately for creative serving options. Keep the topping in a separate container for up to 3 days—just sprinkle fresh before baking.
For a breakfast twist, serve warm slices with Greek yogurt instead of ice cream. The crisp also reheats beautifully for a comforting dessert after dinner.
Storage Containers
Use glass Pyrex containers with tight-sealing lids for fridge storage—they maintain moisture better than plastic. For freezer storage, opt for quart-sized freezer bags** with all air removed to prevent freezer burn. Label containers with dates to track freshness. I always keep one in my freezer for spontaneous dessert cravings! ✨
Nutrition facts
Frequently asked questions
Can I use frozen apples instead of fresh?
Yes, but thaw and drain them first! Use 2 cups frozen apples (about 3-4 medium apples worth) and pat them completely dry with paper towels before tossing with the other ingredients. Frozen apples work best in this recipe because they’re often pre-peeled and pre-sliced, saving you prep time.
Why did my topping get gummy instead of crispy?
Overmixing the butter into the oat mixture is the #1 culprit! The topping should be crumbly with pea-sized butter pieces. Also, check your baking time—if it’s overdone, the topping will lose crispness. For extra crunch, add 1-2 tablespoons flour to the topping mix or bake at 350°F instead of 375°F for slightly slower caramelization.
What’s the best way to make this crisp ahead of time?
Assemble the crisp completely and refrigerate for up to 24 hours before baking. For longer storage, freeze the assembled crisp (unbaked) for 3 months375°F for 45-50 minutes. The cold start actually enhances the caramelization and flavors!
Can I make this recipe gluten-free?
Swap the old-fashioned oats for gluten-free rolled oats and use a gluten-free 1:1 flour blend instead of regular flour (if adding any). For extra binding, add 1 tablespoon ground almond flour to the topping. Just be sure to check all your spices and vanilla extract for gluten-free certification too.
How do I know when the apples are perfectly cooked?
Pierce the apples with a fork—they should be tender but still hold their shape. The filling should look bubbly with caramelized edges. If you’re unsure, check at 30 minutes and add extra time if needed. The topping should be golden brown with crisp edges—if it’s still pale, give it another 5-10 minutes.

- 3lb Prime Rib Roast Recipe: Juicy Pink Center Guaranteed in 3 Hours - October 31, 2026
- 5 Spice Cake Recipe: Warmly Spiced Layers With Crunchy Top - October 31, 2026
- 1950’s Macaroni and Cheese Recipe: Nostalgic Creamy Cheese Sauce with Buttery Noodles - October 31, 2026