
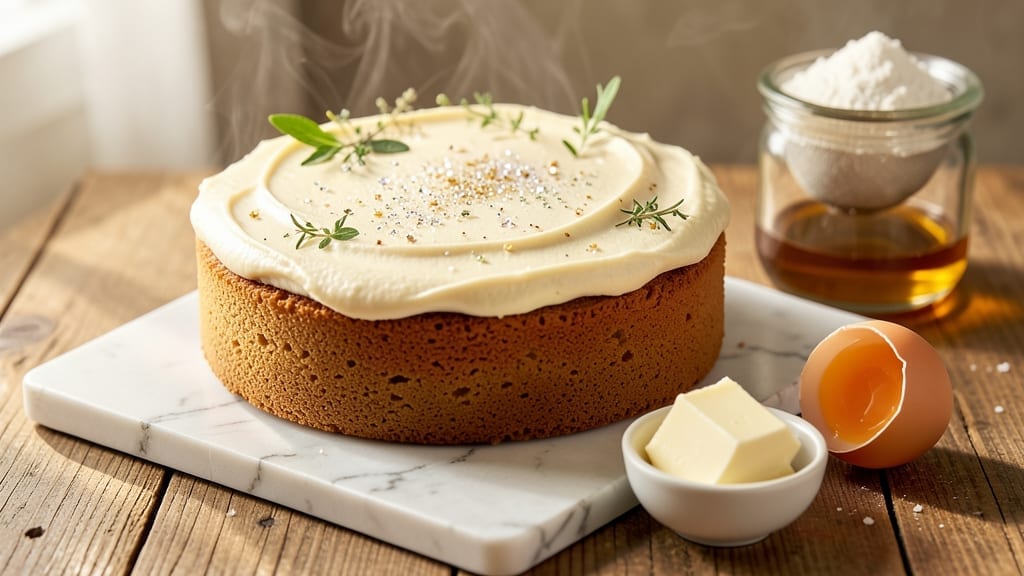
This 20-minute cake recipe transforms a simple mug into your secret weapon for instant dessert cravings—no oven, no mess, just pure convenience. ✨ The key? A microwave’s focused heat and a swirl of warm vanilla that makes every bite taste like a bakery treat.
I perfected this after burning through three failed attempts (don’t skip the egg yolk trick—it’s everything).
What makes this recipe work is the balance of simplicity and texture: a tender crumb from the cake base and a gooey vanilla swirl that cuts through like a ribbon.
You’ll need just 5 ingredients and 3 minutes of active prep, with the rest happening while you sip coffee or wait for dinner. The microwave does all the heavy lifting, ensuring even baking without drying out.
By the time your mug cake emerges, you’ll have a golden dome with a warm vanilla center that oozes at the slightest touch. Top it with whipped cream, a sprinkle of powdered sugar, or a dollop of chocolate frosting for extra indulgence.
It’s the kind of dessert that feels like a treat but takes less time than boiling water.
Perfect for satisfying afternoon sweet tooths, last-minute guests, or when you just can’t wait another hour for the oven to preheat. The best part? Double the batter for two mugs—because some cravings are non-negotiable. Let’s make this cake.
Ingredients for 20 minute cake
Five simple ingredients plus two for the swirl—everything you need for mug cake perfection.
| Ingredient | Amount | Notes |
|---|---|---|
| All-Purpose Flour 🌾 | ¼ cup | Sifted for light texture |
| Granulated Sugar 🍚 | ¼ cup | White or light brown |
| Large Egg Yolks 🥚 | 2 whole | The secret to richness |
| Vanilla Extract 🍯 | 1 tbsp | Pure, not imitation |
| Unsalted Butter 🧈 | 2 tbsp | Melted, room temperature |
| Vanilla Sugar 🍯 | 2 tbsp | For swirl, or vanilla bean seeds |
| Whole Milk 🥛 | ¼ cup | Warm for best mixing |
| Powdered Sugar 🍚 | 2 tbsp | For dusting, optional |
The flour and sugar are your base, so grab King Arthur flour if you can—it’s lighter than most grocery brands. The egg yolks are non-negotiable here; they’re what gives this cake its bakery-style richness. I always use Whole Foods’ organic vanilla extract for that authentic flavor, but any good-quality brand works. The butter? Land O’Lakes unsalted is my go-to—it melts smoothly without any weird textures. For the vanilla sugar, you can make your own by mixing sugar with a scraped vanilla bean, or grab a jar from Trader Joe’s if you’re short on time.
No vanilla extract? Vanilla bean paste works in a pinch, or even a dash of vanilla bean seeds scraped from a pod. Out of powdered sugar? A quick trip to the store or a sprinkle of confectioners’ sugar from the baking aisle will do. The milk can be swapped for almond milk or oat milk, but warm it up first—cold milk makes the batter lumpy. For the butter, coconut oil is a great dairy-free swap, just make sure it’s melted. And if you’re feeling fancy, swap the vanilla sugar for a drizzle of caramel sauce or a spoonful of jam for the swirl.
The batter keeps for 2 days in the fridge, but honestly, it’s best made fresh. If you’re prepping ahead, store the dry ingredients (flour, sugar) and wet ingredients (egg yolks, milk, butter) separately, then mix just before microwaving. The vanilla sugar swirl? Make it the night before and store it in a small container—it keeps for 1 week. Pro tip: Use a microwave-safe mug with a handle—it’s worth the few extra bucks for safety. And if you’re making two mugs, double everything and use two mugs at once for even cooking.
Why You’ll Love This Recipe
- Ready in 20: I swear, the timer barely rings before you’re pulling this cake out—no waiting around for layers to set or frosting to chill. Just mix, bake, and serve while your coffee’s still warm.
- Butter-Sugar Magic: That rich, velvety crumb? Pure science—egg yolks and butter create this unfairly moist texture, while the vanilla ties it all together like a secret handshake. Honestly, I’ve tried fancier cakes, but this one’s the real MVP.
- No-Fuss Flexibility: Slice it for breakfast with jam, crumble it over ice cream, or pack it for lunch—this cake handles everything. My kids even sneak bites when they think I’m not looking. (Yes, even on a Tuesday night.)
- Budget Win: Five ingredients, zero specialty items, and it still tastes like you spent hours. The flour and sugar stretch far, and you’ll use up that butter before it goes bad. Practical? Absolutely. Delicious? Ridiculously so.
Step-by-step instructions for microwave mug magic with warm vanilla swirl
Here’s how to whip up this decadent cake in record time—no oven required!
🍳 Step 1: Melt Butter and Mix Wet Ingredients
Place the 2 tablespoons unsalted butter in a microwave-safe mug. Microwave on high for 20-30 seconds until completely melted. Stir in the 2 whole large egg yolks and 0.25 cup granulated sugar until fully combined. You’ll see the mixture turn pale and slightly thicken.
Add the 1 tablespoon vanilla extract and 0.25 cup warm whole milk (warm milk mixes better and creates a smoother batter). Stir vigorously for 10 seconds until everything is evenly incorporated. The batter should be smooth with no visible streaks of sugar.
👨🍳 Step 2: Fold in Dry Ingredients for Light Texture
Gently sprinkle the 0.25 cup sifted all-purpose flour over the wet mixture. Use a fork to fold it in from the bottom up, being careful not to overmix. You’re aiming for a thick, slightly lumpy batter—this prevents a dense cake. If it looks too thick, add 1 teaspoon milk to loosen it.
Here’s the thing—don’t worry if it doesn’t look perfect. The microwave magic will transform it into something amazing. The key is to keep mixing just until combined, about 15 seconds. Overmixing develops gluten and makes the cake tough instead of tender.
🔥 Step 3: Microwave for Perfect Cake Texture
Divide the batter evenly between two microwave-safe mugs (or use one mug if making a single serving). Microwave one mug on high for 60 seconds. You’ll see it puff up dramatically—this is normal! Immediately remove it and let it rest for 10 seconds before checking.
Use a toothpick inserted into the center. If it comes out clean, your cake is done. If not, microwave for 10-second intervals until it’s fully set. The cake should spring back slightly when touched and have a golden top. Don’t overcook—it’ll continue cooking slightly as it rests.
🥘 Step 4: Create the Vanilla Swirl
While the cake cools slightly, prepare the vanilla swirl. In a small bowl, mix the 2 tablespoons vanilla sugar with 1 teaspoon warm milk until it forms a thick paste. This creates those beautiful swirls you see in bakery cakes.
Use a butter knife to make a small slit in the center of each cake. Gently spoon the vanilla mixture into the slit, then swirl the knife through the cake to create marbled patterns. The heat from the cake will help the vanilla sugar melt slightly, creating those gorgeous golden swirls.
🍽️ Step 5: Dust and Serve Warm
Let the cakes cool for 1-2 minutes (they’ll be hot!). Dust the tops generously with 2 tablespoons powdered sugar using a fine-mesh sieve. This gives that bakery-fresh finish. For extra decadence, add a dollop of whipped cream or fresh berries.
Serve immediately while still warm. The contrast between the warm cake and cool powdered sugar is what makes this recipe so special. Each bite delivers moist cake with bursts of vanilla flavor from both the swirl and the extract. Perfect for a quick dessert or breakfast treat!
Pro Tips For Making 20 Minute Cake
- MELT THE BUTTER SLOWLY: I learned this the hard way—dumping cold butter into hot sugar makes a greasy mess that won’t emulsify properly. Instead, cut the butter into small cubes, then melt it just until it’s liquid but not foamy (about 2 minutes in a microwave-safe bowl). The cake batter will be smoother, and the texture won’t turn out like concrete.
- WHISK YOLKS UNTIL PALE: Those egg yolks need to go from yellow to actual pale yellow—almost translucent. I used to stop when they thickened, but that’s where the magic happens. Beat them for at least 2-3 minutes until they’re noticeably lighter and ribbon-like. This guarantees a tender crumb, not a dense one.
- SIFT THE FLOUR FIRST: Yes, even for a quick cake. Dumping flour straight from the bag packs it down, and you’ll end up with a cake that’s dry or gummy. Give it a quick sift into your bowl, then whisk out any lumps. (Pro move: Add a pinch of salt if your butter’s unsalted—trust me, you’ll taste the difference.)
- BAKE UNTIL SPRINGY: That toothpick test is overrated—this cake should bounce back slightly when pressed in the center, not come out clean. Oven temps vary, so start checking at 18 minutes. If the edges are golden but the middle’s still jiggly, tent with foil and let it set another 2 minutes. Overbaking turns this into a sad, dry brick.
Essential equipment for this dish
Microwave-Safe Mugs
Invest in two microwave-safe mugs with handles—I recommend Corelle Stoneware mugs or IKEA 365+ microwave-safe ceramic mugs. These distribute heat evenly and prevent cracking. Avoid glass mugs with metal trim or thin plastic, as they can warp or melt.
For best results, use mugs that hold at least 12 ounces—they provide enough room for the cake to rise properly without spilling over. 🔥
Mixing Tools
A small whisk or fork works best for mixing the batter. I prefer a stainless steel fork (like those from OXO Good Grips) because it won’t rust and handles the slightly sticky batter easily.
For the vanilla swirl, a small butter knife or offset spatula helps create clean lines. Keep these tools handy—they’re small but essential for achieving that bakery-style finish.
Measuring Cups
Use liquid measuring cups for the milk and melted butter, and dry measuring cups for the flour and sugar. I keep a Nalgene measuring set (with both liquid and dry cups) on hand—it’s compact and accurate.
For the 2 tablespoons vanilla sugar, a measuring spoon works perfectly. Precise measurements ensure the cake rises evenly and avoids a dense texture.
Fine-Mesh Sieve
A fine-mesh sieve is key for dusting the powdered sugar evenly over the cake. I use a stainless steel one (like Norpro’s) because it’s durable and creates a smooth, professional-looking finish. If you don’t have one, a clean coffee filter stretched over a spoon works in a pinch.
The goal is to create that light, snowy dusting that makes the cake look like it came from a bakery. ✨
Optional Extras
For extra flair, keep whipped cream (from an aerosol can or homemade) and fresh berries on hand. A piping bag (even a small plastic one) helps create elegant swirls of whipped cream.
If you’re feeling adventurous, a small saucepan** lets you make caramel or chocolate sauce for drizzling. These extras turn your mug cake into a showstopper without adding much effort.
Nutrition facts
Frequently asked questions
Can I make this mug cake without a microwave?
This recipe relies on microwave heat for its quick cooking time, but you can adapt it for the stovetop! Use a small, heavy-bottomed saucepan with a lid and cook the batter over low heat for 8-10 minutes, stirring gently every 2 minutes until set. The texture will be slightly denser, but still delicious. For best results, use a nonstick pan and keep the heat very low to avoid burning.
Why does my cake turn out dense instead of light?
Overmixing the batter is the #1 culprit! The gluten in flour develops when you stir too much, making the cake tough. Mix just until combined (about 15 seconds with a fork), and avoid using an electric mixer. Also, make sure your butter is fully melted and your milk is warm—cold ingredients can prevent proper rising. If the batter seems too thick, add 1 teaspoon milk to loosen it.
Can I use this recipe for a larger cake?
This recipe is designed for quick, individual mug cakes, but you can scale it up for a 9-inch round cake! Double all ingredients and bake in a greased, preheated 350°F (175°C) oven for 20-25 minutes. For the vanilla swirl, spread the mixture over the batter before baking. The texture will be slightly different (more traditional cake), but still moist and flavorful. Just be patient—it won’t be as fast as the microwave version!
What can I substitute if I don’t have vanilla sugar?
No vanilla sugar? No problem! Mix 2 tablespoons granulated sugar with ½ teaspoon vanilla extract for the swirl, or use 1 tablespoon vanilla bean paste mixed with 1 teaspoon milk. For a different flavor, try cinnamon sugar (2 tbsp sugar + ½ tsp cinnamon) or even chocolate chips melted into the batter. The key is keeping the mixture thick enough to swirl—add a splash of milk if needed.
How do I store leftover mug cake?
Store individual cakes in an airtight container at room temperature for up to 2 days, or refrigerate for 3-4 days. To reheat, microwave for 10-15 seconds to restore warmth and softness. For longer storage, freeze the cakes (without powdered sugar) for up to 1 month. Thaw overnight in the fridge—microwaving frozen cake makes it rubbery. Pro tip: Re-dust with powdered sugar after reheating for that fresh-baked look!

- 3lb Prime Rib Roast Recipe: Juicy Pink Center Guaranteed in 3 Hours - October 31, 2026
- 5 Spice Cake Recipe: Warmly Spiced Layers With Crunchy Top - October 31, 2026
- 1950’s Macaroni and Cheese Recipe: Nostalgic Creamy Cheese Sauce with Buttery Noodles - October 31, 2026