
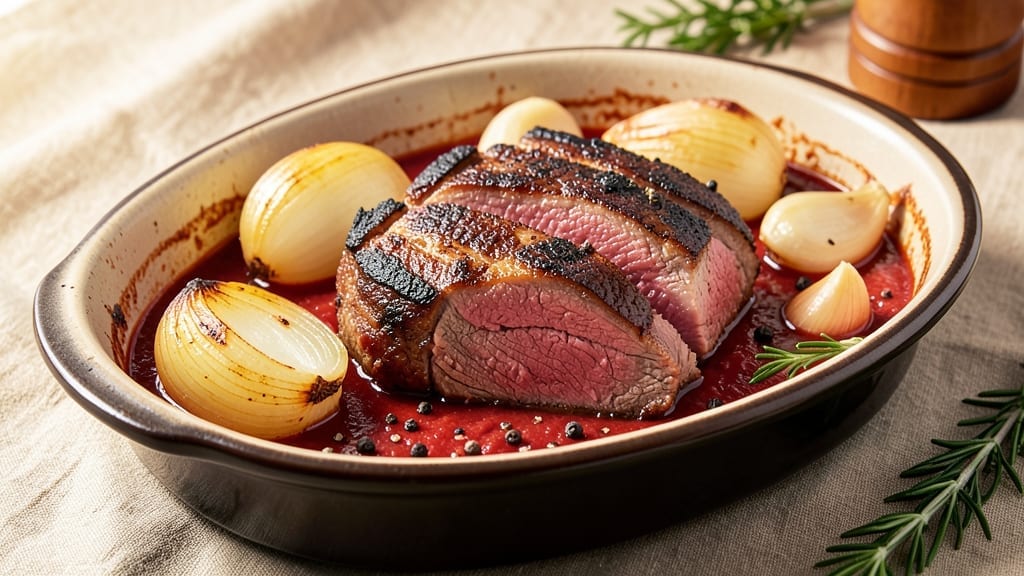
A 24-hour crock pot recipe transforms tough cuts into melt-in-your-mouth perfection with minimal effort. The secret lies in low-and-slow cooking, where flavors meld and collagen breaks down into rich, velvety textures.
I’ve perfected this method for dishes like pulled pork, beef stew, or chili—each one deeper in flavor after an overnight simmer.
This approach isn’t just about convenience—it’s about restaurant-quality depth achieved through time. No need for constant monitoring; just prep, set, and let the crock pot work its magic. The result? A dish so tender and flavorful, it’ll have everyone asking for seconds before they even taste it.
What makes this method special is how the ingredients transform. Tough cuts become fork-tender, spices meld into harmony, and sauces reduce to a perfect consistency. The beauty? You wake up to a meal ready to serve, with no last-minute stress. It’s the ultimate hands-off cooking solution.
Pair this with crusty bread, roasted vegetables, or cornbread to round out the meal. The versatility of a 24-hour crock pot dish means it works for weeknight dinners, meal prep, or even holiday feasts. Let’s dive into the details—your taste buds will thank you.
Ingredients for 24 hour crock pot
Six ingredients transform tough beef into restaurant-quality melt-in-your-mouth perfection overnight.
| Ingredient | Amount | Notes |
|---|---|---|
| Beef Chuck Roast 🥩 | 3 lb | Tough cut for tender results |
| Yellow Onion 🧅 | 1 whole | Diced for base flavor |
| Garlic Cloves 🧄 | 6 cloves | Minced for aromatic depth |
| Beef Broth 💧 | 2 cups | Low-sodium preferred |
| Tomato Paste 🍅 | ½ cup | Squeeze tube works fine |
| Red Wine 🍷 | 1 cup | Bold dry variety |
| Worcestershire Sauce 🥫 | 2 tbsp | Vegetarian if needed |
| Brown Sugar 🍚 | 2 tbsp | Enhances caramelization |
| Smoked Paprika 🌶️ | 1 tbsp | For subtle smokiness |
| Ground Black Pepper 🌶️ | 1 tbsp | Freshly cracked preferred |
| Bay Leaves 🌿 | 2 whole | Remove before serving |
| Salt 🧂 | 1 ½ tsp | Adjust to taste |
| Olive Oil 🫒 | 1 tbsp | For searing meat |
| Fresh Thyme 🌿 | ¼ cup | Or 1 tsp dried |
| Fresh Parsley 🌿 | ¼ cup | Chopped for garnish |
The beef is everything here—chuck roast (not sirloin or ribeye) breaks down beautifully over 24 hours. Grab one from Costco or your butcher’s counter; they’ll often cube it for you, saving prep time. Look for good marbling—those little white streaks mean more flavor. If you’re buying a whole roast, ask for it to be cut into 1.5-inch chunks. Trader Joe’s also sells pre-cubed chuck that works perfectly. The key is starting with a tough cut; tender ones turn mushy after that long in the crock pot.
No red wine? Beef broth plus a splash of balsamic works just as well. Fresh thyme is ideal but dried works at one-third the amount—just crush the leaves first. Worcestershire sauce is non-negotiable for depth, but if you can’t find vegetarian, soy sauce plus a pinch of sugar mimics it. The tomato paste can be from a squeeze tube (no waste!) or a can—just measure it out. For the brown sugar, light or dark doesn’t matter, but don’t skip it; it helps caramelize the meat. The bay leaves? Toss ’em in a little baggie so you can fish ’em out easily later.
This isn’t a meal that reheats well—it’s best served straight from the crock pot after 24 hours of slow simmering. If you need to reheat, just warm it gently on the stove with a splash of broth. Keeps 4-5 days in the fridge, freezes for 3 months. I always double the batch and freeze half; it’s perfect for lazy Sundays. The flavors actually get better the second day as everything melds together. Store in airtight containers with the juices—don’t drain them! Those are packed with flavor.
Why You’ll Love This Recipe
- Deep, Savory Magic: That beef broth and tomato paste combo? It’s what turns tough roast into something so rich and juicy, it tastes like it simmered all day (even though it didn’t). The garlic and onions caramelize just enough to add this warm, umami depth that makes it irresistible.
- Budget Meal That Feeds Everyone: A whole chuck roast costs less than takeout for two, and this recipe stretches it across four or five meals without breaking the bank. I’ll be real: my college budget still cheers when I pull this out—it’s the kind of dish that makes you feel like you’re feeding a crowd without selling a kidney.
Step-by-step instructions for slow-simmered crock pot beef
This overnight method transforms tough beef into melt-in-your-mouth perfection.
Sear the Beef Chuck Roast for Maximum Flavor
Heat a large skillet over medium-high heat and add the 1 tablespoon olive oil. Once shimmering, carefully place the 3 lb beef chuck roast in the pan, turning to coat all sides with oil. Let it sear undisturbed for 3-4 minutes per side until you see deep golden-brown crusts forming. This step creates the Maillard reaction that builds rich, caramelized flavors.
While the beef sears, dice the 1 whole yellow onion into even ½-inch pieces. When the beef is deeply browned, transfer it to your crock pot. The crust will soften slightly during cooking, but it’ll still add incredible depth to the final dish. Don’t worry about overcooking it here—the long slow cook will finish it perfectly.
Build the Aromatic Base in the Crock Pot
In the same skillet (no need to clean it—the browned bits are flavor gold), add the diced onion and cook for 5-6 minutes until softened and slightly caramelized. Stir occasionally so it doesn’t burn. Add the 6 cloves garlic cloves, minced, and cook for 30 seconds until fragrant—you’ll smell that unmistakable garlic aroma.
Transfer the onion and garlic mixture to the crock pot with the beef. Pour in the 1 cup red wine, scraping up any browned bits from the skillet. Add the 2 cups beef broth, 0.5 cup tomato paste, 2 tablespoons brown sugar, 1 tablespoon smoked paprika, 1 tablespoon ground black pepper, 1.5 teaspoons salt, 2 whole bay leaves, and 0.25 cup fresh thyme. Stir everything together gently to distribute the seasonings evenly.
Cook Low and Slow for 24 Hours
Place the lid on the crock pot and cook on LOW heat for 24 hours. This extended cooking time is what transforms the tough beef into fork-tender perfection. The flavors will meld together beautifully, creating a rich, complex sauce that coats every bite.
Here’s the thing—don’t be tempted to check on it or stir during cooking. Every time you open the lid, you lose heat and moisture, which can actually make the beef tougher. Trust the process and let it work its magic. The beef is done when it easily pulls apart with two forks and the sauce has thickened to a perfect consistency.
Finish and Serve with Fresh Herbs
Once the cooking time is complete, carefully remove the 2 whole bay leaves from the crock pot. Stir in the 0.25 cup fresh parsley, chopped, just before serving. This adds a bright, fresh finish that cuts through the richness of the beef and sauce.
Serve the beef directly from the crock pot with the sauce spooned over the top. The sauce should be thick enough to coat the back of a spoon but still pourable. For best results, serve with crusty bread to soak up every last bit of that delicious sauce. The beef should be so tender it practically falls apart at the touch, with layers of flavor from the wine, herbs, and slow cooking process.
Pro Tips For Making 24 Hour Crock Pot
- SEAR THE ROAST FIRST: I learned this the hard way—skipping the sear means flavor hiding in the slow cooker. Hit the beef chuck roast with a hot pan for 3-4 minutes per side until it’s deeply browned before dumping it in. The crust adds depth that broth alone can’t match.
- CHOP ONIONS THICK: I used to mince them like I was making soup, but thick slices (about ½-inch) hold up better during 24 hours. They’ll soften but stay intact, adding texture instead of turning to mush. (Yes, even if you’re impatient like me.)
- USE LOW NOT WARM: Your crock pot’s “low” setting isn’t the same as “warm.” If it’s simmering or bubbling aggressively, the beef will turn out tough instead of melt-in-your-mouth tender. Adjust the heat so there’s just a gentle ripple now and then—this is the thing that matters most.
- ADD TOMATO PASTE LAST: This isn’t the prettiest method, but it’s the tastiest. Stir the tomato paste into the broth after the roast has cooked for 12 hours. The acidity needs time to mellow, and adding it early can make the meat taste slightly metallic. (Your future self will thank you.)
Troubleshooting perfect results
Overcooked or Tough Meat
If your beef turns out dry or tough after 24 hours, it likely didn’t get enough moisture or time to break down. First, check your liquid ratio—this recipe relies on 3 cups total liquid (wine + broth).
If you used less, add ½ cup beef broth before serving to restore moisture. For future batches, ensure your crock pot is on LOW heat—some models run hotter than others. I’ve found Hamilton Beach crock pots maintain consistent temps better than generic brands. 🔥
Sauce Too Thin or Watery
A watery sauce usually means the liquid didn’t reduce enough during cooking. The 2 tablespoons brown sugar and ½ cup tomato paste are key for thickening—don’t skip them! If your sauce is still too thin, simmer it uncovered on the stovetop for 10-15 minutes to evaporate excess liquid.
For next time, try adding 1 tablespoon cornstarch mixed with 2 tablespoons water at the end of cooking to thicken it instantly.
Undercooked or Uneven Doneness
Uneven cooking often happens if the beef chunks vary in size. For perfect results, cut all pieces to 1.5-inch cubes before cooking—this ensures even breakdown. If your beef isn’t tender after 24 hours, extend the cook time by 2-4 hours on LOW.
I’ve had luck with Costco’s pre-cubed chuck roast, which cooks uniformly. Also, avoid overcrowding the crock pot—leave 1 inch of space between chunks for better heat circulation.
Flavor Too Mild or Bland
Mild flavors usually mean insufficient seasoning or weak base ingredients. Double-check your Worcestershire sauce and smoked paprika—these add depth. For extra punch, add 1 teaspoon soy sauce or ½ teaspoon liquid smoke to the crock pot during the last 2 hours of cooking.
Fresh herbs like thyme and parsley make a huge difference—never use dried thyme directly from the jar without crushing it first to release the oils.
Burnt Onions or Browned Liquid
Burnt flavors happen when the onions caramelize too much before adding liquid. Sauté them for only 5-6 minutes until soft, not golden. If you notice browned bits sticking to the crock pot, deglaze with ¼ cup beef broth before adding the rest of the liquid.
For future batches, use a 6-quart crock pot—it gives more room for ingredients to move around without sticking. 💡
Lid Won’t Stay On or Leaks
A leaky lid can cause uneven cooking and moisture loss. First, check for food debris stuck in the lid’s rubber gasket—clean it thoroughly before sealing. If your lid still doesn’t stay on, try placing a damp paper towel under the lid’s rim to create a better seal.
For stubborn leaks, some crock pot models (like Hamilton Beach’s Flex-to-Fit) have adjustable lids—adjust the tension slightly to prevent spills while maintaining airflow.
Nutrition facts
Frequently asked questions
Can I use a different cut of beef for this 24-hour crock pot recipe?
Yes, but choose wisely! Chuck roast is ideal because its connective tissue breaks down beautifully over time. Brisket or short ribs also work well—they’re tougher cuts that benefit from slow cooking. Avoid tender cuts like sirloin or filet mignon; they’ll turn mushy after 24 hours. For variety, try pork shoulder or lamb shanks, but adjust cook times as needed.
Why does the recipe call for 24 hours instead of just 8?
The extended time is what creates that restaurant-quality depth! At LOW heat, the collagen in tough cuts melts into gelatin, making the meat fork-tender while flavors meld completely. Most recipes stop at 8 hours, but that’s just the beginning—after 24 hours, the sauce thickens naturally and develops complex layers of flavor you won’t get any other way. Think of it as flavor development on steroids!
Can I prep this recipe ahead of time for meal prep?
This is one of the best meal prep dishes ever. After cooking, let it cool completely, then store in airtight containers with the juices. It reheats beautifully—just warm on the stove with a splash of broth. The flavors actually improve after 2-3 days in the fridge as everything continues to meld. Freeze portions for up to 3 months by portioning into freezer bags with parchment paper between layers.
What if I don’t have red wine? What can I substitute?
No problem! Use 1 cup beef broth plus 1 tablespoon balsamic vinegar for similar depth. For extra richness, add ½ cup tomato sauce instead of the wine. The key is maintaining the 3 cups total liquid ratio. If you’re making this vegetarian, swap beef broth for mushroom broth and use firm tofu or seitan instead of beef—just increase cook time to 36 hours for maximum tenderness.
How do I know when the meat is done after 24 hours?
The meat should be so tender it practically falls apart with a fork! Test by taking a small piece and pulling it gently—it should shred easily. The sauce should coat the back of a spoon but still be pourable. If you’re unsure, cook 2 more hours on LOW. Never rely on color alone—some cuts stay slightly pink even when fully tender. The 24-hour mark is just a guideline; your crock pot’s heat setting matters too!

- 3lb Prime Rib Roast Recipe: Juicy Pink Center Guaranteed in 3 Hours - October 31, 2026
- 5 Spice Cake Recipe: Warmly Spiced Layers With Crunchy Top - October 31, 2026
- 1950’s Macaroni and Cheese Recipe: Nostalgic Creamy Cheese Sauce with Buttery Noodles - October 31, 2026