
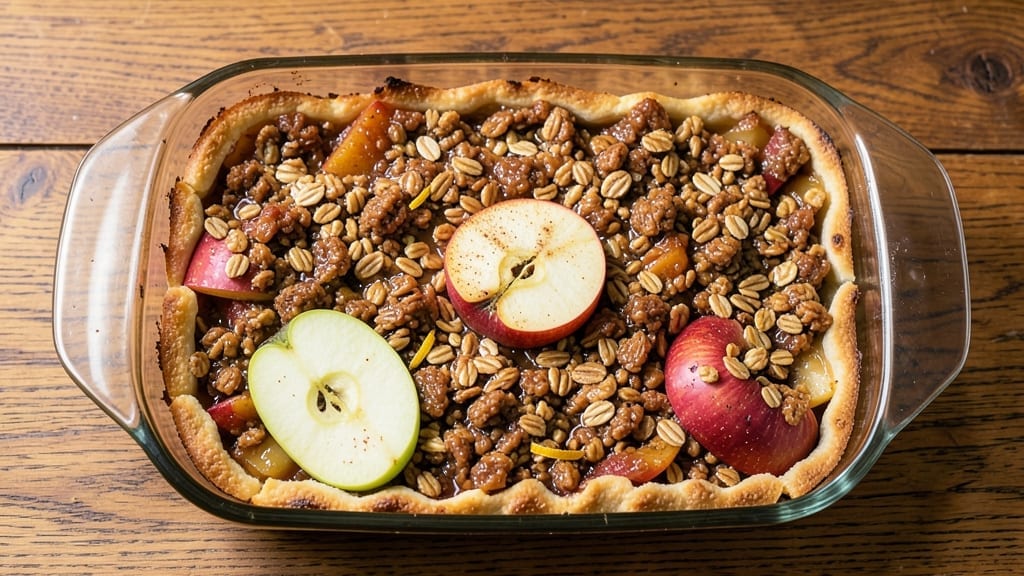
This 3 apple crisp recipe delivers the perfect balance of warm, spiced apples and a buttery, nutty streusel topping that becomes irresistibly crispy at the edges.
After testing countless variations, I’ve perfected a method that yields tender fruit filling and a topping with just the right crunch—no overbaked or soggy results here. The secret lies in the right apple combination and a few key preparation steps that transform this classic dessert into something truly special.
The recipe starts with a mix of tart and sweet apples—think Granny Smith for acidity and Honeycrisp for natural sweetness—tossed with cinnamon, brown sugar, and a touch of lemon juice to keep the filling bright.
The topping combines old-fashioned oats, flour, butter, and spices for that signature streusel texture, while a pinch of salt enhances every flavor. Baking at 375°F ensures the apples soften perfectly while the topping achieves that golden, caramelized crunch.
What you’ll end up with is a dessert that’s warm, comforting, and impossibly delicious—the kind of dish that makes fall feel like a cozy embrace.
The apples release their juices, creating a fragrant filling that’s just thick enough to hold its shape, while the streusel topping turns into clusters of buttery, spiced crunch. Serve it warm with a scoop of vanilla ice cream or a dollop of whipped cream for the ultimate dessert experience.
This recipe is foolproof and adaptable—swap in gluten-free oats or almond flour for a dietary-friendly version, or experiment with spices like cardamom or nutmeg for a twist on tradition.
The best part? It’s a crowd-pleaser that feels like a homemade hug, perfect for family dinners, potlucks, or a simple treat when you crave something sweet and satisfying.
Ingredients for 3 apple crisp
Six ingredients transform into the coziest dessert—warm apples hugged by buttery crunch.
| Ingredient | Amount | Notes |
|---|---|---|
| Granny Smith Apples 🍎 | 2 lb | Peeled, cored, sliced thin |
| Honeycrisp Apples 🍎 | 2 lb | Peeled, cored, sliced thin |
| Light Brown Sugar 🍚 | 1 ½ cups | Packed, not leveled |
| Old-Fashioned Rolled Oats 🌾 | 2 cups | Not quick oats |
| All-Purpose Flour 🌾 | 1 cup | Spooning method for accuracy |
| Cold Unsalted Butter 🧈 | 1 cup | Cut into cubes, don't melt |
| Ground Cinnamon 🌿 | 1 ½ tbsp | Freshly ground preferred |
| Granulated Sugar 🍚 | ½ cup | For extra crunch |
| Salt 🧂 | ½ tsp | Kosher or sea salt |
| Lemon Juice 🍋 | 2 tbsp | Freshly squeezed |
| Vanilla Extract 🥛 | 1 tsp | Pure vanilla preferred |
| Chopped Walnuts 🥜 | ½ cup | Optional for extra crunch |
The apples are everything here. Granny Smith for that bright tang and Honeycrisp for natural sweetness—don’t skimp on quality. I always grab these at Whole Foods or my local farmers market (they’re seasonal, so plan ahead!). If you can’t find Honeycrisp, Fuji or Gala work in a pinch. Slice them thin—about 1/4-inch thick—and toss immediately with lemon juice to keep them from browning. The butter matters too: cold cubes create flaky streusel clusters, so don’t melt it ahead of time. Pro tip: use a mix of brown and granulated sugar in the topping—brown for moisture, granulated for that signature crunch.
No old-fashioned oats? Quick oats work too, but they’ll be slightly softer. Short on walnuts? Pecans or almonds add a different buttery crunch. The cinnamon is non-negotiable, but if you want to get fancy, add a pinch of cardamom or nutmeg to the filling. For a gluten-free version, swap the flour for almond flour or gluten-free oat flour. And if you’re worried about soggy bottoms, toss the sliced apples with a bit of cornstarch before baking. Trust me, it makes all the difference.
This dessert tastes even better the next day, so make a double batch if you can. Store leftovers in an airtight container at room temperature for up to 3 days, or freeze the whole crisp (unbaked or baked) for up to 3 months. To reheat, wrap slices in foil and warm at 350°F for 10 minutes. The best part? It reheats beautifully—perfect for a quick dessert when you’re craving something warm and comforting. Serve with vanilla ice cream or whipped cream for the ultimate fall treat.
Why You’ll Love This Recipe
- No-Fuss Assembly: I swear by this recipe because it’s the kind of dessert that feels like a hug—just slice, toss, and bake. The apples barely need peeling (I usually leave the skins on for texture), and the topping comes together in under 5 minutes with whatever’s in my pantry.
- Tart-Sweet Magic: Granny Smiths keep it bright, while Honeycrisp adds that melt-in-your-mouth juiciness. The brown sugar caramelizes into a sticky, buttery crust that’s ridiculously good—like a cross between a crunchy cookie and a warm hug.
- Weeknight or Guest Night: Make it for yourself on a lazy Sunday or impress company with zero stress. It reheats beautifully (microwave or oven, no judgment), so I often bake two pans—one for now, one for later. (Yes, even on a Tuesday night.)
- Budget-Friendly Luxury: This recipe costs me about $8 for ingredients that last weeks. The oats and flour stretch far, and apples stay fresh longer than most produce. Plus, it’s the kind of dessert that makes people think you slaved over it—when really, you just mixed and waited.
Step-by-step instructions for warm spiced apples with nutty streusel crunch
Here’s how to create the perfect balance of tender apples and crispy streusel topping.
Prepare the Apple Filling
In a large bowl, combine the peeled and sliced 2 lb Granny Smith Apples and 2 lb Honeycrisp Apples. The Granny Smith adds tartness while the Honeycrisp provides sweetness and texture. Sprinkle the apples with 1.5 cups Light Brown Sugar, 1.5 tbsp Ground Cinnamon, and 0.5 tsp Salt. Toss gently until the apples are evenly coated with the spiced sugar mixture.
Add the 2 tbsp Lemon Juice and 1 tsp Vanilla Extract to the bowl. The lemon juice brightens the apples and prevents browning, while the vanilla enhances the warm spice flavors. Mix one final time to ensure everything is well combined. Transfer the apple mixture to a 9×13-inch baking dish and spread it out evenly in a single layer. This even distribution ensures the apples cook uniformly and develop that perfect caramelized texture.
Make the Streusel Topping
In a separate medium bowl, cut the 1 cup Cold Unsalted Butter into small cubes. This keeps the butter cold and prevents it from melting prematurely during mixing. Add the 2 cups Old-Fashioned Rolled Oats, 1 cup All-Purpose Flour, 0.5 cup Granulated Sugar, and 0.5 cup Chopped Walnuts to the bowl. If using walnuts, they’ll add a delightful crunch to every bite.
Using a pastry cutter, fork, or your fingers, work the butter into the dry ingredients until the mixture resembles coarse crumbs with some pea-sized butter pieces remaining. This texture is crucial—it creates pockets of butter that melt during baking, creating that signature crispy streusel topping. If the mixture seems too dry, add 1-2 teaspoons of ice water to help bind it together without making it too wet.
Assemble and Bake for Perfect Crisp
Preheat your oven to 375°F and let it come to temperature while you prepare the dish. Sprinkle the streusel topping evenly over the apple mixture, pressing down gently with your fingers or the back of a spoon. This ensures good contact between the filling and topping, which helps create a crispy bottom layer. Bake for 35-40 minutes until the apples are tender and the streusel is golden brown and bubbly around the edges.
Here’s the thing—don’t overbake. The apples should be soft enough to pierce easily with a fork, but still hold their shape. The streusel should be golden brown with some crispy spots, not burnt. If you’re unsure, check at the 30-minute mark and continue baking until you reach that perfect balance of tender and crispy. The warm, spiced aroma filling your kitchen will be worth the wait!
Cool and Serve Warm
Remove the apple crisp from the oven and let it cool for 10-15 minutes before serving. This resting period allows the juices to redistribute throughout the dish, preventing them from pooling at the bottom. The streusel topping will firm up slightly as it cools, giving you that perfect contrast between warm, soft apples and crispy topping.
Serve warm with a scoop of vanilla ice cream or a dollop of whipped cream. The contrast of warm crisp with cold ice cream creates an experience that’s simply irresistible. Real talk: this dish tastes even better the second day, so if you have leftovers, store them in an airtight container and reheat in the oven at 350°F for 10-15 minutes until heated through. The crispy topping will remind you why you made this classic dessert in the first place!
Pro Tips For Making 3 Apple Crisp
- Prep Apples Evenly: Cut Granny Smiths and Honeycrisp into the same size chunks—about 1-inch pieces. I learned this the hard way: uneven apples mean some cook to mush while others stay crunchy. A sharp knife and steady hand make this faster than you’d think.
- Sweat the Oats: Toast your rolled oats in a dry skillet for 3–4 minutes before mixing with butter and sugar. This deepens their flavor and prevents a bland topping. (Yes, even if you’re impatient like me.)
- Skip the Overmixing: Stir the topping ingredients just until combined—lumpy is fine. Overworking the flour-butter mix makes the crisp dense instead of crispy. Fold in the oats gently; they’re fragile.
- Bake Until Golden: Let the crisp sit 10 minutes after pulling it from the oven—this guarantees a caramelized top. If the edges brown too fast, tent loosely with foil halfway through. Patience here makes all the difference.
Make-ahead tips for this dish
Prep Ahead Strategy
Assemble this apple crisp up to 24 hours in advance and store it in an airtight container in the refrigerator. The flavors deepen overnight, and the apples release more juice, creating a richer filling.
I always prep mine the night before—just bake straight from the fridge at 375°F for 45-50 minutes (add 5-10 minutes if cold). The extra time ensures the topping gets perfectly crispy even when starting cold. 🍎
Freezer-Friendly Options
For maximum convenience, freeze the unbaked crisp in a 9×13-inch baking dish (covered tightly with plastic wrap and foil) for up to 3 months. When ready to bake, thaw in the fridge overnight, then bake as directed.
For a quick shortcut, bake straight from frozen at 375°F for 50-55 minutes, covering loosely with foil for the first 30 minutes to prevent over-browning. The texture stays perfect—just slightly softer than fresh-baked!
Portion Control Tips
Divide the baked crisp into individual servings in ramekins or small baking dishes before freezing. This lets you reheat just what you need—perfect for single servings. Reheat covered at 350°F for 10-12 minutes until the topping is crispy again.
I keep a stash of these in my freezer for lazy weeknights when I crave something comforting without the effort of baking from scratch. 🥧
Make-Ahead Topping
Prepare the streusel topping in advance and store it in a sealed container in the fridge for up to 5 days. Keep the butter cold and mix everything together (including the walnuts) so you can just sprinkle and bake later.
This is a game-changer for busy mornings—I often make the topping while watching TV the night before. Just toss it over prepped apples and bake! For extra convenience, pre-measure all the dry ingredients in a jar and store them separately. 🌾
Apple Prep Shortcut
Skip peeling the apples if you’re short on time—just scrub them well and slice thinly. The skins add texture and nutrients, and most people won’t notice the difference. I also like to use a mandoline slicer for perfectly even slices, but a sharp chef’s knife works just as well.
Toss the sliced apples with 1 tbsp lemon juice immediately to prevent browning while you prep the rest. This keeps your workspace tidy and saves cleanup time. 🍋
Double Batch Hack
Make two crisp pans at once by doubling the recipe and using two 9×13-inch dishes. Bake them side by side on the middle rack for even heat distribution. This is perfect for gatherings—just assemble both pans simultaneously.
Store one in the fridge and freeze the other for future use. Pro tip: Use a light-colored baking sheet underneath each dish to catch any spills and make cleanup effortless. 💡
Nutrition facts
Frequently asked questions
Can I use frozen apples instead of fresh?
Yes, but thaw and drain them first! Use 4 cups frozen unsweetened apples (about 2 lbs equivalent), thawed overnight in the fridge. Drain well to remove excess moisture, then pat dry with a paper towel. This prevents a soggy topping. For best results, avoid pre-sliced frozen apples—they tend to be mushier.
How do I make this gluten-free?
Swap the all-purpose flour for a 1:1 gluten-free flour blend and use certified gluten-free oats. For extra binding, add 1 tbsp cornstarch to the topping. The texture will be slightly different but still delicious. Always check labels—some oats are processed in wheat facilities.
Why did my streusel turn out greasy?
Overmixing the topping or using melted butter creates greasy results. Keep the butter cold in pea-sized pieces and mix just until combined. If the mixture seems too dry, add 1 tsp ice water at a time. Also ensure your oven isn’t too hot—375°F is perfect for even browning.
Can I bake this in a different pan?
Yes, but adjust baking time. A 9-inch round pan will take about 40-45 minutes, while an 8×8-inch pan may need 35-40 minutes. Use a metal pan for even heat distribution. If using glass, add 5 minutes to the baking time. Always check for doneness with a fork—apples should be tender but hold their shape.
What’s the best way to store leftovers?
Cool completely, then store in an airtight container at room temperature for up to 3 days. For longer storage, freeze in portions. To reheat, cover with foil and warm at 350°F for 10-15 minutes**. The topping will crisp up again—just like fresh!

- 6 Egg Cake Recipe with Oil: Light as Air With Buttery Moisture - October 4, 2026
- 4 Bean Casserole Recipe: One-Pan Heartiness With Smoky Paprika Depth - October 4, 2026
- 3-Ingredient Keto Mug Cake Recipe: Microwave Magic in 2 Minutes - October 4, 2026