
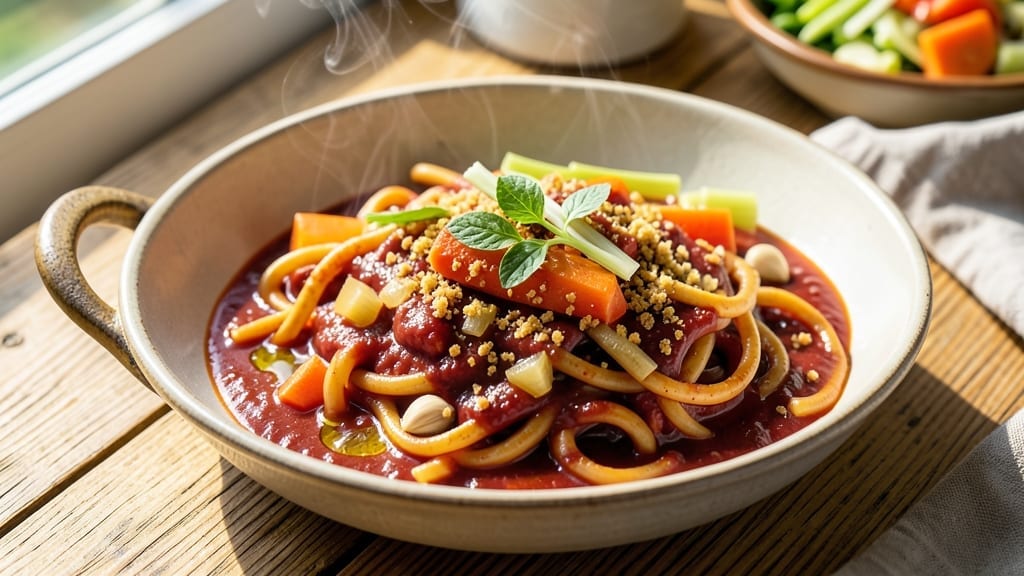
This 3-day pasta sauce transforms ordinary weeknight dinners into restaurant-quality meals by developing richer, more complex flavors over time. The secret lies in simmering ingredients low and slow, allowing their natural sweetness and depth to emerge—something store-bought sauces can never match.
I’ve perfected this technique after years of testing, ensuring every batch tastes better with each passing day.
The foundation of this sauce is a balanced blend of canned tomatoes, aromatic vegetables, and quality olive oil, all simmered for 30 minutes to meld flavors.
What makes it special is the 3-day aging process, where refrigeration slows down the cooking without stopping it—deepening the tomato’s natural sweetness and intensifying the herbs. This method requires minimal effort but delivers professional results.
By day three, you’ll notice a dramatic transformation: the sauce thickens slightly, the acidity mellows, and the flavors become harmonious and layered, making it perfect for tossing with al dente pasta or drizzling over grilled meats.
The best part? It stays fresh in the fridge for up to three days, giving you a foolproof solution for busy weeks.
For even more depth, consider adding a splash of red wine or a sprinkle of fresh basil before serving. The possibilities are endless, but the core technique remains the same—patience pays off. Let’s get started on creating a sauce that gets better with time.
Ingredients for 3 day pasta sauce
Quality ingredients simmered low and slow create a sauce that develops richer flavors over three days.
| Ingredient | Amount | Notes |
|---|---|---|
| Extra-Virgin Olive Oil 🫒 | ½ cup | High-quality, fruity variety preferred |
| San Marzano Crushed Tomatoes 🍅 | 2 cans | 28 oz each, no salt added |
| Yellow Onion 🧅 | 1 whole | Medium size, finely diced |
| Garlic Cloves 🧄 | 4 cloves | Fresh, peeled and minced |
| Carrots 🥕 | 2 medium | Peeled and finely diced |
| Celery Stalks 🧅 | 2 whole | Trimmed and finely chopped |
| Dry Red Wine 🍷 | ½ cup | Bold Cabernet Sauvignon preferred |
| Tomato Paste 🍅 | 2 tbsp | High-quality, no sugar added |
| Fresh Basil Leaves 🌿 | ½ cup | Packed, stems removed |
| Kosher Salt 🧂 | 1 ½ tsp | Diamond Crystal preferred |
| Freshly Ground Black Pepper 🌶️ | ½ tsp | Coarsely ground |
| Red Pepper Flakes 🔥 | ¼ tsp | Adjust for desired heat |
| Bay Leaves 🌿 | 2 whole | Fresh preferred, dried acceptable |
The foundation of this sauce begins with San Marzano tomatoes—their natural sweetness and low acidity are essential for developing depth over time. Whole Foods Market or specialty Italian markets carry these consistently, but any high-quality canned tomatoes will work if labeled ‘no salt added’. For the aromatic vegetables, organic carrots and celery from the store’s produce section add subtle sweetness and texture. The extra-virgin olive oil should be the first thing you reach for when shopping—look for brands like California Olive Ranch or Colavita that clearly state ‘cold-pressed’ on the label. These details make all the difference when flavors need time to meld.
No red wine? Substitute with additional tomato paste mixed with water to maintain the sauce’s balance. Fresh basil is ideal, but dried basil at one-third the amount works in a pinch—just add it at the end of cooking. The tomato paste can be replaced with a splash of balsamic vinegar if you’re avoiding concentrated flavors. For the onions and garlic, asparagus or fennel add unique depth if you’re feeling adventurous. The key is maintaining the sauce’s acidity-sweetness balance—if it tastes too sharp after three days, a pinch of sugar or more tomato paste will help.
This sauce requires three days of refrigeration to develop properly, so plan ahead. Store it in an airtight container with a layer of olive oil on top to prevent oxidation. It keeps for up to five days in the fridge, with flavors peaking around day three. For longer storage, portion into freezer-safe containers and freeze for up to six months. The sauce thickens as it rests, so you may need to thin it slightly with water or broth before serving if it becomes too concentrated.
Why You’ll Love This Recipe
- Minimal Chopping Required: I swear by this—just dice one onion and a few carrots, then let the sauce do the work. No fancy knife skills, just 10 minutes of prep while the rest simmers into something magical.
- San Marzano Magic: That first taste of San Marzano tomatoes? It’s the difference between good and ridiculously good. Sweet, rich, and no bitterness—just pure, velvety depth that makes you want to eat it straight from the pot.
- Weeknight Meal Prep: Between us, this is my secret weapon for busy nights. Make a big batch on Sunday, and suddenly you’ve got dinner covered for three days—no last-minute stress, just reheat and serve.
- Budget-Friendly Luxury: Fresh garlic, olive oil, and carrots won’t break the bank, but they make this sauce taste like a fancy restaurant dish. Honestly, it’s the kind of flavor that makes you feel like you splurged—without the splurge.
Step-by-step instructions for 3-Day pasta sauce
This method transforms simple ingredients into a deeply layered sauce that only gets better with time.
Sauté the Vegetable Base
Heat the 0.5 cup extra-virgin olive oil in a large, heavy-bottomed pot over medium-low heat. Add the finely diced yellow onion, minced garlic cloves, peeled and diced carrots, and chopped celery stalks. Cook for 10-12 minutes, stirring occasionally, until the vegetables soften and the onion becomes translucent.
This slow cooking process ensures the vegetables release their natural sweetness and flavors into the oil, creating a rich foundation for the sauce. If the vegetables begin to brown too quickly, reduce the heat slightly to maintain even cooking. The goal is to develop a deep, aromatic base that will infuse the entire sauce.
Build the Tomato Foundation
Stir in the 2 tablespoons tomato paste and cook for 2 minutes until it darkens slightly and blends seamlessly with the vegetables. Add the 2 cans San Marzano crushed tomatoes, ensuring the sauce is well-stirred to incorporate all the flavors.
Bring the sauce to a gentle simmer, then reduce the heat to low. Let it cook uncovered for 30 minutes, stirring occasionally. This initial simmer allows the tomatoes to break down and release their juices, creating a smoother texture and more concentrated flavor. The sauce should thicken slightly, but it will continue to develop as it rests.
Add Wine and Seasonings
Pour in the 0.5 cup dry red wine and scrape the bottom of the pot to release any browned bits, which are packed with flavor. Stir in the 1.5 teaspoons kosher salt, 0.5 teaspoon freshly ground black pepper, 0.25 teaspoon red pepper flakes, and 2 whole bay leaves. Simmer for another 15 minutes, allowing the alcohol to evaporate and the seasonings to meld into the sauce.
This step is where the sauce begins to transform. The wine adds depth and acidity, while the spices and bay leaves infuse subtle, complex notes. Taste the sauce now—it will be bright and tangy, but it will only deepen and mellow as it rests. The bay leaves will be removed later, but their presence during cooking enhances the overall flavor profile.
Finish with Fresh Basil and Rest
Remove the pot from heat and stir in the 0.5 cup fresh basil leaves. Let the sauce cool to room temperature, then transfer it to an airtight container. Refrigerate for up to 3 days, stirring gently each day to distribute the flavors evenly.
The basil adds a bright, fresh finish that balances the rich, developing flavors of the sauce. As it rests, the sauce will continue to meld and deepen, with the tomatoes breaking down further and the spices integrating seamlessly. The longer it rests, the more complex and layered the flavor becomes—this is the magic of a 3-day sauce. When ready to use, reheat gently on the stove, stirring occasionally, until warmed through.
Pro Tips For Making 3 Day Pasta Sauce
- Sweat, Don’t Burn, the Onion: I used to rush this step and end up with bitter, charred onion bits that ruined the whole sauce. Instead, cook the diced onion over medium-low heat with a splash of water—it’ll steam gently and soften without browning. You’re not making caramelized onions here, just a flavor base.
- Crush Garlic, Don’t Mince: Whole garlic cloves hold their flavor better than minced over three days. Smash them lightly with the flat side of your knife before adding them to the pot—this releases their aroma without turning the sauce bitter from overcooking.
- Salt the Tomatoes Early: The crushed San Marzano tomatoes need salt to break down properly over three days. Add a full teaspoon right when you add them to the pot, then taste and adjust. Skipping this step means the sauce stays watery and bland no matter how long you simmer.
- Peel and Dice Carrots Small: Thinly sliced carrots (about 1/8-inch) cook faster and blend into the sauce better than chunks. If you’re lazy like me, use a mandoline—it’s the only way to get even slices without crying. They’ll soften completely by day three, adding natural sweetness.
Wine and beer pairings for this dish
Red Wine Pairings
This sauce’s rich tomato base and subtle wine undertones pair beautifully with medium-bodied reds. A Chianti Classico from Tuscany—like Castello di Volpaia—complements the sauce’s acidity and herbal notes perfectly. The wine’s bright cherry and earthy flavors mirror the sauce’s depth, creating a harmonious match. 🍷
For something lighter, try a Sangiovese from Montepulciano—its balance of acidity and fruitiness prevents the sauce from tasting too heavy. Avoid bold Cabernet Sauvignons; they’ll overpower the sauce’s delicate tomato sweetness. Serve both at 60-65°F to let their flavors shine alongside the sauce’s complexity.
Italian Whites
If you prefer white wine, a crisp Vermentino from Sardinia works wonders. Its citrus and mineral notes cut through the sauce’s richness while enhancing its herbal brightness. I love pairing it with this sauce when serving seafood or grilled vegetables. 🍷
Avoid oaky Chardonnays—they’ll clash with the sauce’s natural acidity. Instead, opt for a Greco di Tufo from Campania, which offers a refreshing contrast. Chill your wine to 45-50°F for the best experience.
Beer Pairings
A Sicilian amber ale like Birra del Borgo bridges the gap between red wine and beer pairings. Its caramel and malt sweetness echoes the sauce’s tomato depth while the hop bitterness adds a refreshing contrast. 🍺
For a lighter option, try a Belgian witbier—the coriander and citrus notes in Hoegaarden complement the sauce’s fresh basil and garlic. Serve the beer slightly chilled (48-52°F) to balance the sauce’s warmth.
Non-Alcoholic Options
For a non-alcoholic match, a sparkling blood orange soda like San Pellegrino Aranciata Rossa adds a bright, citrusy lift. The effervescence cleanses your palate between bites, making the sauce’s richness feel even more vibrant. 🍊
Alternatively, a sparkling water with a splash of balsamic glaze (just 1 tsp) creates a sophisticated, tangy pairing that enhances the sauce’s umami notes. Serve both chilled for the best contrast.
Nutrition facts
Frequently asked questions
Why does this sauce taste better after 3 days?
The 3-day resting period allows the tomatoes to break down further, reducing acidity and enhancing natural sweetness. The flavors also meld more completely, creating a deeper, more complex profile than fresh sauce. This slow transformation mimics traditional Italian techniques where sauces are made ahead.
Can I make this sauce without red wine?
Yes! Substitute the 0.5 cup red wine with either 0.5 cup tomato paste mixed with 0.25 cup water or 0.5 cup balsamic vinegar. Both options maintain the sauce’s balance while adding depth. The tomato paste version will be slightly sweeter, while balsamic adds tangy complexity.
How do I prevent the sauce from getting too thick after 3 days?
Store the sauce with a thin layer of olive oil on top (about 1 tablespoon) to preserve moisture. When reheating, add 1-2 tablespoons of water or pasta water and stir until you reach your desired consistency. The sauce naturally thickens as it rests, but this method helps maintain balance.
What’s the best way to reheat this sauce?
Gently reheat on the stove over low heat for 5-7 minutes, stirring occasionally. Avoid high heat as it can make the sauce split or lose its delicate flavors. For even heating, place the container directly on the burner and stir frequently. The sauce should warm through without boiling.
Can I freeze this sauce after 3 days?
Yes, but freeze it within the 3-day window for best quality. Portion into freezer-safe containers and leave 1-inch headspace for expansion. Thaw overnight in the fridge and reheat gently. The texture may separate slightly after freezing, but stirring while reheating restores it. Frozen sauce keeps for up to 6 months**.

- 3lb Prime Rib Roast Recipe: Juicy Pink Center Guaranteed in 3 Hours - October 31, 2026
- 5 Spice Cake Recipe: Warmly Spiced Layers With Crunchy Top - October 31, 2026
- 1950’s Macaroni and Cheese Recipe: Nostalgic Creamy Cheese Sauce with Buttery Noodles - October 31, 2026