
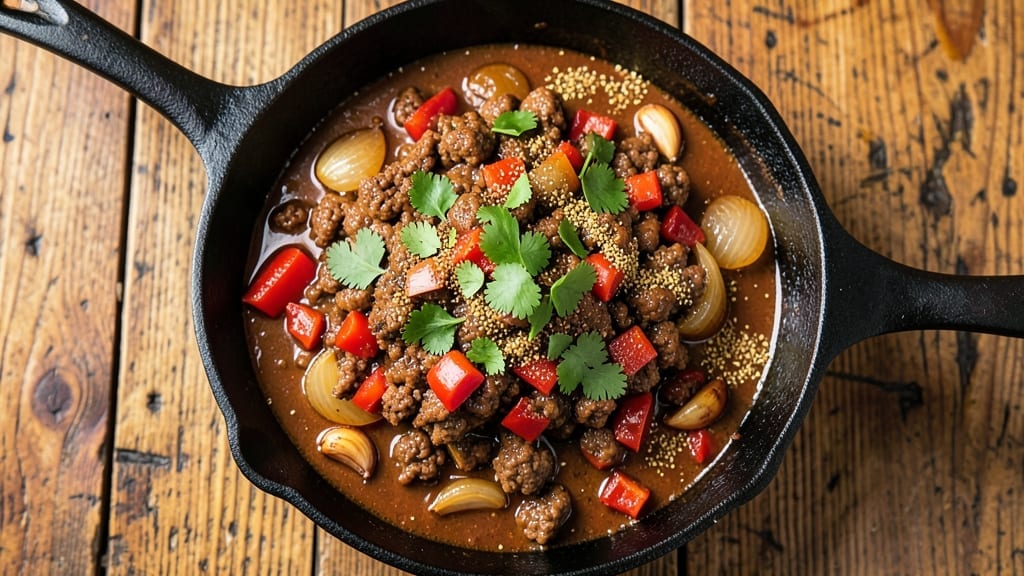
This 3-hour chili recipe transforms simple ingredients into a rich, complex masterpiece that only gets better with time—deep-smoky, tender, and packed with layers of flavor. The key lies in slow simmering, which allows the spices to meld and the meat to break down into perfect bite-sized chunks.
I’ve perfected this method over years of testing, and it consistently delivers chili that’s restaurant-quality without requiring fancy techniques.
The beauty of this recipe is its balance—bold yet approachable, with a perfect harmony of spices and textures. You’ll start with ground beef and beans, but the magic happens when you let it develop over 3 hours on the stove or in the oven.
The slow cook transforms tough cuts into tender, flavorful bites while allowing the chili to thicken naturally, creating a sauce that’s rich without being greasy.
By the end, you’ll have a pot of chili that’s deeply aromatic, with a crust of spices on the edges and a velvety texture throughout. The flavors deepen as it sits, making it even more satisfying the next day.
Serve it with all the classic toppings—sour cream, shredded cheese, or fresh green onions—but the chili itself is already complete, a hearty dish that’s perfect for feeding a crowd or meal prepping for the week.
This method is foolproof and designed for home cooks who want restaurant-quality results without the fuss. Whether you’re preparing for a family gathering or just craving a comforting bowl of chili, this recipe delivers every time. Let’s get started!
Ingredients for 3 hour chili
Sixteen ingredients. Three hours. A chili so rich it tastes better tomorrow.
| Ingredient | Amount | Notes |
|---|---|---|
| Ground Beef 🥩 | 2 lb | 80/20 fat ratio for flavor |
| Onion 🧅 | 1 medium | Yellow or red, diced |
| Bell Pepper 🍅 | 1 whole | Green or red, diced |
| Garlic Cloves 🧄 | 4 cloves | Minced for depth of flavor |
| Chili Powder 🌶️ | 2 tbsp | Smoked or mild variety |
| Ground Cumin 🌿 | 1 tbsp | Toasted for warmth |
| Dried Oregano 🍃 | 1 tsp | Mexican oregano preferred |
| Cayenne Pepper 🔥 | ½ tsp | Adjust for heat preference |
| Black Beans 🫘 | 1 can | 15 oz can, drained and rinsed |
| Kidney Beans 🫘 | 1 can | 15 oz can, drained and rinsed |
| Tomato Paste 🍅 | ½ cup | For rich, concentrated flavor |
| Beef Broth 💧 | 2 cups | Low-sodium preferred |
| Tomatoes 🍅 | 1 can | 28 oz can, diced |
| Olive Oil 🫒 | 1 tbsp | For sautéing vegetables |
| Salt 🧂 | 1 tsp | Kosher or sea salt |
The beef is your flavor anchor—80/20 fat ratio is non-negotiable for that deep, smoky richness. Most grocery stores carry it pre-ground, but if you’re buying a whole chuck roast, ask the butcher to grind it fresh (it makes a difference). I grab mine from Costco when I’m feeding a crowd, but the regular supermarket stuff works fine for weeknight dinners. Look for good marbling if you’re buying whole—it’s what gives you that melt-in-your-mouth texture. The onions and bell peppers? Yellow or red onions both work, but red adds a little extra color to that crusty chili top. Don’t skip the garlic—it’s doing heavy lifting here.
No chili powder? Mix 1 tbsp smoked paprika + 0.5 tsp cayenne for a close substitute. Short on kidney beans? Swap for extra black beans or pinto beans—just adjust the broth slightly. The tomato paste can be a squeeze tube from Trader Joe’s if you hate measuring—those little tubes are perfect for this. For the beans, low-sodium is key—you don’t want to over-salt your chili later. The beef broth matters too—homemade is best, but Annie’s or Pacific Foods are solid store-bought options. And if you’re worried about the chili being too thin, crush the beans slightly with your hands before adding them—they’ll thicken things up naturally as they cook.
This chili only gets better with time—plan ahead. The flavors meld beautifully over the 3-hour simmer, but it’s even more delicious the next day. Keeps for 5 days in the fridge, freezes for 3 months. I always make a double batch—one for dinner, one for lunches. The leftovers reheat perfectly, and the crusty top? That’s the good stuff—don’t scrape it all out. Store in airtight containers with a little extra broth to keep it moist. And if you’re prepping for a crowd, make it in a Dutch oven—it’s the only way to get that perfect crust.
Why You’ll Love This Recipe
- Slow-Simmered Magic: I swear by the 3-hour cook time—it’s not about rushing. The beef actually melts into the onions and peppers, while the garlic cloves infuse deep, mellow heat. That’s when the chili powder transforms from spicy to complex, like a whisper instead of a shout.
- One-Pot Simplicity: Between us, this is the kind of recipe where you can walk away. Brown the beef, toss in the chopped veggies, add spices, and let it do its thing. No stirring every five minutes, no burnt edges—just set it and forget it until it smells like home.
- Leftovers That Beg: Honestly, I make this on Sundays just so I can reheat it all week. The flavors only get richer overnight, and it’s the kind of dish that turns “I’m not hungry” into “hand me another bowl.” My kids even ask for it in school lunches—no joke.
- Budget-Friendly Powerhouse: Ground beef, onions, and a bell pepper stretch into so many servings without breaking the bank. I’ll be real: this is my go-to when grocery money’s tight, but it still feels like a treat. The chili powder makes it taste like you spent hours, not minutes.
Step-by-step instructions for deep-smoky chili
This isn’t your average chili—it’s a slow-simmered masterpiece where flavors meld and deepen over time.
Build the Flavor Base with Aromatics
Heat the 1 tablespoon olive oil in a large Dutch oven over medium-high heat. Add the 2 lb ground beef and break it apart with a wooden spoon, cooking until it loses its raw color and starts to brown—about 6-8 minutes. This step is crucial for developing deep meaty flavor.
Once the beef is browned, drain all but 1 tablespoon of fat from the pot (this adds richness). Add the diced onion and diced bell pepper, cooking for 5 minutes until softened. Stir in the 4 cloves minced garlic and cook for another 30 seconds until fragrant—this prevents the garlic from burning and ensures it infuses the chili with sweet depth.
Toast the Spices for Maximum Depth
Lower the heat to medium and add the 2 tablespoons chili powder, 1 tablespoon ground cumin, 1 teaspoon dried oregano, and ½ teaspoon cayenne pepper. Stir constantly for 1-2 minutes until the spices are fragrant and slightly toasted—this awakens their flavors and prevents bitterness.
Here’s the thing—don’t walk away. Spices burn quickly, and that can turn your chili bitter. You’ll know it’s ready when the spices release their aroma and the pot smells like a smoky campfire. This is where the magic begins.
Simmer the Chili for Rich, Complex Flavor
Add the ½ cup tomato paste, stirring to distribute it evenly throughout the beef mixture. Cook for 2 minutes to cook out the raw taste of the tomato paste. Then pour in the 2 cups beef broth and 1 can diced tomatoes, stirring well to combine.
Bring the mixture to a gentle simmer, then reduce heat to low and let it cook uncovered for 2 hours. This slow simmer allows the flavors to develop and meld together. Stir occasionally to prevent sticking, and add water if the chili gets too thick.
Finish with Beans and Season to Perfection
After 2 hours, stir in the 1 can drained black beans and 1 can drained kidney beans. Add the 1 teaspoon salt and adjust the seasoning if needed—this is when the chili really comes together. Taste it now, and you’ll notice how much more complex the flavors have become compared to the start.
Continue simmering for another 30-45 minutes until the chili reaches your desired thickness. The beans should be heated through, and the flavors should be perfectly balanced—smoky, spicy, and rich. If it’s too thin, simmer uncovered to reduce; if too thick, add a splash of water or broth.
Rest and Serve for Maximum Flavor
Remove the chili from heat and let it rest for 15-20 minutes before serving. This resting period allows the flavors to fully meld and the chili to thicken slightly. I know it’s tempting to dig in immediately, but trust me—this step makes all the difference.
Serve the chili hot with your favorite toppings—sour cream, shredded cheese, or chopped green onions. The longer it sits, the better it tastes, so don’t be surprised if you find yourself going back for seconds (or thirds). This chili is a labor of love, and it shows in every spoonful.
Pro Tips For Making 3 Hour Chili
- CRISPY THE BEEF: Brown the ground beef in two batches if your pan is crowded—this keeps it sizzling instead of steaming. I learned this the hard way after ending up with greasy, undercooked beef that tasted more like a meatloaf than chili.
- TOAST THE SPICES: Bloom the chili powder in the same pot for 30 seconds after the onions and peppers cook down—it deepens the flavor. Skip this, and your chili will taste like it’s missing something, even if you followed the rest perfectly.
- SIMMER, DON’T BOIL: Keep the chili at a gentle bubble, not a rolling boil, after the first hour. I used to crank the heat, thinking it would cook faster, but it just made the onions mushy and the flavors dull.
- UPGRADE THE GARLIC: Mince the garlic cloves finely—almost into a paste—so they dissolve into the chili instead of sitting as chunks. (Yes, it takes a few extra minutes, but your chili will taste like it came from a restaurant.)
Flavor customization for this 3 hour chili
Spice Level Control
Adjust the heat to your taste by tweaking the cayenne pepper—start with ½ teaspoon for mild heat, then increase to 1 teaspoon for medium, or 1.5 teaspoons for a fiery kick. For an even smoother heat, toast ½ teaspoon smoked paprika with the spices to add depth without sharpness.
I often keep a small bowl of cayenne on hand to let guests add their own heat at the table. 🌶️
Sweet and Smoky Fusion
Balance the smoky flavors with 1 tablespoon brown sugar or 2 tablespoons molasses—add it with the tomato paste. This creates a caramelized crust on the chili’s edges while mellowing the spices.
For a deeper sweetness, stir in ½ cup apple cider or ¼ cup tomato sauce during the final 30 minutes of simmering. This works especially well with kidney beans for a Texas-style twist.
Umami Boosters
Elevate the chili’s depth by adding 1 tablespoon soy sauce or 1 teaspoon fish sauce (trust me, it disappears but adds layers). For a vegetarian version, swap the beef with 1 lb mushrooms (cremini or portobello) and add 1 tablespoon Worcestershire sauce or 1 teaspoon mushrooms sauce for umami.
I also love adding 1 chipotle pepper in adobo for smoky heat—just remove the seeds and dice it finely.
Herb Variations
Swap out the oregano for 1 teaspoon dried thyme or 1 bay leaf (remove before serving) for a French-inspired twist. For a Southwestern vibe, add ½ teaspoon ground coriander and ½ teaspoon cinnamon—this combo adds warmth without overpowering.
Fresh herbs like cilantro or parsley should be added at the end to keep their bright flavors intact. 🌿
Protein Swaps
Replace the ground beef with 1 lb Italian sausage (remove casing) for a spicier, herby chili. For a lighter option, use 1 lb shredded chicken (cook separately and add at the end) or 1 can lentils (drained and rinsed) for a meatless version.
If using ground turkey, add 1 teaspoon liquid smoke to compensate for the milder flavor. Each swap changes the texture and depth—experiment to find your favorite!
Texture Adjustments
For a chunkier chili, add 1 diced potato or ½ cup corn kernels—they’ll thicken the chili naturally as they cook. If you prefer a smoother texture, blend ½ cup of the chili at the end with an immersion blender for a velvety finish.
I also love adding ¼ cup diced jalapeños (seeds removed) for texture and a subtle kick. The beans themselves can be mashed slightly before adding for extra creaminess. 💡
Nutrition facts
Frequently asked questions
Can I make this chili in a slow cooker instead?
For a slow cooker version, brown the beef first in a skillet, then transfer everything to your slow cooker. Cook on low for 6-7 hours or high for 3-4 hours—the long cook time enhances the flavors even more. Just add the beans in the last 30 minutes to prevent them from getting mushy.
Why does the chili taste better the next day?
The flavors deepen as the spices and ingredients meld together during the 3-hour simmer, but the real magic happens when the chili rests. The starches from the beans and tomatoes thicken slightly, and the meat absorbs more of the rich, smoky sauce. This resting period also allows the acidity from the tomatoes to balance out, creating a more harmonious taste.
What if my chili is too thin or too thick?
For thin chili, simmer uncovered for 10-15 minutes to reduce the liquid. If it’s too thick, stir in ¼ cup beef broth or water at a time until you reach the desired consistency. The beans help thicken naturally as they cook, so don’t rush this step—let the chili work its way to the perfect texture.
Can I freeze this chili?
Yes! Let the chili cool completely, then transfer it to airtight containers or freezer bags, leaving ½-inch headspace for expansion. It freezes for up to 3 months. Thaw overnight in the fridge and reheat on the stove over medium-low heat, stirring occasionally. For best results, reheat only until hot—overheating can make the beans mushy.
How can I make this chili vegetarian?
Swap the beef for 1 lb mushrooms (cremini or portobello) or 1 can lentils (drained and rinsed). Add 1 tablespoon soy sauce or Worcestershire sauce for umami depth, and use vegetable broth instead of beef broth. For extra richness, stir in 1 chipotle pepper in adobo (seeds removed) during the final 30 minutes of cooking.

- 6 Egg Cake Recipe with Oil: Light as Air With Buttery Moisture - October 4, 2026
- 4 Bean Casserole Recipe: One-Pan Heartiness With Smoky Paprika Depth - October 4, 2026
- 3-Ingredient Keto Mug Cake Recipe: Microwave Magic in 2 Minutes - October 4, 2026