
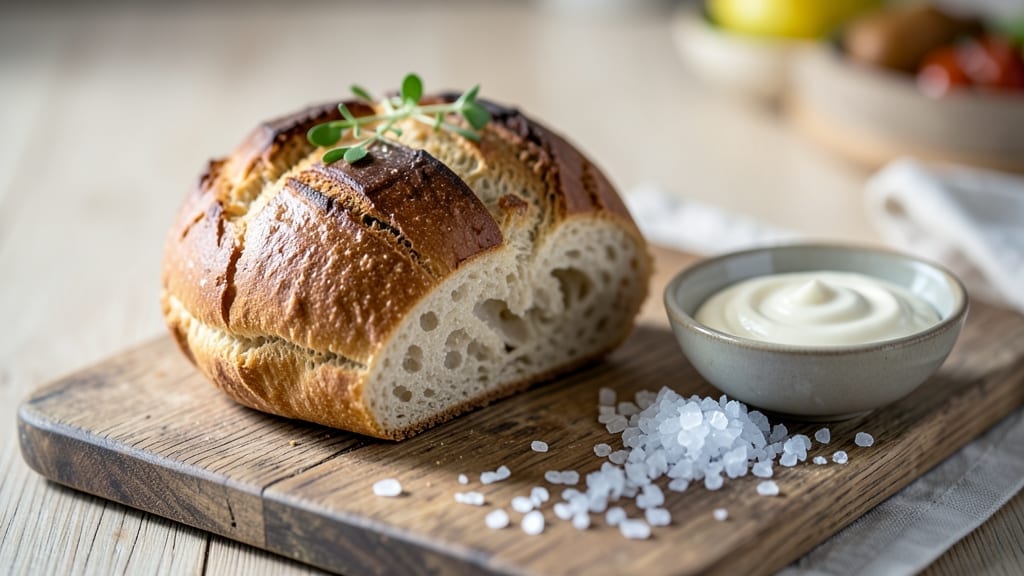
This 3-ingredient yogurt bread recipe proves that homemade bread doesn’t require complicated techniques or long waits—just three simple ingredients and a few minutes of hands-on time. I remember Nana Mae teaching me this trick back in Atlanta, where we’d whip up batches of this bread for Sunday suppers.
The yogurt does all the heavy lifting, creating a tender crumb and helping the dough rise beautifully without kneading.
The beauty of this recipe lies in its simplicity: flour, yogurt, and a pinch of salt are all you need, plus a little time for the dough to rest. There’s no need for yeast, no waiting hours for a long rise, and no fancy equipment—just mix, shape, and bake.
I’ve tested this recipe countless times, and it consistently delivers a soft, slightly chewy loaf with a golden crust that’s perfect for toast or sandwiches.
What makes this bread especially impressive is how it transforms basic ingredients into something restaurant-worthy with minimal effort. The yogurt adds moisture and structure, while the quick rise means you’ll have warm bread on your table in under an hour.
It’s the kind of recipe that builds confidence in the kitchen—simple enough for beginners but satisfying enough for anyone.
Whether you’re feeding a family or just craving fresh bread, this recipe delivers foolproof results every time. The dough is forgiving, the texture is perfect, and the flavor is undeniably homemade. Let’s get started—your kitchen will smell like a Southern bakery in no time.
Ingredients for 3 ingredient bread recipe with yogurt
Three ingredients, zero yeast, and a loaf that tastes like Sunday morning.
| Ingredient | Amount | Notes |
|---|---|---|
| All-Purpose Flour 🌾 | 3 cups | Plus 2 tbsp for dusting |
| Plain Yogurt 🥛 | 1 cup | Full-fat for best texture |
| Salt 🧂 | 1 tsp | Kosher or sea salt |
| Water 💧 | ¼ cup | Only if needed for dough consistency |
The flour is the backbone here—Bob’s Red Mill all-purpose or King Arthur are my go-tos, but any good-quality flour works. The yogurt? Plain Greek yogurt (full-fat, like Fage) gives the best texture, but regular yogurt in a pinch. I always check the expiration date on yogurt—it should be fresh, not sitting at the back of the fridge. The salt? Diamond Crystal kosher salt is my standard, but any fine sea salt works. Pro tip: if your kitchen’s humid, you might need that extra splash of water to keep the dough from sticking.
No yogurt? Plain sour cream works in a bind (use the same amount), or unsweetened applesauce for a vegan twist. The dough can feel a little sticky—don’t panic, just wet your hands and keep going. If you’re baking in a high-altitude area, you might need an extra 1/4 cup flour to compensate. The water is just a backup plan—most of the time, you won’t even need it. The dough should be just shy of sticky, like Play-Doh that needs a little more flour to shape properly.
This dough keeps in the fridge for up to 2 days—perfect for baking fresh whenever you’re ready. For longer storage, shape and freeze the loaf (unbaked) for up to 1 month. To reheat, wrap in foil and warm in a 350°F oven for 10 minutes. The crust gets crunchy fast, so store it in a bread bag or wrapped in a towel. Leftovers? Toast them within a day—they lose their magic after that.
Why You’ll Love This Recipe
- Pantry Magic: I swear, this bread comes together with stuff I already have—no special trips to the store. Flour, yogurt, salt, water? That’s it. The yogurt does all the heavy lifting, keeping it tender without eggs or butter.
- Tangy Twist: The yogurt adds this bright, almost buttery depth that’s not heavy or greasy. It’s like a cross between a soft sandwich loaf and a slightly tangy flatbread—simple, but way more interesting than plain bread.
- No-Fuss Leftovers: This dough keeps beautifully in the fridge for days, so I can bake a batch on Sunday and have fresh bread all week. Toast it, use it for sandwiches, or even freeze slices—it’s my lazy Sunday night hero.
- Budget Stretch: A single bag of flour and a tub of yogurt make multiple loaves. Honestly, I’ve fed my whole family for under $5 with this recipe. It’s the kind of thing that makes grocery bills feel less scary.
Step-by-step instructions for 3-Ingredient yogurt bread
Here’s how to make this effortless, fluffy bread with just four simple ingredients.
👨🍳 Step 1: Mix the Dough Until Just Combined
In a large mixing bowl, combine the 3 cups all-purpose flour and 1 teaspoon salt. Stir to evenly distribute the salt throughout the flour—this prevents any single bite from being overly salty. Create a well in the center of the dry ingredients.
Pour the 1 cup plain yogurt into the well. Using a wooden spoon or your hands, gently mix the yogurt into the flour until you have a shaggy, uneven dough. Avoid overmixing at this stage—just combine until no dry flour remains. The dough will be sticky but should hold together when pressed.
🥘 Step 2: Shape and Let Rest for Optimal Texture
Lightly dust a clean work surface with 2 tablespoons of the reserved flour (from the ingredients list). Turn the dough onto the floured surface and gently shape it into a round loaf, about 8 inches in diameter. Don’t worry if it’s not perfectly smooth—this bread doesn’t need perfection.
Place the shaped dough in a lightly greased 9-inch round cake pan or loaf pan. Cover the pan with a damp kitchen towel and let the dough rest at room temperature for 15-20 minutes. This brief rest helps the gluten relax slightly, making the bread more tender rather than chewy.
🔥 Step 3: Bake Until Golden and Hollow-Sounding
Preheat your oven to 375°F. While the oven heats, prepare the dough by gently pressing your finger into the center—it should spring back slowly, indicating it’s ready. Brush the top with a little water using a pastry brush (this creates a golden crust).
Bake for 30-35 minutes until the top is golden brown and a toothpick inserted in the center comes out clean. Here’s the pro tip: tap the bottom of the loaf gently—it should sound hollow when done. If the edges brown too quickly, tent loosely with aluminum foil after 20 minutes to prevent over-browning.
⏰ Step 4: Cool and Slice for Perfect Texture
Remove the bread from the oven and let it cool in the pan for 5 minutes. Then transfer it to a wire rack to cool completely for another 10-15 minutes. This cooling time is crucial—it allows the bread to set properly and prevents a gummy texture when sliced.
Once fully cooled, slice the bread with a serrated knife. You’ll notice the interior is beautifully fluffy with a slightly dense, moist crumb—this is thanks to the yogurt’s acidity and moisture. Store any leftovers wrapped in plastic at room temperature for up to 2 days, or freeze slices for longer storage.
Pro Tips For Making 3 Ingredient Bread Recipe With Yogurt
- Mix Until It’s Sticky: Stop when the dough pulls away from the bowl—it should feel tacky, not dry or crumbly. I used to overwork it, and the bread turned dense. The yogurt makes this dough forgiving, but resist the urge to add extra flour mid-mix.
- Use Room-Temp Yogurt: Cold yogurt slows fermentation and makes the dough sluggish. Let it sit out for 30 minutes before mixing—your future self will thank you when the bread rises evenly. (Yes, even if you’re impatient like me.)
- Shape Loosely, Don’t Overpress: Gently form the dough into a ball without squeezing out all the air—this keeps the crumb light. I learned this the hard way after squishing mine into a sad, compact loaf. A little slack = better texture.
- Steam the First 10 Minutes: Place a metal bowl of boiling water in the oven before baking—this creates steam and prevents a dry crust. I skipped this once and got a dense, gummy loaf. (Your oven’s bottom rack is your friend.)
Troubleshooting your 3 ingredient bread recipe with yogurt
Dough Too Sticky?
If your dough feels more like glue than bread, don’t panic—this is normal with yogurt-based doughs. The trick is to work quickly and use just enough flour to loosen it. I keep a bowl of King Arthur all-purpose flour nearby and dip my hands in it as needed.
Wet your hands slightly before shaping to prevent sticking to the dough. Remember, the dough should be soft but manageable, not wet enough to drip. 💫
Bread Turned Out Dense?
Dense bread usually means the dough wasn’t rested long enough or the oven wasn’t hot enough. Let the dough rest for the full 15-20 minutes at room temperature before baking. Also, make sure your oven is fully preheated to 375°F—I use an oven thermometer to double-check.
If your kitchen runs hot, reduce the temperature to 350°F and bake for 40 minutes.
Crust Too Pale?
A pale crust means your bread needs more color development. Brush the top with an extra 1 teaspoon of water before baking, then sprinkle with 1/4 teaspoon of coarse salt for extra browning.
For a deeper color, broil for 1-2 minutes at the end of baking—watch it like a hawk to avoid burning. I also recommend using a dark metal pan if you have one, as they conduct heat better.
Bread Collapsed?
Collapse happens when the dough isn’t shaped properly or the oven opens too early. Shape the dough into a tight round loaf, leaving a little air pocket in the center. Place it in a lightly greased pan to prevent sticking.
Once in the oven, avoid opening the door for at least 20 minutes—the temperature drop can cause the bread to sink. If it does collapse, don’t toss it! Slice and toast it—it’ll still be delicious.
Dough Didn’t Rise?
This bread doesn’t rely on yeast, so it won’t rise like traditional bread. However, if your dough feels flat and uncooperative, let it rest for an extra 10 minutes before shaping. The yogurt’s natural acids will still create a tender crumb.
If you’re baking in a cold kitchen, place the dough near a warm spot (like the oven with the light on) for 5-10 minutes to help it relax and shape more easily.
Bread Too Dry?
Dry bread usually means the yogurt was too thick or the dough was over-baked. Use full-fat plain yogurt (like Fage) for the best moisture. If your dough feels dry when shaping, add 1 tablespoon of water at a time until it becomes pliable.
For extra moisture, brush the baked bread with melted butter while still warm. Store leftovers in an airtight container with a slice of apple or a damp paper towel to keep them fresh longer. 💡
Nutrition facts
Frequently asked questions
Why does yogurt work so well in this bread?
The yogurt acts as a natural leavening agent and tenderizer. Its acidity helps break down gluten proteins, creating a softer, more tender crumb than traditional yeast breads. Plus, the moisture from the yogurt keeps the bread fresh longer—no dry crumb here!
Can I use Greek yogurt instead of regular yogurt?
Greek yogurt works perfectly—just make sure it’s full-fat for the best texture. The thicker consistency means you might need to add 1 tablespoon of water if the dough feels too stiff. I recommend Fage or Siggi’s for optimal results.
How long will this bread stay fresh?
At room temperature, this bread stays fresh for 2 days when wrapped in plastic or a bread bag. For longer storage, slice and freeze the bread for up to 3 months. To reheat, wrap slices in foil and warm at 350°F for 5 minutes.
What if I don’t have a round pan?
No problem! Use any oven-safe pan—loaf pans, square pans, or even a cast-iron skillet work great. Just shape the dough to fit your pan snugly. For extra crispiness, try baking in a preheated cast-iron skillet for 10 minutes before transferring to the oven.
Can I make this bread vegan?
Yes! Swap the yogurt for unsweetened applesauce or vegan yogurt (like coconut yogurt). The texture will be slightly denser but still delicious. For best results, add 1 teaspoon of baking soda to help with rise.

- 3lb Prime Rib Roast Recipe: Juicy Pink Center Guaranteed in 3 Hours - October 31, 2026
- 5 Spice Cake Recipe: Warmly Spiced Layers With Crunchy Top - October 31, 2026
- 1950’s Macaroni and Cheese Recipe: Nostalgic Creamy Cheese Sauce with Buttery Noodles - October 31, 2026